Advertisement
Quick Links
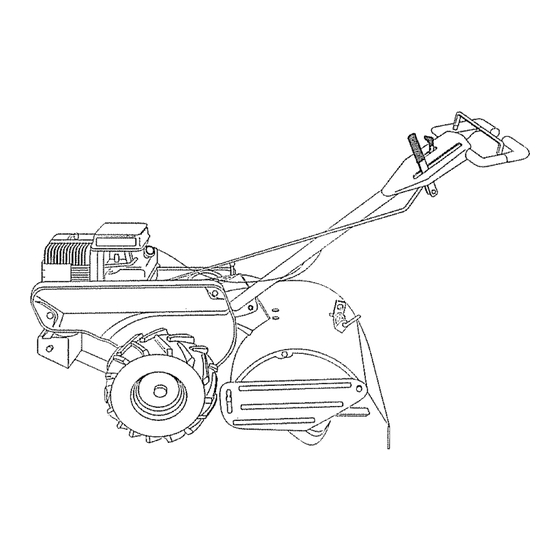
MODEL NO.
917.293550
Caution:
Read and follow
all Safety Rules
and instructions
Before Operating
This Equipment
®
5.0 HP
14 INCH TINE WBDTH
REAR TmNETILLER WUTH
COUNTER ROTATING TiN
, Assembly
, Operation
®Customer
Responsibilities
, Service and Adjustments
®Repair Parts
...............................
i1,,,111 i,,
i1,,11,,111,,,111
Sears, Roebuck and Co., Hoffman Estates, IL 60179 U.S.A.
Advertisement

Related Manuals for Craftsman 917.293550


Summary of Contents for Craftsman 917.293550
- Page 1 MODEL NO. 917.293550 ® 5.0 HP Caution: 14 INCH TINE WBDTH Read and follow all Safety Rules REAR TmNETILLER WUTH and instructions COUNTER ROTATING TiN Before Operating This Equipment , Assembly , Operation ®Customer Responsibilities , Service and Adjustments ®Repair Parts .......
-
Page 2: Accessories
SAFETY RULES Safe Operation Practices for Walk-Behind Powered Rotary Tillers TRAINING Keep children and pets away. Read the Owner's Manual carefuNy. Be thorougNy ° Do not overload the machine capacity by attempting to familiar with the controls and the proper use of the till too deep at too fast a rate equipment: Know how to stop the unit and disengage Never' operate the machine at high speeds on slippery... - Page 3 • If this Craftsman Tiller is used for commercial or rental purposes, this Warranty applies for only 30 days from the date of purchase° WARRANTY...
- Page 4 iil i,.lll ........OF CONTENTS "FABLE , i,i, i, Hi i imll i, i, i_!l_,1,,i., ,i ..H _L SAFETY RULES ............MAINTENANCE SCHEDULE ........CUSTOMER RESPONSIBILITIES ...... 3,14-16 SERVICE & ADJUSTMENTS ......... t6-19 PRODUCT SPECIFICATIONS ........STORAGE ..............WARRANTY ..............
- Page 5 These accessories were available when the tiller was purchased. They are also available at most Sears Retail outlets and Service Centers. Most Sears Stores can order repair parts for you when you provide the model number of your tiller. ENGINE i i ,ill, SPARK PLUG...
- Page 6 ASSEMBLY ....t,l,,,,l,,,,,,t,,ll,t,,,, ....... t,,, ......t Your new tiller has been assembled at the factory with exception of those parts left unassembled for shipping purposes_ To ensure safe and proper operation of your tiller all parts and hardware you assemble must be tightened securetyo Use the correct tools as necessary to insure proper tightness.
- Page 7 ',,,,,, ..,i,,, i,,11, ii i, i ..,H,,,,I,, UNPACKING CARTON (See Fig. 2) ° Grasp handle assemblyo Holdin"up"position, Besure handle lock remains in gearcase notch° Slide handle CAUTION: Be careful of exp0sedq assembly into position,, staples when handling or disposing ca.oning r.ate,ial, HANDLE ASSEMBLY...
- Page 8 , ,,i ..i,,i,,,i ...., i,, i1,1,, ASSEMBLY .., ..ii........i1,,,,,i,i .., ..i ,, ii!l REMOVE TILLER FROM CRATE CONNECT SHIFT ROD (See Fig. 6) ° insert end of shift rod farthest from bend into hote of Adjust handle assemby to lowest position, Be sure lock shift [ever indicator.
-
Page 9: Depth Stake 1
I'MII""I'I"'"II'III'I' I"11"'"""1 '1.."1'1'"'1 ... OPERAT O I ..i,,i,, i,,,11,,,,,111 i1,1,11 ..,, ... KNOW YOUR TILLER READ THIS OWNER'S MANUAL AND SAFETY RULES BEFORE OPERATING YOUR TILLER. Compare the illustrations with your tiller to familiarize yourself with the location of various controls and adjustments, Save this manual for future reference. - Page 10 OPERATION ,, i, ......, ,,,,,,,,, ,,,,, Jl,t , i,,,,, .... The operation of any tiller can result in foreign objects thrown into the eyes, which can result in severe eye damage. Always wear safety glasses or eye shields before starting your tiller and while tilling.
- Page 11 OPERATmON =..,....° Engine oil should be to point of overflowing when TURNING engine is level. For approximate capacity see "PROD- ° Release the drive control bar. UCT SPECIFICATIONS" on page 3 of this manual. All oil must meet A_P.I. Service Classification SF, SG or Move throttle control to "SLOW"...
- Page 12 OPERATBON TILLING HINTS TO START ENGINE (See Fig. 13) ..........CAUTION: Keep tine control in "OFF" CAUTION: Untilyouareaccustomedto position when starting engine, handling your tiller, start actual field use with throttle in slow position (mid- When starting engine for the first time or if engine has run between "FAST"...
- Page 13 OPERATRO ii iH,,i ,l11111,,,i CULTIVATING OUTER VIEW OF TIRE Cultivating is destroying the weeds between rows to pre- vent them from robbing nourishment and moisture from the CLEVIS plants° At the same time, breaking up the upper layer of soil crust will help retain moistu re in the soil.
- Page 14 u ....= ..i_=.,.t ,¸ ' _........ CUSTOMER ESPO ILmES ..u ......M I1 ....SERVICE DATES Check Engine Oil Level Change Engine Oil Oil Pivot Points Inspect Spark A[rester / Muffler Inspect A{r' Screen Clean or Replace Air Cleaner Cartridge Clean Engine Cylinder Ftns Replace Spark Plug...
- Page 15 CUSTO ESPONSHBIL Y ES ,,i, ii1,1 ..,i ,,,u, ,',r "1'"'"'1'1,..... Disconnec;'"'sPark"pi"ug wire before performing'anymaintenance (excePt ea';'buretor 'adjustment)to prevent accidental starting of engine. Prevent firest Keep the engine free of grass, leaves, spilled oil, or fuel, Remove fuel from tank before tipping unit for maintenance.
-
Page 16: Handle Height
i i ill..... L_,,,i,,,lll,..i ' '"1 II ', ..CUSTOMER ESPONS L[TmES iil,lllllllLl IIII IIIIIIIIIIIIII I IIIIIIIIIII iiiiii MUFFLER TRANSMISSION Do not operate tiller' without muffler. Do not tamper with Yourtransmissionissealed and will only require lubrication exhaust system. Damaged mufflers or spark attesters if serviced could create a fire hazard.. - Page 17 SERVICE AN ADJUSTMENTS TO REPLACE GROUND DRIVE BELT (See TO REMOVE BELT GUARD (See Fig. 24) Figs. 24 and 25) NOTE: For ease of removal, remove hairpin clipand clevis • Move left wheel and remove be{t guard as described in pin from left wheel,, Pull wheel out from tiller about 1 inch, "TO REMOVE BELT GUARD".
- Page 18 LII .. !1¸ j, ,i,_l'lrl,r ' I i,H"".",l"lll II I, iiii, I ....... i ill Illl I,I ,IIUL SERVICE AND ADJUSTMENTS ii. i...i Jl,[iH,,.. TINE REPLACEMENT (See Figs, 26, 27 and 28) ° To maintain the superb of this tilling performance ......
- Page 19 SERVICE ADJUSTB ENTS iiiRi,l l i_ iiii ....iHi,n, llll,l,i, FINAL SETTING ENGINE Start engine and allow to warm for five minutes. Make TO ADJUST THROTTLE CONTROL CABLE final adjustments with engine running at idle and drive control bar in "DISENGAGED" position.
- Page 20 STORAGE ENGINE Immediately prepare your titler for storage at the end of the season or if the unit wilt not be used for 30 days or more. Drain oil (with engine warm) and replace with clean oil. (See"ENGINE" in the Customer Responsibilities section of CAUTION: Never store the tiller with this manual).
-
Page 21: Air Cleaner
LW '" " TIROUBLESHOOT NG POmNTS PROBLEM CAUSF. CORRECTION I, Out of fuel. Fill fuel tank, Will not start 2 Engine not "CHOKED" properly See "TO START ENGINE" in Operation section 3 Engine flooded Wait several minutes before attempting to start 4 Dirty air cleaner CIean or replace air cleaner cartridge, 5 Water in tue!
Need help?
Do you have a question about the 917.293550 and is the answer not in the manual?
Questions and answers