Table of Contents
Advertisement
OWNER'S
MANUAL
MODEL NO.
917.25009
important:
Read and follow
all Safety Rules
and instructions
Before
Operating
This Equipment
/
CRRFTSMRN °
IES
EW
• Assembly
• Operation
• Maintenance
• Service and Adjustments
• Repair Parts
Gasoline
containing
up to 10% ethanol
(El0)
is acceptable
for use in this machine.
The use of any gasoline
exceeding
10% ethanol
(El0)
will void the product
warranty.
Sears Canada, inc., Toronto, Ontario
M5B 2B8
01.13.12 SR
532 44 72-54 Rev. 3
Printed inthe U.S.A.
Advertisement
Table of Contents

Related Manuals for Craftsman 917.25009


Summary of Contents for Craftsman 917.25009
- Page 1 OWNER'S MANUAL MODEL NO. 917.25009 CRRFTSMRN ° important: Read and follow all Safety Rules and instructions Before Operating This Equipment • Assembly • Operation • Maintenance • Service and Adjustments • Repair Parts Gasoline containing up to 10% ethanol (El0) is acceptable for use in this machine.
-
Page 2: Safety Rules
SAFETY RULES SAFE OPERATION PRACTICES FOR WALK=BEHIND POWERED ROTARY TILLERS TRAiNiNG • Never operate the tiller without proper guards, plates, or other safety protective devices in place. • Read the Owner's Manual carefully. Be thoroughly • Keep children and pets away. familiar with the controls and the proper use of the equipment. -
Page 3: Product Specifications
CUSTOMER RESPONSIBILITIES PRODUCT SPECIFICATIONS • Read and observe the safety rules. Gasoline Capacity: 2.9 Quarts (2.7L) • Follow a regular schedule in maintaining, caring for Unleaded Regular and using your tiller. Oil (API:SG-SL): SAE 30 (Above 32°F/0°0) • Follow instructions under "Maintenance" and "Storage" SAE 5W30 (Capacity: 20 oz./0.6L) -
Page 4: Tools Required For Assembly
ASSEMBLY Your new tiller has been assembled at the factory with exception of those parts left unassembled for shipping purposes. To ensure safe and proper operation of your tiller all parts and hardware you assemble must be tightened securely. Use the correct tools as necessary to insure proper tightness. -
Page 5: See Fig.
ASSEMBLY INSTALL DEPTH STAKE ASSEMBLY UNPACK CARTON & INSTALL HANDLE (See Fig. 2) (See Fig. 3) • Loosen nut '_'. & CAUTION: Be careful of exposed • Insert stake support between engine bracket halves staples when handling or disposing of with stake spring down. -
Page 6: Operation
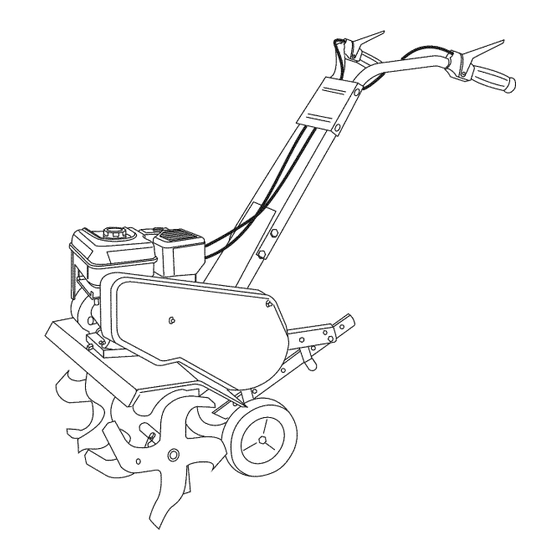
OPERATION KNOW YOUR TILLER READ THIS MANUAL AND SAFETY RULES BEFORE OPERATING YOUR TILLER. Compare the illustrations with your tiller to familiarize yourself with the location of various controls and adjustments. Save this manual for future reference. These symbols may appear on your Tiller or in literature supplied with the product. Learn and understand their meaning. N R &... - Page 7 OPERATION The operation of any tiller can result in foreign objects thrown into the eyes, which can result in severe eye damage. Always wear safety glasses or eye shields before starting your til= SAFETYGLAS$E$ let and while tilling. We recommend a wide vision safety mask over spectacles or standard safety glasses.
-
Page 8: Before Starting Engine
OPERATION TO TRANSPORT CAUTION: Fill to within 1/2" of top of fuel tank to prevent spills and to allow CAUTION: Before lifting or transporting, for fuel expansion. If gasoline is ac= aJiow tiller engine and muffler to cool. cidentally spilled, move machine away Disconnect spark plug wire. - Page 9 OPERATION • You will find tilling much easier if you leave a row un- tilled between passes. Then go back between tilled rows. (See Fig. 9) There are two reasons for doing this. First, wide turns are much easier to negotiate than about-faces.
-
Page 10: Maintenance Schedule
MAINTENANCE MAINTENANCE SCHEDULE FILL IN DATES AS YOU COMPLETE SERVICE DATES REGULAR SERVICE v' v' Check Engine Oil Level Change Engine Oil _1,2 Oil Pivot Points Inspect Spark Arrester/Muffler Inspect Air Screen Clean or Replace Air Cleaner Cartridge Clean Engine Cylinder Fins Replace Spark Plug 1 - Change more often when operating under a heavy load or in high ambient temperatures,... -
Page 11: Air Cleaner
MAINTENANCE Disconnect spark plug wire before performing any maintenance (except carburetor adjustment) to prevent accidental starting of engine. Prevent fires! Keep the engine free of grass, leaves, spilled oil, or fuel. Remove fuel from tank before tipping unit for maintenance. Clean muffler area of all grass, dirt, and debris. - Page 12 MAINTENANCE SPARK PLUG COOLING SYSTEM (See Fig. 14) Replace spark plugs at the beginning of each tilling sea- Your engine is air cooled. For proper engine performance son or after every 50 hours of use, whichever comes first. and long life keep your engine clean. Spark plug type and gap setting is shown in "PRODUCT •...
-
Page 13: Service And Adjustments
SERVICE AND ADJUSTMENTS CAUTION: Disconnect spark plug wire from spark plug and place wire where it cannot come into contact with plug. TILLER MID=WIDTH TILLING =24" PATH (See Fig. 17) • Assemble holes '_' in tine hubs to holes "C" in tine shaft. - Page 14 SERVICE AND ADJUSTMENTS • Recheck in "ON" position and adjust if necessary. TO REMOVE BELT GUARD (See Fig. 19) • Remove two (2) cap nuts and washers from side of NOTE: If"ON" position check required adjustment, recheck belt guard. "OFF" position adjustment to insure tines do not rotate when control is "OFF"...
- Page 15 SERVICE AND ADJUSTMENTS CHECK TINE OPERATION ENGINE • See "TINE OPERATION CHECK" in this section of Maintenance, repair, or replacement of the emission control manual. devices and systems, which are being done at the custom- ers expense, may be performed by any non-road engine REPLACE BELT GUARD repair establishment or individual.
-
Page 16: Storage
STORAGE ENGINE OiL Immediately prepare your tiller for storage at the end of the season or if the unit will not be used for 30 days or more. Drain oil (with enginewarm) and replacewith clean oil. (See "ENGINE" in the Maintenance section of this manual). WARNING: Never store the tiller with gasoline in the tank inside a building... -
Page 17: Troubleshooting
TROUBLESHOOTING POINTS PROBLEM CAUSE CORRECTION Will not start 1. Out of fuel. 1. Fill fuel tank. Engine not "CHOKED" properly. See "TO START ENGINE" in the Operation section. Engine flooded. 3. Wait several minutes before attempting to start. Dirty air cleaner. Clean or replace air cleaner cartridge. - Page 18 TILLER - MODEL NO. 917.250090 HANDLE ASSEMBLY F-handle assy 6 PART PART DESCRIPTION DESCRIPTION 137176X668 Panel, Control 180847 Bolt, RDHD 5/16-18 x 3/4 72140512 Bolt, RDHD 5/16-18 x 1 1/2 9209RX668 Assembly, Panel 165787 166381X498 Handle, RH Double Bend Grip, Handle 166376X498 Handle, LH Double Bend 188562...
- Page 19 TILLER - MODEL NO. 917.250090 BELT GUARD AND PULLEY ASSEMBLY i! 41 belt guard PART PART DESCRIPTION DESCRIPTION 439162X479 Assembly, Bracket, Belt Guard 73350600 Nut, Hex, Jam 3/8-16 9484R Clip, Cable 161806 Pulley, Idler 086777 Screw #10-24 x 1/2 175377X479 Arm, Idler 74610812 Bolt, Hex Head 1/2-20 x 3/4...
- Page 20 TILLER - MODEL NO. 917.250090 WHEEL AND DEPTH STAKE ASSEMBLY PART PART DESCRIPTION DESCRIPTION 9194R Pin, Clevis 5388JX004 Spring, Stake Bolt, Hex Head 5/16-18 x 1-1/4 121117X Bolt, Shoulder 74760520 193851X613 Wheel 74760512 Bolt, Hex Head 5/16-18 x 3/4 73220500 Nut, Hex 5/16-18 9190RX479 Bracket, Wheel...
-
Page 21: Tine Assembly
TILLER - MODEL NO. 917.250090 TINE ASSEMBLY tine_ipb_3 PART DESCRIPTION 156934X479 Tine, Outer, R.H. 3146R Retainer, Spring 156932X479 Tine, Inner, R.H. 156931X479 Tine, Inner, L.H. 156933X479 Tine, Outer, L.H. 4929H Rivet Pan Hd Drilled 1/4 Dia. NOTE: All component dimensions given in U.S. inches• 1 inch = 25.4 mm... - Page 22 TILLER - MODEL NO. 917.250090 TRANSMiSSiON 20iL_ transmission PART PART DESCRIPTION DESCRIPTION Washer 9/32 x 7/8 x 12 Ga. 74760524 Bolt, Hex 5/16-18 x 1-1/2 Gr. 2 19091412 74780652 19092016 Bolt, Hex 3/8-16 x 3-1/4 Washer 9/32 x 1-1/4 x 16 Ga. 19131311 10040400 Washer 13/32 x 13/16 x 11...
- Page 23 TILLER - MODEL NO. 917.250090 DECALS © PART DESCRIPTION 440613 Decal, Logo 429196 Decal, Logo 439989 Decal, Logo Decal, Hand Placement 110614 Decal, Control Forward 158700 Decal, Control Reverse 158701 120076X Decal, Warning, Rotating Tines Decal, Tine Shield 422972 Decal, Tank 409143 Decal, Air Cleaner 432278...
-
Page 24: Warranty
Husqvarna Consumer Wheeled Products - Limited Warran D Husqvarna warrants to the original retail purchaser that this Husqvarna® product is free from defects in material or workmanship under normal use and maintenance from the date of retail purchase for the applicable Warranty Period shown on Exhibit A. -
Page 25: How To Obtain
c. Preventative lnaintenance as outlined in the operator's manual. In addition, you lnUSt cease using the product ilmnediately upon any t:ailure or damage. The product should be taken to an authorized Husqvarna servicing dealer prior to any further use. Damages resulting from normal... - Page 26 Consumer Wheeled Warranty Chart 2010 Exhibit A Consumer (personal, Commercial (any commercial, Rental (any rental household use only) professional, institutional, usage) arigculutral, or income producing use, other than Rental Use) Product/Component NO WARRANTY Frame, Chassis, Front Axle 5 Years NO WARRANTY Engine* Transmission (if made by...
- Page 27 Consumer Wheeled Warranty Chart 2010 Exhibit A Consumer (personal, Commercial (any commercial, Rental (any rental household use only) professional, institutional, usage) arigculutral, or income producing use, other than Rental Use) Product/Component _ntMo ck Ride rs, Engine* Transmission 2 Years NO WARRANTY NO WARRANTY Battery 1 Year Pro-rated...
- Page 28 iiiiiiiiiiiiiiiiiiiiiil '¸ Just Call: iiiiiiiiiiiiiiiiiiiiii iiiiiiiiiiiiiiiiiiiiii iiiiiiiiiiiiiiiiiiiiii 1-800-4-1VlY-HOlVlE® iiiiiiiiiiiiiiiiiiiiii iiiiiiiiiiiiiiiiiiiiii iiiiiiiiiiiiiiiiiiiiii iiiiiiiiiiiiiiiiiiiiii (1-800-469-4663) iiiiiiiiiiiiiiiiiiiiii iiiiiiiiiiiiiiiiiiiiii iiiiiiiiiiiiiiiiiiiiii 24 hours a day, 7 days a week iiiiiiiiiiiiiiiiiiiiii iiiiiiiiiiiiiiiiiiiiii iiiiiiiiiiiiiiiiiiiiii iiiiiiiiiiiiiiiiiiiiii For the repair of major brand appliances in your own home... iiiiiiiiiiiiiiiiiiiiii iiiiiiiiiiiiiiiiiiiiii iiiiiiiiiiiiiiiiiiiiii no matter who made it, no matter who sold it!
Need help?
Do you have a question about the 917.25009 and is the answer not in the manual?
Questions and answers