Table of Contents
Advertisement
Available languages
Available languages
Owner's Manual
CRAFTSMAN °
REAR TINE TILLER WITH
DUAL ROTATING TINES
7.0 HP
17 Inch Tine Width
Model No.
917.294271
• Espahol, p. 23
©
This product has a low emission engine which operates
I_
differently
from previously
built engines. Before you start the
engine, read and understand
this Owner's Manual,
IMPORTANT:
Read and follow all Safety
Rules and Instructions
before
operating this equipment.
Sears, Roebuck and Co., Hoffman Estates, IL 60179
U.S.A.
Visit our Craftsman
website:wwvv.sears.com/craftsman
Advertisement
Table of Contents

Subscribe to Our Youtube Channel
Related Manuals for Craftsman 917.294271


Summary of Contents for Craftsman 917.294271
- Page 1 Before you start the engine, read and understand this Owner's Manual, IMPORTANT: Read and follow all Safety Rules and Instructions before operating this equipment. Sears, Roebuck and Co., Hoffman Estates, IL 60179 U.S.A. Visit our Craftsman website:wwvv.sears.com/craftsman...
-
Page 2: Warranty
• If this Craftsman Tiller is used for commercial or rental purposes, this Warranty applies for only thirty (30) days from the date of purchase. -
Page 3: Operation
• Use extensioncords and receptacles • Neveroperate the machineat high as specifiedby the manufacturerfor all speeds on slippery surfaces.Lookbe- units with electricdrive motors or elec- hind and use care when backing. tric starting motors. • Neverallowbystandersnear the unit. • Neverattemptto make any adjustments •... -
Page 4: Specifications
(Gap: .030") RC12YC AGREEMENTS Congratulations on making a smart pur- CONGRATULATIONS on your purchase chase. Your new Craftsman® product is of a Sears Tiller. It has been designed, designed and manufactured for years of engineered and manufactured to give you dependable operation. - Page 5 These accessorieswere availablewhen the tillerwas purchased. They are also avail- able at most Sears Retail outlets and Service Centers. Most Sears Stores can order repair parts for you when you providethe model numberof your tiller. ENGINE SPARK PLUG MUFFLER AIR FILTER GAS CAN ENGINE OIL STABILIZER...
-
Page 6: Tools Required For Assembly
Your new tiller has been assembled at the factory with the exception of those parts left unassembled for shipping purposes. To ensure safe and proper operation of your tiller all parts and hardware you assemble must be tightened securely. Use the correct tools as necessary to insure... - Page 7 CONNECT SHIFT Rotate handle assembly down. Insert rear carriage bolt first, with head of Insert end of shift rod into hole of shift bolt on L.H. side of tiller and loosely lever indicator. semble Iocknut. Insert hairpin clip through hole of shift Insert pivot bolt in front part of plate rod to secure.
-
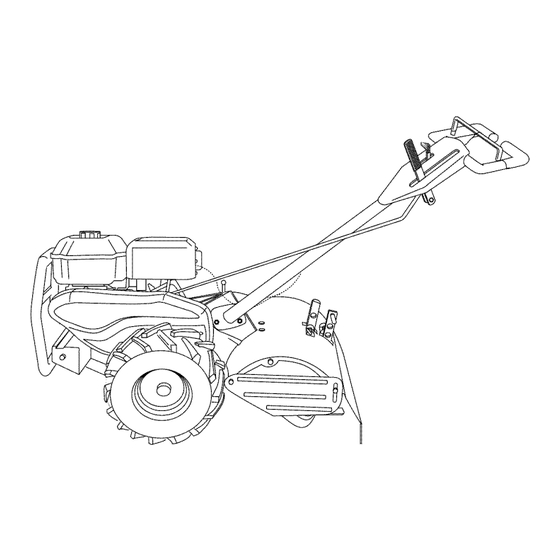
Page 8: Know Your Tiller
These symbols may appear on your Tiller or in literature supplied with the product. Learn and understand their meaning. KNOW YOUR TILLER READ THIS OWNER'S MANUAL AND SAFETY RULES BEFORE OPERATING YOUR TILLER. Compare the illustrations with your tiller to familiarize yourself with the location various... -
Page 9: Drag Stake
The operationof any tiller can result in foreign objects throwninto the eyes, which can result in severeeye damage. Alwayswear safetyglasses or eye shields beforestarting your tiller andwhile tilling. We recommendstandard safetyglassesor a wide vision safety mask worn over spectacles. HOW TO USE YOUR TILLER HARD TO SHIFT GEARS •... - Page 10 Move throttle control to "FAST" position IMPORTANT: Always lower the drag for deep tilling. stake when using the forward rotating tine drive. IMPORTANT: Always release drive control bar before moving shift lever into another OUTER SIDE SHIELDS position. The back edges of the outer side shields "Locked"...
-
Page 11: Add Gasoline
TO START ENGINE • For cold weather operation you should change oil for easier starting (See oil A_,CAUTION: Keep tine control in "OFF" viscosity chart in the Maintenance sec- position when starting engine. tion of this manual). When starting engine for the first time or if •... - Page 12 TILLING HINTS CULTIVATING _IkCAUTION: Until you are accustomed Cultivating is destroying the weeds to handling your tiller, start actual field tween rows to prevent them from robbing use with throttle in slow position (mid-way nourishment and moisture from the plants. between "FAST"...
- Page 13 OUTER VIEW OF TIRE ADJUST WHEELS CULTIVATING ___H8 levis Place blocks under right hand side of tiller and remove hairpin clip and clevis pin from right hand wheel. Move wheel outward approximately inch until hole in inner wheel hub lines up with inner hole in axle.
-
Page 14: Before Each Use
MAINTENANCE SCHEDULE /o 75/ FILL IN DATES y@?, S E V,CE AS YOU COMPLETE DATES /°Y REGULAR SERVICE Check Engine Oil Level Change Engine Oil Oil Pivot Points Inspect Spark Arrester/Muffler Inspect Air Screen Clean or Replace Air Cleaner Cartridge Clean Engine Cylinder Fins Replace... - Page 15 Refill engine with oil. See "CHECK AI:_CAUTION: Disconnect spark plug ENGINE OIL LEVEl" in the Operation wire before performing any maintenance section of this manual. (except carburetor adjustment) to prevent accidental starting of engine. Prevent fires! Keep the engine free of grass, leaves, spilled...
- Page 16 MUFFLER __}----_ Cover Knob Do not operate tiller without muffler. not tamper with exhaust system. Dam- aged mufflers or spark arresters could Cover _ create a fire hazard. Inspect periodically and replace if necessary. If your engine _j_---- Cartridge equipped with a spark arrester screen sembly,...
- Page 17 Belt Guard TIRE CARE . Hex _CAUTION: When mounting tires, unless Nut and beads are seated, overinflation can cause Washer an explosion. (Located • Maintain 20 pounds of tire pressure. Behind tire pressures are not equal, tiller will Tire) pull to one side. Screws •...
-
Page 18: Tine Replacement
TINE REPLACEMENT ° To maintain the superb tilling perfor- mance of this machine the tines should _,CAUTION: Tines are sharp. Wear be checked for sharpness, wear, and gloves or other protection when handling bending, particularly the tines which tines. are next to the transmission. If the gap A badly worn tine causes... - Page 19 TO ADJUST CARBURETOR ENGINE The carburetor has been preset at the Maintenance, repair, or replacement factory and adjustment should not be the emission control devices and systems, necessary. However, engine performance which are being done at the customers can be affected by differences in fuel, tem- pense,...
- Page 20 Immediately prepare your tiller for storage NOTE: Fuel stabilizer is an acceptable at the end of the season or if the unit will alternative in minimizing the formation not be used for 30 days or more. fuel gum deposits during storage.
-
Page 21: Troubleshooting
TROUBLESHOOTING CHART: See appropriate section in manual unless directed to Sears service center CAUSE CORRECTION PROBLEM Will not start 1. Out of fuel. Fill fuel tank. See "TO START ENGINE" Engine not "CHOKED" properly. the Operation section. Wait several minutes before Engine flooded. - Page 22 TROUBLESHOOTING CHART: See appropriate section in manual unless directed to Sears service center CAUSE CORRECTION PROBLEM Engine 1. Low oil level/dirty oil. 1. Check oil level/change oil. overheats Dirty engine air screen. Clean engine air screen. Dirty engine. Clean cylinder fins, air- screen, muffler...
- Page 23 Programa de Mantenimiento ....... GARANTIA LIMITADA DE DOS ANOS PARA LA CULTtVADORA CRAFTSMAN Por dos (2) a5os, a partir de la fecha de compra, cuando esta Cultivadora Craftsman se mantenga, lubrique y afine segQn las instrucciones para la operaci6n y el mantenimiento en el manual del due5o, Sears reparar&...
-
Page 24: Mantenimiento Y Almacenamiento
MANTENIMIENTO Y ALMACENAMIEN- • Despues de pegarle a un objeto extrafio, pare el motor, remueva el alambre de la bujia, inspeccione la cultivadora cuidadosa- • Mantenga los accesorios y aditamentos de mente, para verificar si hay dafios, y repare la maquina en buenas condiciones para el el dafio antes de volver a arrancar y operar la funcionamiento. -
Page 25: Especificaciones
PARA LA REPARACION Capacidad 4 Cuartos Congratulaciones por su buena compra. gasolina: Sin plomo, regular Su nuevo producto Craftsman® esta disefiado Aceite(API-SG-SL): SAE 30 (Sobre 40°F) y fabricado para funcionar de modo fiable por (Capacidad: 19 oz.) SAE 5w-30 SAE 10w-30 muchos afios. - Page 26 Estos accesorios estaban disponibles cuando se compr5 la cultivadora. Tambien estan disponibles en la mayoMa de las tiendas de Sears yen los centros de servicio. La mayoMa de las tiendas Sears tambien pueden ordenar partes de repuesto para usted, si les proporciona el nQmero del modelo de su cultivadora.
- Page 27 Su cultivadora nueva ha sido montada en la fabrica, con la excepcion de aquellas partes que se dejaron sin montar por razones de envio. Para asegurarse que la cultivadora operara en forma segura y adecuada, todas las partes y los articulos de ferreteria que monte tienen que estar apre- tados en forma segura.
- Page 28 Rote el conjunto del mango hacia abajo, tn- Columna serte el perno portador trasero primero, con Mango la cabeza del perno en el lado izquierdo de la cultivadora y ponga sueltamente la tuerca de seguridad. Cables Inserte el perno de pivote de la parte delantera de la placa y apriete en forma segura.
- Page 29 Estos simbolos pueden apareser sobre su cultivadora en la literature proporcionada con el pro- ducto, aprenda y comprenda sus significados. CONOZCA SU CULTIVADORA LEA ESTE MANUAL DEL DUEKIOY LAS REGLAS DE SEGURtDAD ANTES DE OPERAR SU CULTIVADORA Compare las ilustraciones con su cultivadora para familiarizarse con la ubicacion...
- Page 30 La operacion de cualquier cultivadora puede hacer que salten objetos extrafios den- tro de sus ojos, Io que puede producir dafios graves en estos. Siempre use anteojos de seguridad o protecciones para los ojos antes de hacer arrancar su cultivadora o mientras este labrando con ella.
- Page 31 4. Mueva el control d e laaceleracion a la IMPORTANTE: Baje siempre la estaca de ar- posicion de"R/_,PIDO '' (FAST) p araun rastre antes de utilizar el mando de diente de labrado profundo. rotacion hacia adelante. IMPORTANTE: Siempre sueltelabarradecon- DEFENSAS LATERALES EXTERIORES trolde laimpulsion antesde mover l a palanca...
- Page 32 3. Reinstalar lacapadelaceitedemotor y PAPA HACER ARRANCAR EL MOTOR apriete a fondo. _PRECAUCI6N: Mantenga la barra de con- • Paralaoperacion e n clima frio,debecambi- de la impulsion en la posicion "DESENGAN- trol arseel aceiteparafacilitar e l arranque (vea CHADO" cuando haga arrancar el motor. la"TABLA DEVtSCOSlDAD D ELACEITE"...
- Page 33 CULTIVO CONSEJOS PARA LABRAR _PRECAUCI6N: Antes de acostumbrarse a El cultivo quiere decir la destrucci6n de las malezas entre las hileras, para evitar que estas manejar su cultivadora, empiece el uso de esta le roben la nutrici6n y la humedad alas plantas. en el terreno con la aceleracion en la posicion AI mismo tiempo, si se rompe la capa superior de "lento"...
- Page 34 AJUSTE DE LAS RUEDAS PARA VISTA EXTERIOR DE LA LLANTA CULTIVO Ponga bloques debajo del lado derecho de la cultivadora y remueva la abrazadera de horquilla y la clavija de horquilla de la rueda Clavija de del lado derecho. Mueva la rueda hacia afuera, aproximada- mente 1 pulgada, hasta que el agujero en el cubo de la rueda interior se alinee con el agujero interior en el eje.
- Page 35 PROGRAMA MANTENIMIENTO MEo,oA s Rv.c.o I W°+i° 7 s Rv.c.o Revisar el nivel del aceite del motor Cambiar el aceite del motor 1_1.2 Aoeitar los puntos de pivote Inspeccionar el supresor del silenciador Inspeccionar la rejilla de aire Limpiarlcambiar el oartucho del filtro de aire Limpiar las aletas del cilindro...
-
Page 36: Filtro De Aire
Despues de que el aceite se haya drenado _,PRECAUCl6N:Desconecte el alambre de completamente, vuelva a colocar el tapon la bujia antes de dar mantenimiento (excepto del drenaje del aceite y aprietelo en forma por el ajuste del carburador) para evitar que el segura. -
Page 37: Sistema De Enfriamiento
SILENClADOR Cubierta Tornillo de la base No opere la cultivadora sin el silenciador. No manipulee el sistema de escape. Los silenciad- ores o los amortiguadores de chispas da_ados pueden crear un peligro de incendio, lnspec- ci6nelos peri6dicamente y cambielos si es Aletas del_ Cartucho necesario. - Page 38 CUIDADO DE LAS LLANTAS Protecci6n de la correa _,PRECAUCl6N: Cuando monte las Ilantas, a menos que los talones esten asentados, si Hexagonal se inflan demasiado se puede producir una y arandela explosi6n. (Ubicadas • Mantenga 20 libras de presi6n en las Ilantas. detras de la Si la presi6n de las Ilantas no es la misma, la...
- Page 39 CAMBIO DE BRAZOS Para que esta maquina pueda mantener un rendimiento excelente en el labrado, se _ILPRECAUCI6N: Los brazos son afilados. deben revisar los brazos para verificar si Use guantes u otra proteccion cuando maneje estan afilados, desgastados o doblados, los brazos.
- Page 40 MOTOR Cable del tornillo El mantenimiento, la reparacion, o el reemplazo de sujecion de cualquier dispositivos o sistemas del control Cable de la de la emision, los cuales sean hechos al costo Aceleracion del cliente, pueden ser realizados por cualquier individuo o establecimiento de reparacion de motor.
-
Page 41: Aceite Del Motor
AVlSO: El estabilizador de combustible es una Inmediatamente prepare su cultivadora para el almacenamiento al final de la temporada o si la alternativa aceptable para reducir a un minimo unidad no se va a usar por 30 dias o mas. la formacion de dep6sitos de goma en el com- bustible durante el periodo de almacenamiento. - Page 42 IDENTIFICACION DE PROBLEMAS: Vea la seccion apropiada en el manual a menos que este dirigido a un centro de servicio Sears. PROBLEMA CAUSA CORRECCION No arranca 1. Sin combustible. 1. Llene el estanque de combustible. 2. Motor sin la "ESTRANGU- 2.
- Page 43 IDENTIFICACION DE PROBLEMAS: Yea la seccion apropiada en el manual a menos que este dirigido a un centro de servicio Sears. PROBLEMA CAUSA CORRECCION El motor se 1. Revise el nivel del aceite/cambie 1. Nivel del aceite bajo/aceite calienta sucio. el aceite.
- Page 44 TILLER - - MODEL NUMBER 917.294271 HANDLES "'" " .'_" ; 11 handle assy PART PART DESCRIPTION DESCRIPTION 180634 Throttle, Control STD541437 Nut, Crownlock 3/8-16 19131611 Washer 13/32xlx11Ga. 141406 Grip, Handle 110673X Grommet, Handle 109228X Lever, Lock, Handle 127254X Bar, Drive Control Assembly 150628 Handle,...
-
Page 45: Left Side
TILLER - - MODEL NUMBER 917,294271 MAINFRAME, LEFT SIDE mairllrame left PART PART DESCRIPTION DESCRIPTION 73510500 Nut, Keps 5/16-18 STD624008 Retainer Spring STD551137 Washer, Lock 165501X615 Guard, Belt STD541037 Nut, Hex 3/8-16 132801 Belt, V 170127 Shield, Inner Belt Guard 104679X Pulley, Idler 164329... -
Page 46: Right Side
TILLER - - MODEL NUMBER 917,294271 MAINFRAME, RIGHT SIDE ,." mainframe right PART PART DESCRIPTION DESCRIPTION 185190 126875X Rivet, Drilled Bumper 102190X Tire 73970500 Locknut, Hex, Flange 5/16-18 183122X624 STD551031 Washer 11/32x11/16x16Ga. 795R Tire Valve 74760512 Bolt, Hex 5/16-18 x 3/4 102332X Engine, (See Breakdown) Bracket,... - Page 47 TILLER - - MODEL NUMBER 917,294271 TRANSMISSION .0---44 transmission 7 PART PART DESCRIPTION DESCRIPTION 188240 Transmission Assembly (Includes 106388X Spacer 0.70 x 1.00 x 1.150 Sprocket and Gear Assembly Key Nos. 2-52) 102121X 188220 Gearcase, LH. w/Bearing 102112X Shaft, Reduction (2nd) Screw, Whiz, Lock 5/16-18...
- Page 48 TILLER - - MODEL NUMBER 917,294271 TINE SHIELD 27 i tine shield 22 in KEY PART PART DESCRIPTION DESCRIPTION 73900500 Nut, Lock Hex Flange 5/16-18 STD532512 Bolt, Carriage 1/4-20 x 1-1/4 Gr. 5 161415X615 Shield, Side, Outer L H. 102701X Grip 8393J STD541037...
-
Page 49: Tine Assembly
TILLER - - MODEL NUMBER 917,294271 TINE ASSEMBLY PART PART DESCRIPTION DESCRIPTION 132673 Pin, Shear 74610616 Bolt, Hex 3/8-24 x 1 3146R Clip, Hairpin 163499 Tine, Spade 188844 Tine Assembly 163500 Tine, Cleaning 73610600 Nut, Hex 3/8-24 NOTE: All component dimensions given in U.S. STD551137 Washer, Lock3/8 inches. - Page 50 TILLER - - MODEL NUMBER 917,294271 DECALS © PART DESCRIPTION 189339 Decal, CNTRL. 145023 Decal, Logo 189336 Decal, Belt Guard 177566 Decal, Tine Shield 137538 Decal, Caution, Drive Control 120431X Decal, Hand Placement 166202 Decal, Shift Indicator 166188 Decal, Tine, Shield, Counter Rotating Tines...
- Page 51 TILLER - - MODEL NUMBER 917.294270 ENGINE, BRIGGS & STRATTON - - MODEL NUMBER 122002-0394-E1 ® 914A 914B 552 0 11019 KITI LABEL 11058 OWNER'S MANUAL I 1329 REPLACEMENT ENGINE I...
- Page 52 TILLER - - MODEL NUMBER 917.294270 ENGINE, BRIGGS & STRATTON - - MODEL NUMBER 122002-0394-E1 365_ 633A_ 163 _ 186_ 108 _ 137__ 276 @ • _5_ _ f 276 @ 121 CARBURETOR OVERHAUL 633A G 127_ 276@ 358 ENGINE GASKET SET 961 _ 1022_ 971A...
- Page 53 TILLER - - MODEL NUMBER 917.294270 ENGINE, BRIGGS & STRATTON - - MODEL NUMBER 122002-0394-E1 1095 VALVE GASKET SET 1036 LABEL-EMISSION 6081 597_ 1070...
- Page 54 TILLER - - MODEL NUMBER 917.294270 ENGINE, BRIGGS & STRATTON - - MODEL NUMBER 122002-0394-E1 PART PART DESCRIPTION DESCRIPTION 699505 Cylinder Assembly 187A 692601 Line-Fuel (Molded) 399269 Kit-Bushing/Seal (Magneto 699479 Screw(Control Bracket) Side) 699220 Screw (Fuel Tank) 299819 • Seal-Oil (Magneto Side) 694543 Bail-Rocker Arm 699486...
- Page 55 TILLER - - MODEL NUMBER 917.294270 ENGINE, BRIGGS & STRATTON - - MODEL NUMBER 122002-0394-E1 PART DESCRIPTION 699206 Screw (Control Panel) 694257 Spacer-Control Bracket 393757 Deflector-Muffler 690661 Screw (Muffler Deflector) 691855 Spring-Friction 690572 Spring-Detent (Choke) 693462 Bracket-Air Cleaner 690959 Pin-Locating 692565 Gear-Timing 692564...
- Page 56 Your Home To purchase a protection agreement (U.S.A.) or maintenance agreement (Canada) on a product serviced by Sears: 1°800-827°6655 (U.S,A.) 1 o800o361 °6665 (Canada) Pars pedir servicio de reparaci6n Au Canada pour service en fran(_ais: a domicilio, y pars ordenar piezas: 1-800-LE-FOYER 1-888-SU-HOG_:_ sM (1-88G533-6937)
Need help?
Do you have a question about the 917.294271 and is the answer not in the manual?
Questions and answers