Ericsson R250s PRO User Manual
Ericsson mobile phone user's guide
Hide thumbs
Also See for R250s PRO:
- User manual (133 pages) ,
- User manual (130 pages) ,
- Troubleshooting instructions (89 pages)
Table of Contents
Advertisement
Quick Links
Advertisement
Table of Contents

Related Manuals for Ericsson R250s PRO


Summary of Contents for Ericsson R250s PRO
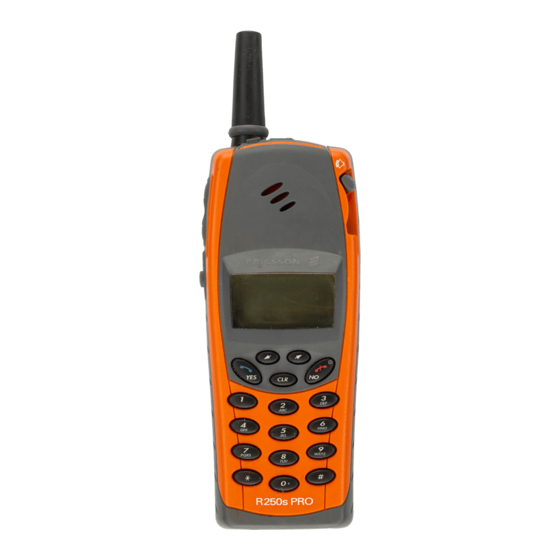
- Page 1 User’s Guide Mobile Phone R250s PRO...
-
Page 2: Quick Start
QUICK START This page helps you to get the phone up and running quickly. If you have not used a mobile phone before, we recommend that you read the chapter “Preparing Your Phone for Use” on page 4, for a more detailed installation procedure. - Page 3 • Alert button. The R250s PRO is equipped with an alert button on the top of the phone, which makes it easy to call a pre-set alert number. Note! Please read the chapter “Guidelines for Safe and Efficient Use” on...
-
Page 4: Table Of Contents
Ericsson Mobile Communications AB at any time and with- out notice. Such changes will, however, be incorporated into new editions of this manual. - Page 5 Please note! Some of the services in this manual are not supported by all net- works. This also applies to the GSM International Emergency Number 112. Please contact your network operator or service provider if you are in doubt whether you can use a particular service or not. symbol on our products signifies that they have been certi- fied according to the EMC directive 89/336/EEC, the Telecommu- nications directive 91/263/EEC, and the Low Voltage directive 73/...
-
Page 6: Getting Started
GETTING STARTED Preparing Your Phone for Use Turning Your Phone On and Off Display Information and Key Functions Making and Receiving Calls During a Call Speakerphone... -
Page 7: Preparing Your Phone For Use
Preparing Your Phone for Use Note! Please read the chapter “Guidelines for Safe and Efficient Use” on page 112, before using your mobile phone. OVERVIEW Front * If you are not using a SIM Pro card (see “GSM Pro” on page 90), i.e. if you are using a regular SIM card, pressing the Push-to-talk button mutes the microphone, if pressed during a conversation. - Page 8 Earpiece/Loud- speaker Indicator Light Back Battery release catch Battery Charging connector ASSEMBLY To use your phone you must: • insert the SIM card • attach the battery to the phone • charge the battery Please see the following pages. Alert Button Connector for external antenna Hole for belt clip...
-
Page 9: The Sim Card
THE SIM CARD When you register as a subscriber with a network operator, you get a SIM (Subscriber Identity Module) card. The SIM card contains a computer chip that keeps track of your phone number, the services included in your subscrip- tion, and your Phone Book information, among other things. - Page 10 We recommend that you charge the battery before you use the phone for the first time. The battery is specially designed for the R250s PRO. The battery has a special locking mechanism that prevents it from falling off if you should drop the phone on the ground.
-
Page 11: Attaching The Battery
For the best talk and standby time in the long run, we recom- mend that you use only Ericsson original batteries with your phone. Note! If you charge a new battery, or a battery that has not been used for a long time, it may take a while until you get an indication of charging. - Page 12 Charging the Battery 1. Make sure that the battery is attached to the phone. 2. Connect the charger to the mains. To indicate charging: • the battery meter in the display pulses continuously. • the indicator on top of the phone shows a steady red light (or green, if the phone is turned on).
-
Page 13: Removing The Battery
Switching Antennas The R250s PRO comes with two antennas. The longer antenna gives you bet- ter receiving signalling when you are within an area with poor radio coverage. Please make sure that you switch antennas during dry conditions, to prevent leakage into the phone. - Page 14 The Clips The R250s PRO comes with two different clips: • standard clip • swivel clip. The standard clip is a metal belt clip which is attached to the battery with a screw. The swivel clip is a belt holder which has a knob and a belt holder. The knob is attached to the battery with a screw.
- Page 15 SYSTEM CONNECTOR BOOT The system connector boot prevents connected accessories, e.g. a handsfree set from falling out. When you use a portable handsfree and the phone is attached to your belt, the handsfree will not fall out if you bend forward or sit down.
- Page 16 TAKING CARE OF YOUR MOBILE PHONE When needed, the phone can be washed under running water. We recommend that you do it gently in cold water under a water tap. Before washing the phone, it is important that the battery is properly connected, the antenna is properly screwed on and that all accessories are removed.
-
Page 17: Turning Your Phone On And Off
See “Security for Your Phone and Subscription” on page 64. 13:40 Network Search After you have turned on the phone (and entered your PIN), the Ericsson 4 4 4 4 NETWORK 7 7 7 7 name appears in the display and the phone searches for a network. -
Page 18: Initial Settings
No Network No network If the message No network is displayed, there is no network within range or 13:40 the received signal is too weak. You have to move to get a stronger signal. You can also try to replace the antenna with the longer high gain antenna. INITIAL SETTINGS The first time you turn on your phone, you may want to change the language in the display, set the clock and choose the ring signal type. -
Page 19: Turning Your Phone Off
Setting the Ring Signal Level 1. Press the MENU The text L L L L Ring level R R R R QQQQQqq) QQQQQqq QQQQQqq (QQQQQqq display. 2. Press RING LEVEL The text L L L L R R R R Buzzer QQQQQqq) QQQQQqq... -
Page 20: Display Information And Key Functions
Display Information and Key Functions DISPLAY INFORMATION Your phone display helps you to: • make sure that you are dialling correctly • check your signal strength and service availability • find out if you have received messages • check which line is in use if you have the Two Line Service •... -
Page 21: Key Functions
Icon: Name: L1/L2 Line indicator KEY FUNCTIONS Before making or receiving a call, it is useful to understand the keys. The table below explains the basic key functions. Note! Some keys have different functions when you enter the menu system. See “Using the Menu System”... -
Page 22: Making And Receiving Calls
Making and Receiving Calls The instructions in this chapter assume that you have turned on your phone and that you are within range of a network. If you are abroad, you may use other networks, provided your home network has an agreement that allows you to do this. -
Page 23: Re-Dialling A Previously Called Number
RE-DIALLING A PREVIOUSLY CALLED NUMBER Your phone conveniently lets you re-dial the last phone numbers you have called (15 or more, depending on your SIM card). It can also re-dial a number automatically if the connection failed when you first called. To re-dial a previously called number 1. -
Page 24: Making Emergency Calls
MAKING ALERT CALLS The R250s PRO is equipped with an Alert button, located on the top of the phone, next to the antenna (see “Overview” on page 4). The alert button makes it easy to set up a call to a pre-set alert number, without having to enter the number manually. -
Page 25: Receiving A Call
RECEIVING A CALL When you receive a call, the phone rings and the indicator light on top of the Answer? phone blinks green rapidly. The display shows If your subscription includes the Calling Line Identification service and the caller’s network sends the number, you see the caller’s number at the bottom of the display. - Page 26 To Show Your Number for a Particular Call MENU 1. Enter the phone number you wish to call. Special L L L L R R R R Functions 2. Press the SPECIAL FUNC 3. Press L L L L R R R R Send ID 01234567890 4.
-
Page 27: During A Call
During a Call Your phone has several functions which you might find helpful while a call is in progress. CHANGING THE EARPIECE VOLUME During a call you can change the earpiece volume. To change the earpiece volume during a call •... -
Page 28: Sending Tone Signals
SENDING TONE SIGNALS To use telephone banking services or control a telephone answering machine, you need to use codes. These codes are sent as tone signals (also known as DTMF tones or touch tones). To send tone signals/codes during a call •... -
Page 29: Speakerphone
Speakerphone The R250s PRO is equipped with a speakerphone which, when on, increases the earpiece/loudspeaker volume significantly. The speakerphone is very useful when e.g you need to speak to someone on the phone and continue using both hands. You may, e.g. receive some instruc- tions over the phone that you need both hands to perform. - Page 30 MAKING AND RECEIVING CALLS Making and receiving calls in speakerphone mode is done in the same way as in phone mode. To make a call in speakerphone mode 1. Enter the phone number, including the area code, and press Do not hold the phone close to your ear during the conversation. 2.
- Page 31 Speakerphone...
-
Page 32: Functions And Settings
FUNCTIONS AND SETTINGS Using the Menu System Your Personal Phone Book Keeping Track of Your Phone Calls Your Voice Mail Service Personalizing Your Phone Sending and Receiving Text Messages (SMS) Diverting Incoming Calls Security for Your Phone and Subscription Setting Network Preferences Handling More than One Call Simultaneously Knowing the Call Time/Call Cost Using Two Phone Lines... -
Page 33: Using The Menu System
Using the Menu System The menu system allows you to control the phone’s functions and to custom- ize it to suit your personal preferences. You use the menu system every time you want to change a setting in your phone, such as the ring signal. Each menu contains a list of options. - Page 34 When L and R are displayed, there are more options you can scroll • through with the • Text in brackets shows the current setting of the function shown in the display. In this manual, we have chosen to exclude some of the details above in the pictures of the displays.
- Page 35 The arrows on either side of the word another menu. 2. Press SETTINGS L L L L Ear volumeR R R R Now you are in the Settings menu. The name of the menu that you have QQQQq) QQQQq QQQQq (QQQQq chosen is shown in capital letters at the top of the display.
-
Page 36: Your Personal Phone Book
Your Personal Phone Book Your phone has a phone book in which you can store names and numbers. The phone book also keeps track of your last dialled numbers and, if you subscribe to the Calling Line Identification service (CLI), the last answered numbers. Convenient if you have to call someone back. -
Page 37: International Numbers
If you are using a SIM Pro card, see “GSM Pro” on page 90. Some storing positions on the SIM card may be used by your service administrator. This means that you may not be allowed to edit, store or erase these positions. For more information, please contact your service administrator. -
Page 38: Storing A Number Together With A Name
• To enter the second letter on the numeric keys straight away, e.g. a ‘B’, press and hold the volume key upwards, then press 2. To enter the third letter, e.g. a ‘C’, press and hold the volume key downwards, then press 2. •... -
Page 39: Overwrite Protection
To make a call with tone signal codes, proceed as described in “Making and Receiving Calls” on page 19. When you make the call, the phone dials the number, waits until the call is answered and then sends the code. If you inserted another pause and another code, it pauses again, sends the next code and so on. -
Page 40: Using The Phonebook
Note! If you are using a GSM Pro card (see “GSM Pro” on page 90) some storing positions on the SIM card may be used by your service administrator. This means that you may not be allowed to use these positions for storing your own phone book entries. -
Page 41: Keeping The Phone Book Up To Date
To recall a phone number using the position 1. Scroll to NAME 2. Enter the position number of the stored phone number. RECALL For a position in the card memory, simply enter the number. For a position Position: in the phone memory, press and hold the # key until the ‘¤’ character appears and then enter the number. -
Page 42: Copying Phone Numbers Between Memories
To edit an entry using the position EDIT 1. Scroll to L L L L R R R R Find pos 2. Enter the position number for the entry you wish to edit. Position For a position in the card memory, simply enter the number. For a position in the phone memory, press and hold the # key until the ‘¤’... - Page 43 4. Enter the number of the first position in the phone memory you wish to copy to and press The message 5. Press Note! If you are using a SIM Pro card the menu “Copy all Card r Phone” may not be available.
- Page 44 To copy numbers from phone memory to card memory one by one 1. Scroll to Phone book Y E S 2. Select Phone card and press To copy from the phone memory to the card memory use the keys as described in “To copy numbers from card memory to phone C L R memory one by one”...
-
Page 45: Keeping Track Of Your Phone Calls
Keeping Track of Your Phone Calls CALLING SOMEONE WHO HAS CALLED YOU If you subscribe to the Calling Line Identification service, and the caller’s net- work sends the number, the numbers of the last ten answered calls are stored in the phone memory. To recall one of the last ten answered numbers 1. - Page 46 (or date) when the call was received. If no information about the caller’s number was received, the display shows one of the following: • MISSED CALLS • L L L L R R R R 19-02-99 Unidentified 2. To see your other unanswered calls, press the repeatedly.
-
Page 47: Your Voice Mail Service
Your Voice Mail Service Note! Not all operators have this service. The service also depends on your subscription. The answering service of your network allows callers to leave a voice mes- 4 4 4 4 7 7 7 7 Voicemail 2 2 2 2 8 8 8 8 sage when you cannot answer your calls. - Page 48 • Scroll to Mail Voice mail, Y E S The phone automatically calls your voice mail. Follow the instructions given to you by your operator’s answering service. Tip! You can also call your voice mail number by pressing and holding 1 in standby mode.
-
Page 49: Personalizing Your Phone
English by pressing ALERT BUTTON The R250s PRO is equipped with an Alert button located on the top of the phone, next to the antenna (see “Overview” on page 4). By pressing and hold- ing the alert button you can easily set up a call to a pre-defined alert number, without having to dial the number in the ordinary way. -
Page 50: Earpiece Volume
To turn the Alert button on or off 1. Scroll to ALERT KEY 2. Select L L L L R R R R To change the alert number 1. Scroll to PHONE BOOK Alert 2. Edit the number in the same way that you edit other phone book entries. L L L L Number R R R R You can also associate a name with the alert number. -
Page 51: Ring Signal Volume
close to your ear during a conversation as it may cause damage to your hear- ing. For more information, see “Speakerphone” on page 26. RING SIGNAL VOLUME You can set the ring signal level in seven steps. The first step means that two clicks are heard when you receive a call. - Page 52 Note! If the Data menus are set to on (See “Sending and Receiving Fax and Data calls” on page 85), you can set the ring signal type for speech (the dis- play shows ‘Phone’ in the middle row), fax and data calls respectively. If you have the Two Line service, see “Using Two Phone Lines”...
-
Page 53: Display Light
DISPLAY LIGHT The display light can be set to automatic, off or on. In automatic mode, the display light is turned off automatically 20 seconds after the last key is pressed. It is turned on again when a key is pressed or when a call or message is received. -
Page 54: Time And Date
TIME AND DATE The Clock menu lets you set the time and date. It also lets you turn on the alarm function (see “Alarm” on page 86). The time is shown continuously at the bottom of the display when the phone is in standby mode. When you buy your phone, the time is set to the 24-hour format. - Page 55 To reset all settings 1. Scroll to Settings Master reset Y E S Y E S Enter code 2. Enter the phone lock code. (The default code is 0000.) to reset 3. Press to reset all settings. Y E S Personalizing Your Phone...
-
Page 56: Sending And Receiving Text Messages (Sms)
Sending and Receiving Text Messages (SMS) The Short Message Service (SMS) allows you to send and receive text mes- sages consisting of up to 160 characters. If your phone is turned off when a message is sent to you, an envelope icon lets you know you have a message when you turn your phone back on. -
Page 57: Composing A Text Message
The SIM Card Memory If you receive an important message and want to make sure it is not erased from the phone memory, you can store it in a memory on your SIM card. This means that you can retrieve the message regardless of which phone you use. Messages that are saved in the SIM card memory remain there until you erase them. -
Page 58: Sending A Text Message
Press the appropriate key, 1–9, 0 or #, repeatedly until the desired character appears in the display. Example: • To enter an A, press 2 once. To enter a B, press 2 twice. • To enter lower case letters. enter the letter, e.g. an ‘A’. Then press *, an ‘a’ •... -
Page 59: Customizing Your Text Messages
Note! The same procedure is used with all types of messages, for example e-mail, fax etc. Check with your network operator which message types you can use. CUSTOMIZING YOUR TEXT MESSAGES If your message cannot be delivered because the recipient has turned off the phone, your Service Centre can save your message and send it again later. -
Page 60: Replying To A Message
message arrived. However, you can toggle between the date and time by pressing the * key. 2. Press Scroll through the message using the takes you forwards, and To move three lines forward, press 3. To move three lines backwards, press 1. -
Page 61: Storing A Message
STORING A MESSAGE All incoming messages are stored temporarily in the phone memory until the memory space is needed for other purposes, such as storing new messages. Even so, sometimes you may receive an important message that you want to store more safely. -
Page 62: Area Information
FREQUENTLY USED MESSAGES If you have one or more messages you use often, you can store them on the SIM card, to be re-used whenever you want. Storing Frequently Used Messages To make sure your standard messages are not erased when the phone memory becomes full, you should store them in the SIM card memory. - Page 63 To turn area information on/off. 1. Scroll to 2. Select You can now receive Area information messages, provided your network operator supports this function. Area Information Message Types Each type of Area Information message is identified by a three-digit code. At present, the following message types exist: Code: Note! These codes are operator dependent.
-
Page 64: Receiving Area Information
3. To insert a code, scroll to the first empty location, using the key and press R I G H T 4. Enter the new code. (You only need to enter 40 for 040, since the phone adds the leading zero automatically.). 5. -
Page 65: Diverting Incoming Calls
Diverting Incoming Calls If you want to make certain that your incoming calls are taken care of when you are unable to answer them, you can use the Call Divert service to divert them to another phone number. The Call Divert service lets you: •... - Page 66 Diverting When the Data Menus Are On If you have turned the Data menus on, you can set call diverts for your phone, fax and data numbers respectively or for all three together. To divert, proceed as described above. For the fax and data numbers, there are only two divert alternatives: •...
-
Page 67: Security For Your Phone And Subscription
Security for Your Phone and Subscription There are several ways to protect your phone and subscription from unauthor- ized use. Anything from a simple keypad lock to full phone number control. KEYPAD LOCK The Keypad Lock feature helps you to avoid accidental dialling, which can happen if you keep your phone in your pocket or attached to your belt. -
Page 68: The Sim Card Lock
To unlock the keypad • Press The keypad is unlocked. Note! The Keypad lock is always disabled if the phone is connected to vehicle handsfree equipment. THE SIM CARD LOCK Most modern SIM cards are protected with a PIN (Personal Identity Number) at the time of purchase. -
Page 69: Phone Lock
Changing Your PIN2 Code Depending on the network you use, some services require that you enter a sec- ond PIN, the PIN2. 1. Scroll to 2. Follow the same procedure as described in “Changing your PIN Code” above. Turning On the SIM Card Lock 1. -
Page 70: Call Barring
3. Enter your new code and press The message 4. Re-enter your new code and press The message To lock/unlock the phone 1. Scroll to 2. Select the setting you want ( 3. Enter the security code and press Phone Lock CALL BARRING The Call Barring service of the cellular network allows you to bar different types of outgoing and incoming calls. - Page 71 Note! If you divert incoming calls, see “Diverting Incoming Calls” on page 62, you cannot activate some barring options. Likewise, if you bar calls, you cannot activate some call divert options. Cancelling All Call Bars 1. Scroll to BARRING 2. Enter your password and press L L L L Cancel all R R R R The message call bars have been cancelled.
- Page 72 • Numbers beginning with the international (+) sign and country code can also be stored, allowing you to make and receive calls from abroad. • Numbers including question marks can be stored. For example storing 01234567?0 allows calls to be made to and received from numbers ending with a zero from 0123456700 to 0123456790.
-
Page 73: Setting Network Preferences
Setting Network Preferences The Networks menu includes a number of functions which you can use to determine how the phone searches for a network. You may also select a net- work yourself from those within range. SEARCHING FOR NETWORKS When you turn on the phone, it searches for the last accessed network. If this is not within range, you may use another network, provided your home net- work has an agreement that allows you to do so. -
Page 74: Selecting A Network
Note! The order of preference in which the phone selects a network is deter- mined by a list of preferred networks on your SIM card, which you can edit at any time. Manual Search Mode The manual search mode means that your phone first searches for the last accessed network. -
Page 75: List Of Preferred Networks
To start an automatic network search NETWORKS • Scroll to The phone automatically starts searching for a network according to the L L L L New Search R R R R list of preferred networks stored on your SIM card. Forbidden Networks The names of the forbidden networks are stored on your SIM card. - Page 76 4. If the desired network does not appear, press appears. Then enter the three-digit country number and the two-digit net- work number. 5. Finally, to add the network to the list, press To erase a network from the list 1. Scroll to EDIT LIST 2.
-
Page 77: Handling More Than One Call Simultaneously
Handling More than One Call Simultaneously Your phone allows you to handle more than one call simultaneously. This means that you can put a call that is in progress on hold, while you make or answer a second call, and then switch between the two calls. You can also set up a Conference Call to have a joint conversation with up to five people. - Page 78 RECEIVING A SECOND CALL WHILE A CALL IS IN PROGRESS If the Call Waiting function is on, you hear a tone in the earpiece if you receive a second call and the message do one of the following: To end the current call and accept the waiting call 1.
-
Page 79: Receiving A Third Call
To connect two calls – explicit call transfer If you have one active call and one on hold, it is possible to connect the two calls. • Press 4 followed by The two calls are now connected to each other, and you are disconnected from both calls. - Page 80 4. Press 3, followed by Y E S call. You can now put the conference group on hold and add a third person by repeating steps 2 to 4. It is possible to add up to five persons in this way. Note! In the display, the last called number is referred to as call number one, the call before that number two etc.
-
Page 81: Knowing The Call Time/Call Cost
Knowing the Call Time/ Call Cost When you are on the phone, the display shows the duration of a call. By using the Call info function in the Settings menu you can check the time for all calls, both incoming and outgoing. You can also have the call cost or the number of call units displayed by selecting the Cost option, provided your network and your SIM card support this feature. -
Page 82: Determining The Call Cost
To reset the total call time/cost meter 1. Scroll to The message 2. Press Note! If you choose the call cost option you must enter your PIN2 to reset the meter. DETERMINING THE CALL COST This menu only appears if you have selected the Cost option in the Call info function in the Settings menu, see below. - Page 83 deducted from this amount. When the amount reaches zero, no more calls can be made. To set a credit limit for calls 1. Scroll to Info Credit unlimited New Credit Y E S Y E S Y E S CREDIT 2.
-
Page 84: Using Two Phone Lines
Using Two Phone Lines If your subscription supports the Two line service, (also called Alternate Line Service, ALS), you can have two different speech lines. This is useful feature if e.g. you, want to use one number for your business calls and one for your private calls. - Page 85 The call meters in the Info menu show the call times (call costs) for the line currently selected. Changing the Name of the Two Lines The phone allows you to personalize the names of the two lines. You might, for example, want to call Line 1 “Private” and Line 2 “Work”. To change the name of a line 1.
-
Page 86: Calling Card Or Credit Card Calls
Calling Card or Credit Card Calls When making international or long distance calls, you may not want your operator to charge you for these calls on your normal account. If you have a credit card or a calling card, you may want to re-direct the charges to one of those accounts instead. -
Page 87: Selecting A Card
STORING CREDIT OR CALLING CARD NUMBERS Your phone allows you to store two calling card numbers in the phone book menu. This sub-menu is only visible if the Call card function is activated in the Access menu. To store a credit or a calling card number 1. -
Page 88: Sending And Receiving Fax And Data Calls
Sending and Receiving Fax and Data calls If you have a SIM card that does not support separate fax and data numbers, you need to turn on the data menus. When you turn on the Data menus two new menus appear; the menu, Speech then fax appears before the Info menu when you scroll with the appears after the Info menu. -
Page 89: Some Useful Tools
Some Useful Tools ALARM The phone has an alarm function. When it is on, an icon in the shape of a bell (B) is shown next to the current time in the display. The alarm rings at the set time even if the phone is turned off. The illumina- tion of the keys and the display flash. - Page 90 5. Scroll with the L E F T get the answer. You can also press # to get the answer. 6. To clear the display, press To enter a decimal point Press *. • To multiply Press * twice. • key to the equal sign (=) and press R I G H T C L R...
- Page 91 Some Useful Tools...
-
Page 92: Gsm Pro
GSM PRO GSM Pro... -
Page 93: Group Calls
Private Mobile Radio (PMR) and Public Access Mobile Radio (PAMR) networks. With a R250s PRO and a GSM Pro subscription you get access to all the regu- lar GSM network services and most PMR and PAMR services, such as group calls, call monitoring and alert calls. - Page 94 Mode Switch Selector The R250s PRO has a mode switch selector on the right side of the phone, see “Overview” on page 4, which you use to switch between phone and Push-To- Talk mode. When you switch modes the phone gives out a warning tone. You can switch modes at any time: when the phone is in standby, when receiving a call and during a call.
-
Page 95: Alert Calls
ALERT CALLS The R250s PRO is equipped with an the phone next to the antenna. See “Overview” on page 4. Alert calls are eas- ily made by pressing and holding the alert button for one second. If the call cannot get through the phone automatically re-dials the number up to ten times. -
Page 96: Making An Alert Call
To make a group call 1. Press to go to standby (if you are not already in standby). C L R 2. Press and hold the P U S H and find the number you want to call. 3. When you find the number, press The display shows Calling The ringing tone is heard until a group member answers the call. - Page 97 Receiving a Group Call in Push-to-Talk Mode An incoming group call is answered automatically, the phone sends out a warning tone and the voice of the calling party will be heard in the loud- speaker. Note! The phone must be set to Push-To-Talk mode to answer a group call automatically.
-
Page 98: Call Monitoring
The other group members will be notified of you entering the call. Making an Alert Call During an Ongoing Group Call You can make an alert call during an ongoing group call. The R250s PRO will disconnect the ongoing group call and connect to the pre-set alert number. -
Page 99: Handling More Than One Call
The Wireless Dispatch Console consists of a PC, dispatcher software, a R250s PRO and a headset. The software runs under standard Windows 95/98/ NT operating system and can co-exist with other Windows programs. The software supports ordinary phone calls, group calls, text messages (SMS) and special display of alert calls. -
Page 100: Additional Information
ADDITIONAL INFORMATION Guidelines for Safe and Efficient Use Declaration of Conformity Accessories Troubleshooting Ericsson Mobile Internet Quick Keys Technical Data Glossary Warranty Index... -
Page 101: Accessories
HANDSFREE CALLING By using the Ericsson portable or car handsfree solutions, you can be on the phone without using your hands to hold it. You can change the settings for the handsfree-related functions so that they fit your own requirements. -
Page 102: Connecting The Charger
Your Phone” on page 46. DESK/WALL STAND The desk/wall stand for the R250s PRO serves both as a charger and a holder for the phone. When the battery runs low just place the phone in the desk/wall stand to charge it (the charger must be connected to the desk/wall stand). - Page 103 Desk Wall Accessories...
- Page 104 Accessories...
-
Page 105: Troubleshooting
Troubleshooting This chapter lists some problems that you might encounter while using your phone. Some problems require that you call your service provider, but most of the problems you encounter are easy to correct yourself. ERROR MESSAGES Insert card Insert There is no SIM card in the phone. -
Page 106: Phone Does Not Come On
Phone locked Phone locked The phone is locked. To unlock the phone, see “Security for Your Phone and Subscription” on page 64. Enter lock code Your phone comes with the default security code, 0000. You can change it to Enter lock code any three- to eight-digit personalized code. -
Page 107: Ericsson Mobile Internet
When you are on the move and in need of communication and information, the Mobile Internet is the answer. The Mobile Internet is a service supplied by Ericsson to make it easier for you to communicate and receive information quickly, wherever you are. It gives you access to various massaging services, on-line customer services, user manuals and other useful information. -
Page 108: Quick Keys
Quick Keys Several keys on your phone can be used to optimize the phone’s functions and decrease the number of times you need to press a key. Some of the key combi- nations demand that your phone is in a certain mode and some can be made from the standby mode. -
Page 109: Technical Data
Type number Battery Dimensions Size Weight with battery Ambient temperatures Technical Data R250s PRO GSM 900/GSM1800 Small plug-in card, 3V or 5V type, supports GSM Pro SIM cards. 1100802-BV 4 Volt/1600mAh 148 x 59 x 32 mm Approx. 325 g... -
Page 110: Glossary
Dual Band GSM 900/1800 The Ericsson R250s PRO is a dual band phone, which means that you can use your phone on two different kinds of networks – the GSM 900 and the GSM 1800 (also called PCN or DCS 1800) systems. - Page 111 improves the coverage offered by your network operator. It also offers you enhanced international roaming, thanks to the additional networks now availa- ble when you are out travelling. The switching between the two systems is done automatically and seamlessly, which means that you can use your phone without ever having to consider which system is best at the time.
- Page 112 GSM 1800 also known as DCS 1800 or PCN, is a digital network working on a frequency of 1800 MHz. It is used in Europe and Asia-Pacific. GSM Pro GSM Pro is an extended feature of GSM which gives the user access to many of the features found today in different Public Mobile Radio and Public Access Mobile Radio networks, such as group calls, alert calls and call moni- toring.
- Page 113 Personal Identification Number – a code used for all GSM-based phones to establish authorization for access to certain functions or information. The PIN code comes with your subscription. PIN2 Personal Identification Number 2 – an authorization code which is used only for special services.
- Page 114 SIM card Subscriber Identity Module card - a card that must be inserted in any GSM- based mobile phone. It contains subscriber details, security information and memory for a personal directory of numbers. The card can be a small plug-in type or credit card-sized but both types have the same functions.
-
Page 115: Guidelines For Safe And Efficient Use
According to this statement, which is based on the available body of research, there is no evidence that mobile terminals meeting the rec- ommended limits can cause any adverse health effects. All Ericsson tele- phones conform to the ICNIRP recommendations and international exposure standards, such as: •... -
Page 116: Antenna Care And Replacement
Do not use an antenna designed for any other type of telephone than the one you have bought. Unauthorized antennas, modifications, or attach- ments could damage the phone and may violate the appropriate regulations and will void the warranty and Ericsson can not guarantee the phone being water resistant. BATTERY •... -
Page 117: Power Supply
• Turn off your phone in health care facilities when regulations posted in the areas instruct you to do so. • Do not use your mobile phone near medical equipment without requesting permission. Mobile phones may affect the operation of some implanted cardiac pacemak- ers, equipment for people with hearing impairments and other medically implanted equipment. -
Page 118: Product Care
• Do not expose your product to extreme temperatures. • Do not use any other accessories than Ericsson originals. Failure to do so may result in loss of performance, fire, electric shock or injury, and will void the warranty. •... -
Page 119: Warranty
Warranty Thank you for purchasing this Ericsson Product. To get maximum use of the features of your new product we recommend that you follow a few simple steps: • Read the Guidelines for safe and efficient use. • Read all the terms and conditions of your Ericsson Warranty. - Page 120 4. This warranty does not cover product failures due to repair installations, modifications or improper service performed by a non-Ericsson authorised service workshop or opening of the product by non-Ericsson authorised persons. 5. The warranty does not cover product failures which have been caused by use of non-Ericsson original accessories.
-
Page 121: Declaration Of Conformity
Declaration of Conformity We, Ericsson Mobile Communications AB of Nya Vattentornet 221 83 Lund, Sweden declare under our sole responsibility that our product Ericsson type 1100802-BV to which this declaration relates, conforms to the appropriate standards TBR 19, TBR 20, TBR31, TBR32, ETS 300 342-1 and EN 60950, following the provisions of Teleterminals directive 91/263/EEC, EMC directive 89/336/EEC, and Low voltage directive 73/23/EEC. -
Page 122: Index
Index Alarm 86 Alarm indicator 17 Alert button 18, 21, 46, 92 turning on/off 47 Alert calls 21, 92, 93 Alert number 21 change number 47 Alternate Line Service (ALS). See Two line service Answering calls 22 Answering mode. See Handsfree calling Answering service. - Page 123 Calls 19 alert 21, 92, 93 answering 22 during 24 emergency 21, 93 group calls. See group calls international 20 making 19 missed 42 putting on hold 75 receiving 22 re-dialling 20 reject 22 switching between two calls 75 unanswered 42 Card memory 33, 54 CB.
- Page 124 Indicators in display 17 alarm 17 battery meter 17 fiexed incoming calls 18 keypad lock 17 line 18 signal strength 17 silent ring 17 SMS 17 voice mail 17 Instructions in the manual 31 International calls 20 Key functions 18 Key sound 49 Keypad 4 Keypad lock...
- Page 125 Push-to-talk button 18 answering 90 calling 37, 90 speaking 90 Push-to-talk mode 90 Put a call on hold 75 Quick dialling. See Speed dialling Quick keys Reading text messages (SMS) 56 Receive Calls 22 Receiving text messages (SMS) 56 Re-dialling 20 Automatic Re-dialling 20 Rejecting calls 22 Reply Requested Reply 57...
- Page 126 Vibrating Call Alert turn on/off 48 Voice mail 44 activating 44 calling 44 Voice mail indicator 17 Volume earpiece 24, 91 ring signal 48 Volume keys 4, 18 Index...
Need help?
Do you have a question about the R250s PRO and is the answer not in the manual?
Questions and answers