Ericsson R320s User Manual
Sony ericsson r320s: users guide
Hide thumbs
Also See for R320s:
- White paper (44 pages) ,
- Working instruction (116 pages) ,
- Working instruction (20 pages)
Table of Contents
Advertisement
Ericsson R320s
Second edition (December 1999)
This User's Guide is published by
Ericsson Mobile Communications AB,
without any warranty. Improvements and
changes to this User's Guide necessitated
by typographical errors, inaccuracies of
current information, or improvements to
programs and/or equipment, may be made
by Ericsson Mobile Communications AB
at any time and without notice. Such
changes will, however, be incorporated into
new editions of this
User's Guide.
All rights reserved.
©Ericsson Mobile Communications AB,
1999
Publication number: EN/LZT 108 2754 R2A
INNOVATRON PATENTS
Contents
at a Glance
Calendar 104
Voice Memo 109
Voice Control 112
Code Memo 115
Extras 121
Accessories 128
Online Services 135
Advertisement
Table of Contents

Related Manuals for Ericsson R320s


Summary of Contents for Ericsson R320s
-
Page 1: Table Of Contents
Ericsson R320s Second edition (December 1999) This User’s Guide is published by Ericsson Mobile Communications AB, without any warranty. Improvements and changes to this User’s Guide necessitated by typographical errors, inaccuracies of current information, or improvements to programs and/or equipment, may be made by Ericsson Mobile Communications AB at any time and without notice. - Page 2 Additional Information 139 Quick Keys 140 Troubleshooting 142 Ericsson Mobile Internet 144 The Online Version of this User´s Guide 145 Technical Data 146 Glossary 147 Guidelines for Safe and Efficient Use 152 Warranty 158 Declaration of Conformity 160 Index 161...
- Page 3 Please note! Some of the services in this manual are not supported by all networks. This also applies to the GSM International Emergency Number 112. Please contact your network operator or service provider if you are in doubt whether you can use a particular service or not. Note! You should read the Guidelines for Safe and Efficient Use and the Warranty chapters before using your mobile phone.
-
Page 5: Getting Started
Getting Started Preparing Your Phone for Use Turning Your Phone On and Off Display Information and Key Functions Making and Receiving Calls During a Call... -
Page 6: Preparing Your Phone For Use
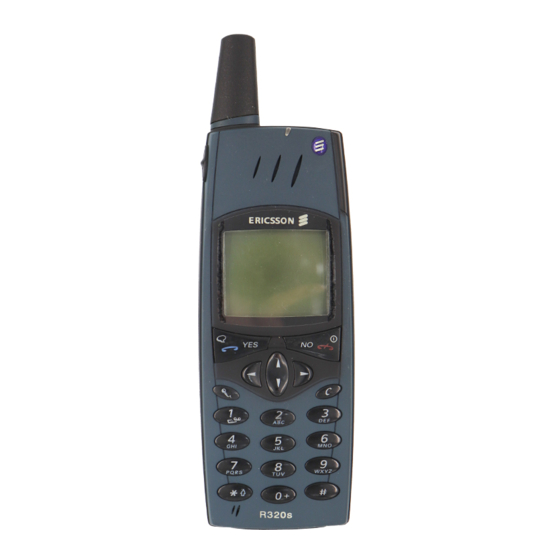
Preparing Your Phone for Use Overview Front Back Hole for belt clip screw Preparing Your Phone for Use Volume key Display Voice Memo button Keypad Microphone Connector for external antenna Antenna Indicator light Earpiece Infrared eye Power On/Off Navigation keys Battery release catch Battery Handsfree... - Page 7 Assembly You need to do the following to use your phone: • insert the SIM card • attach the battery to the phone • charge the battery The SIM Card When you register as a subscriber with a network operator, you get a SIM (Subscriber Identity Module) card.
- Page 8 If your PIN is entered incorrectly three times in a row, the SIM card is blocked. If this happens, you can unlock it by using your PUK (Personal Unblocking Key code), which you also get from your operator. The Battery Your phone comes with a lithium battery.
- Page 9 Charging the Battery Make sure that the battery is attached to the phone. Connect the charger to the mains. Note! The mains plug may look different depending on the mains socket in your country. Do not connect it to any other item than your Ericsson Travel Charger CTR-10.
- Page 10 Note! Batteries that are not Ericsson-approved are charged slowly for safety reasons. These are indicated by the message ‘Alien battery - Slow charging’ in the display during the charging process. Disconnecting the Charger • Move the plug connected to the phone upwards to remove it, as shown in the picture.
-
Page 11: Turning Your Phone On And Off
Turning Your Phone On and Off Turning Your Phone On • Press and hold the key until you hear a tone. If “PIN:” Appears in the Display Some SIM cards are protected with a PIN code. If after you have turned on the phone: Enter your PIN. -
Page 12: Turning Your Phone Off
Display Language Most modern SIM cards automatically set the display language to the language of the country where you bought your SIM card, ( not the case, the preset language is “Display Language and Input Method” on page 48. If your phone shows a language that you do not understand, you can change it Automatic To change the display language to Automatic If not in standby mode, press and hold the... -
Page 13: Display Information And Key Functions
Display Information and Key Functions In standby mode, the display shows the name of your operator, the time, the signal strength and the battery power. Other icons appear if you receive any messages, divert all your incoming calls, set the alarm clock and so on. In this chapter, you will also learn about the key functions. -
Page 14: Key Functions
Note! Each menu has got its own symbol. See “Menu Graphics” on page 24. Key Functions The table below explains the key functions. Y E S (Clear) Number keys (Hash) Volume key upwards and downwards Note! For information about the menus, see “Moving through the Menus” on page 26. -
Page 15: Making And Receiving Calls
Making and Receiving Calls In this chapter, we assume that you have turned on your phone and that you are within range of a network. If you are abroad, you may use other networks, provided your home network has an agreement that allows you to do this. See “Setting Network Preferences”... - Page 16 For more information, see “Using the Call List” on page 39. Automatic Re-Dialling If the connection failed when you first called, the display shows User busy can now re-dial the number by pressing Retry? dials (up to 10 times) • until the call is answered.
- Page 17 Answering a Call • Press call. Rejecting a Call • Slide the volume key on the side of the phone twice. Busy tone The display shows ported by the caller’s subscription. If Divert Calls When Busy is on, the call is diverted to the number you have specified. See “Diverting Incoming Calls”...
-
Page 18: During A Call
During a Call Your phone has several functions, which you might find helpful while a call is in progress. Changing the Listening Volume You can easily change the listening volume during a call by sliding the volume key on the side of the phone. To change the listening volume during a call •... -
Page 19: Minute Minder
The Notepad If you want to make a note of a phone number during a call, you can use your phone display as a notepad. Note! You can also record either yourself or the person you talk to during a call. - Page 20 During a Call...
-
Page 21: Functions And Settings
Functions and Settings R320 Features Using the Menus Your Personal Phone Book Using the Call List Your Voice Mail Service Personalizing Your Phone Sending and Receiving Text Messages (SMS) Communicating via the Built-in Modem Sending and Receiving Fax, Data and E-mail Business Card Exchange Diverting Incoming Calls Security for Your Phone and Subscription... - Page 22 Using the WAP™ Browser Voice Memo Voice Control Code Memo Calling Card Calls The Profile Concept Accessories Online Services Calendar Extras...
-
Page 23: R320 Features
R320 Features Your R320 is a new generation phone: a Dual Band phone with a lithium battery; a phone of modern design and advanced technology. It contains a whole new set of functionality helping you to be more efficient and productive, no matter where you are. -
Page 24: Using The Menus
Using the Menus You can find all your phone functions in the menus. You use the menus every time you want to change a setting in your phone, such as the ring signal. You also use the menus to get the most out of your phone: to set the alarm clock, send text messages, save important phone numbers, etc. - Page 25 Phone memory Indicates that a phone book entry is indicator saved in the phone memory. Group indicator Indicates that a phone book entry is a group. Unread SMS Indicates that a text message has not indicator been read. Unchecked voice Indicates that a voice message has Mail not been checked.
-
Page 26: Moving Through The Menus
Moving through the Menus There are two ways of moving through the menus: • scrolling by using • using shortcuts Scrolling by Using Press... Y E S Note! For information about how to enter letters, see “Entering Letters” on page 31. Tip! Once in the menu system, you can press and hold the hold the volume key until you reach the sub-menu that you want instead of... -
Page 27: Display Text
In this instruction we are going to set the key sound to ‘Tone’. To set the key sound Scroll to Settings Sounds & Alerts Y E S Select Tone Interpret the instruction as follows: From the standby mode, use Press to select the menu. -
Page 28: Help Texts
My Shortcuts You can place your favourite settings in the menu My Shortcuts. In this way, you can reach the settings you use most, quickly and easily. When you buy your phone, My Shortcuts contains a few settings which you can remove if you wish. - Page 29 Using the Menus...
-
Page 30: Your Personal Phone Book
Your Personal Phone Book You can create a personal phone book by saving phone numbers and accompanying names (an entry). An easy way to make calls is by recalling the phone numbers or names saved in your phone book. Creating a Personal Phone Book Before you start creating your personal phone book, there are a few things you need to know. -
Page 31: Entering Letters
Entering Letters You can enter letters when you are using the phone book and when you are composing a short message (SMS). See “Sending and Receiving Text Messages (SMS)” on page 52. Press the appropriate key, 1–9, 0 or #, repeatedly until the character you want appears in the display. -
Page 32: Saving A Number Together With A Name
Saving a Number Together with a Name Every phone number that you save includes a position number. You can save the phone numbers together with a name to make it easier for you to keep track of your phone numbers. To save a number together with a name Scroll to A list of numbers used but not saved may appear. -
Page 33: Speed Dialling
To choose a sort order Scroll to Phone Book Y E S Select a sort order. To call a number saved in the phone book Scroll to Phone Book Y E S Enter the position number or the name (or the first few letters of the name) associated with the number that you want to call. -
Page 34: Copying From One Sim Card To Another
To edit an entry Scroll to Enter the position number or the name for the entry that you wish to edit. Press If the name displayed is not the one you want, press correct name and number. Press Select Edit the number and press Edit the name and press Edit the position number and press Copying From One SIM Card to Another... -
Page 35: Overwrite Protection
To copy from one SIM card to another Make sure your old SIM card is inserted into your phone. Scroll to Phone Book Y E S Enter the position number from which you want to start copying and press Y E S Press again to start copying. -
Page 36: Telephone Banking Services
To delete an entry from the memory Scroll to Enter the position number or the name of the number that you want to delete and press position.) Press Select Press To delete all entries from the phone memory Scroll to The question Delete all in Press... -
Page 37: E-Mail Addresses
phone dials the number, waits until the call is answered and then sends the code. If you insert another pause and another code, it pauses again, sends the next code and so on. Groups The phone also allows you to create groups of phone book entries. In this way you can send a text message to several recipients at the same time. -
Page 38: Checking The Status Of The Memory
To save an e-mail address Scroll to Enter an e-mail address and press Enter a name and press Tip! The @ sign is accessed by pressing the To edit an e-mail address Scroll to Select the entry that you want to edit. Select Edit the e-mail address and press Edit the name and press... -
Page 39: Using The Call List
Using the Call List The Call List is a phone number log that saves information (time, date, phone number and name) about the last 30 incoming and outgoing calls. Once your list exceeds 30 calls, the oldest one is deleted. Note! Depending on whether a call is ongoing or not, the menus ‘Call Info’... - Page 40 To delete a number from the call list Scroll to Scroll to the number you want to delete and press The question Press To clear the call list Scroll to The question Call list Reset? Press To turn the call list on or off Scroll to Select If you select...
-
Page 41: Your Voice Mail Service
Your Voice Mail Service This service depends on your subscription and operator. The answering service of your network allows callers to leave a voice message when you cannot answer your calls. Depending on your network operator, you will be informed that you have received a voice message in different ways. - Page 42 To call your Voice Mail Service • Scroll to Tip! You can also call your Voice Mail Service by pressing and holding from standby. Changing Number and Signal To change your Voice Mail number Scroll to Press and hold Enter your new Voice Mail number and press To change the message alert signal Scroll to Select the signal you want.
-
Page 43: Personalizing Your Phone
Personalizing Your Phone Silent You can choose to set your phone completely silent so that all signals except the alarm and timer signals are turned off. To set the phone silent From standby, press and hold Select Turn on Silent An icon appears in standby. -
Page 44: Ring Signal Type
Ring Signal Type You can choose a ring signal from a list of different sounds and melodies. You can also compose up to four melodies of your own by entering notes with the keypad. See “Composing and Editing Your Own Ring Signals” on page 45. To choose one of the existing ring signals Scroll to Y E S... - Page 45 To delete a caller’s number Scroll to Y E S Scroll to the number you wish to delete and press Select Composing and Editing Your Own Ring Signals You can compose four different ring signals. To compose a ring signal Scroll to Select Press...
- Page 46 Note! It is only possible to send a melody to another similar phone or a handheld PC/PDA, and you can receive melodies from another similar phone and certain PCs and handheld PCs/PDAs. Also, the minimum distance between your phone and another phone, a PC or a handheld PC/PDA can vary.
- Page 47 Vibrating Alert You can choose to be notified of an incoming call by the buzzing of the Vibrating Alert. You can set the phone’s Vibrating Alert to one of the following: • On (all the time) • On If Silent (on when the ring volume is turned off or when you have set the phone to silent) •...
-
Page 48: Display Light
To turn the minute minder on or off Scroll to Select Turn Off Tones If you make a note of a number during a call, you use the display as a notepad, see “The Notepad” on page 19. The person you are talking to will hear the tone signals as you press the keys. -
Page 49: Greeting Text
To select input methods to choose from Scroll to Settings Language Y E S Use * to select or deselect the input methods you want to choose from when using the phone book and when writing text messages. The input method called WAP Address pages. -
Page 50: Master Reset
Time The time is always displayed when the phone is in standby mode. To set the time format Scroll to Select the 24-hour or 12-hour (am/pm) clock. Press To set the clock Scroll to Enter the time in hours and minutes, and press Move from number to number by pressing If you select the 12-hour clock, you can alternate between am and pm by pressing #. - Page 51 To reset the phone Scroll to Settings Master Reset Y E S Enter the phone lock code ( The phone lock code may be another one, in case you have changed it. Y E S 0000 ) and press Y E S Personalizing Your Phone...
-
Page 52: Sending And Receiving Text Messages (Sms)
Sending and Receiving Text Messages (SMS) The Short Message Service (SMS) allows you to send and receive text messages consisting of up to 160 characters. A useful feature in your phone is that you can send text messages to a group which you have defined in your phone book. -
Page 53: Composing A Text Message
Composing a Text Message For more information on how to enter text and the letters, see “Entering Letters” on page 31. Example: • To enter an ‘A’, press 2 once. To enter a ‘B’, press 2 twice quickly. • • To enter lower-case letters, enter the letter, for example an ‘A’... - Page 54 Press Message” above. Note! The same procedure is used with all types of messages, for example e- mail, fax messages etc. Check with your network operator to find out which message types you can use. Sending Text Messages to a Group With your phone you can send text messages to a pre-defined group.
- Page 55 To turn the Set on Send function on or off Scroll to Messages Options, Y E S Select Validity Period If your message cannot be delivered because the recipient has turned off the phone, your service centre can save the message to send it later. If the service centre has not been able to reach the recipient within a certain time, the message will be deleted.
-
Page 56: Receiving A Message
To save a template Scroll to Enter the message and press For more information on how to enter text, See “Composing a Text Message” on page 53. If you want to send the message now, press appears in the display, and proceed as described in “Sending a New Text Message”... - Page 57 • Delete • Reply • Forward • Save • Call • Read Next The options are described on the following pages. Note! If the sender of the message wants you to reply, the message ‘Reply requested Reply?’ appears in the display when you press is supported by your network operator.
-
Page 58: Saving Incoming Messages
Forwarding a Message When you have read the message, press Select You may edit your message before sending it. When you have completed your message, press Enter the recipient’s phone number. Press Deleting a Message When you have read the message, press Select Tip! You can also delete a message by pressing... -
Page 59: Area Information
overwritten if you receive any new messages. The maximum number of messages that you can save depends on your SIM card. To save a received message in the SIM card memory When you have read the message, press Select The message automatically moves from the phone memory to the SIM card memory. - Page 60 Code: Note! These codes are operator dependent. For information about the area information services that you can use, please refer to the information supplied by your network operator. Area Information Message List You can decide which types of area information messages you wish to receive. The number of Area Info codes that can be saved depends on your SIM card.
- Page 61 Cell Information The Cell information channel (see “Area Information Message List” on page 60) is used by network operators for sending messages to their subscribers within a certain network area. For example, the operator may inform you that you are within your home network area and that you can now make calls at a lower rate.
-
Page 62: Communicating Via The Built-In Modem
Communicating via the Built-in Modem A very convenient feature of your mobile phone is the built-in modem (which equates to a PC Card modem). With the modem, you can connect your mobile phone to another similar mobile phone, a handheld PC/PDA or a PC. By doing this you can send and receive business cards, calendar appointments and ring melodies. - Page 63 To set the modem to On • Scroll to Extras Infrared Port Y E S To set the modem to Off • Scroll to Extras Infrared Port Y E S To set the modem to 10 minutes of activity • Scroll to Extras Infrared Port...
- Page 64 Connecting to a PC Using a Cable To establish communication between your computer and your phone, you can also use an RS232 cable. Note! The RS232 cable is an accessory and is not included in the mobile phone kit. If you want to use a cable, be sure to ask for an Ericsson RS232 cable that can be used with your phone.
- Page 65 Switching Between Infrared Communication and Cable Communication You can alternate between using infrared communication or an external RS232 cable when communicating with your PC. Every time you want to change between infrared and cable communication, you need to start the Setup Assistant.
-
Page 66: Trademark Information
The Content of the CD Among other things, the CD that comes with your mobile phone contains this User’s Guide in .pdf format, various useful information and software. Trademark Information Microsoft, Windows, Windows CE and Windows NT are registered trademarks or trademarks of Microsoft Corporation. Pentium is a registered trademark or trademark of Intel. -
Page 67: Sending And Receiving Fax, Data And E-Mail
Sending and Receiving Fax, Data and E-mail To be able to use different communications services you need the appropriate software such as a fax program, an e-mail program or an Internet browser. You also need a phone subscription that supports fax and/or data transmission. This is not included in the phone kit. - Page 68 Receiving Fax and Data Calls – Single Numbering If you have a SIM card that does not support separate fax and data numbers, the phone does not recognize what kind of a call you are receiving. Next Incoming Call Type If you want to receive a fax or data call you have to set the phone to one of these options in the Next Incoming sub-menu.
-
Page 69: Sending And Receiving E-Mail
Sending and Receiving E-mail You can use the phone’s built-in modem and a computer to send or receive e-mail. To send an e-mail In the Dial-Up Networking service on your computer, choose the Ericsson R320 as the modem you wish to use. Place your mobile phone next to your computer and make sure it is connected properly, i.e. -
Page 70: Business Card Exchange
Business Card Exchange An electronic business card consists of a name and a phone number and your phone allows you to send and receive the people in your phone book as business cards. You can also create, edit and send your own business card. The business cards can be sent from your mobile phone to another similar phone and certain handheld PCs/PDAs. -
Page 71: Receiving A Business Card
you want to create one Wait until the display shows To send someone else's business card Scroll to Phone Book Y E S Start a search in your mobile phone’s phone book by entering the first letter of the person whose business card you want to send. If you have chosen to sort the names in your phone book by position, you start a search in the phone book by entering a position number instead of a name. - Page 72 Note! You cannot select ‘Infrared Port’ from the Extras menu if you are using the WAP browser or if you use a cable for the communication between your phone and the computer. Trademark Information The IrDA Feature Trademark is owned by the Infrared Data Association and is used under license there from.
-
Page 73: Diverting Incoming Calls
Diverting Incoming Calls If you want to make certain that your incoming calls are correctly handled when you are unable to answer them, you can use the Divert Calls service to divert them to another phone number. Note! The Divert Calls service may not be available on all networks. The Divert Calls service lets you divert your voice, fax and data calls respectively - provided your subscription supports fax and data calls. - Page 74 A phone number recently used for the divert function or a number recently present in the display will be suggested as a divert number. Enter the phone number, including the area code, to which you want your calls to be diverted and then press Tip! If the phone number is stored in the phone book, you do not need to enter...
-
Page 75: Security For Your Phone And Subscription
Security for Your Phone and Subscription There are several ways to protect your phone and subscription from unauthorized use. Anything from a SIM card lock to full phone number control. The SIM Card Lock The SIM card lock only protects your subscription and not your phone itself from unauthorized use. -
Page 76: The Phone Lock
Enter your new PIN a second time and press The PIN has now been changed. Note! If the message ‘Codes do not match’ appears, this means you entered the new PIN incorrectly. If the message ‘Wrong PIN’ appears, followed by ‘Old PIN:’, you entered your old PIN incorrectly. -
Page 77: The Keypad Lock
Changing the phone lock code Scroll to Settings Y E S Follow the steps described in “To change your PIN code” on page 75. Note! It is important that you remember your new code. If you should forget it, you have to hand in your phone to your local Ericsson retailer. To set the phone lock to on, automatic or off Scroll to Settings... -
Page 78: Restrict Calls
To set the automatic keylock Scroll to Select Note! The keypad lock is always disabled if the phone is connected to vehicle handsfree equipment. Restrict Calls The Restrict Calls service allows you to restrict certain types of calls to be made and received. -
Page 79: Fixed Dialling
To check the status of a call restriction Scroll to Settings Call Options Y E S Scroll to the option you want and press Select Get Status The message Please wait appears, followed by a message which informs you whether the call restriction is on or not. To change the password Scroll to Settings... -
Page 80: Closed User Groups
To save fixed numbers Scroll to Enter your PIN2 and press Enter the fixed number and press Enter the name you want to associate with the number and press To edit a saved fixed number Scroll to Scroll to the fixed number that you want to edit and press Select Edit. -
Page 81: Accept Calls
Calls can only be made within the selected user group. To call outside Closed User Groups You can decide whether outgoing calls to a non Closed User Group number are allowed. Scroll to Settings Call Options Y E S Y E S Select To edit a name in the Closed User Group List Scroll to... - Page 82 To check the Accepted Callers List Scroll to Y E S To turn on the From List function Scroll to Y E S Select Now you will only receive calls from the participants in the Accepted Callers List. An icon is shown in standby. To turn on the From No One function Scroll to Y E S...
-
Page 83: Handling More Than One Call Simultaneously
Handling More than One Call Simultaneously Your phone allows you to handle more than one call simultaneously. This means that you can put a call that is in progress on hold, while you make or answer a second call, and then switch between the two calls. You may also set up a Conference Call to have a joint conversation with up to five people. - Page 84 Making a Second Call Put the current call on hold by pressing Call held Enter the number you wish to call and press You may also retrieve the number from your phone book by pressing and holding Note! You can only put one call on hold. Receiving a Second Call If the Call Waiting service is on, you hear a tone in the earpiece if you receive a second call.
- Page 85 End both calls • Scroll to Ongoing Call Y E S Connect the two calls (Call Transfer) • Scroll to Ongoing Call Y E S The two calls are now connected to each other, and you are disconnected from both calls. Note! The Call Transfer service may not be available on all networks.
- Page 86 To join the two calls into a conference call • Scroll to You have now created a conference call (with yourself, the former active and held calls as participants). Adding New Participants to the Conference Group You may put the conference group on hold and then add new participants. To add a new participant Press Call the next person you wish to include in the conference group.
- Page 87 Making a Call while a Conference Call Is in Progress You can put the conference group on hold and make another call. You can then switch between the new call and the conference call. To put the conference group on hold and make a new call Press Y E S Enter the number you wish to call and press...
-
Page 88: Setting Network Preferences
Setting Network Preferences Searching for Networks When you turn on the phone, it searches for the last accessed network. If this is not within range, you may use another network, provided your home network has an agreement that allows you to do so. This is called roaming. The order of preference in which the phone chooses a network is determined by a list of preferred networks on your SIM card. -
Page 89: Forbidden Networks
All other networks without any icons are available, i.e. they are not included in the preferred or forbidden list on your SIM card but they may be used. Forbidden Networks The names of the forbidden networks are stored on your SIM card. If such a forbidden network is within range, it is left out when the phone searches for a network (automatic search mode). -
Page 90: Search Modes
To delete a network from the list Scroll to Scroll to the network that you want to delete and press Select To rearrange the list Scroll to Scroll to the network that you want to move and press Select Enter the new position within the list and press Search Modes When you turn on your phone, it searches for a network. -
Page 91: Knowing The Call Time And Call Cost
Knowing the Call Time and Call Cost During a call, the duration of the call is shown in the display. When you end the call, the call duration information is shown for another three seconds. If you subscribe to cost information, the call cost (or the number of call units) is displayed instead of the call duration. -
Page 92: Determining The Call Cost
To reset the total call cost Scroll to Press Note! If you subscribe to cost information, you must enter your PIN2 to clear the cost or time counter. Determining the Call Cost The Tariff function lets you enter and specify the price per call unit. The price entered is stored on your SIM card. - Page 93 To set a specific credit limit Scroll to Call Info Y E S Enter your PIN2 and press Select Change Credit Enter the amount, for example 30 pounds, and then press To set unlimited credit Scroll to Call Info Y E S Enter your PIN2 and press Select Unlimited...
-
Page 94: Using Two Voice Lines
Using Two Voice Lines If your subscription supports the Two Line Service, your phone will have two voice lines with different phone numbers, separate bills and perhaps different subscription services. This is useful for example if you want to keep business calls and private calls on separate lines. -
Page 95: Using The Wap™ Browser
Using the WAP™ Browser During the last couple of years we have grown accustomed to browsing the Internet via our computers. This has proven to be a simple and effective way to find all kinds of information. Thanks to a new technology called WAP (Wireless Application Protocol), a new dimension of mobility has been added to the Internet. -
Page 96: Viewing A Wap Page
and that your subscription supports WAP browsing. See “Changing the WAP Profile Settings” on page 100. Whenever you work with your WAP profiles, you need to remember two things: • You can use up to five different homepages. Each of your WAP profiles can have its own homepage. -
Page 97: Working With Bookmarks
To go to a homepage Scroll to WAP Services Y E S Select the top menu item and press The name of this menu item depends on what you have chosen to call it. See “Editing the Homepage of a WAP profile” on page 101. The default names for your five homepages are Home 1, Home 2, Home 3, etc. - Page 98 In order to reach the intranet bookmark again, you therefore need to switch to the intranet WAP profile and then access the bookmark once gain. See “Using WAP Profiles to Simplify your Browsing” on page 95. To add a bookmark Scroll to Start your browsing, either by selecting menu or by going to a homepage.
- Page 99 Select Send as link Enter your message and press Enter the recipient’s phone number or retrieve it from the phone book by pressing Press to send the message. Y E S Tip! To send the bookmark you are currently visiting in the browser: open the Options menu by pressing and holding Going to a WAP Page by Entering its Address Scroll to...
-
Page 100: Returning To The Browser After Accessing The Menus
Returning to the Browser after Accessing the Menus If you have selected Services menu, you can easily return to the WAP page that you visited when you left the browser. You might, however, not enter the WAP page exactly where you left it. To return to the browser •... - Page 101 Renaming a WAP profile Instead of the default names Profile 1, Profile 2 etc., you can rename the profiles so that you can separate them easily. For instance you can use the name of your network operator for WAP profile, the name of your bank for another WAP profile and the name of your company for a third WAP profile.
-
Page 102: Choosing Which Access Type To Use When Browsing
To set the download timeout Scroll to Scroll to the WAP profile whose download timeout you want to edit and press Select continue before it stops and press Choosing Which Access Type to Use When Browsing When you choose which access type to use when you are browsing, you tell your phone and a WAP gateway how they should connect to each other. - Page 103 Enter the IP address to your gateway and press An IP address looks something like this: 123.4.67.901. Note! An IP address consists of four groups of digits, with a maximum of three in each group. If one of your digit groups consists of only one or two digits, you have to enter a zero (0) in front of the original digit for each digit that is missing.
-
Page 104: Calendar
Calendar The Calendar makes it possible for you to keep track of important phone calls that you need to make or meetings that you need to attend. You can also have the phone remind you before an appointment. In this way, you can be sure that you don’t miss anything important, no matter where you are. -
Page 105: Deleting An Appointment
Deleting an Appointment To delete single appointments Scroll to Extras Calendar Y E S Go to the day of the appointment you wish to delete by selecting either View today Week view Month view : Scroll to the appointment you wish to delete and press C. View today Week view Month view... -
Page 106: Weekly Overview
Viewing Today’s Appointments Scroll to Navigate through the appointments using appointment for today. Weekly Overview The weekly overview displays all your appointments during a certain week. All your appointments are displayed as boxes, and the number of the week is displayed in the top right-hand corner. - Page 107 Sending and Receiving Calendar Appointments Whenever you and your business colleagues, friends or spouse need to synchronize your calendars, you can use the Beaming function. In this way you can send and receive appointments instead of having to enter them by hand into the phone.
- Page 108 Shortcuts” on page 28. Position your mobile phone next to the other person’s phone or PDA. Make sure the infrared eyes are facing each other and that they are within a meter and 30 degrees of each other. Ask the other person to send the appointment. If you want to view the received calendar entry before storing it, then press when you see the text Y E S...
-
Page 109: Voice Memo
Voice Memo The voice memo function allows you to record up to one and a half minutes of your own messages or parts of one or several calls. This is useful when you want to remember what you or someone else has said, but you do not have pen and paper available. -
Page 110: Setting The Recording Quality
If you have recorded during a call, the other person’s phone number is shown instead of ‘Memo’. If this number is stored in your mobile phones’ phone book, the name of the person you were talking to is shown instead. Viewing and Playing Voice Memos You can view and play your voice memos at any time, except during a call. - Page 111 You can choose either to record at High quality with 36 seconds of high sound quality, or to record at Normal quality with 92 seconds of normal sound quality. To set the recording quality Scroll to Extras Voice Memo Y E S Select whether you wish to use to confirm your choice.
-
Page 112: Voice Control
Voice Control Your phone allows you to: • voice dial - call someone by simply saying the name • answer and reject calls using your voice when connected to a handsfree kit To call someone, you only need to press name (voice label) associated with that person and your phone automatically dials the number. - Page 113 Note! To use voice dialling with a vehicle handsfree unit, you need to record your voice labels in the car, when connected to a vehicle handsfree. Voice labels for phone book entries recorded in the phone will not be available in the car, and vice versa.
-
Page 114: Voice Answering
The name (voice label) is played back to you, and the call is connected. Instead of pressing and holding hold the volume key. Voice Answering When connected to a portable or vehicle handsfree unit, you can answer or reject incoming calls by using your voice. Before you can use voice answering, you need to turn on the voice answering function and record your voice commands. -
Page 115: Code Memo
Code Memo Today there is an ever-increasing number of security codes connected to our credit cards, our home, our work etc. Usually, they all have different security codes. The more cards you have, the harder it is to remember all the codes. This problem has been eliminated thanks to the code memo function in your phone. - Page 116 Note! Normally, when you enter a password or an SMS, letters are displayed when you press the keys on your mobile phone. By pressing and holding can easily change between alphabetic Opening the Code Memo To open the Code Memo for the first time Scroll to The following message appears: password to access the Code Memo next time...
- Page 117 Resetting All Codes Note! This function resets all your codes and your password to open the code memo. Scroll to Extras Code Memo Y E S Enter your password to open the code memo. Scroll to Options and press Scroll to Reset and press Y E S...
-
Page 118: Calling Card Calls
Calling Card Calls When making international or long distance calls, you may not want your operator to charge you for these calls on your normal account. If you have a credit card or a calling card, you may want to redirect the charges to one of these accounts instead. -
Page 119: Choosing A Card
Select whether you want to send the number that you want to call or the verification code first and press Note! Your service provider will give you the information needed for the verification codes. To delete a card number Scroll to Phone Book Y E S Scroll to the card number that you want to delete and press... - Page 120 To send the number and verification code during the connecting phase, press when the display shows Send or wait a few seconds and they are Y E S sent automatically. Now you are connected to your personal phone call. Calling Card Calls...
-
Page 121: Extras
Extras Alarm Clock The phone has an alarm clock, which you may find useful when travelling. When it is on, an icon is shown in the display. The alarm rings at the time set and the display flashes, even if the phone is turned off. - Page 122 To use the calculator In this example we are going to divide 134 by 32. Scroll to Enter 134. Press # repeatedly until the division sign (/ ) appears. Enter 32. Press To clear the display, press Stopwatch The phone has a built-in stopwatch for you to time a certain activity. To run the stopwatch Scroll to Press...
- Page 123 To turn off the timer Scroll to Extras Timer Y E S Select Cancel Note! The timer does not work when the phone is turned off. Games Your phone has two different games for your enjoyment. There are help texts available in each game as a guide for you to get started.
- Page 124 Columns of cards are built up in descending order and alternating colour. For example, the eight of hearts may be placed on either the nine of clubs or spades. The remaining cards in the deck are available for play. You can turn these cards one at a time.
-
Page 125: The Profile Concept
The Profile Concept Your phone includes a number of pre-programmed profiles. A profile is a group of settings which are set to suit a certain environment. For example, when you go to a meeting, you can just choose the Meeting profile and a number of settings that suit a meeting are set. - Page 126 Accept Calls Divert Calls Calling Cards Light Line 1/2 Silent Auto Activation Accessories Choosing a Profile Manually You can always choose to use another profile than the one you currently use. To choose a profile manually Scroll to Select the profile you want. Press You can also find Select Profile in the My Shortcuts menu.
- Page 127 on page 128. If you change a setting which is included in a certain profile, the profile is updated. With the Reset Profiles function, you can change all profile settings back to the way they were set when you bought your phone. To reset the profile settings Scroll to Settings...
-
Page 128: Accessories
Accessories By using your phone together with Ericsson original accessories, you have access to a large range of useful features, in addition to those you have when the phone is used separately. • Automatic divert of incoming calls when the phone is placed in a desktop charger •... - Page 129 Placing the Phone in the Desktop Charger Place the phone in the desktop charger as shown in the picture and press downwards to attach the phone. Note! For further instructions on how to connect the desktop charger, please contact your local Ericsson retailer. To associate the desktop charger with a profile and a divert number Place the phone in the desktop charger.
-
Page 130: Portable Handsfree
Edit Profile Profiles, 126. Note! The phone must be switched on and the automatic activation must be on for the phone to switch profile automatically when connected to an accessory. Tip! If you have several desktop chargers, each charger can be associated with a specific profile or all chargers can be associated with the same profile. - Page 131 To voice dial using the Portable Handsfree Press and hold the button on your Portable Handsfree until you hear a tone from the phone. Release the button and say a name (voice label) that you have recorded previously. The name is played back to you and the call is connected. Note! Before you can use voice dialling, you need to record voice labels for entries in your phone book.
-
Page 132: Handsfree Types
Tip! If you do not want your phone to switch profile automatically when you connect it to the Advanced Vehicle Handsfree, you need to turn the Auto Activation off. To do this, manually select the ‘In Car’ profile and set the Auto Activation to off. -
Page 133: Answering Mode
Full Handsfree Full Handsfree means that the phone handles the call in full duplex mode. This considerably increases the quality of speech, since you do not have to wait until it is your turn to speak. For this function to work properly, your phone adapts to the sound environment around the handsfree equipment. - Page 134 automatically. You must first choose the profile manually to which you want to add an accessory, see “To choose a profile manually” on page 126. To add an accessory to a profile Scroll to Now you are in the list of the accessories which are already associated with the profile.
-
Page 135: Online Services
Online Services Imagine that you hear about a new service that your network operator is offering. You call your operator, explain that you want to subscribe to the service and suddenly, within seconds, you have a new menu in your phone that instantly lets you use the new service. -
Page 136: Proactive Sim
In your phone, this menu appears under the Extras menu. There can only be one new sub-menu entry under the main menu, but there can be several sub- menus under the new sub-menu entry. To enter your new menu system Scroll to If any sub-menus appear, select the one that you want and press Press... -
Page 137: Details Of Services Offered
• If you want to make the SIM card initiated call, press • If you do not want to make the SIM card initiated call, press • If you are already engaged in a call, you are asked either to put the current call on hold or to end it. - Page 138 Online Services...
-
Page 139: Additional Information
Additional Information Ericsson Mobile Internet The Online Version of this User´s Guide Guidelines for Safe and Efficient Use Declaration of Conformity Quick Keys Troubleshooting Technical Data Glossary Warranty Index... -
Page 140: Quick Keys
Quick Keys Several keys on your phone can be used to optimize the phone’s functionality and decrease the number of times you need to press a key. Some of the key combinations demand that your phone is in a certain mode and some can be made from the standby mode. - Page 141 To... enter the first sub-menu My Shortcuts of the menu find out which profile you are using change the language Automatic change the language English reach the second letter or character of a key reach the third letter or character of a key change between lower- and upper-case letters enter numbers...
-
Page 142: Troubleshooting
Troubleshooting This chapter lists some problems that you might encounter while using your phone. Some problems require that you call your service provider, but most of the problems you encounter you can easily correct yourself. Error Messages Insert Card There is no SIM card in the phone or you may have inserted it incorrectly. Insert card Insert a SIM card. -
Page 143: The Phone Cannot Be Switched On
PUK blocked- Contact operator PUK blocked- You entered your personal unblocking key code (PUK) incorrectly 10 times in Contact operator a row. Contact your network provider or service operator. Phone Locked Phone locked The phone is locked. To unlock the phone, see “The Phone Lock” on page 76. Phone lock code: Your phone comes with the phone lock code, 0000. -
Page 144: Ericsson Mobile Internet
Ericsson Mobile Internet When you are on the move and in need of communication and information, the Mobile Internet is the answer. The Mobile Internet is a service supplied by Ericsson to make it easier for you to communicate and receive information quickly, wherever you are. It gives you access to various messaging services, on-line customer services, user manuals and other useful information. -
Page 145: The Online Version Of This User´s Guide
The Online Version of this User´s Guide On the CD that comes with your phone, you can find an online version of this User’s Guide. This can be handy when you quickly want to look something up and you do not have the paper version of the User’s Guide nearby. When you run the installation program from the CD, as described in “To install the built-in modem on the PC”... -
Page 146: Technical Data
Technical Data General Product name System SIM card Type number Dimensions Size Weight with Ultra Slim battery Weight without battery Ambient temperatures The built-in modem Standards for transfer Data transmission rate Power consumption RS232 Technical Data R320 GSM 900/GSM1800 Small plug-in card, 3V or 5V type 110 1201-BV 130 x 51 x 15 mm +55°C... -
Page 147: Glossary
Glossary Advice of Charge (AoC) enables you to monitor the cost of calls made from your mobile phone. Details of the last call and total calls made are shown in the phone display. To use this service, it must be supported by your network. Area Information (AI) is a service that allows you to receive messages about pre-set topics i.e. - Page 148 which system is best at the time. This is taken care of by the networks. However, you should note that the functions offered and the network coverage differ depending on your choice of operator and/or subscription. Enter is used for keying in letters or numbers from the keypad. Fixed Numbers enables you to allow only numbers beginning with certain pre-defined figures to be dialled from your mobile phone.
- Page 149 another system. International roaming is based on agreements between network operators in different countries. Line 1/Line 2 see Two Line Service. Menu System is where you can access all the phone’s functions. The menus can be accessed and viewed by scrolling with the arrow keys. Micro browser accesses and displays the Internet contents in your mobile phone, just as an ordinary browser does in your computer.
- Page 150 Personal Unblocking Key Code – used to unlock a blocked SIM card. This comes with your subscription. Restrict Calls enables you to restrict or bar certain or all types of calls to and from your mobile phone, i.e. outgoing calls, outgoing international calls, incoming calls. Barring is switched on with a personal code.
- Page 151 Subscription is the contract that you have with the service/network provider. To use your phone, you need to have a subscription to a network. You get a SIM (Subscriber Identity Module) card with your subscription. The services included in your subscription depend on your choice of operator and/or subscription.
-
Page 152: Guidelines For Safe And Efficient Use
Guidelines for Safe and Efficient Use Note! Read this information before using your mobile phone. Product Care and Maintenance Your mobile phone is a highly sophisticated electronic device. To get the most out of your mobile phone read this text about product care, safe and efficient use. -
Page 153: Efficient Phone Operation
• Only use an antenna that has been specifically designed for your phone. Unauthorised antennas, modifications, or attachments could damage the phone and may violate the appropriate regulations causing loss of per- formance and radio frequency (RF) energy above the recommended limits. Efficient Phone Operation To enjoy optimum performance with minimum power consumption please: •... -
Page 154: Electronic Devices
Driving Check the laws and regulations on the use of mobile phones in the areas where you drive. If you are going to use your phone while driving, please: • Give full attention to driving. • Use an Ericsson Vehicle Handsfree Solution, if available. Law in many countries requires vehicle Handsfree Solution. -
Page 155: Blasting Areas
Some hearing aids might be disturbed by mobile phones. In the event of such disturbance, you may want to consult your service provider, or call the cus- tomer services line to discuss alternatives. Aircraft • Turn off your mobile phone before boarding any aircraft. •... -
Page 156: Emergency Calls
Children Do not allow children to play with your mobile phone since it contains small parts that could become detached and create a choking hazard. Emergency Calls IMPORTANT! This phone, like any mobile phone, operates using radio signals, cellular and landline networks as well as user-programmed functions, which cannot guar- antee connection under all conditions. -
Page 157: Recycling Your Battery
• Do not attempt to take a battery apart. • Do not let the metal contacts on the battery touch another metal object. This could short-circuit and damage the battery. • Do not expose a battery to open flames. This could cause the battery to explode. -
Page 158: Our Warranty
Warranty Thank you for purchasing this Ericsson Product. To get maximum use of the features of your new product we recommend that you follow a few simple steps: • Read the Guidelines for safe and efficient use. • Read all the terms and conditions of your Ericsson Warranty. •... - Page 159 units. Replaced faulty parts or components will become the property of Ericsson. This warranty does not cover any failure of the Product due to normal wear and tear, misuse, including but not limited to use in other than the normal and customary manner, in accordance with Ericsson´s instructions for use and maintenance of the Product, accident, modification or adjust- ment, acts of God, improper ventilation and damages resulting from liquid.
-
Page 160: Declaration Of Conformity
Declaration of Conformity We, Ericsson Mobile Communications AB of Nya Vattentornet 221 83 Lund, Sweden declare under our sole responsibility that our product Ericsson type 110 1201-BV to which this declaration relates, conforms to the appropriate standards TBR 19, TBR 20, TBR31, TBR32, ETS 300 342-1 and EN 60950, following the provisions of Teleterminals directive 91/263/EEC, EMC directive 89/336/EEC, and Low voltage directive 73/23/EEC. -
Page 161: Index
Index Accept calls 81 Add accessories to a profile 133 Alarm 121 Alarm indicator 13 Alarm signal 47 Answered calls indicator 39 Answering calls 17 Answering mode 133 Answering service. See Voice Mail Appointments, storing them in the calendar 104 Area information 59 message types 59 receiving area messages 60... - Page 162 Conference calls 85 adding new participants 86 creating 85 extracting a participant 86 releasing a participant 86 reviewing participants 86 Connecting Using Infrared Communication 63 Copying From One SIM Card to Another 34 Credit card making a call 119 saving number 118 Data, sending and receiving 67 Date 50 format 50...
- Page 163 Line indicator 13 Lock - keypad lock 77 Making a call 15 Meetings, storing them in the calendar 104 Menu system 24 display text 27 moving through 26 Message signal 47 Message types (SMS) 54 Microphone muting 18 Minute minder 47 Missed calls 40 Missed calls indicator 13, 39 Mobile Internet 144...
- Page 164 Quick Keys 140 Receive calls 16 Receiving a business card 71 Receiving messages (SMS) 56 Recording a voice memo 109 Redialling numbers 15 Rejecting calls 17 Request reply (SMS) 55 Resetting phone 50 Restrict calls 78 cancelling all 78 changing password 79 changing status 78 Ring signal choosing 44...
- Page 165 Vehicle handsfree 131 Voice control answering 112, 114 dialling 112 labels 112 making calls 113 rejecting 112 Voice label 112 Voice mail 41 activating 41 calling 41 changing number 42 changing signal 42 Voice Mail indicator 13 Voice memos 109 Volume changing 18 Volume keys 14, 17...
Need help?
Do you have a question about the R320s and is the answer not in the manual?
Questions and answers