Table of Contents
Advertisement
Quick Links
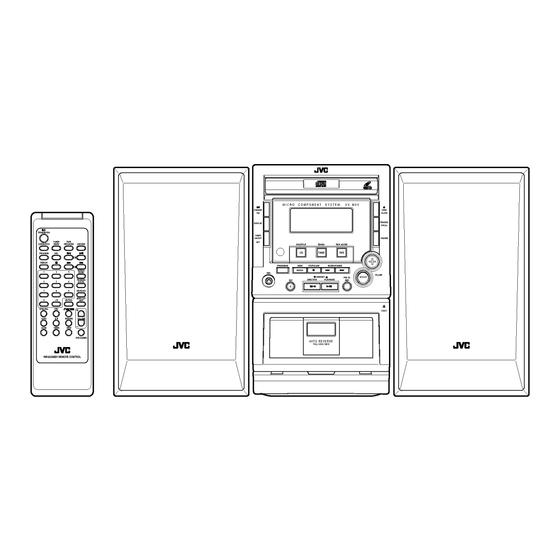
JVC
MICRO COMPONENTSYSTEM
UX-M6V
,.IVC
,.IVC
VIDEO C D
[NI_ITALVIDE@
mmTALAUmO
INSTRUCTIONS
For Customer Use:
Enter below the Model No. and Serial No.
which are located either on the rear, bot-
tom or side of the cabinet.
Retain this
information
for future reference.
Model No.
Serial No.
LVT0809-001A
[us, UB]
Advertisement
Table of Contents

Related Manuals for JVC UX-M6V


Summary of Contents for JVC UX-M6V
- Page 1 MICRO COMPONENTSYSTEM UX-M6V ,.IVC ,.IVC VIDEO C D [NI_ITALVIDE@ mmTALAUmO INSTRUCTIONS For Customer Use: Enter below the Model No. and Serial No. which are located either on the rear, bot- tom or side of the cabinet. Retain this information for future reference. Model No.
- Page 2 Warnings, Cautions and Others Caution -- STANDBY/ON 011 button! Disconnect the mains plug to shut the power off completely. The STANDBY/ON O/I button in any position does not disconnect the mains line. The power can be remote controlled. _,_-- 0/I CAUTION _/-I- _==,1=1...
- Page 3 IMPORTANT FOR LASER PRODUCTS REPRODUCTION OF LABELS/_,_1_ _P_I]_ (_) CLASSIFICATION LABEL, PLACED ON REAR (_) WARNING LABEL, PLACED INSIDE THE UNIT ENCLOSURE DANGER-Invisiblelaser radiation VARO!Avattaessaja suojalukitus ohitettaessa olet alttiina n_dkmiit6n i_sersateilylle. when open and interlock defeated. AVOIDDIRECTEXPOSURETO BEAM. AI_katso siiteesen. VARNING!Osymlig laserstr_lning niir denna JORSICHT-UnsichtbareLaserstrahlung, del _r 6sppad ochspiirren _r urkopplad.
- Page 4 Introduction We would like to thank you for purchasing one of our JVC products. Before operating this unit, read this manual carefully and thoroughly obtain the best possible performance from your unit, and retain this manual for future reference. Powersources About This Manual •...
-
Page 5: Table Of Contents
Contents Location of the Buttons and Controls ..... Front Panel ..............Remote Control ............Getting Started ............Unpacking ..............Putting the Batteries into the Remote Control ..6 Connections .............. Common Operations ..........Turning On or Off the Unit ........Setting the Clock ............ -
Page 6: Locationof The Buttonsand Controls
Locationof the Buttonsand Controls Become familiar with the buttons and controls on your unit. Front Panel Display Window... -
Page 7: Frontpanel
Continued FrontPanel SEARCH/TUNING buttons (8, 10, 13, 17, 20) MP3-CD: select pmviomZnext album or tt_ck. See pages in the parentheses for derails. CD/VCD: search bacloa, ard/fotward or skip to the Disc compm_aent (12) beginning of the current/previou_next track. O/I STANDBY/ON button (8) Tuner: tune to a lower or higher t_dio frequency search radio stations. -
Page 8: Remotecontrol
RemoteControl RemoteControl Oil STANDBY/ON button CD/SHUFFLE button TUNER/BAND button PROGRAM button REC (Recording) button DISPLAY button • button Number buttons CD/VCD/MP3-CD: select a track number: Tuner: select a preset radio station. NTSC/PAL button Selects the video output for NTSC or PAL. PBC (Playback Control) button... -
Page 9: Gettingstarted
GettingStarted Continued Connections Unpacking After unpacking, check to be sure that you have all the following items. • DO NOT comlect mayequipment to the unit while the unit is powered. The number in the parentheses following each item name • DO NOT plug in may equipment until all comaections indicates the supplied quantity. - Page 10 2 Connect the supplied AM loop antenna to the Connect the VIDEO OUT jack at the rear of AM LOOP terminal. the unit to the TV using a video connecting cord (not supplied). Place the a_tem_a away" fl:om the unit a_d adjust its )osifion for the best reception.
-
Page 11: Common Operations
Common Operations Continued TurningOn orOffthe Unit clock resetting Toturn onthe unit If a power failure occurred or the AC power cord is Press O/I STANDBY/ON on the discom_ected, the clock is reset to "0:00" (flashing). In such a unit or remote control. case you need to set the clock again. -
Page 12: Demonstration Mode
Demonstration Mode Digital SoundControl The unit has a demonstration mode that shows various The unit's digital sound control feature enables you to select features offered by the unit. desired preset equalizer settings (selectable as sound modes) to enjoy special sound effects matching the music type. Toactivatethe demonstration You can also use the BBS system to enjoy powerful bass DEUO... -
Page 13: Listeningto Fm Andam Broadcasts
Listeningto FM andAM Broadcasts Continued TuningIn a Station PresettingStations You cma preset 20 FM mad 10 AM stations. Press TUNER/BAND to select tuner mode. • There is a time limit in doing the following steps. If the The unit automatically"turns on, m_d tunes in the last setting is cmaceled before you finish, stm"tfi'om step 1 station tuned in (either FM or AM). -
Page 14: Tuningin A Presetstation
TuningIn a PresetStation 1 Press TUNER/BAND to select tuner mode. 2 Press TUNER/BAND to select the band, FM or AM. 3 Press II/_ or l-ill repeatedly I ..II..I select the desired preset number. • Alternatively, use the numbe_: buttons on the remote cont_:ol. -
Page 15: Playingbackcds/Vcds/Mp3-Cds
PlayingBackCDs/VCDs/MP3-CDs Continued Loadinga Disc This taCit cma play back all digital audio CDs, video CDs (VCDs), finalized digital audio CD-Recordable (CD-R) discs 1 Press CD/SHUFFLE to select CD/ s._, and finalized digital audio CD-Rewritable (CD-RW) discs. VCD mode. The unit automatically turns on. OIGITAL AIJDIO [DIGITAL VII3 EEJ]... -
Page 16: Playingbacka Disc
PlayingBacka Disc Toselect a desiredtrack (for MP3-CD only) _.,,,, In stop mode, press _ or _ I " II - I 1 Load a disc. repeatedly (or press the number buttons on the remote control) to select a desired " track from the current album. -
Page 17: Progarm Play Of A Mp3-Cd
Continued To clearthe program ShufflePlay Press • in stop mode. _op_._A. You can play"all the tracks in random order. "PROG CLEARED" scrolls through the display" and the PROG. indicator goes off. In play mode, pause or stop mode, • The stored program is cleared when the CD compmlrnent is press CD/SHUFFLE. -
Page 18: Onscreendisplay(Osd)For A Cd/Vcd
OnScreenDisplay(OSD)for a CD/VCD VariousVCDOperations PAUSE If you insei_ a CD/VCD, your TV screen will serve as m_ additional display" for messages (such as PLAY, STOP, etc.) During playback, press I_/ll to have a still picture mad infoi_ation stored on the VCD/CD. on the TV screen. - Page 19 A-B REPEAT This feature is also applicable to the audio CD (except MP3- CD). A certain scene or passage of the disc can be played back repeatedly. Press A-B on the remote control during playing a CD/VCD to mark the repeat sta_ point. _--_)'x.
-
Page 20: Playingbacktapes
PlayingBackTapes AutoReverse • Use only _'pe I normal tapes. Press TAPE/REV.MODE repeatedly ..oo_ 'lhe use of tapes longer thin1 ] 20 mflmtes is not recommended, since characteristic deterioration may to select the desired playback mode. occur and these tapes easily jam ha the pflachrollers and playback on one side of the tape only. -
Page 21: Recording
Recording IMPORTANT: RecordingTapes • It may be unlawful to record or play back copyrighted 1 Load a recordable tape into the tape deck. material without the consent of the copyright owner. • The recording level is automatically"set correctly, so it is Press TAPE/REV.MODE not affected by the volume control. -
Page 22: Karaoke
Karaoke MicrophoneMixing When playing a VCD, each press changes the audio chamael selection as follows: Microphone mixing is available in CD/VCD mode. --_CH LEFT--_-CH RIGHT--_VP LE,FT-- I Comaecting a microphone (not supplied) to the unit allows you to sing along with the music source. STEREO'_VP RIGHT_- 1 Connect a microphone... -
Page 23: Usingthe Timers
Usingthe Timers Continued There are three timers available -- daily timei; recording Set the time to stop playback following timer mad sleep timer. same procedure as steps 5 and 6. Before using the timers, you need to set the built-in clock. "TIMER OK"... -
Page 24: Usingsleeptimer
UsingSleepTimer With the sleep timer, you can fall asleep to music. You can set the sleep timer using the remote control when the unit is turned on. Howthe sleep timer actuallyworks The unit automatically" turns off after the specified time length passes. -
Page 25: Maintenance
Maintenance To get the best peffomaance of the unit, keep your discs, tapes, mad mechm_ism clem_. Cassettedecks Handlingdiscs If the heads, capstans, and pinch rollers of the cassette deck • Remove the disc from its case by become dWty,the following will occur: holding it at the edge while pressing •... -
Page 26: Troubleshooting
Troubleshootin If you are having a problem with your unit, check this list for a possible solution before calling for service. If you cm_aot solve the problem from the hints given here, or the unit has been physically damaged, call a qualified person, such as your dealer, for service. - Page 27 IMPORTANT for mains (AC) line BEVORE PLUGGING IN, do check that. your mains (AC) line voltage COlTesponds with the position of the voltage selector swkch provided on the outside of this equipment AC 110-127V mad, if different, reset the voltage selector switch, prevent...
Need help?
Do you have a question about the UX-M6V and is the answer not in the manual?
Questions and answers