Weslo CADENCE 340 CS User Manual
Wltl29012
Hide thumbs
Also See for CADENCE 340 CS:
- User manual (19 pages) ,
- User manual (19 pages) ,
- User manual (19 pages)
Table of Contents
Advertisement
ModelNo.WLTL29012
SerialNo.
Writetheserial n umber i n the
spaceabove forfuturereference.
Serial N umber D ecal
QUESTIONS?
If you have questions, or if there
are missing parts, we will guaran-
tee complete satisfaction through
direct assistance from our factory.
TO AVOID UNNECESSARY
DELAYS, PLEASE CALL DIRECT
TO OUR TOLL-FREE
CUSTOMER
HOT LINE. The trained techni-
cians on our customer
hot line
will provide
immediate
assis-
tance, free of charge to you.
CUSTOMER HOT LINE:
1-800-999-3756
Mon.-Fri.,
6 a.m.-6 p.m. MST
tions in this manual before using
this
equipment. Save this manu-
al for future reference,
USER'S MANUAL
Visit our website at
www.weslo.com
new products,
prizes,
fitness tips, and much more!
Advertisement
Table of Contents

Related Manuals for Weslo CADENCE 340 CS


Summary of Contents for Weslo CADENCE 340 CS
- Page 1 CUSTOMER HOT LINE: 1-800-999-3756 Mon.-Fri., 6 a.m.-6 p.m. MST Visit our website at tions in this manual before using www.weslo.com this equipment. Save this manu- al for future reference, new products, prizes, fitness tips, and much more!
- Page 2 120 volts AC and 15 amps. To purchase a surge suppressor, 7. The treadmill should not be used by persons see your local WESLO dealer or call 1-800- weighing more than 250 pounds. 999-3756 and order part number 146148.
- Page 3 13.Nevermovethe walkingbeltwhilethe power mustbeableto safelylift45 pounds(20kg) in orderto raise,lower,or movethe treadmill. is turnedoff. Donot operatethe treadmillif the powercordor plug is damaged, o r if the treadmillis not workingproperly.(See 19. Do not changethe inclineof the treadmillby BEFORE YOUBEGIN on page4 if the tread- placingobjectsunderthe treadmill.
- Page 4 BEFORE YOU BEGIN Thank you for selecting the WESLO ®CADENCE 340 please call our Customer Service Department toll-free CS treadmill. The CADENCE 340 CS combines at 1-800-999-3756, Monday through Friday, 6 a.m. advanced technology with innovative design to let you until 6 p.m.
- Page 5 ASSEMBLY Assembly requires two people. Set the treadmill in a cleared area and remove all packing materials. Do not dis- pose of the packing materials until assembly is completed. In addition to the included allen wrench, assembly requires a phillips screwdriver, (_=======_ an adjustable wrench __ and scissors _.
- Page 6 3. HoldtheConsole Base(87)nearthe rightHandrail (4). Makea loopwiththeindicated plastic tie andinsert t he twoWires(53)through theloop.Pulloutonlyenough Wiretoconnect theWirestothetwoconnectors i nthe Plastic Console Base(87). Important: Make sure that the Wires are fully inserted. WARNING: Do not discon- nect or connect the Wires while the treadmill power cord is plugged Refer drawing 3a.
- Page 7 1 at the right). To purchase a surge suppressor, see your local Metal Screw WESLO dealer or call toll-free 1-800-999-3756 order part number 146148. Use only a single-outlet surge suppressor that is UL 1449 listed as a transient voltage surge suppressor (TVSS). The surge suppres-...
- Page 8 DIAGRAM OF THE CONSOLE Monitor Displays SPEED TRAINING ZONES STEP BY STEP HEART RATE INSTRUCTIONS TRAINING ZONES INSERT KEY 12.$ 16.$ PRESSON/RESET i S° BUTTON CALS F'CALS SPEED TIME DISTANCE SET TO DESIRED LEVEL FAST Speed Control If there is a thin sheet of clear plastic on the console, remove it.
- Page 9 • Distance--This mode shows the total number of Insert the key fully into the power switch. miles you have walked or run. Inserting the key will not turn on the displays. The displays will turn on when the ON/RESET button If desired, reset the displays by pressing the ON/RESET button.
-
Page 10: Handrail Height Adjustment
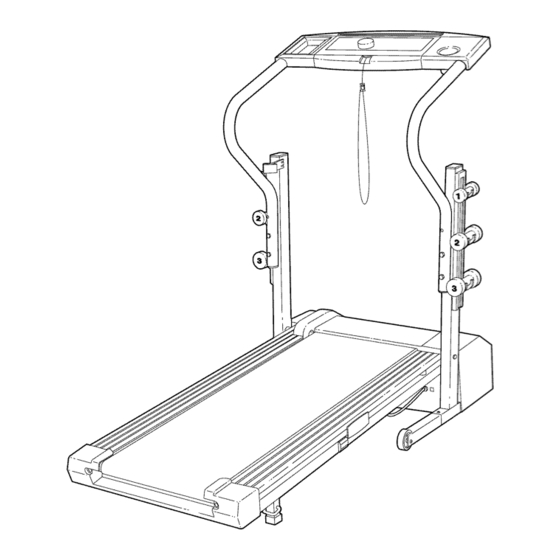
HANDRAIL H EIGHT ADJUSTMENT The Handrails (4) can be adjusted to either of two heights. Before adjusting the Handrails, remove the key and unplug the power cord. Remove the four Console Screws (3). While a second person lifts the Console Base (87), remove the Handrail Bolts (1), Handrail Washers (80), and Handrail Star Washers (2). - Page 11 HOW TO MOVE THE TREADMILL Before moving the treadmill, convert the treadmill to the storage position as described above. Make sure that the storage latch is locked fully over the catch. 1. Remove the weights from the weight racks. 2. Hold the upper ends of the handrails. Place one foot on one of the wheel as shown.
-
Page 12: Troubleshooting
MAINTENANCE AND TROUBLE-SHOOTING Most treadmill problems can be solved by following the steps below. Find the symptom that applies, and follow the steps listed. If further assistance is needed, please call our Customer Service Department toll- free at 1-800-999-3756, Monday through Friday, 6 a.m. until 6 p.m. Mountain Time (excluding holidays). PROBLEM: The power does not turn on SOLUTION: a. - Page 13 PROBLEM: The walking belt slows when walked on SOLUTION: a. Use only a single-outlet surge suppressor that is UL 1449 listed as a transient voltage surge suppressor (TVSS). The surge suppressor must have a UL suppressed voltage rating of 400 volts or less and a minimum surge dissipation of 450 joules.
- Page 14 CONDITIONING GUIDELINES speed control on the console to FAT BURN to help you A, WARNING: Before maintain the proper intensity level. (See page 9.) beginning this or any exercise program, consult your Aerobic Exercise physician. This is especially important for individuals over the age of 35 or individuals If your goal is to strengthen your cardiovascular sys- with pre-existing health problems.
- Page 15 WORKOUT G UIDELINES zoneforlongerthan20 minutes.) Breathe regularly anddeeply as you exercise--never hold your breath. Each workout should include the following three parts: A Cool-down A Warm-up Finish each workout with 5 to 10 minutes of stretching Start each workout with 5 to 10 minutes of stretching to cool down.
- Page 16 REMOVE THIS EXPLODED DRAWING AND PART LIST FROM THE MANUAL Save this EXPLODED DRAWING and PART LIST for future reference. Note: Specifications are subject to change without notice. For information about ordering replacement parts, see the back cover of the User's Manual.
- Page 17 PART LIST--Model No. WLTL29012 Key No. Qty. Description Key No. Qty. Description Handrail Bolt Motor Tension Nut Handrail Star Washer Upright Endcap Console Screw Right Foot Rail Handrail Platform Screw Console Insert Screw Front Roller Adj. Bolt Key/Clip Wire Harness Right Frame Guide Isolator Screw Incline Leg...
- Page 18 I" & I'" i/' / _>...
- Page 19 • The MODEL NUMBER of the product (WLTL29012) • The NAME of the product (WESLO CADENCE <_ 340 CS treadmill) • The SERIAL NUMBER of the product (see the front cover of this manual) •...
Need help?
Do you have a question about the CADENCE 340 CS and is the answer not in the manual?
Questions and answers