
Related Manuals for Soleus Air GH-PAC-12E1


Summary of Contents for Soleus Air GH-PAC-12E1
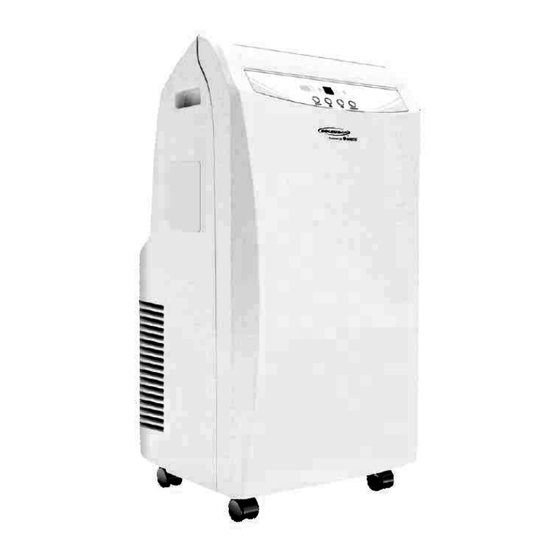
- Page 1 Model: GH-PAC-12E1 Model: GH-PAC-12E1HP WITH HEAT 12,000 BTU Portable Air Conditioner Operating Instructions...
-
Page 2: Important Instructions
Thank you for choosing a Soleus Air Powered by Gree Portable Air Conditioner. This owner’s man- ual will provide you with valuable information necessary for the proper care and maintenance of your new product. Please take a few moments to thoroughly read the instructions and familiarize yourself with all the operational aspects of your new Portable Air Conditioner. -
Page 3: Package Contents
PACKAGE CONTENTS Portable Air Conditioner Exhaust Hose (1) Front Exhaust Hose Adapter (1) Window Kit Adapter (1) Rear Exhaust Hose Adapter (1) Remote Control & AAA Ba tteries (2 batteries) Window Kit - 3 Sliding Panels (1 sing le hose panel, 2 extension panels) Owner’s Manual SPECIFICATIONS The cooling capacity is measured at an ambient temperature of DB 86 °F, WB 78 °F. -
Page 4: Power Cord And Plug
POWER CORD AND PLUG WARNING This unit has a grounded three pronged plug intended to fit into a three slot outlet. (A) An adapter is available for connecting three pronged plugs into two slot outlets. (B) When doing so, the green ground- ing tab extending from the adapter must be fastened under the wall plate’s mounting screw. -
Page 5: Product Diagram
PRODUCT DIAGRAM Air Outlet & Louvers Carry Handle Control Panel Filter Upper Air Intake Location Air Exhaust Vent Lower Air Intake Power Cord... -
Page 6: Mounting The Exhaust Hose
PARTS & WINDOW KIT ASSEMBLY PARTS EXHAUST HOSE & ADAPTERS Front Exhaust Hose Rear Exhaust Hose Exhaust Hose Adapter Adapter Window Kit Adapter Sliding Panels (3) ASSEMBLY & INSTALLATION INSTALLATION When the unit is operating as an air conditioner or dehumidifier, the window kit and exhaust hose must be installed. When the unit is operating in fan mode, the window kit and exhaust hose do not need to be installed . -
Page 7: Single Hose Window Kit Installation
SINGLE HOSE WINDOW KIT INSTALLATION This installation is OK The is a poor installation 22” When installing the exhaust hose, try and keep it as flat as possible. The less angles and bends in the hose, the better the unit will perform. If bending or an angle is necessary, use single 90° angles like the pictures above. -
Page 8: Control Panel
CONTROL PANEL GH-PAC-12E1 COOL MODE LIGHT DRY MODE LIGHT LED DISPLAY FAN MODE LIGHT BUCKET FULL LIGHT POWER BUTTON MODE BUTTON TEMP SELECT BUTTONS GH-PAC-12E1HP HEAT MODE LIGHT DRY MODE LIGHT LED DISPLAY FAN MODE LIGHT COOL MODE LIGHT POWER BUTTON MODE BUTTON TEMP SELECT BUTTONS... -
Page 9: Control Panel Functions
CONTROL PANEL FUNCTIONS CONTROL PANEL OPERATING INSTRUCTIONS 1) Power On and Off - Press the POWER button once to manually turn the unit on. Press the POWER button once more to turn the unit off. 2) Mode Selection - Press the MODE Button repeatedly to cycle between the different modes: Air Conditioner, Dehumidifier (DRY), Fan only, and Heater mode (NOTE: Heater mode is only available on the GH-PAC-12E1HP). -
Page 10: Ating Instructions
REMOTE CONTROL OPER ATING INSTRUCTIONS - / + - / + BUTTONS SIGNAL TRANSMITTER When the unit is in Air Conditioner or Heater (GH-PAC- 12E1HP) mode you can select your desired temperature. Press the TEMP SELECT buttons ( + or -) to select your desired temperature setting. -
Page 11: Remote Control Operating Instructions
REMOTE CONTROL OPERATING INSTRUCTIONS TIMER TIMER BUTTON Auto-on Timer: When the air conditioner is off, it can be set to automatically turn on in 30 minutes to 24 hours at the previous set mode and fan setting. To set the Auto- on Timer, press the TIMER button on the unit or remote control. -
Page 12: Lock Function
REMOTE CONTROL OPER ATING INSTRUCTIONS Blow Blow REMOTE CONTROL Press the blow button to enable the blow function. When enable, blow will force the fan to remain on once the unit is powered down. The fan stays on to dry out any remaining moisture in the unit to help minimize mold or bacteria growth. -
Page 13: Clean Unit Housing
MAINTENANCE Note: Make sure power is off and the power cord is not plugged into an electrical outlet prior to performing any maintenance on the unit. Clean or replace filter - If the air filter is blocked with a dust, the airflow volume may decrease. It is recommended to clean the filter once every two weeks, or as needed. -
Page 14: Troubleshooting
TROUBLESHOOTING PROBLEM POSSIBLE CAUSES SOLUTIONS The Air Conditioner will not start The air conditioner is unplugged or not • Make sure the air conditioner plug connected well. is pushed completely into the out- • Check the house fuse/circuit breaker box and replace the fuse The fuse is blown/circuit breaker is or reset the breaker. - Page 15 TROUBLESHOOTING (CONT.) PROBLEM POSSIBLE CAUSES SOLUTIONS The LCD Display is showing “E5” Low Voltage Protection • Unplug for 10 minutes and then turn on the unit. If “E5” is still dis- played, contact customer service. The LCD Display is showing “H8” •...
-
Page 16: This Warranty Does Not Cover
One Year Limited Warranty Soleus International Inc. warrants the accompanying Soleus Air Powered by Gree Portable Air Conditioner to be free of defects in material and workmanship for the applications specified in its operation instruction for a period of ONE (1) year from the date of original retail purchase in the United States.
Need help?
Do you have a question about the GH-PAC-12E1 and is the answer not in the manual?
Questions and answers