Dynex DX-DRTVL103 User Manual
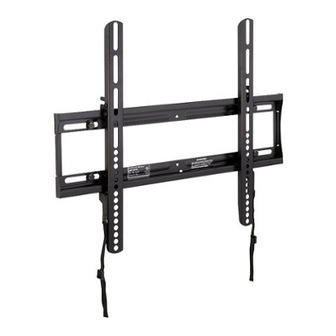
Large low profile wall mount with optional -5° tilt
Hide thumbs
Also See for DX-DRTVL103:
- Manual (6 pages) ,
- Instructions de montage manual (16 pages) ,
- Instrucciones de montaje manual (16 pages)
Advertisement
Quick Links
Download this manual
See also:
Manual
A SS E M BLY IN S TRU C T I O N S
DX-DRTVL103
Large Low Profile Wall Mount with Optional -5° Tilt
For wood-stud, concrete-wall, or
concrete-bloack installation
specifications...........................................2
TVs the wall mount fits ........................3
Tools needed ...........................................3
Parts ............................................................4
Hardware...................................................5
Assembly instructions..........................6
Advertisement

Related Manuals for Dynex DX-DRTVL103


Summary of Contents for Dynex DX-DRTVL103
-
Page 1: Table Of Contents
A SS E M BLY IN S TRU C T I O N S DX-DRTVL103 Large Low Profile Wall Mount with Optional -5° Tilt Safety information and specifications...........2 TVs the wall mount fits ......3 Tools needed ...........3 Parts ............4 For wood-stud, concrete-wall, or Hardware...........5... -
Page 2: Safety Information And Specifications
For customer service, call: Customer Service or call a qualified contractor. Dynex is 800-305-2204 (U.S./Canada markets) not responsible for damage or injury caused by incorrect installation or use. -
Page 3: Tvs The Wall Mount Fits
DX-DRTVL103 TVs the wall mount fits The wall mount fits TVs with M4, M5, M6, or M8 screw holes that are the following distances apart: 1.375" to 15.748" (35 mm to 400 mm) maximum horizontal distance Tools needed You will need the following tools to assemble your new wall mount:... -
Page 4: Parts
DX-DRTVL103 Parts Package contents: parts Make sure you have all the parts necessary to assemble your new TV wall mount: 01 Wall plate (1) 02 Left TV 03 Right TV bracket (1) bracket (1) Need help? Call 800-305-2204... -
Page 5: Hardware
DX-DRTVL103 Hardware Package contents: hardware Note: Not all hardware will be used. Make sure you have all the hardware necessary to assemble your new wall mount: Label Hardware Qty. Label Hardware Qty. M6 × 35 mm screw 5/16" × 2 3/4" lag bolt M8 ×... -
Page 6: Assembly Instructions
DX-DRTVL103 Step 1: Assembly instructions Adjust the tilt Note: The tilt on the left TV bracket (02) and right TV bracket (03) must be the same. Use a Phillips screwdriver to remove the two screws (S) from the outside edges of each TV bracket (02 and 03). - Page 7 DX-DRTVL103 Step 2: Determine whether your TV has a flat back or an irregular or obstructed back Carefully place your TV screen face-down on a cushioned, clean surface to protect the screen from damages and scratches. If your TV has a table-top stand attached, remove the stand. See the documentation that came with your TV for instructions.
- Page 8 DX-DRTVL103 Step 3: Select screws and spacers Select the hardware for your TV (screws, washers, and spacers). See the documentation that came with your TV for screw length and diameter. Select one of the following types of screws: M4 × 12 mm screws (07) M6 ×...
- Page 9 DX-DRTVL103 Step 4: Install the TV brackets Option 1: Installing for a TV with a flat back Align the holes you noted on the left TV bracket (02) and right TV bracket (03) with the screw holes on the back of your TV.
- Page 10 DX-DRTVL103 Step 4: Install the TV brackets (continued) Option 2: Installing for a TV with an irregular or obstructed back Place M4/M5 spacers (19) or M6/M8 spacers (20) over the mounting holes in the back of your TV. If you are using M4 or M5 screws, place M4/M5 washers (17) over the spacers.
- Page 11 DX-DRTVL103 Step 5: Determine the wall-mount location. Note: For help with determining where you need to drill screw holes, use the HeightFinder™ Installation Assistant at: http://mf1.bestbuy.selectionassistant.com/index.php/heightfinder The center of your TV will match the center of the wall plate (01). Before you drill holes in the wall: Measure the distance between the middle of one of the TV brackets and the bottom of your TV.
- Page 12 DX-DRTVL103 Step 6: Mount the wall plate Note: Any material covering the wall (such as sheetrock) must not exceed 5/8" (16 mm). Option 1: Mounting on a wood-stud wall Locate the studs. Verify the center of the stud with an edge-to-edge stud finder.
- Page 13 DX-DRTVL103 Step 6: Mount the wall plate (continued) Note: Any material covering the wall (such as sheetrock) must not exceed 5/8" (16 mm). Option 2: Mounting on a solid concrete or concrete block wall Level the wall plate (01) and mark the hole locations.
- Page 14 DX-DRTVL103 Step 7: Mount the TV on the wall plate Lower the TV onto the wall plate (01) making sure that the hooks on the top of the left and right TV brackets (02 and 03) slide over the top of the wall plate and the hooks on the bottom of the TV brackets slide under the bottom of the wall plate.
- Page 15 DX-DRTVL103 Removing the TV from the wall plate Simultaneously pull down on the two release cords on the TV brackets (02 and 03), then lift the TV up and away from the wall plate. For customer service, call: 800-305-2204 (U.S./Canada markets)
- Page 16 7601 Penn Ave. South, Richfield, MN 55423 U.S.A. © 2011 BBY Solutions, Inc. All rights reserved. DYNEX is a trademark of BBY Solutions, Inc. Registered in some countries. All other products and brand names are trademarks of their respective owners. 6907-002034 <01>...
Need help?
Do you have a question about the DX-DRTVL103 and is the answer not in the manual?
Questions and answers