Advertisement
Quick Links
Advertisement

Subscribe to Our Youtube Channel
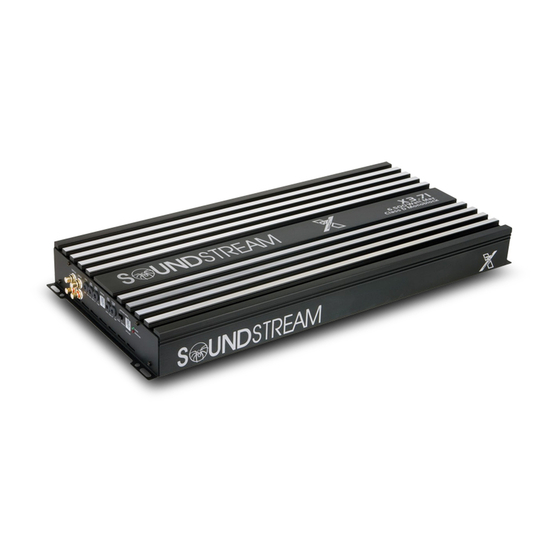
Summary of Contents for Soundstream X3.60
- Page 1 X3.60 / X3.71...
-
Page 3: Table Of Contents
TABLE OF CONTENTS INTRODUCTION FEATURES & SPECIFICATIONS 3 ~ 4 CONTROLS & FUNCTIONS 5 ~ 10 PLANNING & MOUNTING YOUR SYSTEM WIRING DIAGRAM BRIDGING TWO AMPLIFIERS ADJUSTING & TUNING TROUBLE SHOOTING... -
Page 4: Introduction
INTRODUCTION Ampli er's provide high-performance sound reinforcement for your mobile audio equipment. The Multi-Mode bridging capabilities allow exibility in hosting several di erent speaker con gurations. To achieve optimum performance, it is highly recommended that you read this Owners Manual before beginning installation. -
Page 5: Speci Cations
FEATURES X3.60 4000Watts Max Power 350<@80Hz(+/- 5Hz) Damping factor 15Hz ~150Hz Operating frequency(band-width) 0.5 ~ 10.0 (volts) Input Sensitivity 24dB / octave Low-Pass crossover slope attenuation factor 18dB Subsonic(cut/increase) range factor (15Hz ~ 40Hz) 50Hz ~ 150Hz Continuously variable low-pass control(range) 0 ~ 180 deg. - Page 6 FEATURES X3.71 6500Watts Max Power 350<@80Hz(+/- 5Hz) Damping factor 15Hz ~150Hz Operating frequency(band-width) 0.5 ~ 10.0 (volts) Input Sensitivity 24dB / octave Low-Pass crossover slope attenuation factor 18dB Subsonic(cut/increase) range factor (15Hz ~ 40Hz) 50Hz ~ 150Hz Continuously variable low-pass control(range) 0 ~ 180 deg.
-
Page 7: Controls & Functions
Controls & Functions X3.60 <Front panel> <Rear panel>... - Page 8 Controls & Functions X3.71 <Front panel> <Rear panel>...
- Page 9 Controls & Functions 1.Low Level OUT RCA jacks LINE OUT LINE IN LINE OUT LINE IN X3.71 X3.60 The LINE OUT allows you to build multiple amplifier systems without having to use splitter cords to distribute the signal. Now it is simply a matter of bringing one set of RCAS into the first amplifier, then using the line out RCA jacks as the feed to the next amplifier.
- Page 10 Controls & Functions 4.Subsonic Filter Control SONIC 15Hz 40Hz Variable Subsonic Filter (15Hz - 40Hz) : The Subsonic lter will roll o all of the unwanted frequencies below 15Hz - 40Hz. This will allow the ampli er to use that wasted power on the audible bandwidth. 5.
- Page 11 Controls & Functions 7. Low Level Filter Control PASS 50Hz 150Hz This control is used to set the desired low pass frequency (50 ~ 150HZ). The filter acts to cut-off frequencies above the set-point. In general, the selected frequency should closely match the resonant frequency of the speaker box. 8.
- Page 12 Controls & Functions 10. LED indicatior POWER PROTECTION POWER : This GREEN LED will illuminate when the amplifier is turned "ON". If it fails to illuminate, check the power connections to the Amplifier and fuses. PROTECT: The amplifier protection circuitry will disable the amplifier if input overload, short circuit or extremely high temperature conditions are detected.
- Page 13 Controls & Functions 12.B-Terminal (Chassis ground) X3.60D X3.71 To avoid unwanted ignition noise caused by ground loops, it is essential that the Amplifier be grounded to a clean, bare, metal surface of the vehicles chassis. Note : GROUND WIRE SHOULD NOT BE EXTENDED MORE THAN 3 FT (1 METER). 13.
-
Page 14: Planning & Mounting Your System
Planning and Mounting Your System The mounting position of your Amplifier will have a great effect on its ability to dissipate the heat generated during normal operation. Under normal conditions, the heatsink will dissipate sufficient heat to avoid thermal shutdown. However please do not install the amplifier in a wooden box or similar device as this will prevent heat dissipation into the atmosphere. -
Page 15: Wiring Diagram
Wiring Diagram X3.60 SUB WOOFER 1 OHM X3.71 SUB WOOFER 1 OHM... - Page 16 Bridging Two Ampli ers X3.60 SLAVE MASTER MASTER AMP SLAVE MASTER SLAVE AMP MASTER AMP SPEAKER IMPEDANCE 2 OHMS SLAVE AMP...
-
Page 17: Bridging Two Amplifiers
Bridging Two Amplifiers X3.71 SLAVE MASTER MASTER AMP SLAVE MASTER SLAVE AMP MASTER AMP SPEAKER IMPEDANCE 2 OHMS SLAVE AMP... - Page 18 Tuning on the Amplifier The amplifier automatically turns on a few seconds after you turn your vehicle's ignition switch to ACC or ON or turn on your auto sound system, depending on how you wired the system. The POWER indicator on the top of the amplifier lights when the amplifier is on. Important : Your amplifier requires 30 amps or more of power from your vehicle's battery during operation.
-
Page 19: Trouble Shooting
Trouble Shooting SYMPTOMS CHECK REMEDY Is the power Check all fuses to amplifier. NO SOUND Be sure Turn-on lead is connected LED illuminated? Check signal leads. (NO) Check gain control. Check Tuner/Deck volume level. Clean contacts on fuse holders. Is the Diagnostic Check for speaker short or LED illuminated? (YES) amplifier overheating.


Need help?
Do you have a question about the X3.60 and is the answer not in the manual?
Questions and answers