Epson PowerLite Home Cinema 3010 User Manual
Epson home theater screen user manual
Hide thumbs
Also See for PowerLite Home Cinema 3010:
- Quick setup (4 pages) ,
- Brochure & specs (4 pages)
Table of Contents
Advertisement
Advertisement
Table of Contents

Related Manuals for Epson PowerLite Home Cinema 3010


Summary of Contents for Epson PowerLite Home Cinema 3010
- Page 1 ® PowerLite Home Cinema 3010/3010e Home Theater Projector User’ s Guide...
-
Page 2: Table Of Contents
Contents Introduction Projector Parts Remote Control Optional Accessories Registration and Warranty Using This Manual Setting Up the Projector Choose a Location Installing the Projector Connecting the Cables Connecting Video and Computer Equipment Making Other Connections Installing Batteries in the Remote Control Turning the Projector On and Off Turning On the Projector Turning Off the Projector... - Page 3 Advanced Color Adjustments Adjusting the Gamma Setting Adjusting RGBCMY Locking the Projector Making Detailed Adjustments Using the Menu System Changing How the Menus Display Adjusting the Picture Quality Input Brightness Settings Sharpness and Picture Quality Settings Color Settings 3D Setup Adjustments for Computer Images WirelessHD Settings Split Screen Setup...
- Page 4 Changing HDMI Link Settings Maintenance Cleaning the Lens Cleaning the 3D Glasses Cleaning the Projector Case Cleaning and Replacing the Air Filter Replacing the Lamp Resetting the Lamp Usage Timer Checking the Projector Status Storing the Projector Transporting the Projector Problem Solving What To Do When the Lights Come On or Flash Solving Picture Problems...
- Page 5 Notices Important Safety Information FCC Compliance Statement Copyright Notice A Note Concerning Responsible Use of Copyrighted Materials Trademarks Contents...
-
Page 6: Introduction
Introduction The PowerLite ® Home Cinema 3010/3010e projector lets you enjoy theater-quality 3D images in the relaxing environment of your own home. Designed especially for home cinema use, it offers these outstanding features: ■ Native 1080p (1920 × 1080) resolution, dynamic contrast ratio up to 40,000:1 and up to... -
Page 7: Projector Parts
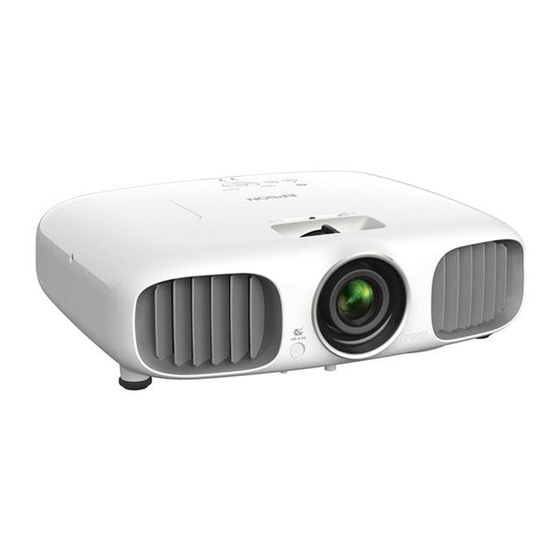
Projector Parts Front Lamp cover Air exhaust Remote receiver Lens cover Back Cable clip hole Speakers Power inlet Remote receiver Control panel Air intake Adjustable foot Cable clip hole USB port HDMI ports External 3D IR port Kensington ® lock port Audio (L-R) port Horizontal keystone slider Zoom ring... -
Page 8: Projector Control Panel
Bottom Mounting bracket attachment points Front adjustable feet Projector Control Panel Brightness sensor Power light Power button Source button Introduction Volume/horizontal keystone buttons Lamp light Escape button Vertical keystone buttons Temperature light... -
Page 9: Remote Control
Remote Control On button Turns projector on HDMI Link button Enables and disables the HDMI link function 2D/3D button Toggles between 2D and 3D projection Menu navigation buttons Default button Resets menu selection to default values Menu button Displays the projector’s menus Auto Iris button Toggles the Auto Iris... -
Page 10: Optional Accessories
In addition, Epson offers free Extra Care equipment failure, you won’t have to wait for your unit to be repaired. Instead, Epson will ship you a replacement unit anywhere in the United States, Canada, or Puerto Rico. See your Extra Care Home Service brochure for details. -
Page 11: Using This Manual
Note: Contains important information about your projector. Tip: Contains helpful projection tips. Need additional help? Take advantage of Epson’s automated support services 24 hours a day at epson.com/support (U.S.) or epson.ca/support (Canada). Use this site to view FAQs or product information and e-mail Epson. -
Page 12: Setting Up The Projector
Setting Up the Projector Follow the instructions in this section to choose a location for the projector, connect the cables, and display an image. Choose a Location You can install the projector for the viewing setups shown below, as well as rear projection. Center Side Ceiling... - Page 13 Keep the projector level and place it at a height where its lens is centered between the top and bottom of the screen. If this isn’t possible, use the horizontal keystone slider and vertical keystone buttons to adjust the image (see page 24). Note: Image quality may be reduced if excessive keystone correction is used.
- Page 14 To determine the exact image size when you know the projection distance (or the exact projection distance when you know the desired image size), you can use the Image Size Calculator. This program is available on the Epson website at epson.com/support (U.S.) or epson.ca/support (Canada).
- Page 15 In order to view 3D images correctly, 3D glasses must be worn within proper range of the projector. Use the image below to determine the ideal distance for 3D projection (the shading represents the 3D viewing area): 60º 16.5 ft (5 m) 13 ft (4 m) Use the optional external 3D emitter if you cannot view the 3D image normally or if the projector is located more than 16.5 feet (5 m) from the viewing area.
-
Page 16: Installing The Projector
Installing the Projector To install the projector, you first need to determine the location, based on the size of your screen (maximum diagonal image size). Use the tables on page 13 as a guide to positioning the projector. To suspend the projector from a ceiling, you will need the optional projector mount designed for the projector. - Page 17 The following illustrations show the dimensions of the projector: 16.5 in. (420 mm) Center of lens 2.4 in. (60 mm) 5.9 in. (150 mm) 8.3 in. (210 mm) 11.8 in. (300 mm) 5.5 in. (139.6 mm) 3.2 in. (80 mm) 2.8 in.
-
Page 18: Connecting The Cables
Connecting the Cables Connecting Video and Computer Equipment You can connect the projector to many types of video equipment, such as a Blu-ray ™ Disc /DVD player, digital tuner, cable or satellite box, video game console, camcorder, or digital camera. You can also connect it to a desktop or laptop PC or Apple details on compatible video formats, see page 81. - Page 19 Port name Video equipment connection — Video Use an RCA video and audio cable: For best results, connect your video equipment to the equipment doesn’t support HDMI, connect it to either the component video) or (for composite video) port. Video When you connect an HDMI cable to the projector, it is recommended that you fasten it with the included cable clip.
-
Page 20: Making Other Connections
Making Other Connections Connect the power cable and other cables described below, depending on how you plan to use the projector. ■ Plug the power cable into the projector and a grounded electrical outlet. ■ To use an AV controller with the projector, connect a 9-pin null modem serial cable to port. -
Page 21: Installing Batteries In The Remote Control
Installing Batteries in the Remote Control The remote control uses two AA batteries. Warning: Keep batteries away from children. If a battery is swallowed, contact your doctor immediately. 1. Release the tab and lift open the cover. 2. Insert two new AA batteries as shown. 3. -
Page 22: Turning Off The Projector
Note: To prevent children from turning on the projector, you can use the Child Lock feature. See page 36 for details. If you’ll be using the projector at an altitude above 4921 feet (1500 meters), turn on High Altitude Mode so the fan can properly cool the projector at the high altitude air pressure. See page 55 for details. - Page 23 If you press the button on the projector, you see a list of available sources. Press Source button to move through the list and select the desired source. Source Note: If an image does not appear, see “Problem Solving” on page 69. To temporarily turn off the image and darken the screen, press the A/V Mute button on the remote control.
-
Page 24: Positioning The Image
Positioning the Image If the projector is not centered in front of the screen, use the horizontal keystone slider, horizontal keystone buttons, volume buttons on the projector, and vertical keystone buttons to correct the shape of the image. Horizontal keystone slider Note: You can display a test pattern to help adjust the image position by pressing the Pattern button on the remote control. - Page 25 If one side of the image is taller than the other, make sure the projector is parallel to the screen. If necessary, adjust the front feet so that the projector is horizontal. Adjustable feet Your projector automatically adjusts images that are wider at the top or bottom, but if necessary, you can also use the vertical keystone buttons on the projector to correct this.
-
Page 26: Making Basic Adjustments
Making Basic Adjustments Follow the instructions in this chapter to make basic adjustments to the image shape, size, color, and quality. For further refinements, see “Making Detailed Adjustments” on page 37. Focusing and Zooming Use the focus ring to sharpen the image. Use the zoom ring to reduce or enlarge the image. -
Page 27: Choosing The Aspect Ratio
Choosing the Aspect Ratio In many cases, video signals are automatically resized to fit on your screen when Auto setting. You may need to change the size of the image (or aspect ratio) for certain image types by pressing the button on the remote control. -
Page 28: Viewing 3D Images
Viewing 3D images To view 3D content, you must first connect a 3D-compatible video device to one of the HDMI ports on your projector. You will also need a pair of Epson or Epson-compatible M-3Di active shutter glasses. 1. Turn on and begin playback on the 3D-compatible video device. -
Page 29: Projecting In Split Screen Mode
Projecting in Split Screen mode You can use the Split Screen feature to simultaneously project two images from different image sources next to each other. You can control the Split Screen feature using the remote control or the projector menus. Note: While you use the Split Screen feature, other projector features may not be available and some settings may be automatically applied to both images. -
Page 30: Starting A Slideshow
Note: Depending on the video input signals, the images may not appear at the same size even if you choose the Equal setting. 5. To choose the audio you want to hear, select the select an audio option, press Note: Select Auto to hear audio from the largest screen or the left screen. 6. -
Page 31: Choosing Slideshow Options
3. Do one of the following to start your slide show: ■ To display an individual image, press the arrow buttons to highlight the image and press . (Press the Enter ■ To display a slide show of all the images in a folder, press the arrow buttons to highlight the Slideshow Note: If any file names are longer than 8 characters or include unsupported symbols, the file... -
Page 32: Choosing The Color Mode
Setting Sort Order Continuous Play Screen Switching Time Effect Choosing the Color Mode You can change the Color Mode to automatically adjust brightness, contrast, and color, letting you quickly optimize the projected image for various lighting environments. You can also select a different color mode for each input source—which is useful if you view different types of images from different sources. -
Page 33: Advanced Color Adjustments
■ Living Room for watching television programs during the day. ■ Natural for projecting natural, accurate colors in a dimly lit room. ■ 3D Dynamic for projecting the brightest 3D picture available (only available when the projector is in 3D Mode). ■... - Page 34 Note: This setting cannot be used when the Color Mode is set to Auto (see page 32). 1. Press the button. Select Menu . You see the following displayed on the screen: Gamma 2. Do one of the following: ■ Select one of the numeric correction values using the u or d button on the remote control and press the right.
-
Page 35: Adjusting Rgbcmy
Adjusting RGBCMY Use this feature to adjust the hue, saturation, and brightness for each of the red (R), green (G), blue (B), cyan (C), magenta (M), and yellow (Y) color components (not available when is selected as the Color Mode). Auto 1. -
Page 36: Locking The Projector
Locking the Projector The projector includes two lock settings to prevent the image from being accidentally changed once it’s adjusted, and to keep children from turning on the projector without adult supervision. To access the lock settings, follow these steps: 1. -
Page 37: Making Detailed Adjustments
Making Detailed Adjustments You can use the projector’s on-screen menus to make detailed adjustments to the image quality—such as the brightness, contrast, sharpness, and color. You can also change the menu display, sleep mode settings, and other projector features. Using the Menu System You can access the menu system either from the remote control or the buttons on the projector’s control panel. -
Page 38: Changing How The Menus Display
4. When you’re finished, press the button to exit the menu system. Menu To display one of the line menus, press the bottom of the image: ■ Press the l or r button to adjust the setting. ■ Press the Menu Note: When a line menu is displayed, you can press Default on the remote control to reset the menu to its factory setting. -
Page 39: Adjusting The Picture Quality
Adjusting the Picture Quality Before fine-tuning the image using these adjustments, make sure you have already selected the best Color Mode for your picture and viewing environment, as described on page 32. Then use the settings in this section to finish adjusting the picture to your liking. Most image quality settings are saved independently for each input source (Video, HDMI, Component, PC) and color mode. -
Page 40: Auto Iris
(see page 22). This setting cannot be used when the Color Mode is set to Auto (see page 32) or Epson Super White is set to On. If your video equipment has an HDMI port and you’ve connected it to the projector using an HDMI cable, set the level of the projector to match that of the video equipment. -
Page 41: Sharpness And Picture Quality Settings
Sharpness and Picture Quality Settings If the image looks fuzzy, or if it contains noise or flickering, you can use these settings to correct it. ■ Sharpness Image > Sharpness Use this function to make lines and edges appear more distinct in the image. This setting is stored separately for each image source and color mode setting. -
Page 42: Noise Reduction
■ Progressive Signal > Progressive Converts interlaced to progressive signals. The projector uses 3D DigiScan Circuitry Processing for video-sourced images. Leave the setting on output. Select Video viewing images with a large amount of movement. Note: This setting can be used only when viewing a composite video signal, or 480i or 576i, or 1080i signals input through the Component, HDMI 1, or HDMI 2 ports (see page 81). -
Page 43: Color Settings
Color Settings If the image colors don’t look correct, you can adjust them using these settings. Use the first three settings described below to make the most visible changes. If you only need to make slight adjustments, you can fine-tune the picture with the remaining settings. Most color settings are stored separately for each image source and color mode. - Page 44 ■ RGB Image > Advanced > RGB Note: This setting cannot be used when the Color Mode is set to Auto (see page 32). Use the RGB settings to fine-tune the color of the image. You can adjust the offset and gain for each signal color (red, green, and blue).
-
Page 45: 3D Setup
3D Setup Use this menu to adjust 3D brightness, the 3D display format and other 3D settings. Note: You should only adjust the 3D Format and Inverse 3D Glasses settings if 3D images aren’t displaying correctly. Changing these settings unnecessarily may cause problems with 3D projection. -
Page 46: Adjustments For Computer Images
■ 3D Viewing Notice Signal > 3D Setup > 3D Viewing Notice Enables or disables the viewing notice that is displayed when 3D mode is activated. Adjustments for Computer Images In addition to the settings described previously, you can adjust the Tracking and Sync settings for analog RGB computer images. -
Page 47: Wirelesshd Settings
WirelessHD Settings Use these options to manage the WirelessHD connection and access the WirelessHD reception monitor. ■ Device Connections Settings > WirelessHD > Device Connections Select this option to display a list of available WirelessHD devices. Use the arrow keys to navigate the menu and press ■... -
Page 48: Split Screen Setup
■ Reset Settings > WirelessHD Select this option to reset all WirelessHD settings and return them to their default values. Split Screen Setup Press the button while in Split Screen mode to access this menu. Menu ■ Screen Size Split Screen Setup > Screen Size Adjusts the size of the two screens. -
Page 49: Selecting Memory Settings And Resetting The Projector
■ Swap Screens Split Screen Setup > Swap Screens Select this option to quickly switch the images on the left and right sides of the split screen display. ■ Audio Source Split Screen Setup > Audio Source Use this setting to select which screen’s audio you want to hear while in split screen mode. Note: Select Auto to hear audio from either the largest screen or the screen on the left (depending on the Screen Size setting). -
Page 50: Selecting Memory Settings
Selecting Memory Settings You can easily recall the memory settings by using the button on the remote control. Memory 1. Press the Memory 2. Select Load Memory 3. Use the arrow buttons to select the desired setting, then press the button. -
Page 51: Deleting Saved Memory Settings
Deleting Saved Memory Settings You can clear all your memory settings at once. 1. Press the button on the remote control. Menu 2. Open the menu, then select Reset 3. Select , then press the Note: You can delete memory settings one at a time with the Erase Memory setting under the Memory menu. -
Page 52: Customizing Projector Features
3. Do one of the following: ■ Select Reset Lamp Hours You should reset the lamp timer only when you install a new projector lamp. See page 67 for more information. ■ Select Reset Memory ■ Select Reset All Signal, User Button, Language, and Lamp Hours). Customizing Projector Features Use the settings in this section to adjust the image size and position, suppress on-screen text, and select basic setup options. -
Page 53: Screen Options
■ Aspect Signal > Aspect This setting lets you change the aspect ratio of your image, and works the same as pressing the button on the remote control. See page 27 for more information. Aspect Note: When displaying 720p, 1080i, or 1080p signals through the HDMI or Component video port, the aspect ratio is automatically selected and you cannot change it. -
Page 54: Other Setup Options
Other Setup Options ■ Projection Settings > Projection You can select different options for projecting the image: Rear/Ceiling Note: Only the Front option is available when the Color Mode is set to Auto. ■ Direct Power On Extended > Operation > Direct Power On Sets projection to start without pressing the P power button on the projector or the button on the remote control. - Page 55 ■ Sleep Mode Extended > Operation > Sleep Mode Turn off this setting if you don’t want the projector to enter sleep mode. (Sleep mode shuts the projector off automatically when there is no video signal.) Select , or 5min. 10min.
-
Page 56: Using Wirelesshd
Using WirelessHD You can use the included WirelessHD Transmitter (PowerLite Home Cinema 3010e only) to wirelessly stream HD content from a video device to the projector. Placing the WirelessHD Transmitter Place the WirelessHD Transmitter so that the unit’s lights face the front of the projector. Make sure the transmitter is within 32 feet (10 meters) of the projector and is located in the same room. -
Page 57: Setting Up A Wirelesshd Connection
Setting Up a WirelessHD Connection To prepare your device to work with the 1. Follow the instructions on the previous page and place the transmitter within range of the projector. 2. Plug the AC adapter into the transmitter and an electrical outlet. 3. -
Page 58: Using Hdmi Link
Using HDMI Link When you connect HDMI CEC-compatible devices to the projector with HDMI cables, you can control them using the HDMI Link control buttons on the projector’s remote control. This lets you use just one remote control to operate many commonly used features on all your devices. -
Page 59: Changing Hdmi Link Settings
4. Set up your connected devices so their HDMI CEC-compatible functions are enabled. For details, refer to the device manufacturer’s documentation. Changing HDMI Link Settings 1. Press the button on the projector’s remote control. HDMI Link 2. Select Device Connections 3. -
Page 60: Maintenance
Maintenance Your projector needs little maintenance. All you need to do on a regular basis is keep the lens clean. You also may need to clean the air filter to prevent overheating. Warning: Before you clean any part of the projector, turn it off and unplug the power cord. Never open any cover on the projector, except the lamp and filter covers. -
Page 61: Cleaning The 3D Glasses
Cleaning the 3D Glasses Use the included lint-free cloth (do not use paper towels) to gently wipe the 3D glasses whenever you notice dust or dirt on the surface. Caution: Never rub the 3D glasses with abrasive materials. Cleaning the Projector Case Before you clean the case, turn off the projector and unplug the power cord. -
Page 62: Cleaning And Replacing The Air Filter
Cleaning and Replacing the Air Filter Your projector includes an air filter to ensure the best performance. If dust collects on the air filter, clean it as described below. Dust clogs prevent proper ventilation and cause overheating and damage to the projector. You can replace the air filter while the projector is mounted to the ceiling, if necessary. - Page 63 If the dirt is difficult to remove or the filter is broken, replace it. You can purchase air filter part number V13H134A38 from an authorized Epson reseller. To find the nearest reseller, please call 800-GO-EPSON (800-463-7766). To purchase online, visit www.epsonstore.com (U.S.
-
Page 64: Replacing The Lamp
Turn off this product when not in use to prolong the life of the projector. You can purchase lamp part number V12H010L68 from an authorized Epson reseller. To find the nearest reseller, please call 800-GO-EPSON (800-463-7766). To purchase online, visit www.epsonstore.com (U.S. - Page 65 5. Remove the lamp cover as shown. 6. Loosen the screws securing the lamp (they don’t come all the way out). 7. Lift up the lamp handle and gently pull the lamp out of the projector. Warning: The lamp(s) in this product contain mercury. Please consult your state and local regulations regarding disposal or recycling.
- Page 66 8. Gently insert the new lamp into the projector and press the handle down. Tighten the screws. Caution: Don’t touch the glass portion of the lamp assembly. Touching the glass could result in premature lamp failure. 9. Replace the lamp cover. (The projector won’t work if the lamp cover is open or loose.) 10.
-
Page 67: Resetting The Lamp Usage Timer
Resetting the Lamp Usage Timer After replacing the lamp, plug the projector back in and press the Ppower button on the projector or the button on the remote control. Then follow these steps to reset the lamp usage timer: 1. Press the button on the projector or remote control. -
Page 68: Storing The Projector
Pack the projector in its original packaging or equivalent. Transporting the Projector Note: Epson shall not be liable for any damages incurred during transportation. The projector contains many glass and precision parts. When shipping the projector for repairs, use the original packaging material if possible. If you do not have the original packaging, use equivalent materials. -
Page 69: Problem Solving
Problem Solving This section explains how to interpret the projector’s status lights, solve problems with the picture and remote control, and contact technical support. What To Do When the Lights Come On or Flash The lights on top of the projector indicate the projector’s status and let you know when a problem occurs. - Page 70 If the lamp isn’t cracked, reinstall it, plug the projector into an outlet, and turn the power on. If this doesn’t fix the problem, or if the lamp is cracked, contact Epson for assistance (see page 77).
-
Page 71: Solving Picture Problems
Cause and solution There is a fan or sensor problem. Turn off the projector and unplug it from the electrical outlet. Then contact Epson for assistance (see page 77). There is an internal problem. Turn off the projector and unplug it from the electrical outlet. - Page 72 3D content does not display or does not display correctly. ■ Press the 2D/3D necessary. ■ Make sure that you are within the 3D viewing range (see page 12). ■ Check that your video device and media are both 3D-compatible. Refer to the documentation that came with your video device for more information.
- Page 73 ■ If the function key doesn’t let you display simultaneously on both screens, you might need to use the Display utility in the Windows Control Panel to make sure that both the LCD screen and external monitor port are enabled. From the Windows Control Panel, open the utility.
- Page 74 The picture is blurry. ■ Make sure the Input Signal ■ There may be dirt on the lens. Clean the lens as described on page 60. ■ Adjust the focus (see page 26). ■ Make sure the lens is not fogged by condensation. If you’ve just moved the projector from a cold environment, wait a couple of minutes before using it.
-
Page 75: Solving Remote Control Problems
Solving Remote Control Problems The projector doesn’t respond to remote control commands. ■ Make sure you’re within about 32 feet (10 m) of the projector, and the remote control is aimed at the projector’s front or back sensor within the ranges shown below. ■... - Page 76 ■ Make sure that your projector is connected to the correct WirelessHD device. See“WirelessHD Settings” on page 47 for more information. ■ You may need to reset the WirelessHD connection. Turn off both the WirelessHD Transmitter and the projector. Start playback on your video device, then turn on the WirelessHD Transmitter and the projector.
-
Page 77: Where To Get Help
Speak to a Support Representative To use the Epson PrivateLine Support service, call (800) 637-7661 and enter the PIN on the Epson PrivateLine Support card that came with your projector. This is the fastest way of speaking to a live representative, and it’s free. -
Page 78: Specifications
Specifications General Type of display Size of LCD panels Lens Resolution (native format) Brightness Dynamic contrast ratio Image size Projection distance Zoom ratio Aspect ratio Internal sound system Fan noise level Lamp Note: Lamp life will vary depending on mode selected, environmental conditions, and usage. Brightness decreases over time. -
Page 79: Remote Control
Dimensions Height 5.4 inches (137.3 mm), not including adjustable feet Width 14.4 inches (365 mm) Depth 16.5 inches (420 mm); not including lens protrusion Weight 13.2 lb (6.0 kg) (Home Cinema 3010) 13.7 lb (6.2 kg) (Home Cinema 3010e) Specifications... -
Page 80: Electrical
Electrical Rated frequency Power supply Power consumption Environmental Temperature Humidity Operating altitude Safety United States Canada Pixelworks DNX Specifications 50/60 Hz AC 100 to 120 V AC: 3.7 A 200 to 240 V AC: 1.7 A 100 to 120 V AC: Operating: 372 W (Normal mode) 285 W (ECO mode) -
Page 81: Compatible Video Formats
Compatible Video Formats The projector supports analog video in NTSC, PAL, and SECAM formats, and it automatically adjusts to the incoming signal. It can receive these formats as composite or component video—which it accepts through the Video and Component ports, respectively. The projector also supports digital video (SDTV, HDTV) and various monitor display formats. - Page 82 Analog RGB (computer display) Signal SVGA SXGA WXGA HDMI Signal SDTV 480i 576i 480p 576p HDTV 720p 1080i 1080p 3D mode Signal HDTV 720p 1080i 1080p WirelessHD Signal SDTV 480i 576i 480p 576p Specifications Refresh rate (Hz) Resolution 60/72/75/85 640 × 480 56/60/72/ 75/85 800 ×...
-
Page 83: Esc/Vp21 Command Codes
You can use an AV controller with a 9-pin null modem serial cable to control the projector. You can download the complete ESC/VP 21 Communication Manual for home theater projectors from the Epson website at epson.com/support (U.S.) or epson.ca/support (Canada). Resolution 1280 ×... -
Page 84: Notices
Notices Important Safety Information Follow these safety instructions when setting up and using the projector: ■ Never look into the projector lens when the lamp is turned on; the bright light can damage your eyes. Never let children look into the lens when it is on. ■... - Page 85 ■ The following people should limit 3D content viewing: People with a history of photosensitivity People with heart disease People in poor health People who are sleep deprived People who are physically tired People under the influence of drugs or alcohol Anyone who has ever experienced epileptic seizures or sensory disturbances triggered by flashing light effects SOME LIGHT PATTERNS MAY INDUCE SEIZURES IN PERSONS WITH NO PRIOR...
-
Page 86: Fcc Compliance Statement
■ Allow the lamp to cool for one hour before replacing it. ■ Unplug the projector during lightning storms or when not in use for extended periods. ■ Don’t place the projector or remote control on top of heat-producing equipment. ■... -
Page 87: Copyright Notice
Seiko Epson Corporation. The information contained herein is designed only for use with this Epson product. Epson is not responsible for any use of this information as applied to other products. -
Page 88: Trademarks
Fine are registered trademarks, 1080Perfect is a trademark, and Epson Exceed Your Vision is a registered logomark of Seiko Epson Corporation. PrivateLine is a registered trademark, DigiScan and AccuCinema are trademarks, and Extra Care and Epson Connection are service marks of Epson America, Inc.
Need help?
Do you have a question about the PowerLite Home Cinema 3010 and is the answer not in the manual?
Questions and answers