Table of Contents
Advertisement
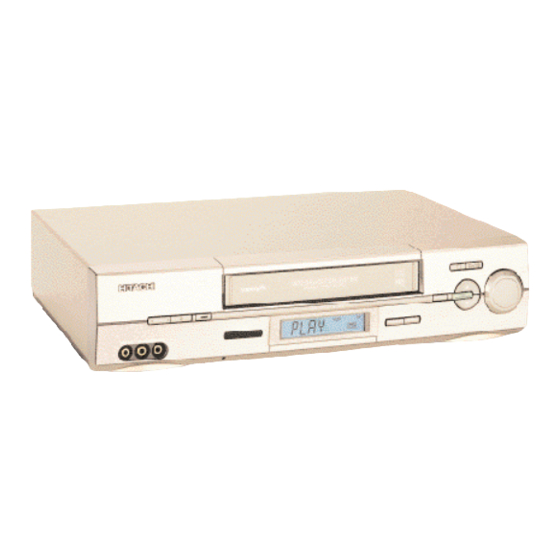
Auto Installation System –
only plug in all leads and
press the OPERATE button.
F
F
I
OR
URTHER
NFORMATION
P
LEASE CONTACT OUR CUSTOMER
01628-643029
HELP LINE ON
PAL
QR32067
VIDEO CASSETTE RECORDER
VT-FX960E(UKN)
Instruction manual
VIDEO Plus+ and PlusCode are
registered trademarks of Gemstar
Development Corporation. The
VIDEO Plus+ system is manufactured
under licence from Gemstar
Development Corporation.
To obtain the best performance
please read this instruction manual completely.
Advertisement
Table of Contents

Related Manuals for Hitachi VT-FX960EUKN


Summary of Contents for Hitachi VT-FX960EUKN
- Page 1 VIDEO CASSETTE RECORDER Auto Installation System – VT-FX960E(UKN) only plug in all leads and Instruction manual press the OPERATE button. VIDEO Plus+ and PlusCode are registered trademarks of Gemstar Development Corporation. The VIDEO Plus+ system is manufactured under licence from Gemstar Development Corporation.
- Page 2 Dear Hitachi Customer Congratulations on your choice of a Hitachi Video Cassette Recorder (VCR). And welcome to our company-wide commitment to your complete satisfaction and viewing enjoyment. INFORMATION FOR YOUR SAFETY Please read the following instructions carefully Mains supply: AC 230V, 50 Hz only before using this VCR.
-
Page 3: Table Of Contents
CONTENTS CAUTION: AUTO INSTALLATION SYSTEM - Please ensure that all leads are connected as illustrated as in page 6 and 7, otherwise auto installation will not work. This instruction manual consists of the following four sections. Section-1 Setting Up This section tells you how to set up your Connection................. - Page 4 * MOVIETEXT is a registered trademarks of — Rental Play immediately starts to play a tape Hitachi Home Electronics (Europe) Ltd. without its safety tab, rewinds the tape after • Tape Navigation allows you to automatically...
-
Page 5: Cassette Tapes
Section-1 Setting Up Connection Pages 6 — 7 This tells you how to connect your VCR to an aerial, TV, etc. Customer Controls and Remote Operation Pages 8 — 9 This tells you the location and the detailed functions of the switches, buttons, VCR’s display and connection terminals on the VCR. -
Page 6: Connection
CONNECTION Basic Method Aerial AERIAL DECODER/CANAL PLUS AUDIO OUT/ AERIAL SORTIE SON ANTENNE EURO. A/V R/D. L/B. RF OUT SORTIE To AC outlet AC 230V/50Hz RF OUT Aerial cable TV set (supplied) Do not connect to the mains supply socket before connecting all leads, refer to page 10. - Page 7 Connecting your VCR to your television using a scart lead Aerial Satellite/Cable box decoder AERIAL Do not connect to the mains supply socket before connecting all DECODER/CANAL PLUS leads, refer to AUDIO OUT/ AERIAL SORTIE SON page 10. ANTENNE EURO. A/V R/D.
-
Page 8: Customer Controls
CUSTOMER CONTROLS VCR Customer Controls STOP PLAY/STILL EJECT VIDEO LINK TAPE 400x DRIVE NAVIGATION PROG VIDEO IN L (MONO)–AUDIO IN-R Item No. Function Page Cassette compartment STOP button PLAY/STILL button Shuttle ring Tape navigation programme select up/down buttons TAPE NAVIGATION button DECODER/CANAL PLUS REC button AUDIO OUT/... -
Page 9: Customer Control And Remote Operation
Remote Control Handset Customer Controls Item No. Function Page Transmission window OPERATE — switch between operate and standby mode TRACKING button PROG (programme up /down Cursor buttons REW — rewind or search REC — record button MENU — to recall OSD menu DISP —... -
Page 10: Auto Installation Function
AUTO INSTALLATION FUNCTION Auto Install (Plug & Play) function This automatically tunes all broadcast channels, sets the clock and date. TV screen Switch on at the mains supply socket after completely connecting all leads (as described on pages 6 and 7). The VCR will be in the standby mode at this stage and the VCR display will show "–... - Page 11 TV screen If you cannot tune your TV correctly to the test STOP PLAY/STILL signal, or if there is distortion in the signal, it may TAPE be necessary to change the VCR RF channel. 400x DRIVE NAVIGATION PROG In this case, press the PROG select button ( ) on the VCR to change the VCR RF channel, and then retune your TV.
-
Page 12: Pre-Tuning Of Built-In Tv Tuner
PRE-TUNING OF BUILT-IN TV TUNER VCR should display “ – – : – – ” in it’s LCD panel after the mains supply is connected. TV Screen Turn on the TV and the VCR, then set the TV to the video programme number. If you connect the VCR and TV using a 21-pin Scart connector lead, select the 21-pin Scart input of the TV. - Page 13 Deleting Unwanted Preset Channels Press the MENU button. Press the cursor button to select the CH option, and then press AUTO the ENTER button. ANN E L NICAM – The CH PRESET display, as illustrated, will appear on the TV screen. Exit SELECT MENU...
- Page 14 (PRE-TUNING OF BUILT-IN TV TUNER) Fine tuning of the picture of the received channel: Press the MENU button. Press the cursor button to select the CH option, and then press the AUTO ENTER button. ANN E L NICAM – The CH PRESET display, as illustrated, will appear on the TV screen.
- Page 15 You may do this if you have accidently deleted a To change the channel manually channel or particular channel was not found. Press the MENU button. Press the cursor button to select the CH option, and then press the AUTO ENTER button.
- Page 16 (PRE-TUNING OF BUILT-IN TV TUNER) To change the programme number (To exchange the channel) You can set your own programme number according to your wish after pre-tuning your VCR. For example, if you want to interchange programme number 03 to programme number 04 follow the procedures below: Controls TV screen...
- Page 17 To preset satellite or cable box programme (Refer page 7 for Connection) Press the MENU button. Press the cursor button to select the CH option, and then press the AUTO ENTER button. ANN E L NICAM – The CH PRESET display, as illustrated, will appear on the TV screen.
-
Page 18: Guide Channel Setting
GUIDE CHANNEL SETTING The PlusCode/ShowView Guide Channel must match the VCR programme when timer programming with PlusCode/ShowView is used. Perform the following procedures to set the Guide Channel. Controls TV screen Press the MENU button. Press the cursor button to select the CH option, and press the AUTO ENTER button. -
Page 19: Auto Clock Setting Using Pdc Signal
AUTO CLOCK SETTING USING PDC SIGNAL This function engages when “AUTO clock (on)” is specified on the VCR MODE setting screen. To release this function, specify “AUTO clock – (off)”. To switch auto clock setting between on and off Controls TV Screen Turn the VCR and TV on, and then set the TV to the video programme number. -
Page 20: Setting The Clock Manually
SETTING THE CLOCK MANUALLY Things to know before starting • Turn the VCR and TV on, then set the TV to the video programme number. • While you are setting the clock, the display on the TV screen will prompt you through the procedure. •... -
Page 21: Cassette Tapes
CASSETTE TAPES Only use video cassettes with the mark in this VCR. Insertion Push the cassette through the door until the VCR mechanism pulls it into the compartment. STOP PLAY/STILL The VCR automatically turns on and the indicator EJECT VIDEO LINK TAPE 400x DRIVE NAVIGATION... -
Page 22: Basic Operations
Section-2 Basic Operations Playback Pages 23 — 26 This tells you how to play a tape back and how to view a scene at variable tape speeds. Shuttle Ring; allow you to view a tape at variable tape speed easily. Recording TV Programmes Pages 27 —... -
Page 23: Playback
PLAYBACK Start point: Turn the TV set on and select the video programme number). Controls VCR Display Insert a cassette. Note: When a cassette (with its safety tab snapped off) is loaded, playback starts automatically. Press the PLAY button on the remote control unit or PLAY/STILL button on the VCR. - Page 24 (PLAYBACK) Controls VCR Display Visual search Press either the REW or F.FWD button during playback. Pictures can be viewed at high speed in either the forward or reverse direction. Press the button again (or press the PLAY button) to return to normal speed playback.
- Page 25 Controls VCR Display Notes: • If there is a noise bar in the picture during still or slow motion play, press the SLOW button and then press the TRACKING button until the noise is reduced. • To prevent tape damage, the VCR will switch from the still/slow mode to the stop mode after TRACKING about 1 minute.
-
Page 26: Playback Using Shuttle Ring
PLAYBACK USING SHUTTLE RING Use of the shuttle ring allows many different kinds of playback – slow-motion play, normal play, forward search, reverse slow- motion play, reverse play and reverse search. Note: If the shuttle ring is operated in the stop mode, the VCR STOP PLAY/STILL enters the fast forward or rewind mode. -
Page 27: Recording Tv Programmes
RECORDING TV PROGRAMMES Start point: Turn the TV set on and select the video programme number. Controls VCR Display Insert a cassette. Note: Be sure to check that the safety tab is not missing. If it is removed, the VCR is set to the playback mode automatically. - Page 28 (RECORDING TV PROGRAMMES) Controls VCR display To view a programme while recording it You can view a programme while recording it by selecting the video programme number on your To record one programme while viewing another You can record one programme while viewing another by selecting the programme you want to view on your TV.
- Page 29 NICAM “ON/OFF” selection Controls TV Screen Press the MENU button. Press the cursor button to select the CH option, AUTO and then press the ENTER button. ANN E L NICAM – The CH PRESET display, as illustrated on the TV screen.
-
Page 30: Tape Analyzer
TAPE ANALYZER Tape Analyzer (ATRS) automatically detect the type of tape used during recording. ATRS will operate automatically if a new tape or a tape which first time used in this VCR is used for normal recording or timer recording. Tape Analyzer function “on”... -
Page 31: Timer Recording
TIMER RECORDING Your TV does not have to be on to make a recording because the VCR records TV programmes without the aid of your TV. It is only used for monitoring. Controls VCR Display Make sure that the clock shows the present time correctly. -
Page 32: Programming The Timer
(TIMER RECORDING) Programming the timer This VCR incorporates two programming procedures for timer recording. One is conventional, whereby the TV programme No., start time, stop time, recording date, etc., must be input, and the other is called VIDEO Plus+ system whereby up to 9 digits must be input. Programming the timer using VIDEO Plus+ programming system Things to know before starting programming •... - Page 33 Controls TV Screen Notes: • If you change the TV programme number by the above procedure, the TV programme number will be automatically replaced by the new programme number in subsequent programming. • Use of PlusCode programming numbers. PlusCode numbers only record programmes at the times shown in the TV guide.
- Page 34 (TIMER RECORDING) Controls TV Screen To record on a specified day at the same time OGRA each week C H02 19 : 30 20 : 00 Press the button twice. DATE 1 7/ 5 1 T H WKL "WKL" will appear next to the date on the TV AY/MONTH / YEAR SP screen.
- Page 35 Programming the timer without using VIDEO Plus+ programming system Things to know before starting programming • Turn the VCR and TV on, then set the TV to the video programme number. • While you are programming the timer, the display on the TV screen will prompt you through the procedure.
- Page 36 (TIMER RECORDING) Controls TV Screen Select the start time. OGRA For example, press for 16:00 (4:00 C H04 16 : 00 – – : – – p.m.). (0:00 for midnight and 12:00 for noon) Exit 0 0 0 0 MENU Select the stop time.
- Page 37 Controls VCR's Display Now, programming has been completed to record one event. OGRA C H04 Press the MENU button. 16 : 00 18 : 00 DATE 5 1 T H AY/MONTH / YEAR SP OPERATE DLY/WKL Exit 0 0 0 0 MENU The VCR shows the timer programme number for a few seconds.
- Page 38 (TIMER RECORDING) Recalling and clearing programmes from the VCR’s memory Controls TV screen Turn the VCR and TV on. Be sure that the TV is set to the video programme number. Press the MENU button. The OSD menu appears on the TV screen. REV I EW M DE N V I...
-
Page 39: Video Link-Recording Using Satellite Decoder Or Tv
VIDEO LINK-RECORDING USING SATELLITE DECODER OR TV “VIDEO LINK” function allows you to easily prepare the VCR to record signals from a satellite/cable decoder or TV, without setting the timer programme. This avoids the necessity of doing timer programming twice. (For the decoder and the VCR). Controls VCR's Display Connect your decoder to L2 (the blue socket... -
Page 40: Additional Operations
Section-3 Additional Operations Tape Navigation Pages 41— 47 Tape Navigation allows you to automatically locate a programme you want to view, and also to list on the TV screen the recorded contents of every tape you have recorded on this VCR. Navi Lock Pages 48 —... -
Page 41: Tape Navigation
TAPE NAVIGATION Tape Navigation Function Whenever the VCR records a programme, the Tape Navigation function stores specific information in the VCR memory. This information can be displayed on the TV screen in a directory, and used to locate either a recorded programme you want to watch or the beginning of a non-recorded section of tape. The information also includes genre marks that you can use to designate each programme in the TAPE NAVI menu. - Page 42 (TAPE NAVIGATION) Tape Navigation Operation Controls TV Screen Cassette with Tape Navigation data Insert a cassette recorded on this VCR. The VCR will check the Tape Navigation data. The TAPE NAVIGATION button will flash for a few seconds, and then change to steady light if the VCR has recognised the tape.
- Page 43 Controls TV Screen Cassette without Tape Navigation data If a cassette which was not recorded on this VCR STOP PLAY/STILL is inserted, the VCR will check the Tape Navigation TAPE 400x DRIVE data. The TAPE NAVIGATION button will flash for NAVIGATION PROG a few seconds, and the VCR will prompt you to...
- Page 44 (TAPE NAVIGATION) Searching for a programme or a non-recorded (blank) section Controls TV Screen Insert a cassette recorded on this VCR. The VCR will automatically turn on, the tape indicator will light in the VCR display, and the TAPE NAVIGATION button will flash. Press the TAPE NAVIGATION on the VCR or NAVI STOP PLAY/STILL...
- Page 45 Using TAPE NAVI MENU You can use the on-screen display menu to manage stored tape data. The TAPE NAVI MENU will allow you to: • Turn TAPE NAVI on or off. • PROGRAM LOCK on or off. • Delete tape data. •...
- Page 46 (TAPE NAVIGATION) Controls TV Screen To display stored tape number data Press the cursor button to select TAPE TAPE NAV I – LIST, and then press the ENTER button. PROGRAM LOCK – DELE E The TAPE LIST menu will appear on the TV screen. TAPE LIST Exit SELECT...
- Page 47 Caution display menu This VCR has a memory capacity of 200 programmes. If the memory is full or does not have enough free space to store any more tape data, the on-screen display will show caution messages when you start recording.
-
Page 48: Navi Lock
NAVI LOCK NAVI LOCK function prevent accidently deleting of important programmes. Notes: Tape Navi function must be set to enable Navi lock function. Program Lock function “on” / “off” Controls TV Screen Press the MENU button. Press the cursor button to select the NAVI TAPE NAV I –... - Page 49 Controls TV Screen Press the button. “ ” will appear on the left of the date at the DATE START 1 1 : 1 1 1 2SP selected programme. 1 0 : 1 2 1 0 : 1 9 The programme is locked. : 2 8 : 3 5 To lock other programmes, please follow step 3...
-
Page 50: Soap Recording
SOAP RECORDING “Soap Recording” function is an easy way to set timer programming by choosing a registered programme from Tape Navi data menu. It is convenient for serial drama. Controls TV Screen Insert a cassette recorded on this VCR. The VCR will check the Tape Navigation data. - Page 51 Controls TV Screen Press the NAVI button to go to REVIEW screen and I EW press MENU button to exit. DATE T I ME V, P 1 7 5 H 1 6 : 0 0 1 8 : 3 0 11 U ITV 2 3 : 0 0 2 3 : Exit SELECT...
-
Page 52: Movietext Tm
MOVIETEXT You can display a subtitles on the TV screen when the VCR is playing back a tape with MOVIETEXT signal. • The subtitle will disappear during forward/reverse search or slow motion play. • The subtitle may not appear correctly when a tape with scratches or a poorly recorded tape is played back. -
Page 53: Special Characteristics
SPECIAL CHARACTERISTICS Linear time counter Press the DISP button twice to select the linear time counter display. Every time the button is pressed, it changes the VCR’s display between the clock time display and time counter display. • The counter is reset to 0:00:00 when a tape is ejected. -
Page 54: Index Function
(SPECIAL CHARACTERISTICS) Index function The cassette tape may be recorded using the tape Note: An index signal is also recorded during indexing feature for the rapid location of any recording pause by pressing the PROG button to section. switch the channel to be recorded. To record using the indexing feature To locate a programme using the index feature Record as usual. -
Page 55: Menu Features
MENU FEATURES Controls TV Screen Turn the VCR and TV on, then set the TV to the video programme number. Point the remote control handset at the receiver on the front of the VCR. Press the MENU button. REV I EW M DE The menu, as illustrated, will appear on the TV N V I... - Page 56 (MENU FEATURES) OSD ( ) or (—) Press the cursor button to change the On- Screen Display setting and then press the MENU MODE button. – ( ): Whenever you change the mode, the new YZER – PROGRAM PLAY – mode is automatically displayed on the TV AUTO –...
- Page 57 PROGRAM PLAY ( ) or (—) 1. Press the cursor button to select PROGRAM PLAY. MODE 2. Press the cursor button to change the – – auto programme play setting and then press the – PLAY – AUTO – MENU button. ( ): After the timer recording has finished, the Exit SELECT...
-
Page 58: Editing - Tape Dubbing
EDITING — Tape Dubbing Video equipment for playback To Scart or DECODER socket To AUDIO IN (L), (R) To VIDEO IN STOP PLAY/STILL EJECT VIDEO LINK TAPE 400x DRIVE NAVIGATION PROG VIDEO IN L (MONO)–AUDIO IN-R Recording VCR Controls VCR Display Connect the second video equipment to this VCR as shown above. - Page 59 Controls VCR Display Press the REC button on the recording VCR and the play button on the playback VCR. To edit out unwanted material, press the PAUSE button on the recording VCR while it is recording at the appropriate time. Press the PAUSE button PAUSE again to resume recording.
-
Page 60: Satellite/Cable Box Decoder Operation
SATELLITE/CABLE BOX DECODER OPERATION Connect the Satellite/Cable Box decoder as follows. What is a Satellite/Cable Box Broadcast? The radio waves are transmitted from the broadcasting station in the same way as with an ordinary TV broadcast in the Satellite/Cable Box system, however, the radio waves are scrambled, therefore you cannot receive them or view the broadcast on the TV without unscrambling. - Page 61 To record the Satellite/Cable Box programme while viewing it 1. Turn the TV and VCR on. 2. Set the TV to the programme number for VCR (video programme number). 3. Press the buttons labeled AUX on the remote control until “L2” is showing in the VCR display. 4.
-
Page 62: Hi-Fi Sound
Hi-Fi Sound This VCR records sound using the following two formats. Hi-Fi sound Normal (mono) sound FM sound recorded using the rotary audio Records in monaural using the same format heads. as with a non-Hi-Fi VCR. Therefore, conventional VCRs can be used for playback. Remarkable Specifications of Hi-Fi Sound Frequency Range: 20 Hz to 20 kHz... -
Page 63: Subsidiary Information
Section-4 Subsidiary Information Problem Guide Page 64 Some problems you will be able to solve easily by checking a few basic items. Please follow this section before you call for help or take your VCR to your dealer. It could save your time and money. User Guide Display Page 65 Maintenance... -
Page 64: Problem Guide
PROBLEM GUIDE Sometimes problems can be solved easily by checking a few basic things. Check below before you call for help or take your unit to your dealer. No power • Check to see if the VCR is plugged into an AC mains socket. Will not record •... -
Page 65: User Guide Display
USER GUIDE DISPLAY Guide indications in VCR display The following indications appear in the VCR display to tell you the current status of your VCR. Indication When it appears Meaning and troubleshooting When programming the • The VCR clock has been set to “– – : – –”. timer Set the time and programme the timer. -
Page 66: Maintenance
MAINTENANCE 1. To maintain the optimum performance of this VCR, regular periodic maintenance is required. Your dealer will advise you further. 2. Maintenance and adjustments may not be carried out by the user. In all cases of difficulty or doubt, consult your dealer. 3. -
Page 67: Specifications
SPECIFICATIONS Format: VHS PAL Standard Recording: Rotary Two-Head Helical Scan Azimuth Recording Tape Speed: 23.39 mm/sec. — SP, 11.7mm/sec. — LP Tape Width: 12.7 mm Operation Temperature: 5°C to 40°C Video: PAL colour (system I) & CCIR monochrome signals 625 lines Recording Time: 240 min. -
Page 68: Pdc (Programme Delivery Control) Function
PDC (Programme Delivery Control) FUNCTION This VCR incorporates the PDC function. PDC function If the VCR is tuned to a TV station transmitting a PDC signal, the VCR automatically takes any delay, earliness or extension of the programme into OGRA account and can record the specified programme. -
Page 71: Warranty Letter
Please note that evidence of the date of purchase will be required before service under guarantee is carried out. This guarantee does not affect your statutory rights. In all cases of difficulty consult your HITACHI dealer. HITACHI HOME ELECTRONICS (EUROPE) LTD. -
Page 73: Some Do's And Don'ts
SOME DO’S AND DON’TS ON THE SAFE USE OF EQUIPMENT This equipment has been designed and manufactured to meet international safety standards but, like any electrical equipment, care must be taken if you are to obtain the best results and safety is to be assured. DO read the operating instructions before you attempt to use the equipment. - Page 74 ITEM N.V./ S.A. (INTERNATIONAL TRADE FOR ELECTRONIC MATERIAL & MEDIA N.V. / S.A.) UCO Tower - Bellevue, 17-B-9050 GENT BELGIUM (for BENELUX) Tel: 02 9 230 4801 Fax: 02 9 230 9680 Email: hitachi.item@skynet. be www.hitachi-consumer-eu.com QR32067 © Hitachi, Ltd. 2000 Printed in Malaysia...
-
Page 75: Quick Set Up Guide
Aerial cable for connecting this VCR and a TV Before using your Hitachi VCR for the first time, we suggest that you spend a few minutes reading these set-up instructions. Even if you never used a VCR before, you can connect it up and tune it in quickly by following this Quick Set-Up Guide. - Page 76 Connection Connect the set and cables as shown below but do not connect the VCR to the mains power supply just yet. Otherwise auto installation will not work. DECODER SET Satellite/Cable box Do not connect to the mains supply socket before Aerial connecting all leads, refer to page 3.
- Page 77 Auto Install Auto Install (Plug & Play) function This automatically tunes all broadcast channels, sets the clock and date. To operate proceed as follows; Plug the aerial lead into the VCR. Plug the aerial cable (supplied) from the VCR RF OUT into the TV aerial input.
- Page 78 Auto Install TV screen If the VCR display “ ”, press the STOP button on the VCR or on the remote control. The RF channel data will appear on the VCR display. Press STOP PLAY/STILL the PROG button to change the RF TAPE 400x DRIVE NAVIGATION...
- Page 79 Pre-Tuning the Built in Tuner Mis-Operation of Auto Install In the case of mis-operation on the Auto Install on page 3 and page 4, please follow the procedure of pre- tuning as shown below. Controls TV Screen Turn on the TV and the VCR, then tune the TV to the video programme number. If you connect the VCR and TV using a 21-pin Scart connector lead, select the 21-pin Scart input of the TV.
- Page 80 Resetting the Clock You should only need to reset the clock if Auto Set-up did not do this. If the clock has been set your VCR should now be fully operational and ready for use. Turn the VCR and TV on, then tune the TV to the video programme number.
Need help?
Do you have a question about the VT-FX960EUKN and is the answer not in the manual?
Questions and answers