Table of Contents
Advertisement
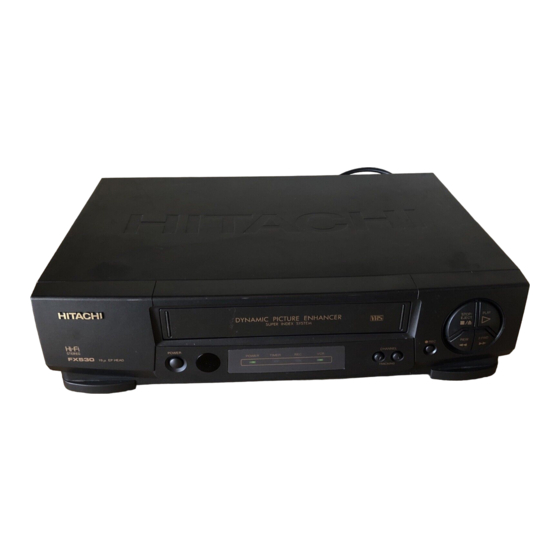
VIDEO CASSETTE RECORDER
VT-FX630A / VT-FX530A
Owner's manual
Using these quality features:
§
Super index allows you to quickly search for a program you want to view or the point from
which you want to start recording on the tape.
§
Super rewind and fast forward
§
Multi-channel TV sound (MTS).
§
8-program/1-year preset recording.
§
Auto tracking system automatically adjusts the tracking so the picture is optimized.
§
Frequency synthesized tuner provides easy, preset tuning of up to 68 broadcast TV channels
and 125 cable channels.
§
VHS Hi-Fidelity sound in playback.
§
On-screen programming guide.
Hitachi Home Electronics (America), Inc.
3890 Steve Reynolds Blvd., Norcross, GA 30093
Tel. 770-279-5600
HITACHI SALES CORPORATION OF HAWAII, INC
3219 Koapaka Street, Honolulu, Hawaii 96819
Tel. 808-836-3621
HITACHI (HSC) CANADA INC
3300 Trans Canada Highway, Pointe Claire,
Quebec, H9R 1B1, CANADA
Tel. 514-697-9150
1
Advertisement
Table of Contents

Related Manuals for Hitachi VT-FX530A


Summary of Contents for Hitachi VT-FX530A
- Page 1 On-screen programming guide. Hitachi Home Electronics (America), Inc. 3890 Steve Reynolds Blvd., Norcross, GA 30093 Tel. 770-279-5600 HITACHI SALES CORPORATION OF HAWAII, INC 3219 Koapaka Street, Honolulu, Hawaii 96819 Tel. 808-836-3621 HITACHI (HSC) CANADA INC 3300 Trans Canada Highway, Pointe Claire, Quebec, H9R 1B1, CANADA Tel.
-
Page 2: Table Of Contents
POWER SUPPLY: AC 120V, 60 Hz ONLY. The POWER button turns the VCR on and off, leaving the clock/timer unaffected. If the unit is to be left unattended for a long period, it is recommended that the unit be completely switched off and unplugged. -
Page 3: Important Safeguards
operation and maintenance of this unit has been included. Therefore, it should be read carefully in order to avoid any problems. CAUTION: TO REDUCE THE RISK OF ELECTRIC SHOCK, DO NOT REMOVE COVER (OR BACK). NO USER-SERVICEABLE PARTS INSIDE. REFER SERVICING TO QUALIFIED SERVICE PERSONNEL. WARNING: Many television programs and films are copyrighted. - Page 4 marking label. If you are not sure of the type of power supply to your home, consult your video dealer or local power company. For video products intended to operate from battery power, or other sources, refer to the operating instructions. 6 Overloading -- Do not overload wall outlets and extension cords as this can result in a risk of fire or electric shock.
- Page 5 EXAMPLE OF ANTENNA GROUNDING 13 Power Lines -- An outside antenna system should not be located in the vicinity of overhead power lines or other electric light or power circuits, or where it can fall into such power lines or circuits. When installing an outside antenna system, extreme care should be taken to keep from touching or approaching such power lines or circuits as contact with them might be fatal.
-
Page 6: Vcr Customer Controls
CHANNEL (channel up/down)/ TRACKING buttons LED Indicator POWER indicator TIMER (delayed recording) indicator REC - recording indicator VCR - operate mode indicator Accessories supplied VCR Customer Controls VCR Rear Panel Item No. AUDIO IN L, R jacks IN FROM ANT. - signal input... -
Page 7: Remote Control Customer Controls
DISP- to recall on-screen display PROGRAM (programming) button CLEAR - clears time counter REC - record button VCR, TV- Device buttons let you set the remote to control one of the two devices. VCR/TV mode select button CH (channel up/down) button F.FWD button - fast forward or search... -
Page 8: Operating In The Remote Control
Operating the VCR: 1 Make sure there is no obstacle between the remote control and VCR's infrared receiver. Infrared Receiver Note: You cannot operate the VCR if there is an obstacle (for example, coffee table, sofa, etc) between the VCR... -
Page 9: Cassette Tapes
The table shows the recording time of different cassettes. • To get the best quality picture record at standard recording speed (SP) • This VCR does not record at the LP speed, but it can play cassette that were recorded at the LP speed. •... -
Page 10: Basic Antenna Hookup [A]
Hook-up A Illustration Switch the RF Channel When the VCR is on, its video signal can come into your TV on either channel 3 or channel 4. You need to select the appropriate channel. • When the power is turned on, press the POWER button to turn it off. Press the PLAY button on front of the VCR. -
Page 11: Basic Cable Hookup [C]
• RECORD AND WATCH THE SAME CHANNEL • RECORD ONE CHANNEL AND WATCH ANOTHER Hookup C Illustration Switch the RF Channel When the VCR is on, its video signal can come into your TV on either channel 3 or channel 4. You need to select... -
Page 12: Advanced Cable Hookup -Av Hookup [D]
VCR. The POWER indicator will light up and the VCR indicator will flash. Press the CHANNEL alternates between channel 3 and channel 4. The VCR will stop flash. If within 30 seconds, the CHANNEL button not been press, the VCR will terminate the selection of RF Channel. -
Page 13: Advanced Cable Hookup -With Cable Box [F]
Switch the RF Channel When the VCR is on, its video signal can come into your TV on either channel 3 or channel 4. You need to select the appropriate channel. • When the power is turned on, press the POWER button to turn it off. Press the PLAY button on front of the VCR. -
Page 14: Advanced Cable Hookup - With Cable Box And Splitter [G]
Tips You'll need to set the clock when first hooking up your VCR, and any time the power goes out for more than 1 hour. When you first plug in the VCR or after a power outage, the clock display will read "--:--" on the TV display.. - Page 15 The main on-screen menu will appear on the TV screen. You may view all the on-screen instructions in English, French, or Spanish. When you first set up your VCR, it will be set to English. Press the (8) button for French or the (9) button for Spanish.
-
Page 16: Pre-Tuning The Vcr Tuner
For example, if today is July 8 1998, press (0)(7)(0)(8)(9)(8). The correct day of the week will appear by itself. 6 Press the GUIDE button. The VCR clock is now set, and if you press the DISP button, the correct time of the day appears on the TV screen. - Page 17 6 Press the (2) button. The VCR will automatically store channels received in your area. It takes about 2 - 3 minutes. After the channels are stored in memory, the channel with the lowest number appears in the VCR's display.
-
Page 18: When Automatic Presetting Of Channels Are Finished
7 Press GUIDE to return to regular viewing. Note: Your VCR is capable of receiving 68 broadcast TV channels (VHF 2-13, UHF 14-69) and cable channels (1-125). In some areas channels cannot be received when CATV1 is selected. In this case, select CATV2 in the receiving setup. -
Page 19: Auto Blue Setting
Remote Control Illustration. 3 Press the (3) button to select "ADD/ERASE CHANNEL". 4 Use the number buttons to select the number of the channel you want to add or erase. 5 Press the STOP button to delete the channel, or press the PLAY button to add it. 6 Press the GUIDE button to return to regular viewing. -
Page 20: Playback
Remote Control Illustration. 4 Press the (1) button to select AUTO BLUE "ON" or "OFF". The screen becomes blue and mutes sound when a channel without a broadcast signal on the VCR or a channel on which broadcasting has finished. -
Page 21: To Playback A Recorded Tape
Or, if you are hooked up with an audio/video cable, set the TV to AUX or VIDEO. 2 Insert a recorded tape. The power comes on automatically and the POWER indicator and also VCR indicator on the VCR will light up. • When a cassette without its safety tab is inserted, playback starts automatically. -
Page 22: Rewinding Or Fast Forwarding A Tape At High Speed
Movie Return If your videocassette has the safety tab removed, the VCR will stop and automatically rewind the videocassette, eject it, and turn off the power when it reaches the end of the tape or blank section of the tape which lasts for more than 30 seconds. -
Page 23: Special Playback Effects
• After 1 minute in the PAUSE mode, the VCR automatically switches to STOP mode to protect the tape. • If noise bars appear on the TV screen during the PAUSE mode, first set the VCR to the SLOW mode by... - Page 24 • The above function always work when you are viewing a video cassette even if the display, as shown, is not displayed. Frame Advance 1 Press the PAUSE button to stop the tape during playback. Remote Control Illustration. 2 Press the (6) button to view the picture one frame at a time. •...
-
Page 25: Choosing A Mode For Audio Playback
Choosing a mode for audio playback The VCR records the same audio on both the Hi-Fi and linear tracks on the tape. The Hi-Fi sound is recorded on separate left and right stereo channels. Monaural sound is recorded on the linear track. -
Page 26: Using The "Super Index" Feature
• feature*. * Each time you press the REC or REC/IRT button to start recording, the VCR will record an INDEX mark at the start of recording. The INDEX feature uses this signal recorded on tapes (VISS signal) to locate the beginning of a program you want to view. - Page 27 • To stop the index search before an index mark is reached, press the STOP button. Note: If there are no index marks on the tape, the VCR will just rewind to the beginning or fast forward to the end.
- Page 28 When the beginning of blank is located, the STOP screen will appear for five seconds and the tape will stop. • The tape remaining time appears in the VCR display. Note: Make sure that the tape is at the beginning of blank before you start recording or editing.
-
Page 29: Viewing The On-Screen Display
Remote Control Illustration. • Skipping unnecessary scenes (SKIP PLAYBACK) While playing back your tape you can skip forward by pressing the The tape will search ahead for about a minute and then resume playing. Remote Control Illustration. VIEWING THE ON-SCREEN DISPLAY •... -
Page 30: Indexing With The Time Counter
You can set the time counter to memorize a certain point in the video programming, and you can return to that point automatically. 1 Press the DISP button two or three times. The counter will appear in the VCR's display. Remote Control Illustration. 2 Begin recording or playing back a tape. -
Page 31: Recording A Program
Note: The cassette safety tab must be in place in order to record. The VCR must be hooked up properly for recording. See the Simple Hookups at the beginning of this manual. Most television programs and films are copyrighted. This means that someone has legal rights governing the reproduction and distribution of this material. - Page 32 • • • • • • • • • • • • • • • • • • • • • • • • • • • • • • • • • • • • • • • • • • • • • • • • • • • • • • • • • • • • • • • • 2 Insert a blank or erasable tape.
-
Page 33: To Watch One Program While Recording Another
• Press the PAUSE button to set the VCR to the recording pause mode. Press the button again to re-start recording. • If you stay in PAUSE mode for more than 5 minutes, the VCR automatically switches to STOP mode to protect the tape. -
Page 34: To Change The Channel Being Recorded
The REC indicator on the VCR will stop flash. Automatic Indexing Your VCR will automatically create an invisible "INDEX" mark every time you press the REC button while recording. During playback, the Index Search feature will let you move through a tape that has several recordings on it by searching for the "INDEX"... -
Page 35: Stereo Vs. Mono Sound
Stereo vs. mono sound When you select the STEREO option in the initial setup operation, your VCR records in stereo any station that broadcasts stereo sounds. When a TV channel broadcasts in stereo, you'll see a stereo indicator on the TV screen. -
Page 36: Delayed Recording
Note: The cassette safety tab must be in place in order to record. With the delayed recording feature, you can set this VCR so that it automatically turns on and records programs whenever you like - without your being around! You can record a program one time only, or you can automatically record a show every weekday or every week at the same time. - Page 37 Records a show at the same day and time every week. EXAMPLE: Set the VCR to record "one time", a program on Channel 8 that starts at 6:00 PM and ends at 6:30 PM on 7/10/98, at the EP recording speed.
- Page 38 7 Press the (2) button for PM. 8 Enter the end time by pressing (0), (6), (3) and (0) for 6:30. The VCR automatically selects PM for you. 9 Enter the recording date by pressing (0), (7), (1) and (0) for 7/10/98.
- Page 39 The TIMER (delayed recording) indicator will display on the VCR. This tells you that the VCR will automatically record at the times and dates you have programmed. Note: If a cassette has not been inserted or a cassette without safety tab has been inserted, the delayed recording indictor will flash to warn you.
-
Page 40: Program Review
Important: Your timed recording settings take effect when you turn off the power on the VCR. PROGRAM REVIEW • Reviewing what you have programmed You can look back over any of the recordings you have preset and if you need to, clear out any of the programs. -
Page 41: Using The Vcr Remote To Control Your Tv
Remote Control Illustration. 4 Press buttons corresponding to the functions available on your TV remote control. Note: This function is available on Hitachi TV. Some of Hitachi TV does not work with this remote. INTEGRATING YOUR STEREO SYSTEM WITH YOUR VCR •... -
Page 42: Copying Tapes From A Camcorder
• Make sure that "STEREO" audio is selected from the VCR Set-Up Menu, as shown on page 35, of "RECORDING OPERATIONS" section, "Stereo vs. mono sound". • Select VCR recording speed (SP or EP) as shown on page 32, of "RECORDING OPERATIONS" section, "Basic recording steps". -
Page 43: To Copy From A Camcorder
Connect the camcorder's AV output cable to the audio/video jacks on the back of your VCR. 1 Press the AVX button twice on remote control, to display LINE on the TV display. 2 Press the REC, then PAUSE buttons on the VCR remote control. The VCR will go into Record/ Pause. Remote Control Illustration. -
Page 44: Copying From One Vcr To Another Vcr (Dubbing)
COPYING FROM ONE VCR TO ANOTHER VCR (DUBBING) • Hookup If you have two VCRs, you may use one VCR to record a tape that is being played back in the other VCR. VCR to VCR Hook-up Illustration Rear Panel •... -
Page 45: Problem Guide / Maintenance
Please consult your service dealer for further information. NOTE: Dirt accumulation on the video heads will cause the playback picture to become noisy. The VCR may require the video heads to be professionally cleaned by a qualified service dealer. -
Page 46: Technical Specifications
2 AA batteries * Check your cable company's compatibility requirements. For information about how to obtain these and other HITACHI accessories, please call HiTRON, Inc. TOLL FREE at 1-800-995-4500 (in the continental United States). For ALASKA and HAWAII, please contact the nearest Hitachi Regional Office.
Need help?
Do you have a question about the VT-FX530A and is the answer not in the manual?
Questions and answers