Table of Contents
Advertisement
Quick Links
IMPORTANT SAFEGUARDS
HITACHI
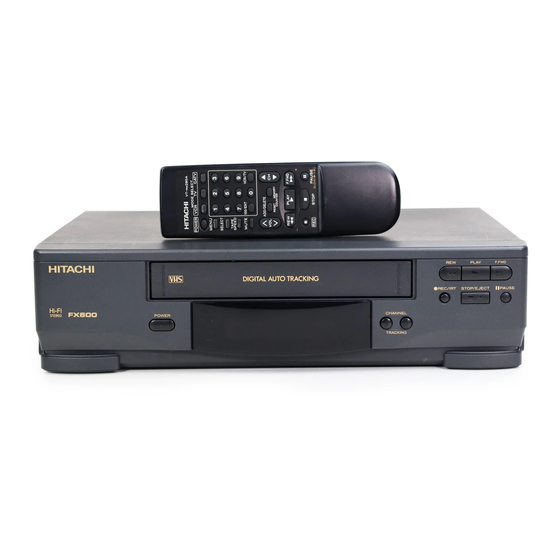
Video Deck
VT-FX600A / VT-FX600C
Owner's Manual
Your Complete Guide
to Videocassette Viewing
and Recording
Using these quality features:
Hi-Fi System
Rotary 4-head Record/Playback System
Bilingual on-screen menu display selectable in English or Spanish
Infrared remote control
Real time tape counter
181 channel capability PLL frequency synthesizer tuner with direct station call
Auto power on and off system
Auto counter reset
Auto rewind when the end of a tape is reached
Direct Button Operation
2 Step Picture Search Operation
Still
Digital Auto Tracking (DTR)
Auto Repeat
Rental Play Mode
Three different tape speeds (SP/LP/SLP)
IRT (Instant Recording Timer)
1 Year, 7 events (including Daily and Weekly Timer Recording)
Auto Return
Time Search / Blank Search / Index Search / Edit Search
Just-In-Time Recording
Remaining Tape Running Time Display
Slow Motion
Hitachi Home Electronics (America), Inc.
3890 Steve Reynolds Blvd., Norcross, GA 30093
Tel. 770-279-5600
HITACHI SALES CORPORATION OF HAWAII, INC
3219 Koapaka Street, Honolulu, Hawaii 96819
Tel. 808-836-3621
QR15334 ©Hitachi, Ltd. 1996
HITACHI (HSC) CANADA INC
3300 Trans Canada Highway, Pointe Claire,
Quebec, H9R 1B1, CANADA
Tel. 514-697-9150
Printed in Hong Kong
- 1 -
Advertisement
Table of Contents

Related Manuals for Hitachi VT-FX600A, VT-FX600C


Summary of Contents for Hitachi VT-FX600A, VT-FX600C
- Page 1 Remaining Tape Running Time Display Slow Motion Hitachi Home Electronics (America), Inc. 3890 Steve Reynolds Blvd., Norcross, GA 30093 Tel. 770-279-5600 HITACHI SALES CORPORATION OF HAWAII, INC 3219 Koapaka Street, Honolulu, Hawaii 96819 Tel. 808-836-3621 QR15334 ©Hitachi, Ltd. 1996 HITACHI (HSC) CANADA INC...
-
Page 2: Table Of Contents
IMPORTANT SAFEGUARDS IMPORTANT SAFEGUARDS... 4 PRECAUTIONS ... 5 LOCATION ... 6 POWER SUPPLY... 6 AVOID THE HAZARDS OF ELECTRICAL SHOCK AND FIRE ... 6 WARNING... 6 FEATURES... 7 VIDEO CASSETTE TAPE... 7 PRECAUTIONS ... 8 THREE DIFFERENT TAPE SPEEDS... 8 INSERTING A CASSETTE ... - Page 3 REMAINING TAPE RUNNING TIME DISPLAY ... 39 COPYING A VIDEO TAPE ... 39 TO MONITOR THE RECORDING... 40 CONTROLLING YOUR TV WITH THE VCR'S REMOTE ... 40 REMOTE CONTROL OF THE TV ... 40 PROGRAMMING THE REMOTE CONTROL OF THE TV... 40 CONTROLLING THE TV...
-
Page 4: Important Safeguards
IMPORTANT SAFEGUARDS - 4 - THIS SYMBOL INDICATES THAT DANGEROUS VOLTAGE CONSTITUTING A RISK OF ELECTRIC SHOCK IS PRESENT WITHIN THIS UNIT. THIS SYMBOL INDICATES THAT THERE ARE IMPORTANT OPERATING AND MAINTENANCE INSTRUCTIONS IN THE LITERATURE ACCOMPANYING THE APPLIANCE. The caution marking is located on the rear of the cabinet. IMPORTANT SAFEGUARDS 1. -
Page 5: Precautions
13. Outdoor Antenna Grounding-If an outside antenna or cable system is connected to the VCR, be sure the antenna or cable system is grounded so as to provide some protection against voltage surges and built-up static charges. -
Page 6: Location
Moisture condensation may occur inside the unit when it is moved from a cold place to a warm place, or after heating a cold room or under conditions of high humidity. Do not use the VCR at least for 2 hours until its inside is dry. -
Page 7: Features
• Auto rewind when the end of a tape is reached- (not in the case of timer recording). • Direct Button Operation- When a tape is in the VCR and the power is off, just press PLAY, REW or F.FWD button on the main unit and it will automatically turn on the VCR and playback, rewinding or fast-forwarding will start immediately (not in the case of timer recording). -
Page 8: Precautions
• Avoid moisture, which can condense on the tape if it is moved from a cold place to a warm place. Before using a tape with these conditions, to avoid damage to the tape and your VCR, wait until the tape has warmed to room temperature and the moisture has evaporated. -
Page 9: Operating Controls And Functions
Tracking function- Press to minimize video 'noise' (lines or dots on screen) during playback. (only the VCR) Press to stabilize the picture in the Still mode when the picture begins to vibrate vertically. -
Page 10: Preparation For Use
27. VIDEO IN jack- Connect to a video output jack of your video camera or another VCR. 28. CH3/CH4 selector switch- Use to select a video output channel (3 or 4) for playback from the VCR. 29. ANT. OUT terminal- Connect to an antenna input terminal of your TV. -
Page 11: Setting A Video Channel
TV will receive the signals from the VCR on either channel 3 or 4. To use the VCR with your TV, set the selector switch to CH3 or CH4, whichever is not used or least used for normal broadcasts in your area. Then set your TV to that same channel. -
Page 12: Mts (Multi-Channel Television Sound) System
Connect your VCR to your stereo source using the following diagram. CHECKING THE SELECTED MTS MODE When you receive a signal from a tape or VCR tuner channel you are watching, the status shown below will appear when you press the SELECT button on the remote control. -
Page 13: Mts Recording/Monitor Mode
Make sure... • VCR power must be turned on. • Turn on the TV and set the TV channel to the same video output channel as located on the back of the VCR. (CH 3 or 4) • Press VCR/TV button on the remote control so that "VCR" appears on the display. -
Page 14: To Select Mono Mode
You can change the selection to "MONO" if you want to listen to HIFI tapes in normal audio playback. 1) Press MENU button. 2) Press CH button repeatedly to point to "VCR SET UP". Then, press SELECT button. 3) Press CH button repeatedly to point to "AUDIO OUT". Then, press SELECT button. -
Page 15: Preset For Use
AUTOMATIC CHANNEL PRESET (Without a Cable Box) NOTES: • Follow the steps below once. Repeat it only if there is a power failure or the VCR is unplugged for more than 30 seconds. (In these cases, the programmed channels are erased.) •... - Page 16 - 16 - 2 Select channel 3 or 4 on the TV Turn on the TV and set the TV channel to the same video output channel as located on the back of the VCR. (CH3 or 4) 3 Turn on the VCR Press the POWER button to turn on the VCR.
-
Page 17: To Recall A Desired Channel
Make sure... • VCR power must be turned on. • Turn on the TV and set the TV channel to the same video output channel as located on the back of the VCR. (CH 3 or 4) • Press VCR/TV button on the remote control so that "VCR" appears on the display. -
Page 18: Channel Preset Again
PRESET FOR USE - 18 - 5 Enter the desired channel number Press the number buttons or CH button repeatedly until your desired channel number appears. (Example: CH02) 6 Delete it from memory Press ADD/DELETE button so that "DELETE" flashes on the TV screen. •... -
Page 19: Setting The Clock
Make sure... • VCR power must be turned on. • Turn on the TV and set the TV channel to the same video output channel as located on the back of the VCR. (CH 3 or 4) • Press VCR/TV button on the remote control so that "VCR" appears on the display. - Page 20 PRESET FOR USE Make sure... • If you did not set your desired digit within 2 seconds after pressing CH the input mode will forward to next step. • When you press SELECT button after pressing CH next step. • Press ADD/DELETE button to go back one step from current step during steps [5] to [9]. 4 Select the month Press CH button repeatedly until your desired month appears.
-
Page 21: To Change Clock Setting
PRESET FOR USE 9 Select "AM" or "PM" Press CH button repeatedly to point to "AM" or "PM". (Example: PM) 10 Start the clock Press MENU or SELECT button. Although seconds are not displayed, they begin counting from 00 when you press MENU or SELECT button. Use this feature to synchronize the clock with the correct time. -
Page 22: On Screen Display
ON SCREEN DISPLAY - 22 - 3 Select "LANGUAGE SELECT" Press CH button repeatedly to point to "LANGUAGE SELECT". Then, press SELECT button. 4 Select "ENGLISH" or "ESPANOL" Select "ENGLISH" or "ESPANOL=Spanish" using CH/SET button. 5 Exit the Language select Press MENU button to return to TV mode. -
Page 23: Normal Playback
NORMAL PLAYBACK Make sure... • Turn on the TV and set the TV channel to the same video output channel as located on the back of the VCR. (CH 3 or 4) • Press VCR/TV button on the remote control so that "VCR" appears on the display. -
Page 24: Special Play Back
Make sure... • VCR power must be turned on. • Turn on the TV and set the TV channel to the same video output channel as located on the back of the VCR. (CH 3 or 4) • Press VCR/TV button on the remote control so that "VCR" appears on the display. -
Page 25: To Stop Playback
• Once you select the repeat play mode, it stays in effect even after you turn off the VCR. • When the Counter Memory is activated, the tape will rewind to 0:00:00 and the VCR will be in the Stop mode. -
Page 26: To Stop Playback
Make sure... • VCR power must be turned on. • Turn on the TV and set the TV channel to the same video output channel as located on the back of the VCR. (CH 3 or 4) • Press VCR/TV button on the remote control so that "VCR" appears on the display. -
Page 27: To Exit The Counter Memory
SEARCH 4 Begin recording or playback Press REC or PLAY button. Press STOP button when recording or playback is completed. 5 To activate the Counter Memory Press REW (or F.FWD) button. The tape will automatically stop when the counter returns to 0:00:00 (approx.) TO EXIT THE COUNTER MEMORY When the counter appears on the TV screen, press COUNTER MEMORY button once and then the SELECT button twice so that the "M"... -
Page 28: Index Search
SEARCH 5 Begin Time Search Press REW or F.FWD button. The VCR begins rewinding or fast forwarding to the specified point. The time counts down as the searching progresses. 6 After Time Search When 0:00 is reached, the VCR will start playback automatically. -
Page 29: Blank Search
3 programs) 5 Begin Index Search Press REW or F.FWD button. The VCR begins rewinding or fast forwarding to the beginning of desired program. Note: Every time an index signal is skipped, the number in the program indicator decreases by one. -
Page 30: Recording
Make sure... • VCR power must be turned on. • Turn on the TV and set the TV channel to the same video output channel as located on the back of the VCR. (CH 3 or 4) • Press VCR/TV button on the remote control so that "VCR" appears on the display. -
Page 31: Edit Search
Press VCR/TV button on the remote control to select TV so that the "VCR" appears on the display 2 Select channel 3 or 4 on the TV Turn on the TV and set the TV channel to the same video output channel as located on the back of the VCR. (CH3 or 4) -
Page 32: Irt (Instant Recording Timer)
Make sure... • VCR Power must be turned on. • Turn on the TV and set the TV channel to the same video output channel as located on the back of the VCR. (CH3 or 4) • Press VCR/TV button on the remote control so that "VCR" appears on the display. -
Page 33: Timer Recording
Make sure... • VCR Power must be turned on. • Turn on the TV and set the TV channel to the same video output channel as located on the back of the VCR. (CH3 or 4) • Press VCR/TV button on the remote control so that "VCR" appears on the display. - Page 34 TIMER RECORDING NOTE: If you have not yet set the clock, "SETTING CLOCK" appears. If so, follow the steps [4] to [10] on pages 14, 15. Then, set the timer recording. 3 Select your desired program number (1 ~ 7) Program number which is not set up flashes.
- Page 35 Press MENU button. Program 1 is now completed. To set another program, repeat steps [1] to [10]. 11 Set the timer Press POWER button. This turns the VCR power off, and the " of all programmed events are displayed with current time. - 35 -...
-
Page 36: To Correct An Automatic Timer Program
You may cancel the entire program by pressing ADD/DELETE button. HINTS FOR TIMER RECORDING • If there is a power failure or the VCR is unplugged for more than 30 seconds, the clock setting and all timer settings are lost. -
Page 37: Watch The Recorded Program
Press POWER button to turn on the VCR. Then, press PLAY button. JUST-IN TIME RECORDING This function allows you to fully utilize the available tape length for timer recording. The VCR calculates the remaining tape amount and then adjusts the tape speed from SP to SLP as needed. -
Page 38: Setting The Remaining Time
Make sure... • VCR power must be turned on. • Turn on the TV and set the TV channel to the same video output channel as located on the back of the VCR. (CH3 or 4) • Press VCR/TV button on the remote control so that "VCR" appears on the display. -
Page 39: Remaining Tape Running Time Display
EXAMPLE: The editing (recording) VCR is this unit. The source (playing) VCR is another VCR. NOTE: When you connect the monaural VCR to this VCR, connect the Audio output jack of the monaural VCR to the AUDIO IN L jack of this VCR. The audio signal will be recorded both L and R channel equally. -
Page 40: To Monitor The Recording
CONTROLLING YOUR TV WITH THE VCR'S REMOTE This Hitachi remote control can be used with your TV as well as the VCR, as long as your TV comes with a remote control. This feature comes in handy--you won't have to juggle two remotes. -
Page 41: Controlling The Tv
REMOTE CONTROL OF THE CABLE CONVERTER If you have a cable converter, you will probably want to program your VCR's remote control so you can easily change channels. The process is the same as for programming the remote to operate your TV. For additional details, see the previous page. -
Page 42: Maintenance
SERVICING Should your VCR become inoperative, do not try to correct the problem by yourself. There are no user-servicable parts inside. Turn off, unplug the power cord, and take the unit to Hitachi Authorized Service Center for servicing. CABINET CLEANING •... -
Page 43: Head Cleaning
1. Please visit your local Audio/Video store and purchase a good quality VHS Video Head Cleaner. 2. If a Video Head Cleaner does not solve the problem, consult the nearest Hitachi Authorized Service Center. Professional video head cleaning requires highly technical attention.
Need help?
Do you have a question about the VT-FX600A, VT-FX600C and is the answer not in the manual?
Questions and answers