
Related Manuals for Elo TouchSystems Entuitive 1767L Series


Summary of Contents for Elo TouchSystems Entuitive 1767L Series
- Page 1 ELO Entuitive Touchmonitor User Guide For 17" LCD Modular Kiosk Touchmonitors 1747L/1767L Series Revision A...
-
Page 2: User Guide
Elo Entuitive Touchmonitor User Guide 1 " LCD Touchmonitor Series Revision P/N 008559 Elo TouchSystems, Inc. 1-800-ELOTOUCH www.elotouch.com... -
Page 4: Trademark Acknowledgments
Elo TouchSystems. Disclaimer The information in this document is subject to change without notice. Elo TouchSystems makes no representations or warranties with respect to the contents hereof, and specifically disclaims any implied warranties of merchantability or fitness for a particular purpose. Elo TouchSystems reserves the right to revise this publication and to make changes from time to time in the content hereof without obligation of Elo TouchSystems to notify any person of such revisions or changes. -
Page 6: Table Of Contents
Table of Contents Chapter 1 Introduction Precautions ....1 About the Product ....1 Chapter 2 Installation and Setup Unpacking Your Touchmonitor . -
Page 8: Introduction
Congratulations on your purchase of an Elo TouchSystems Entuitive touchmonitor. Your new touchmonitor combines the reliable performance of Elo’s touch technology with the latest advances in LCD display design. This combination of features creates a natural flow of information between a user and your touchmonitor. - Page 9 Spanish, Italian and Japanese • Serial or USB touch interface (USB requires Windows 98, 2000, Me and XP.) • Patented touch technology of Elo TouchSystems • VESA DDC 1/2B data communication • VESA DPMS power saving • Cable management device •...
-
Page 10: Installation And Setup
This chapter discusses how to install your LCD touchmonitor and how to install Elo TouchSystems driver software. Unpacking Your Touchmonitor Check that the following 10 items are present and in good condition: LCD Display Software User Guide-on CD, Quick Install Guide and software CD... -
Page 11: Product Overview
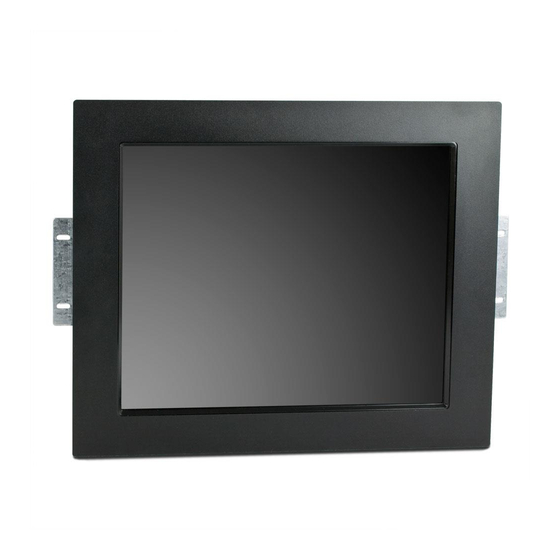
Product Overview Main Unit 1767L Front-Mount Rear View 1767L Bottom View (1747L shown) See Detail A E l o E n t u i t i v e T o u c h m o n i t o r U s e r G u i d e 1747L Rear-Mount 1747L POWER... -
Page 12: Side View
Attaching the L-Brackets Depending on your mounting scheme, use the L-brackets or the VESA 75/100mm standard holes located on the back of the kiosk monitor or the 5.5 diameter holes (only on rear mount). See page 15 for VESA mounting information. You will need a screwdriver to attach the L-brackets. -
Page 13: Panel Cut Out
Panel Cut Outs 1747L Option 1 E l o E n t u i t i v e T o u c h m o n i t o r U s e r G u i d e... -
Page 14: 1747L Option 2
1747L Option 2... -
Page 15: 1747L Option 3
1747L Option 3 E l o E n t u i t i v e T o u c h m o n i t o r U s e r G u i d e... -
Page 16: 1767L Option 1
1767L Option 1... -
Page 17: 1767L Option 2
1767L Option 2 2-10 E l o E n t u i t i v e T o u c h m o n i t o r U s e r G u i d e... -
Page 18: Touch Interference Connection
Yo ur touchmonitor comes with one of the following touchscreen connector cables: Serial (RS-232) cable or USB cable. (For Windows 98, 2000, Me and XP systems only.) To set up this display, please refer to the following figures and procedures: The following illustrations guide you step by step in connecting your touchmonitor using a serial or USB cable connection Before connecting the cables to your touchmonitor and PC, be sure that the computer... -
Page 19: Step 1-Connecting The Video Cable
• Connect the 15-pin video cable (the ferrite bead end) to the video port on your PC. • Connect the other end of the video cable to the video connector on your touchmonitor. • Secure the cable to your touchmonitor and PC by turning the screws on the connector clockwise. -
Page 20: Step 2-Connecting The Serial Or Usb Touchscreen Cable
USB CONNECTOR FEMALE 9-PIN SERIAL TOUCHSCREEN CONNECTOR CONNECTORS ON THE UNDERSIDE • Connect the female end of the serial (RS-232) cable to the serial port on your PC, or connect the USB touchscreen cable to the USB touchscreen connector on the back of your touchmonitor. •... -
Page 21: Connecting The Osd Remote Cable
OSD Remote CONNECTIONS ON UNDERSIDE • Connect the 6-pin Remote OSD DIN cable to the black Remote OSD port of the monitor. 2-14 E l o E n t u i t i v e T o u c h m o n i t o r U s e r G u i d e... -
Page 22: Step 4-Connecting The Power Cable
POWER CONNECTIONS ON UNDERSIDE Depending on where you live, you will use either the European or US/Canadian power cable. • Connect the female end of the power cable to the Connect the Brick power cable into the power port on the touchmonitor. •... -
Page 23: Optimizing The Lcd Display
Optimizing the LCD Display To ensure the LCD display works well with your computer, configure the display mode of your graphic card to make it less than or equal to 1024 x 768 resolution, and make sure the timing of the display mode is compatible with the LCD display. -
Page 24: Vesa Mounting Interface
VESA Mounting Interface Your monitor has standard VESA mounting holes on the rear of the unit. The holes are spaced at 75mm and 100mm standard. The following companies provide VESA mounting devices compatible with your touchmonitor: Ergotron 800-888-8458 651-681-7600 www.ergotron.com 800-228-2555 707-773-1100 www.gcx.com... -
Page 25: Installing The Drive Software
Installing the Driver Software Elo TouchSystems provides driver software that allows your touchmonitor to work with your computer. Drivers are located on the enclosed CD-ROM for the following operating systems: • Windows XP • Windows 2000 • Windows Me • Windows 98 •... -
Page 26: Installing The Serial Touch Driver
Installing the Serial Touch Driver Installing the Serial Touch Driver for For Windows 2000 and NT 4.0 you must have administrator access rights to install the driver. Insert the Elo CD-ROM in your computer’s CD-ROM drive. If the AutoStart feature for your CD-ROM drive is active, the system automatically detects the CD and starts the setup program. -
Page 27: Installing The Serial Touch Driver For Ms-Dos And Windows 3.1
Installing the Serial Touch Driver for MS-DOS and Windows 3.1 You must have a DOS mouse driver (MOUSE.COM) installed for your mouse if you wish to continue using your mouse along with your touchmonitor in DOS. To install Windows 3.x and MS-DOS from Windows 95/98, follow the directions below: Insert the Elo CD-ROM in your computer’s CD-ROM drive. -
Page 28: Installing The Usb Touch Driver
Browse to select the \EloUSB directory on the Elo CD-ROM. CD-ROM. Choose Next. Once the Elo TouchSystems USB touchscreen driver has been Choose Next. Once the Elo TouchSystems USB touchscreen driver has been detected, choose Next again. - Page 29 2-22 E l o E n t u i t i v e T o u c h m o n i t o r U s e r G u i d e...
-
Page 30: Chapter 3 Operation
About Touchmonitor Adjustments Your touchmonitor will unlikely require adjustment. Variations in video output and application may require adjustments to your touchmonitor to optimize the quality of the display. For best performance, your touchmonitor should be operating in native resolution, that is 1280 x 1024 at 80k-75 Hz. Use the Display control panel in Windows to choose 1280 x 1024 resolution. -
Page 31: Remote Osd Buttons
AUTO/SEL DOWN AUTO/SEL DOWN MENU Down AUTO/SEL 3-24 E l o E n t u i t i v e T o u c h m o n i t o r U s e r G u i d e MENU MENU Control... -
Page 32: Osd Menu Function
CONTRAST ANALOG CONTRAST AUTO CONTRAST Function Symbol P r o c e s s Contrast Analog Contrast Auto Contrast Brightness Left/Right Up/Down Recall defaults Color Temperature options for R/G/B (red, green and blue foreground) using the OSD direction button. Select and specify the desired value by using the OSD button. specifically Down option... -
Page 33: Additional Color Setting
Information DSUB Analog/ DVI Digital Clock Phase Additional Color Settings SATURATION FLESH TONE OSD Left/Right OSD Up/Down OSD Timeout Auto Adjust Language 3-26 E l o E n t u i t i v e T o u c h m o n i t o r U s e r G u i d e intensity tint Adjusts the color so faces appear natural. -
Page 34: Chapter 4 Trouble Shooting
If you are experiencing trouble with your touchmonitor, refer to the following table. If the problem persists, please contact your local dealer or our service center. Solutions to Common Problems Problem No image appears on screen. “Out of Range” display OSD/Power buttons don't respond ROUBLESHOOTING HAPTER... -
Page 35: Image, Scrolling
Image has vertical flickering line bars. Image is unstable and flickering Image is scrolling Touch doesn’t work 4-28 E l o E n t u i t i v e T o u c h m o n i t o r U s e r G u i d e Use “Phase”... -
Page 36: Appendix A Native Resolution
The native resolution of a monitor is the resolution level at which the LCD panel is designed to perform best. For the Elo LCD touchmonitor, the native resolution is 1280 x 1024 for the SXGA-17 inch size. In almost all cases, screen images look best when viewed at their native resolution. - Page 37 As an example, a SVGA resolution LCD panel has 800 pixels horizontally by 600 pixels vertically. Input video is also represented by the same terms. XGA input video has a format of 1024 pixels horizontally by 768 pixels vertically. When the input pixels contained in the video input format match the native resolution of the panel, there is a one to one correspondence of mapping of input video pixels to LCD pixels.
-
Page 38: Appendix B Touchmonitor Safety
Do not use a damaged power cord. Use only the power cord that comes with your Elo TouchSystems Touchmonitor. Use of an unauthorized power cord may invalidate your warranty. -
Page 39: Care And Handling Of Your Touchmonitor
Care and Handling of Your Touchmonitor The following tips will help keep your Elo Entuitive touchmonitor functioning at the optimal level. • To avoid risk of electric shock, do not disassemble the brick supply or display unit cabinet. The unit is not user serviceable. Remember to unplug the display unit from the power outlet before cleaning. -
Page 40: Compatible Video Modes
You r Elo Entuitive touchmonitor is compatible with the following standard video modes: Mode Resolution 720 x 400 640 x 480 640 x 480 VESA 640 x 480 VESA 640 x 480 VESA 800 x 600 VESA 800 x 600 VESA 800 x 600 VESA... -
Page 41: Touchmonitor Specifications
Touchmonitor Specifications Table C.1 17" LCD Touchmonitor (ET17X7L-XXWB-1) Specifications Active matrix, thin film transistor Display Type (TFT), liquid crystal display 17-inch diagonal Size 337.920 x 270.336 mm useful screen area 1280 x 1024 Pixel Format 0.125-inch IntelliTouch and Touchscreen AccuTouch, anti-glare IntelliTouch or AccuTouch 16 million with dithering Colors... -
Page 42: Electrical Safety Information
Table C.2 IntelliTouch Touchmonitor Specifications Mechanical Positional Accuracy Touchpoint Density Touch Activation Force Surface Durability Expected Life Performance Sealing Optical Light Transmission (per ASTM D1003) Visual Resolution Gloss (per ASTM D2457 using a 60- degree gloss meter) Standard deviation of error is less than 0.080 in. (2.03 mm). Equates to less than ±1%. -
Page 43: Chemical Resistance, Intellitouch
Environmental Chemical Resistance Electrostatic Protection (per EN 61 000-4-2, 1995) C-36 E l o E n t u i t i v e T o u c h m o n i t o r U s e r G u i d e The active area of the touchscreen is resistant to all chemicals that do not affect glass, such as: Acetone... -
Page 44: Accutouch Touchmonitor Specifications
Table C.3 AccuTouch Touchmonitor Specifications Mechanical Construction Positional Accuracy Touchpoint Density Touch Activation Force Surface Durability Expected Life Performance Optical Light Transmission (per ASTM D1003) Visual Resolution Haze (per ASTM D1003) Gloss (per ASTM D2457) Top: Polyester with outside hard-surface coating with clear or antiglare finish. -
Page 45: Side View
767L 747L Side View C-38 E l o E n t u i t i v e T o u c h m o n i t o r U s e r G u i d e... -
Page 46: Regulatory Information
EGULATORY HAPTER I. Electrical Safety Information: A) Compliance is required with respect to the voltage, frequency, and current requirements indicated on the manufacturer’s label. Connection to a different power source than those specified herein will likely result in improper operation, damage to the equipment or pose a fire hazard if the limitations are not followed. - Page 47 E l o E n t u i t i v e T o u c h m o n i t o r U s e r G u i d e This Information Technology Equipment (ITE) is required to have a CE Mark on the manufacturer’s label which means that the equipment has been tested to the following Directives and Standards: This equipment has been tested to the requirements for the CE Mark as...
- Page 48 BAUART GEPRÜFT TÜV TYPE RheinLand Product Safety APPROVED E141667 Tested To Comply With FCC Standards FOR HOME OR OFFICE USE "This application of this monitor is restricted to special controlled luminous environment. This screen surface trend to reflect annoying light of lamps and sunlight. To avoid these reflections the monitor should not be positioned in front of a window or directed to luminaries.
- Page 49 E l o E n t u i t i v e T o u c h m o n i t o r U s e r G u i d e...
-
Page 50: Warranty
ARRANTY HAPTER Except as otherwise stated herein or in an order acknowledgment delivered to Buyer, Seller warrants to Buyer that the Product shall be free of defects in materials and workmanship. The warranty for the touchmonitors and components of the product are: 3 years monitor, 10 years IntelliTouch screen, 5 years Accu- Touch screen, 5 years Controller. - Page 51 THESE REMEDIES SHALL BE THE BUYER’S EXCLUSIVE REMEDIES FOR BREACH OF WARRANTY. EXCEPT FOR THE EXPRESS WARRANTY SET FORTH ABOVE, SELLER GRANTS NO OTHER WARRANTIES, EXPRESS OR IMPLIED BY STATUTE OR OTHERWISE, REGARDING THE PRODUCTS, THEIR FITNESS FOR ANY PURPOSE, THEIR QUALITY, THEIR MERCHANTABILITY, THEIR NONINFRINGEMENT, OR OTHERWISE.
-
Page 52: Installing The Usb Touch Driver For Windows Xp, 2000, Me And
Numerics 17" LCD Touchmonitor (ET17X7L-XXWB-X) Dimensions, 38 17" LCD Touchmonitor (ET17X7L-XXWB-X) Specifications, 34 About the Product, 1 About Touchmonitor Adjustments, 23 VESA Mounting Interface, 17 AccuTouch Touchmonitor Specifications, 37 Additional Color setting, 26 Agencies, 34 Analog Contrast, 25 Analog Adjust, 26 Attaching the L-Brackets, 5 Auto Contrast, 25 Back-light Lamp Life, 34... - Page 53 Operation, 23 Optical, AccuTouch, 37 Optical, IntelliTouch, 35 Optimizing the LCD Display, 16 OSD Left/Right, 26 OSD Menu Function, 25 OSD Timeout, 26 OSD Up/Down, 26 OSD Power, Respond, 27 Out of Range display, 27 Panel Cut Outs, 6 , 26 Phase Pixel Format, 34 Positional Accuracy, AccuTouch, 37...
-
Page 54: Product Information
To find out more about Elo’s extensive range of touch solutions, visit our Web site at www.elotouch.com or simply call the office nearest you: Germany Elo TouchSystems, Inc. Elo TouchSystems GmbH & Co. KG 6500 Kaiser Drive Haidgraben 6 Fremont, CA 94555-3613...
Need help?
Do you have a question about the Entuitive 1767L Series and is the answer not in the manual?
Questions and answers