
Related Manuals for Fusion CA-CD800


Summary of Contents for Fusion CA-CD800
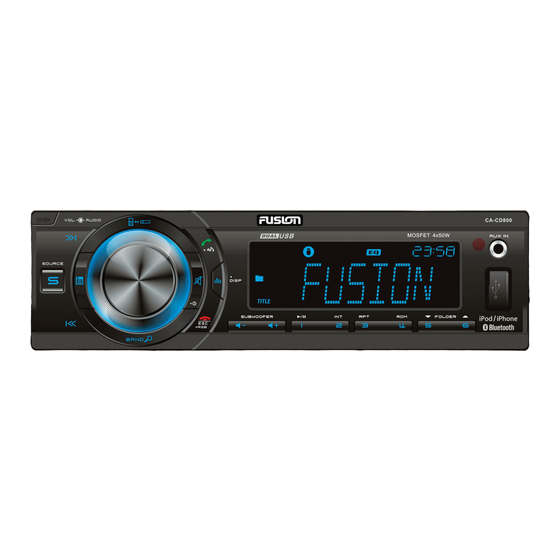
- Page 1 INSTRUCTION MANUAL MODEL: CA-CD800 A2DP Bluetooth AM/FM/CD/MP3/WMA/SD/USB/AUX/iPod/iPhone Receiver...
-
Page 2: Table Of Contents
CONTENTS Precautions & Maintenance Quick Start Guide Dashboard Installation Connecting the System Removal / Re-Attachment of the Face Basic Operations Audio Functions System Menu Radio Operation RDS Operation iPod / iPhone Operation Bluetooth H/F & A2DP Operation Media Playback (CD/USB/SD/Aux In) Additional Media Playback Functions Steering Wheel Control Interface Ready FCC COMPLIANCE STATEMENT... -
Page 3: Quick Start Guide P3
PRECAUTIONS & QUICK START GUIDE MAINTENANCE TUNER REGION SETTING GENERAL When the unit is powered up for the first time (or the battery is disconnected or runs flat), you will need to set • When cleaning the vehicle, do not get water or cleaning your tuner region. -
Page 4: Dashboard Installation P4
2. Search for a new Bluetooth device on the phone. If you have any questions or require information regarding 3. Select “FUSION” on the Bluetooth device list. installation kits, consult your car audio retailer. 4. Some devices may require you to enter a PIN. -
Page 5: Connecting The System P5
CONNECTING THE SYSTEM WIRING DIAGRAM... -
Page 6: Removal / Re-Attachment Of The Face P6
REMOVAL/RE-A TT ACHMENT BASIC OPERA TIONS OF THE FACE 1. Press the Panel OPEN button. 2. After flipping down the front panel, push it to the right (A), then draw the left of the front panel outwards (B) 3. To re-attach the face, please complete the above steps in reverse. 1. - Page 7 a) Press this button to answer an incoming call. c) RGB – 32K+ RGB COLOUR. Press and hold this button to access the 32k+ variable colour setting mode. See Page 9 for more b) Press & hold for 2 seconds to transfer the call from the information CA-CD800 back to the Mobile Phone.
-
Page 8: Audio Functions P8
AUDIO FUNCTIONS MID CFQ Select the Midrange centre frequency: 0.5K / 1.0K / 1.5K / 2.5KHz All Audio functions are easily accessable on the CA-CD800. Adjust the Treble level between -7 to +7. AUDIO MENU. Press the ENCODER VOLUME CONTROL TRE CFQ Select the Treble centre frequency: 10.0K / to access the Audio Menu mode. -
Page 9: System Menu P9
SYSTEM MENU LOC* ON/OFF (Local/Distance). Use this setting to Auto Seek to strong Press (MENU) to access the System Menu and press local stations (Local) or all stations regardless of their again to select the item be adjusted, then rotate Encoder strength (Distance). -
Page 10: Radio Operation P10
COLOUR SCAN (default setting); WHITE; GREEN 1; GREEN UP or DOWN button, and press it again repeatedly until you select 2; GREEN 3; AMBER; PINK 1; PINK 2; PURPLE 1; PURPLE your desired frequency. After 5 seconds, the display will stop 2;... -
Page 11: Ipod / Iphone Operation P11
(AF) SELECT ALTERNATE FREQUENCIES iPod/iPhone OPERA TION If the radio signal from the current station is poor, you can turn This unit is equipped with iPod/iPhone control which on the AF (Alternate Frequency) function to let the unit search allows you to directly control and charge iPod/iPhones automatically for another station with a stronger signal but with using the units controls –... - Page 12 BASIC SEARCH – PLAYLIST/ARTIST/ALBUM/SONG on 2. Rotate the Encoder Volume knob to select the desired iPod/iPhone selection within the field then, press ENTER to confirm. Press BAND NOTE to browse the iPod/iPhone menu. When searching for Album, Artist, Song etc, rotate the Encoder Then rotate the Encoder Volume Control clockwise to and Volume Control clockwise to search from A-Z or anti-clockwise press ENTER to choose one of the following selections,...
- Page 13 [PHONE IN] will be shown on the Display along with the Caller ID if it is enabled by the 3. Select “FUSION” on the Bluetooth device list. Phone/Carrier. 4. Some devices may require you to enter a PIN. If prompted, enter “0000”...
- Page 14 TO REDIAL A NUMBER ADVANCED OPERATION 1. During normal head unit operation, press the ANSWER If the device also supports Audio Video Remote Control button to call the last number dialled by the paired mobile Profile (AVRCP), you can control basic playback functions phone.
-
Page 15: Media Playback (Cd/Usb/Sd/Aux In) P15
1. Press MENU to enter the system menu. USB OPERATION Keep pressing until [CONNECT>] is displayed. Insert the USB Device 2. Press ENTER on the Encoder Volume Control. 1. Open the cover marked on the front panel. [WAITING] will be displayed on the LCD display, followed 2. -
Page 16: Additional Media Playback Functions P16
ADDITIONAL MEDIA 3. Insert the SD card into the slot with label facing up until a “CLICK” sound is heard. PLAYBACK FUNCTIONS 4. Replace the front panel and the unit will start playing (CD/USB/SD) files from the card automatically. PLAY OPTIONS Removal of the SD Card MP3/WMA File or Folder Search Detach the face and press the card until you hear a click... -
Page 17: Steering Wheel Control Interface Ready P17
3) to repeat all tracks on the storage media. [RPT ALL] is DISPLAY FUNCTION displayed. During playback, pressing the DISP button will automatically • If you press RPT again, the current track will be repeated cycle through the following information on the file being only [RPT TRK] will be displayed played on the LCD display: •... -
Page 18: Optional Remote Control P18
Vol Up Volume Up TROUBLESHOOTING Vol Down Volume Down Before going through the check list, please check the wiring Track Up Track Up connection diagram. If problems persist, please consult your Car Audio dealer. Track Down Track Down No power or no sound Preset Down Sub Level Down •... -
Page 19: How To Reset The Unit P19
• USB/SD data error. Check to ensure only MP3 or WMA HOW TO RESET THE UNIT files are loaded on the storage devices. Using the Reset button, you can reset the unit to its default Display shows ERR-5 settings. • Communication error. The USB/SD device could be •... -
Page 20: Product Specifications P20
RDS PROGRAM TYPES PRODUCT & DESCRIPTIONS SPECIFICA TIONS Power Supply 12V DC (11-16V), Negative Ground NEWS News services Fuse AFFAIRS Politics & current affairs Suitable Speaker 4 – 8Ω INFO Special information programs Impedance SPORT Sports Power output MOSFET 50W MAX x 4 channels EDUCATE Education and advanced training RMS output... -
Page 21: Register Your Product Online P21
The Bluetooth word mark and logos are owned by the Bluetooth at www.fusionelectronics.com SIG, inc and any use of such marks by FUSION ELECTRONICS is under license. Other trademarks and trade names are those of We’ll keep you up to date with any news related to your product or new accessories to help you get the most from your product. - Page 22 • The product was used with or connected to an accessory not supplied by FUSION or fit for use with FUSION product, or used in a manner other than its intended use. If a problem develops during the limited warranty period, the consumer should take the following step-by-step procedure: The consumer shall return the product to the place of purchase for repair or replacement processing.
- Page 23 Fusion or its authorised dealer. • Repair work conducted by Fusion after this warranty has expired or if this warranty for any other reason this Fusion warranty does not apply is subject to Fusion’s normal service policies and Fusion charges for labour and material may apply.
- Page 24 Le numéro de série du produit ou le code de date de l’accessoire a été effacé, dégradé ou altéré. • Le produit était utilisé avec ou connecté à un accessoire non fourni par FUSION ou incompatible avec le produit FUSION, ou a été utilisé pour un usage autre que celui pour lequel il est prévu.
- Page 25 • Se ha eliminado, borrado o modificado el número de serie del producto o el código de fecha del accesorio. • El producto se utilizó con o se conectó a un accesorio no suministrado por FUSION o no adecuado para utilizar con productos FUSION, o se utilizó de una forma diferente a su uso indicado.
- Page 26 Il numero di serie del prodotto o il codice di data di un accessorio sia stato rimosso, reso illeggibile o alterato. • Il prodotto sia stato usato insieme a o in collegamento con un accessorio non fornito da FUSION o inadatto all’uso con il prodotto FUSION, o sia stato utilizzato per scopi diversi da quello a cui è destinato.
- Page 27 Die Seriennummer des Produkts oder der Zubehörcode wurde entfernt, ausgestrichen oder abgeändert. • Das Produkt wurde mit einem Zubehörteil verwendet oder an ein Zubehörteil angeschlossen, das nicht von FUSION geliefert bzw. für die Verwendung mit dem Produkt von FUSION nicht geeignet war oder unsachgemäß verwendet wurde.
- Page 28 ВСЛЕДСТВИЕ ИСПОЛЬЗОВАНИЯ ИЛИ НЕВОЗМОЖНОСТИ ИСПОЛЬЗОВАНИЯ ПРОДУКТА. • FUSION не берет на себя и не уполномачивает никакие центры обслуживания, лица или субъекты брать на себя от ее имени никакие другие обязательсва или отвественность помимо тех, которые явно предусмотрены этой гарантией. •...
- Page 29 Het productserienummer of de datumcode op het accessoire is verwijderd, onleesbaar gemaakt of veranderd. • Het product is gebruikt met of aangesloten op een accessoire dat niet door Fusion is meegeleverd of niet geschikt is voor gebruik met het Fusion-product, of gebruikt op een wijze anders dan het bedoelde gebruik.
- Page 30 NOTES ________________________________________________ ________________________________________________ ________________________________________________ ________________________________________________ ________________________________________________ ________________________________________________ ________________________________________________ _______________________________________________ ________________________________________________ ________________________________________________ ________________________________________________ ________________________________________________ ________________________________________________ ________________________________________________ ________________________________________________ ________________________________________________ ________________________________________________ ________________________________________________ ________________________________________________ ________________________________________________ ________________________________________________ ________________________________________________ ________________________________________________ ________________________________________________ ________________________________________________ ________________________________________________ ________________________________________________ ________________________________________________ ________________________________________________ ________________________________________________ ________________________________________________ ________________________________________________ ________________________________________________ ________________________________________________ ________________________________________________ ________________________________________________ ________________________________________________ ________________________________________________ ________________________________________________ ________________________________________________ ________________________________________________ ________________________________________________...
- Page 31 NOTES ________________________________________________ ________________________________________________ ________________________________________________ ________________________________________________ ________________________________________________ ________________________________________________ ________________________________________________ _______________________________________________ ________________________________________________ ________________________________________________ ________________________________________________ ________________________________________________ ________________________________________________ ________________________________________________ ________________________________________________ ________________________________________________ ________________________________________________ ________________________________________________ ________________________________________________ ________________________________________________ ________________________________________________ ________________________________________________ ________________________________________________ ________________________________________________ ________________________________________________ ________________________________________________ ________________________________________________ ________________________________________________ ________________________________________________ ________________________________________________ ________________________________________________ ________________________________________________ ________________________________________________ ________________________________________________ ________________________________________________ ________________________________________________ ________________________________________________ ________________________________________________ ________________________________________________ ________________________________________________ ________________________________________________ ________________________________________________...
- Page 32 WWW.FUSIONELECTRONICS.COM FUSION Electronics New Zealand 09 369 2900 FUSION Electronics Australia 1300 736 012 FUSION Electronics Europe +31 76 5723 632 FUSION Electronics USA 623 580 9000 FUSION Electronics Pacific +64 9 369 2900...
Need help?
Do you have a question about the CA-CD800 and is the answer not in the manual?
Questions and answers