Table of Contents
Advertisement
Quick Links
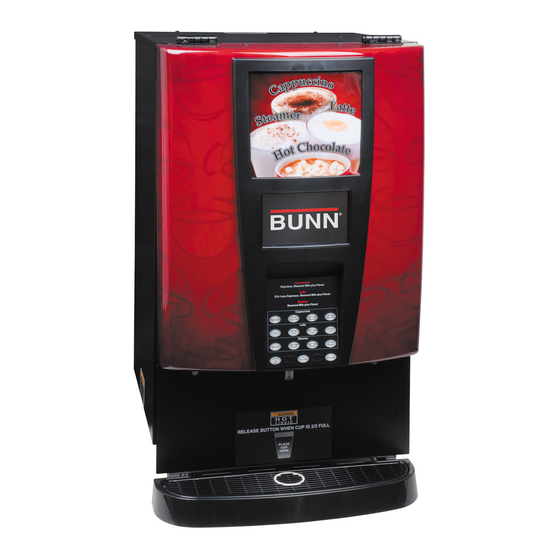
IMIX
-14
®
INSTALLATION & OPERATING GUIDE
BUNN-O-MATIC CORPORATION
POST OFFICE BOX 3227
SPRINGFIELD, ILLINOIS 62708-3227
PHONE: (217) 529-6601
FAX: (217) 529-6644
To ensure you have the latest revision of the Operating Manual, or to view the Illustrated Parts
Catalog, Programming Manual, or Service Manual, please visit the Bunn-O-Matic website, at
www.bunn.com. This is absolutely FREE, and the quickest way to obtain the latest catalog and
manual updates. For Technical Service, contact Bunn-O-Matic Corporation at 1-800-286-6070.
45304.0001A 09/11 ©2011 Bunn-O-Matic Corporation
Advertisement
Table of Contents

Related Manuals for Bunn IMIX 14


Summary of Contents for Bunn IMIX 14
- Page 1 To ensure you have the latest revision of the Operating Manual, or to view the Illustrated Parts Catalog, Programming Manual, or Service Manual, please visit the Bunn-O-Matic website, at www.bunn.com. This is absolutely FREE, and the quickest way to obtain the latest catalog and manual updates. For Technical Service, contact Bunn-O-Matic Corporation at 1-800-286-6070.
- Page 2 SOLE OPTION AS SPECIFIED HEREIN, TO REPAIR, REPLACEMENT OR REFUND. In no event shall BUNN be liable for any other damage or loss, including, but not limited to, lost profits, lost sales, loss of use of equipment, claims of Buyer’s customers, cost of capital, cost of down time, cost of substitute equipment, facilities or services, or any other special, incidental or consequential damages.
-
Page 3: User Notices
READ THE ENTIRE OPERATING MANUAL BEFORE USING THIS PRODUCT As directed in the International Plumbing Code of the 00986.0000F 10/07 ©1994 Bunn-O-Matic Corporation International Code Council and the Food Code Manual of the Food and Drug Administration (FDA), 00986.0000 this equipment must be installed with adequate backflow prevention to comply with federal, state and local codes. -
Page 4: Initial Setup
INITIAL SET-UP 1. Apply the four non-skid pads from the parts box to the bottom of the legs. 2. Remove the drip tray assembly, drip tray bracket, and splash panel assembly from the parts box. 3. Place a set of key holes in the drip tray bracket over the lower two screws in the panel below the hopper ac- cess door;... - Page 5 DOOR COVER INSTALLATION (Continued) 4. With door in raised position, remove four screws 5. Connect black four pin connectors. Connectors and remove inner access panel. Pull door inter- are keyed, and latch must engage hook. connect wiring through access hole. 6.
-
Page 6: Electrical Requirements
ELECTRICAL REQUIREMENTS WARNING - If the power cord is ever damaged, it must be replaced by the manufacturer or its service agent with a special cord available from the manufacturer or its service agent in order to avoid a hazard. CAUTION - The dispenser must be disconnected from the power source until specified in Electrical Hook-Up. -
Page 7: Plumbing Requirements
90 psi to reduce it to 50 psi. The water inlet fitting is 1⁄4” flare. NOTE - Bunn-O-Matic recommends 1⁄4” copper tubing for installations of less than 25 feet and 3⁄8” for more than 25 feet from the 1⁄2”... - Page 8 INITIAL FILL & HEAT 1. Turn on the water supply and connect the dispenser to the power source. 2. Water will automatically flow into the tank to the proper level and then shut-off. This will take less than ten minutes. 3.
-
Page 9: Draining The Hot Water Tank
PREVENTIVE MAINTENANCE Bunn-O-Matic Corporation recommends that preventive maintenance be performed at regular intervals. Maintenance ® should be performed by a qualified service technician. For Technical Service, contact Bunn-O-Matic Corporation at ® 1-800-286-6070. NOTE: Replacement parts or service caused by failure to perform required maintenance is not covered by warranty. - Page 10 CLEANING The use of a damp cloth rinsed in any mild, non-abrasive, liquid detergent is recommended for cleaning all sur- faces on Bunn-O-Matic equipment. Do NOT clean this equipment with a water jet device. 45304.1 090611...
-
Page 11: Programming The Dispenser
PROGRAMMING THE DISPENSER The following function screens are in order of appearance. Each screen will have instructions on how to ac- cess, and the procedures to program the various functions of the dispenser. To enable programming, place the NORMAL/PROGRAM/RINSE” switch in the “PROGRAM” position. IMPORTANT PROGRAMMING NOTES - READ CAREFULLY To exit the programming mode at any time, press and release the exit (center) switch located on the front touch screen. -
Page 12: Programming Switches
PROGRAMMING THE DISPENSER (Cont.) BEVERAGES The IMIX-14 unit has 15 dispense switches. Cappuccino Espresso, Steamed Milk plus Flavor Latte 33% Less Espresso, Steamed Milk plus Flavor Steamer Steamed Milk plus Flavor Cappuccino Dispense switches Mocha Caramel French Vanilla Cappuccino Cappuccino Cappuccino Cappuccino 1 through 4... - Page 13 PROGRAMMING THE DISPENSER (Cont.) GLOSSARY Put "NORMAL/PROGRAM/RINSE" switch into "PROGRAM" position to access program menus. Enables lockout of dispensing if below Adjust tank temperature TANK TEMP ###° DISPENSE LOCKOUT (190° F maximum) minimum water temperature EXIT EXIT Enables rinse alarm Adjust minimum tank ready temper- RINSE ALARM ? READY TEMP ###°...
- Page 14 PROGRAMMING THE DISPENSER (Cont.) Press and release right switch (advance to next screen), "TANK TEMP ###°" appears on screen. Adjust tank CALIBRATION TANK TEMP ###° EXIT EXIT temperature continue to A Adjust minimum tank LOCKS/DISABLES ? READY TEMP ###° EXIT EXIT ready temperature for lockout...
- Page 15 PROGRAMMING THE DISPENSER (Cont.) SELECT UNITS EXIT METRIC ###° ###° TEST WATER 2? TEST POWDER 6? (-) TANK TEMP (+) PRESS DISPENSE PRESS DISPENSE REFILL TEST POWDER 3? AUGER DELAY EXIT PRESS DISPENSE #.## TEST POWDER 1? TEST WATER 3? DILUTION DELAY PRESS DISPENSE PRESS DISPENSE...
- Page 16 PROGRAMMING THE DISPENSER (Cont.) DISPENSE LOCKOUT TEST SWITCHES EXIT Use Switch To Test RINSE ALARM ? TEST HEATER ? EXIT EXIT RINSE ALARM TIME TEST REFILL ? (-) ##HOURS EXIT RINSE LOCKOUT TEST HOT WATER ? EXIT EXIT TEST AUGERS ? DISPENSE TO TEST SET PASSWORD ? TEST WHIPPERS ?
- Page 17 GRN/BLK LINE LOAD ORN/BLK WHI/BLK WHI/BLK ORN/BLK GRN/BLK LED INTERFACE CBA 120 VOLTS AC 2 WIRE + GND STATIC SHIELD 120/240 VOLTS AC 3 WIRE + GND MIMBRANE SWITCH SINGLE PHASE, 60 HZ 44994.0000A 08/11 ©2011 BUNN-O-MATIC CORPORATION 45304.1 090611...
Need help?
Do you have a question about the IMIX 14 and is the answer not in the manual?
Questions and answers