Table of Contents
Advertisement
Quick Links
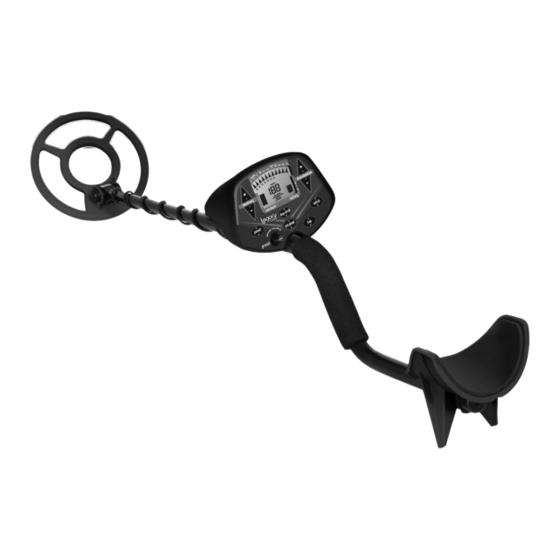
The
Legacy 3300 is
a professional metal
detector. While the most
difficult aspects of metal detecting
have
been
sophisticated electronic device which
requires an understanding of some basic
features and metal detecting concepts.
If you do not have prior experience with a
metal detector, we strongly recommend that you:
1) Adjust the Sensitivity to a low setting in the event
of false signals. Always begin use at a reduced
sensitivity level; use at full sensitivity after you have become
familiar with the detector.
2) Do not use indoors. This detector is for outdoor use only. Many
household appliances emit electromagnetic energy, which can
interfere with the detector. If conducting an indoor demonstration,
turn the sensitivity down and keep the search coil away from
appliances such as computers, televisions and microwave ovens.
If your detector beeps erratically, turn off appliances and lights,
especially those with dimmer switches.
Also keep the search coil away from objects containing metal, such
as floors and walls.
3) Read this manual. Most importantly, review the Quick-Start Demo
(p.7-8) and Basic Operation (p. 9-12).
4) Use 9-volt ALKALINE batteries only. Do not use Heavy Duty Batteries.
OWNER'S MANUAL
automated,
it
is
a
Advertisement
Table of Contents

Related Manuals for Bounty Hunter LEGACY 3300


Summary of Contents for Bounty Hunter LEGACY 3300
- Page 1 OWNER’S MANUAL Legacy 3300 is a professional metal detector. While the most difficult aspects of metal detecting have been automated, sophisticated electronic device which requires an understanding of some basic features and metal detecting concepts. If you do not have prior experience with a metal detector, we strongly recommend that you: 1) Adjust the Sensitivity to a low setting in the event of false signals.
-
Page 2: Table Of Contents
TABLE OF CONTENTS Terminology ......3 Assembly ......4-5 Batteries . -
Page 3: Terminology
TERMINOLOGY The following terms are used throughout the manual, and are standard terminology among detectorists. ELIMINATION - Reference to a metal being "eliminated" means that the detector will not emit a tone, nor light up an indicator, when a specified object passes through the coil’s detection field. DISCRIMINATION - When the detector emits different tones for different types of metals, and when the detector "eliminates"... -
Page 4: Assembly
ASSEMBLY Assembly is easy and requires no tools. Position the lower stem (the straight tube) with the silver button toward the back. Using the bolt and knurled knob, attach the search coil to the lower stem. Twist locking collar on upper stem to open. -
Page 5: Assembly
ASSEMBLY Adjusting the Arm Rest Most people will find the standard position of the arm rest very comfortable. Very large forearms and short forearms (particularly children’s arms), can be accommodated by moving the arm rest forward. The arm rest is adjustable to three positions. To adjust, remove the screw from the underside, then press the silver button and move the arm rest to one of the... -
Page 6: Batteries
BATTERIES Use ALKALINE batteries only. To install the batteries: Remove battery cover by disengaging the clip at the back. Align the polarity of the batteries correctly, with the positive "+" toward the coil plug connection, as indicated by – indicators housing. -
Page 7: Quick-Start Demo
Q UICK-START DEMONSTRATION I. Supplies Needed • A Nail • A Quarter • A Pull-Tab from a beverage can • A Zinc Penny (dated after 1982) • A Nickel II. Position the Detector a. Place the detector on a table, with the search coil hanging over the edge. - Page 8 Q UICK-START DEMONSTRATION (continued) VI. Wave the Nail over the Search Coil a. The Nail will not be detected. b. The Nail has been "Discriminated Out." VII. Press the “DISCRIMINATION- L” touch pad twice. Five “R”s are now displayed. VIII. Wave all objects over the Search Coil The Nail and Pull-Tab will not be detected.
-
Page 9: Basic Operation
BASIC OPERATION POWERING UP Press the POWER touch pad. • The detector will beep 4 times • All display segments will illuminate momentarily • The SENSITIVITY (left) and BATTERY (right) indicators will stay illuminated MOTION and NO-MOTION MODES Depending on the operation mode selected, the Legacy 3300 detects metal both with the coil in motion, or with the coil motionless. -
Page 10: All Metal
BASIC OPERATION continued ALL METAL MODE (Default Operation) The detector defaults to ALL METAL mode after powering on. In this mode, all types of metals will be detected. An object’s PROBABLE identification is indicated by the arrows at the top of the display. In addition, the PROBABLE depth of coin-sized objects is indicated by the rectangular segment indicators on the left side of the display. -
Page 11: Notch
BASIC OPERATION continued disappear, thus returning to detection the objects which fall into the corresponding categories. Discrimination Mode is a fixed-start-point elimination system. Objects are cumulatively eliminated as the level of discrimination increases. NOTCH MODE To selectively eliminate a category from detection within the metallic spectrum, use the NOTCH Mode. -
Page 12: Pinpoint
BASIC OPERATION continued 4) Press ZAP. An "R" appears under the segment to be eliminated. 5) Pass the search coil over the same object again. The undesirable object is eliminated from detection The ZAP control is easy to use in the field. As you are detecting, and encounter an object which you wish to eliminate from detection, simply press the ZAP touch pad after detecting the object. -
Page 13: Audio Target Identification
AUDIO TARGET IDENTIFICATION (motion modes only) While the LCD (Liquid Crystal Display) is very accurate in identifying buried objects, the user in the field does not always maintain the display screen in his field of vision. Therefore, we have incorporated an audio feedback mechanism to alert the user to the nature of buried objects. -
Page 14: Target And Depth Display
DEPTH AND TARGET DISPLAY (motion modes only) READING THE DISPLAY Objects in this category could be worthless scrap, or a more valuable iron relic. The Liquid Crystal Display (LCD) shows 5c/PT: Nickels and most newer pull- the PROBABLE identification of the tabs(those that stay attached to the targeted metal, as well as the PROBABLE can) will register here. -
Page 15: Target Readout
DEPTH AND TARGET DISPLAY (motion modes only) THREE DIGIT TARGET INDICATOR The three digit target indicator, in the buried objects. The target value can vary middle of the LCD display, provides a each time the coil passes over the target, specific target value to help identify buried depending upon the angle of the object targets more accurately. -
Page 16: Sensitivity Adjustment
SENSITIVITY ADJUSTMENT (motion modes only) ELECTROMAGNETIC INTERFERENCE The principle use for the Sensitivity Control is to eliminate Electromagnetic Interference (EMI). A hobby metal detector is an extremely sensitive device; the search coil creates its own magnetic field and acts like an antenna. If your detector beeps erratically when the search coil is... -
Page 17: In The Field Techniques
IN THE FIELD TECHNIQUES (motion modes only) PINPOINTING IN MOTION MODES COIL MOVEMENT Accurate pinpointing takes practice When swinging the coil, be and is best accomplished by careful to keep it level with the ground about 1/2 inch from the “X-ing”... - Page 18 IN THE FIELD TECHNIQUES (motion modes only) Swing the search coil slowly, respond with a repeatable tone. overlapping each sweep as you If the signal does not repeat move forward. It is important after sweeping the coil directly to sweep the coil at a consistent over the suspected target a few speed over the ground as you times, it is more than likely...
- Page 19 IN THE FIELD TECHNIQUES (motion modes only) angles, have trashiest areas have been encountered multiple objects. frequented by the most people, If you are new to the hobby, and frequently hold the most you may want to dig all targets promise for finding the most at first.
-
Page 20: Ground Balancing
IN THE FIELD TECHNIQUES - Pinpoint Mode GROUND BALANCING Before using the PINPOINT mode, it is necessary to ‘Ground Balance” your detector, this ground balancing adjustment offsets the effects of minerals and slats in he ground. To GROUND BALANCE your detector: 1. - Page 21 IN THE FIELD TECHNIQUES - Pinpoint Mode 6. If the detector emits sound with the coil over the ground in STEP 56, further adjustment of the ground balance KNOB is required as follows: • Lift the search coil waist high •...
-
Page 22: In The Field Techniques
It is a probe-like device which is poked into the ground, making close up pinpointing a snap, reducing digging time, and minimizing the size of the holes you will dig. Bounty Hunter offers a robust and inexpensive pinpointer designed for this purpose. -
Page 23: Trouble Shooting
TROUBLE SHOOTING TROUBLE SHOOTING GUIDE SYMPTOM CAUSE SOLUTION Detector chatters • Using detector • Use detector or beeps erratically indoors outdoors only • Using detector near • Move away power lines from power lines • Using 2 detectors in • Keep 2 detectors close proximity at least 20’... -
Page 24: Treasure Hunter's Code Of Ethics
TREASURE HUNTER’S CODE OF ETHICS: • Always check Federal, State, County and local laws before searching. • Respect private property and do not enter private property without the owner’s permission. • Take care to refill all holes and try not to leave any damage. •...
Need help?
Do you have a question about the LEGACY 3300 and is the answer not in the manual?
Questions and answers