Table of Contents
Advertisement
Advertisement
Table of Contents

Related Manuals for AEG Ceramic glass hob


Summary of Contents for AEG Ceramic glass hob
- Page 1 INSTRUCTION BOOK Ceramic glass hob...
-
Page 2: Your New Appliance
Your New Appliance Thank you for purchasing an AEG appliance. To enable you to use your new hob efficiently and safely, please read this instruction book carefully before installing or using the appliance, and retain for future reference. Should the hob be transferred to a new owner please ensure this instruction book is left with the appliance in order that the new owner can get to know the functions of the appliance and the relevant warnings. - Page 3 How to read the operating instructions: 1... 2...Step by step Hint and tips Safety information Environmental information...
-
Page 4: Child Safety
These warnings are provided in the interests of your safety. Ensure you fully understand them before installing or using the appliance. Your safety is of paramount importance. If you are unsure about the meaning of these warnings contact the Customer Care Department for assistance. -
Page 6: Ceramic Glass Surface
Ceramic glass surface The ceramic glass surface has four cooking zones. When a zone is turned on, it will illuminate at various intervals depending on the heat setting selected. Even at the highest setting the zone is disconnected occasionally to ensure that the surface is not over-heated. - Page 7 Connection of child safety device on zones Turn the 2 control buttons to at the same time. The display will show: When you turn on a zone the display will show: To turn on a zone, turn the 2 control buttons to at the same time.
- Page 8 Protection of the glass ceramic surface A protective film should be applied to the glass ceramic surface before use. This will make it easier to clean the surface, as well as preventing substances from being burnt onto the surface. This is what to do: 1.
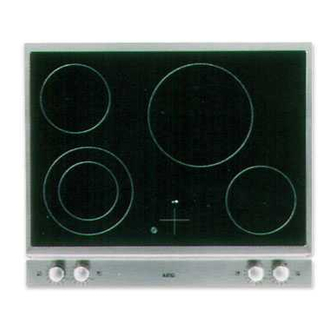
- Page 9 Switch symbols (to the left) control for regulating the small cooking zone at the rear control for regulating the double cooking zone at the front. control for regulating the large cooking zone at the rear control for regulating the small cooking zone at the front.
-
Page 10: Cooking Zones
Residual-Heat indicator When you switch off a zone, an "H" in the display indicates that the zone is still hot. The residual heat indicator will continue to be illuminated as long as the temperature exceeds 80˚C. Cooking zones The control knobs are continuously adjustable from 1 to 9 (9 is the highest setting). - Page 11 CHEC control Autostop If you forget to turn a cooking zone off after use, it will be disconnected automatically after a specific period of time. The higher the setting, the shorter the time before the zone is disconnected. Setting When the autostop function is activated the display will show: The zones cannot be used.
- Page 13 Disconnection of AUTOMAX: If you do not wish to use AUTOMAX, observe the following procedure: 1. Turn the control button to A 2. Then turn the control button to the required setting. Setting the large zone on the double zones 1.
- Page 14 When you turn on a zone the display will show: Observe the following procedure to use a zone: 1. Turn the 2 buttons to at the same time. 2. Use one of the zones within 10 seconds. The light under the symbol in the display will disappear.
- Page 15 Advice and hints for using the cooking zones If you use the advice below you will save energy and make your cleaning tasks easier. Adjust the cooking zones correctly. Select the highest setting for the cooking zones until the food is brought to the boil.
- Page 16 Do not slide saucepans across the surface of the hob - always lift the pan when placing it on, or removing it from the ceramic surface. Wipe the bottom surface of the pots and pans with a clean dry cloth before placing them on the ceramic surface.
- Page 17 For reasons of hygiene and safety, the cooking zones must be kept clean. Grease stains and spilled food generate smoke when heated, and can even cause fire. The splashguard can be removed to make it easier to clean the surface. What to do: 1.
-
Page 18: Stainless Steel Surfaces
Never use metal wool, metal sponges or other abrasive cleaning agents. The ceramic glass hob Immediately scrape off stains caused by food which has boiled over using the scraper supplied with the hob, spilled sugar, dishes containing sugar (jam, juice, etc.), melted plastic and... - Page 19 The decorative pattern on the ceramic surface can become scratched and marred with use, depending upon maintenance, but does not adversely affect performance. Such blemishes are not covered by the warranty and do not affect the operation of the hob. Spills and melts must be removed immediately, while the surface is still warm, using the scraper supplied with...
- Page 20 Caution: In order to avoid a hazard this appliance must be installed according to these instructions for installation The appliance unit can be mounted in any type of kitchen with a work top whose thickness is between 28 mm and 40 mm.
- Page 21 It is not necessary to attach the reinforcement beam to the work top surface, as it is held in place by a specially designed moulding, which is incorporated in the hob units flanges. The units externally measured length 145 mm: Cooker hood 290 mm: Two-zone ceramic-top electric hob...
- Page 22 The electrical connection may only be performed by a qualified electrician/ competent person. The electrical connection must be carried out in accordance with prevailing regulations for appliances using heavy current. The connection must comply with any specific requirements specified by the local electricity supply authority.
- Page 23 Cell Voltage 240 V Electrical connection 240V - 50Hz Total wattage 6400W Instant heat effect Left front 12/18 cm 700/1700 W Left Back 14 cm Right back 21 cm Right front 14 cm This unit is labelled to indicate conformity with the lowvoltage directive (73/23/EEC) and the EMC directive (89/336/EEC).
- Page 24 If the hob is not working correctly, please carry out the following checks before contacting your local AEG Service Force Centre. IMPORTANT: If you call out an engineer to a fault caused by incorrect use or installation, a charge will be made even if the hob is under guarantee. Sympton The hob is not working The fuses keep blowing...
- Page 25 Problems Zones will not come on, Child safety device has been activated. Zones will not come on, Autostop has been activated. If after all these checks, your hob still does not operate correctly, contact your local AEG Service Force Centre. In-guarantee customers should ensure that the above checks have been made as the engineer will make a charge if the fault is not a mechanical or electrical breakdown.
- Page 26 In the event of your appliance requiring service, or if you wish to purchase spare parts, contact your local AEG Service Force Centre by telephoning: Your call will automatically be routed to the Service Centre covering your post code area. In-guarantee customers should ensure that the recommended checks under the heading "Something Not Working"...
- Page 27 The guarantee is for the same period and to the same extent for labour and parts as exists in the new country of use for this brand or range of products. This guarantee relates to you and cannot be transferred to another user.
- Page 28 Before you move please contact your nearest Customer Care centre, listed below, to give them details of your new home. They will then ensure that the local service organisation is aware of your move and able to look after you and your appliances.
- Page 32 325 88-1710 Rev. 3-018...
Need help?
Do you have a question about the Ceramic glass hob and is the answer not in the manual?
Questions and answers