Table of Contents
Advertisement
Advertisement
Table of Contents

Related Manuals for Fujitsu Halcyon ASU12CQ


Summary of Contents for Fujitsu Halcyon ASU12CQ
- Page 1 ASU9CQ ASU12CQ AOU9CQ AOU12CQ...
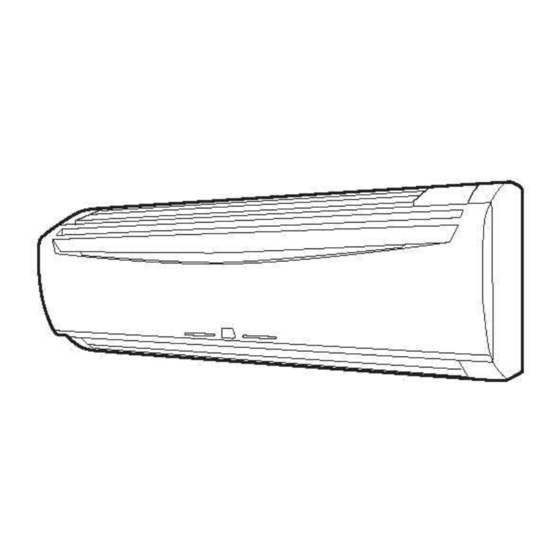
- Page 2 Fig. 1 Indoor Unit Fig. 6 Remote Control Unit H MASTER CONTROL button 1 Operating Control Panel (Fig. 2) I SET TEMP. / SET TIME buttons (+/-) 2 AIR CLEANER RESET / MANUAL AUTO J Signal Transmitter button K TIMER button Intake grill opening mechanism.
-
Page 3: Features And Functions
FEATURES AND FUNCTIONS SLEEP TIMER SUPER QUIET OPERATION When SLEEP is selected be pressing TIMER button during When the FAN CONTROL button is used to select QUIET, Heating mode, the air conditioner’s thermostat setting is the unit begins super-quiet operation; the indoor unit’s air- gradually lowered during the period of operation;... - Page 4 PREPARATION CAUTION! Turn on the Power G Take care to prevent infants from accidentally swallowing batteries. In the case of a direct line connection, turn on the circuit G When not using the remote control unit breaker. for an extended period, remove the batteries to avoid possible leakage and damage to the unit.
-
Page 5: Operation
OPERATION To Select Mode Operation Press the START / STOP button (Fig.6 M). The indoor unit’s OPERATION indicator lamp (red) (Fig. 3 5) will light. The air conditioner will start operating. Press the MASTER CONTROL button (Fig.6 H) to se- lect the desired mode. - Page 6 OPERATION About Mode Operation G Depending on the room temperature at the time operation begins, the AUTO: During Cooling/Dry mode: operating mode will be switched automatically as shown in the Set the thermostat to a temperature set- accompanying table. ting that is lower than the current room Also, depending on the operating mode, the room temperature set- temperature.
-
Page 7: Air Cleaning Operation
AIR CLEANING OPERATION If you wish to eliminate dirt,dust,cigarette smoke, pollen, or just simply purify the air of the room, use the Air Cleaning Mode. Press the START/STOP button (Fig. 6 M). The operation indicator lamp will light up (red, as shown in the figure). (If the unit is already in operation, please proceed to step 2.) Press the AIR CLEAN button (Fig. -
Page 8: Timer Operation
TIMER OPERATION Before using the timer function, be sure that the Remote Control Unit is set to the correct current time, see page 4. To Use the ON timer or OFF timer To Cancel the Timer Press the START / STOP button (Fig. 6 M). Use the TIMER button to select “TIMER RESET.”... -
Page 9: Sleep Timer Operation
SLEEP TIMER OPERATION Unlike other timer functions; the SLEEP timer is used to set the length of time until air conditioner operation is stopped. To Use the SLEEP Timer While the air conditioner is operating or stopped, To Cancel the Timer: Use the TIMER button to select “TIMER press the TIMER button (Fig. -
Page 10: Adjusting The Direction Of Air Circulation
ADJUSTING THE DIRECTION OF AIR CIRCULATION Vertical (up-down) direction of airflow is adjusted by pressing the Remote Control Unit’s SET button. Horizontal (right-left) airflow direction is adjusted manually, by moving the Air Flow Direction Louvers. Whenever making horizontal airflow adjustments, start air conditioner operation and be sure that the vertical air direction louvers are stopped. -
Page 11: Swing Operation
SWING OPERATION Begin air conditioner operation before performing this procedure. To select SWING Operation Press the SWING button (Fig. 6 P). The SWING indicator lamp (orange) (Fig. 3 8) will light. In this mode, the Air Flow Direction Louvers will swing automatically to direct the air flow both up and down. -
Page 12: Cleaning And Care
CLEANING AND CARE Before cleaning the plasma filter unit, be sure to turn off the power supply to the air conditioner. WARNING! Electric shock may result. G Make sure the plasma filter unit is properly mounted before cleaning or performing other tasks CAUTION! on it. -
Page 13: Cleaning The Plasma Air Cleaning Filter
CLEANING THE PLASMA AIR CLEANING FILTER Before cleaning the plasma filter unit, be sure to turn off the power supply to the air conditioner. WARNING! Electric shock may result. G Make sure the plasma filter unit is properly mounted before cleaning or performing other tasks CAUTION! on it. -
Page 14: Install The Unit
Cleaning the dust collection unit 4. Install the unit. 5. Install the air filter. G Please consult instructions for cleaning the air filter (The above figure is only for reference, so the intake grille is not included.) on page 12. 6. - Page 15 How to install or remove the Air- Air-cleaning and Deodorizing filter cleaning and Deodorizing filter maintenance As well as ensuring the maintenance of the dust collecting 1. Remove the dust-collecting unit. unit, please also take care of the filter. G Please consult steps 1 and 2 of cleaning the dust- (Please carry out maintenance on the filter every 6 months.) collecting unit on page 13.
-
Page 16: Troubleshooting
TROUBLESHOOTING In the event of a malfunction (burning smell, etc.), immediately stop operation, disconnect the WARNING! Power Supply Plug, and consult authorized service personnel. Merely turning off the unit’s power switch will not completely disconnect the unit from the power source. Always be sure to disconnect the Power Supply Plug or turn off your circuit breaker to ensure that power is completely off. -
Page 17: Operating Tips
TROUBLESHOOTING Symptom Items to check See Page G Is the Power Supply Plug disconnected its outlet? CHECK ONCE Doesn’t operate at all: MORE G Has there been a power failure? — G Has a fuse blown out, or a circuit breaker been tripped? G Is the timer operating? 8 - 9 G Is the air filter dirty? -
Page 18: Temperature And Humidity Range
OPERATING TIPS Temperature and Humidity Range Cooling/Dry Mode Outdoor temperature About 32 to 115 °F Indoor temperature About 64 to 90 °F About 80% or less Outdoor temperature 68°F or obove If the unit is used for long periods under high-humidity conditions, condensation may form on the surface of Indoor Humidity the indoor unit, and drip onto the floor or other objects...
Need help?
Do you have a question about the Halcyon ASU12CQ and is the answer not in the manual?
Questions and answers