Table of Contents
Advertisement
Quick Links
Download this manual
See also:
User Manual
Advertisement
Table of Contents

Subscribe to Our Youtube Channel
Related Manuals for AEG Electrolux E43012-5


Summary of Contents for AEG Electrolux E43012-5
- Page 1 E43012-5 User manual Built-In Electric Oven...
- Page 2 Dear Customer Thank you for choosing one of our high-quality products. With this appliance you will experience the perfect combination of functional design and cutting edge technology. Convince yourself that our appliances are engineered to deliver the best per- formance and control - indeed we are setting the highest standards of excel- lence.
-
Page 3: Table Of Contents
Setting and changing the time Initial Cleaning Using the Rings Setting the heat setting Using the Oven Switching the Oven On and Off Oven Functions Inserting the Combination Shelf, Baking Tray and Roasting Pan Synchronised oven shelf runners Inserting/Removing the Fat Filter... - Page 4 Cleaning and Care Outside of the appliance Oven interior Accessories Fat Filter Shelf Support Rails Oven Shelf Runner Cleaning the Oven Shelf Runner Oven Lighting Oven Ceiling Oven door Oven door glass What to do if … Disposal Installation Instructions...
-
Page 5: Operating Instructions
• Take care when connecting electric appliances to sockets nearby. Do not allow connecting leads to come into contact with or to catch beneath the hot oven door. • Warning: Risk of burns! The interior of the oven becomes hot during use. -
Page 6: How To Avoid Damage To The Appliance
Note on enamel coating Changes in the colour of the oven’s enamel coating as a result of use do not af- fect the appliance’s suitability for normal and correct use. They therefore do not constitute a defect in the sense of the warranty law. -
Page 7: Description Of The Appliance
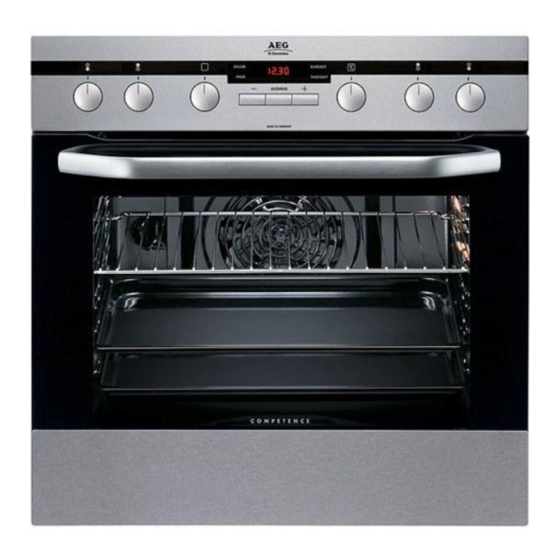
Description of the Appliance General Overview Control Panel Oven Power Indicator Hob Cooking Zone Control Control panel Temperature Pilot Light Time display Clock function buttons Oven Functions Temperature selector Description of the Appliance Full glass door Hob Cooking Zone Control... -
Page 8: Oven Features
Description of the Appliance Oven Features Shelf positions Inside of door On the inside of the oven door you will find the numbers of the different oven shelves. You will also find some brief information about the oven's functions, recommended shelves and temperatures for cooking the most popular dishes. -
Page 9: Oven Accessories
Baking tray For cakes and biscuits. Roasting Pan For baking and roasting or as a pan for col- lecting fat. Triple shelf runner for ovens 2 side rails with 3 telescopic runners. Synchronised oven shelf runners Retaining clips with connecting clamp. -
Page 10: Before Using For The First Time
Before Using for the first time Before Using for the first time Setting and changing the time The oven only operates when the time has been set. When the appliance has been connected to the electrical supply or when there has been a power cut, the function indicator Time (TAGESZEIT) flashes automatically. -
Page 11: Initial Cleaning
2. Remove all accessories and the shelf support rails and wash them with warm water and washing up liquid. 3. Then wash out the oven with warm water and washing-up liquid, and dry. 4. Wipe the front of the appliance with a damp cloth. -
Page 12: Using The Rings
Using the Rings Using the Rings Also refer to the operating instructions for your built-in hob. It contains impor- tant information on ovenware, operation, cleaning and care. Heat settings • You may select the heat settings within the range of settings 1-9. •... -
Page 13: Setting The Heat Setting
Setting the heat setting 1. Select the heat setting. 2. To end the cooking process, turn back to the Off position. The corresponding ring pilot light is lit while the ring is operating. Using the Rings... -
Page 14: Using The Oven
The power indicator is lit as long as the oven is in operation. The temperature pilot light is lit as long as the oven is heating up. 3. To turn the oven off, turn the oven functions dial and the temperature selector to the Off position. -
Page 15: Oven Functions
Grill Dual grill Rotitherm Application Using this function you can light up the oven interior, e.g. for cleaning. For baking on up to three oven levels at the same time. Set the oven temperatures 20-40 °C lower than when using Conventional. -
Page 16: Inserting The Combination Shelf, Baking Tray And Roasting Pan
Inserting the oven shelf: Insert the oven shelf so that the feet point downwards. Insert the oven shelf on the telescopic run- ners of the selected oven level. -
Page 17: Synchronised Oven Shelf Runners
Using the Oven Synchronised oven shelf runners To make it easier to pull out the oven shelf runners, the individual telescopic bars can be connected using a clamp. Fitting the synchronised oven shelf runners When fitting the retaining clips, ensure... -
Page 18: Inserting/Removing The Fat Filter
Hold the fat filter by the grip and insert the two mounts downwards into the opening on the rear wall of the oven (fan opening). Taking out the fat filter Hold the fat filter by the grip and unhook it. -
Page 19: Clock Functions
To set a countdown. A signal sounds after the time has elapsed. This function does not affect the functioning of the oven. Cook time (DAUER) To set how long the oven is to be in use. End time (ENDE) To set when the oven is to switch off again. -
Page 20: How To Use The Clock Functions
• Press any of the buttons to stop the audible signal. • The desired oven function and temperature can be selected before or after the clock functions Cook time (DAUER) and End time (ENDE) are set. • When the cooking process is completed, turn the oven function dial and the temperature selector back to the OFF position. - Page 21 After approx. 5 seconds the display shows the time remaining. The function indicator Countdown (KURZZEIT) lights up. When the time has elapsed, the function indicator flashes and an audible signal sounds for 2 minutes. The signal can be stopped by pressing any button. Using the Oven...
- Page 22 Cook time (DAUER) lights up. When the time has elapsed, the function indicator flashes, an audible signal sounds for 2 minutes and the oven switches itself off. 3. The signal and the programme can be stopped by pressing any button.
- Page 23 The function indicator End time (ENDE) lights up. When the time has elapsed, the function indicator flashes, an audible signal sounds for 2 minutes and the oven switches itself off. 3. The signal and the programme can be stopped by pressing any button.
- Page 24 Using the Oven Cook time (DAUER) and End time (ENDE) combined Cook time (DAUER) and End time (ENDE) can be used simultaneously, if the oven is to be switched on and off automatically at a later time. 1. Using the Cook time (DAUER) function, set the time required for cooking the dish.
-
Page 25: Uses, Tables And Tips
Uses, Tables and Tips Cooking table The information given in the following table is for guidance only. Heat Cooking- setting process Keeping food warm Melting Solidifying Fluffy omelettes, baked eggs Simmer- ing on low heat Steaming Braising Boiling Gentle Frying Heavy Frying Boiling... - Page 26 Uses, Tables and Tips Baking Oven function: Convection with ring heating element Conventional Baking tins • For Conventional • For Convection with ring heating element ble. Oven levels • Baking with Conventional • With Convection with ring heating element trays at the same time: 1 baking tray: e.g.
-
Page 27: General Instructions
• With Conventional or Convection with ring heating element also bake with two tins next to one another on the oven shelf at the same time. This does not significantly increase baking time. When frozen foods are used the trays inserted may distort during cooking. This is due to the large difference in temperature between the freezing temperature and the temperature in the oven. -
Page 28: Baking Table
Uses, Tables and Tips Baking table Baking on one oven level Type of baking Baking in tins Ring cake or brioche Madeira cake/fruit cakes Sponge cake Sponge cake Flan base - short pastry Flan base - sponge mixture Apple pie Apple pie (2tins Ø20cm,... - Page 29 Pizza (thin crust) Unleavened bread Tarts (CH) Biscuits Short pastry biscuits Viennese whirls Viennese whirls Biscuits made with sponge mixture Uses, Tables and Tips Oven Oven function level Convection with ring heating element Conventional Convection with ring heating element Conventional Convection with...
- Page 30 Macaroons Biscuits made with yeast dough Puff pastries Rolls Rolls Small cakes (20per tray) Small cakes (20per tray) 1) Pre-heat the oven 2) Use the drip tray or roasting tray Oven Oven function level Convection with ring heating element Convection with...
- Page 31 Baking on more than one oven level Type of baking Cakes/pastries/breads on baking trays Cream puffs/Eclairs Dry streusel cake Biscuits/small cakes/pastries/rolls Short pastry biscuits Viennese whirls Biscuits made with sponge mixture Biscuits made with egg white, meringues Macaroons Biscuits made with yeast...
-
Page 32: Tips On Baking
Set a shorter baking time Set a lower oven temperature and a longer baking time Spread the mixture evenly on the baking tray Take out the grease filter Use a slightly higher oven set- ting Take out the grease filter... - Page 33 Apple cake, covered Vegetable pie Unleavened bread Puff pastry flan Flammekuchen (Pizza-like dish from Alsace) Piroggen (Russian version of cal- zone) 1) Pre-heat the oven Uses, Tables and Tips Temperature Shelf position °C 180 - 200 180 - 200 180 - 200...
-
Page 34: Table For Bakes And Gratins
Dish Pasta bake Lasagne Vegetables au gratin Baguettes topped with melted cheese Sweet bakes Fish bakes Stuffed vegetables 1) Pre-heat the oven Frozen Ready Meals Table Food to be cooked Frozen pizza Chips (500 g) Baguettes Fruit flans 1) Comments: Turn chips 2 or 3 times during cooking... -
Page 35: Roasting
• Baste large roasts and poultry with their juices several times during roasting. This will give better roasting results. • You can switch the oven off about 10 minutes before the end of the roasting time, in order to utilise the residual heat. - Page 36 Haunch of venison Poultry Poultry portions Half chicken Chicken, poulard Duck Goose Turkey Turkey Fish (steamed) Whole fish 1) Pre-heat the oven Quantity Ovenfunction 1-1.5 kg Rotitherm 1-1.5 kg Rotitherm 750 g-1 kg Rotitherm 750 g-1 kg Rotitherm 1 kg Rotitherm 1.5-2 kg...
-
Page 37: Grill Sizes
Oven function: Grill ting Important: Always grill with the oven door closed. The empty oven should always be pre-heated with the grill functions for 5 minutes. • For grilling, place the shelf in the recommended shelf position. • Always insert the tray for collecting the fat into the first shelf position from the bottom. -
Page 38: Defrosting
Uses, Tables and Tips Defrosting Oven function: Defrost • Unwrap the food and place it on a plate on the oven shelf. • Do not cover with a plate or bowl, as these can substantially lengthen the de- frosting time. -
Page 39: Drying
Oven function: Convection with ring heating element • Use oven shelves covered with greaseproof paper or baking parchment. • You get a better result if you switch the oven off halfway through the drying time, open the door and leave the oven to cool down overnight. -
Page 40: Making Preserves
• As soon as the liquid starts to pearl in the first jars (after about 35-60 minutes with 1 litre jars), switch the oven off or reduce the temperature to 100°C (see table). Preserves table The times and temperatures for making preserves are for guidance only. -
Page 41: Cleaning And Care
Clean the appliance after each use. In this way, dirt is easier to clean off and is not allowed to burn on. 1. For cleaning, turn the oven light on. 2. After every use, wipe the oven with a solution of washing-up liquid and allow to dry. Clean stubborn dirt with a special oven cleaner. -
Page 42: Shelf Support Rails
Cleaning and Care Shelf Support Rails The shelf support rails on the left and right hand sides of the oven can be re- moved for cleaning the side walls. Removing the shelf support rails First pull the front of the rail away from the oven wall (1) and then unhitch at the back (2). -
Page 43: Oven Shelf Runner
Cleaning and Care Oven Shelf Runner The shelf support rails on the left and right hand sides of the oven can be re- moved for cleaning the side walls. Removing the shelf support rails First pull the front of the rail away from the oven wall and then unhitch at the back. -
Page 44: Cleaning The Oven Shelf Runner
– Switch off the oven! – Remove the fuses in the fuse box or switch off the circuit breaker. Place a cloth on the oven floor to protect the oven light and glass cover. Replacing the oven light bulb/cleaning the glass cover 1. -
Page 45: Oven Ceiling
Folding down the heating element Warning: Only fold down the heating ele- ment when the oven is switched off and there is no risk of being burnt! 1. Remove the side shelf support rails. 2. Grip the heating element at the front and pull it forwards and out over the support lug on the inner wall of the oven. -
Page 46: Oven Door
Cleaning and Care Oven door For easier cleaning of the oven interior the oven door of your appliance can be taken off its hinges. Removing the oven door from its hinges 1. Open the oven door as far as it will go. - Page 47 Let the door slide down as far as it will go. 2. Open the oven door as far as it will go. 3. Fold up the clamping levers (A) on both door hinges back into their original positions.
-
Page 48: Oven Door Glass
Cleaning and Care Oven door glass The oven door is fitted with three panels of glass mounted one behind the oth- er.The inner panels can be removed for cleaning. Important! Rough handling, especially around the edges of the front panel, can cause the glass to break. - Page 49 5. Take hold of the door glass panels on their upper edge one after the other and take them out of the guide by pulling them up- wards.. Cleaning the door glass panels Clean the door glass panels thoroughly with a solution of water and washing up liquid.
- Page 50 (D). The clip seal (E) must be snapped in. 3. Open the oven door as far as it will go 4. Fold up theclamping levers (A) on both door hinges back into their original positions...
-
Page 51: What To Do If
Advice on cookers with metal fronts: Because of the cold surface at the front of the cooker, opening the oven door during (or just after) baking or roasting may cause the glass to steam up. Possible cause... -
Page 52: Disposal
Disposal Disposal Packaging material The packaging materials are environmentally friendly and can be recycled. The plastic components are identified by markings, e.g. >PE<, >PS<, etc. Please dis- pose of the packaging materials in the appropriate container at the community waste disposal facilities. Old appliance The symbol on the product or on its packaging indicates that this product... -
Page 53: Installation Instructions
Installation Instructions Attention: The new appliance may only be installed and connected by a regis- tered expert. Please comply with this. If you do not, any damage resulting is not covered by the warranty. Safety information for the installer • The electrical installation is to be set up so that the appliance can be isolated from the mains with a minimum 3mm all-pole contact separation. - Page 54 Installation Instructions...
- Page 55 Installation Instructions...
- Page 56 Installation Instructions...
-
Page 57: Guarantee/Customer Service
European Guarantee This appliance is guaranteed by Electrolux in each of the countries listed at the back of this user manual, for the period specified in the appliance guarantee or otherwise by law. If you move from one of these coun-... - Page 58 Industriestrasse 10, CH-5506 Mägenwil Electrolux Ljubljana d.o.o. +38 61 24 25 731 Gerbièeva 98, 1000 Ljubljana Electrolux Slovakia s.r.o., Electrolux Domáce spot- +421 2 43 33 43 22 rebièe SK, Seberíniho 1, 821 03 Bratislava www.electrolux.fi Electrolux Service, S:t Göransgatan 143,...
-
Page 59: Service
Service In the event of technical faults, please first check whether you can remedy the problem yourself with the help of the operating instructions (section “What to do if…”). If you were not able to remedy the problem yourself, please contact the Cus- tomer Care Department or one of our service partners. - Page 60 www.electrolux.com...
Need help?
Do you have a question about the E43012-5 and is the answer not in the manual?
Questions and answers