Table of Contents
Advertisement
O W N E R ' S M A N U A L
Thank you for choosing Betamotor.
We hope you enjoy your motorcycle.
This booklet provides
the information you will need
to use and maintain your bike properly.
The details and specifications given
in this manual do not commit
BETAMOTOR S.p.A, who reserve
the right to make changes
to their models at any time.
betamotor.com
Advertisement
Table of Contents

Subscribe to Our Youtube Channel
Related Manuals for Beta Evo4t 300


Summary of Contents for Beta Evo4t 300
- Page 1 O W N E R ’ S M A N U A L Thank you for choosing Betamotor. We hope you enjoy your motorcycle. This booklet provides the information you will need to use and maintain your bike properly. The details and specifications given in this manual do not commit BETAMOTOR S.p.A, who reserve the right to make changes...
- Page 2 CAUTION It is important, after the first hour of break-in, to check the tightness of all fasteners, paying particular attention to the following: • Footrest brackets • Front and rear brake discs • Wheel spokes • Shock absorber bolt and rear linkage •...
-
Page 3: Table Of Contents
Index Pag. CHAPTER 1: GENERAL INFORMATION INDEX OF TOPICS Main parts ............................................Vehicle identification details ....................................Engine identification details ....................................Console and controls ........................................Technical details ..........................................Wiring scheme ..........................................CHAPTER 2: Operation and Use INDEX OF TOPICS Filling the fuel tank ........................................ -
Page 5: Chapter 1: General Information
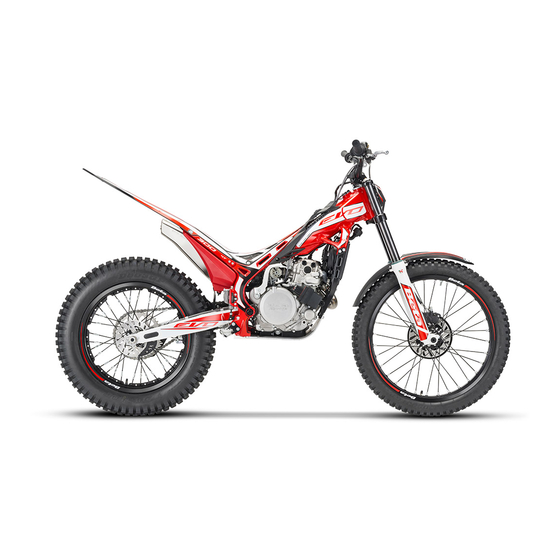
Chapter 1 General information INDEX OF TOPICS Main parts Vehicle identification details Engine identification details Console and controls Technical details Wiring scheme betamotor.com... - Page 6 General information MAIN PARTS 1 - Filter box 2 - Fuel tank 3 - Fuel filler cap 4 - Silencer 5 - Kickstart lever VEHICLE IDENTIFICATION DETAILS Frame identification. The frame identification details (A) are stamped on the right-hand side of the headstock.
-
Page 7: Technical Details
General information TECHNICAL DETAILS Vehicle weight - in running order (dry) .......................... 72 kg Dimensions - overall length ..........................2005 mm - overall width ............................. 850 mm - overall height ..........................1.115 mm - wheelbase ............................1.305 mm - seat height ............................660 mm - ground clearance .......................... -
Page 8: Wiring Scheme
General information General information WIRING SCHEME CAUTION: Do not run the engine with the voltage regulator connected to the electrical gene- rator without having connected the vehicle wiring harness (central system). Doing so could cause damage to the regulator itself. betamotor.com... -
Page 9: Chapter 2: Operation And Use
Chapter 2 Operation and Use INDEX OF TOPICS Filling the fuel tank Start-up Advance map change switch Break-in Checks and maintenance before and after off-road use Recommended lubricants and liquids betamotor.com... - Page 10 Operation and use FILLING THE FUEL TANK Remove filler cap A. The capacity of the fuel tank is approximately 2.5 litres. START-UP 1 Put the gearbox in neutral. 2 WITHOUT opening the throttle, press the kickstart lever progressively downwards, avoiding violent strokes, to the bottom of its travel.
- Page 11 Operation and use STARTING THE ENGINE WHEN HOT 1 Put the gearbox in neutral. 2 Operate the hot start by pulling outward the knob C (the red one) 3 WITHOUT opening the throttle, press the kickstart lever progressively downwards, avoiding violent strokes, to the bottom of its travel.
-
Page 12: Break-In
Operation and use BREAK-IN The break-in period lasts for about 10 hours of use. During this period, please observe the following recommendations: 1 For the first 3 hours of use, the engine should only be used at up to 50% of its power. The engine speed should not exceed 7000 rpm. -
Page 13: Recommended Lubricants And Liquids
Operation and use RECOMMENDED LUBRICANTS AND LIQUIDS To promote better operation and longer life, we recommend that you preferably use the products listed in the table: TYPE OF PRODUCT TECHNICAL SPECIFICATIONS Engine oil Bardahl XT C60 15W50 Brake and clutch fluid Bardahl brake fluid dot 4 Idemitsu oj-racing-01 Fork oil... -
Page 14: Brake Master Cylinder Fluid
Chapter 3 Maintenance and checks INDEX OF TOPICS Lubrication Circuit Engine Oil Brake master cylinder fluid Brakes circuit bleeding Clutch master cylinder fluid Clutch circuit bleeding Fork oil Air filter Ignition generator check Sparkplug Front brake Rear brake Rear suspension linkage Coolant Checks after cleaning Scheduled maintenance... - Page 15 Maintenance and checks LUBRICATION CIRCUIT The output oil pump (1) draws in oil from the area at the base of the gearbox through its own mesh oil filter (2) and then sends it to the paper oil filter (3). From here the oil, starting from the bypass valve (4), is direc- ted in three different directions: by means of a jet (5) it lubricates the piston pin and...
- Page 16 Maintenance and checks ENGINE OIL Use only fully synthetic oils of a reliable brand (BARDAHL XTC60 15W50). CHECKING THE ENGINE OIL LEVEL The engine oil level must be checked when the engine is warm. Run the engine for se- veral minutes and then switch it off. Place the bike on a flat surface in such a way that it is perfectly vertical.
- Page 17 Maintenance and checks CHANGING THE ENGINE OIL N.B. At each oil change, the mesh filters must be cleaned and the paper filter replaced. N.B. The oil change must be carried out when the engine is at working temperature. Be careful not to scald yourself with the hot oil.
- Page 18 Maintenance and checks Execute same procedure for the filter loca- ted on the right side of crankcase. Put a drawn pan under the engine closer to the paper filter cover and then unscrew the cover. betamotor.com...
- Page 19 Maintenance and checks Extract the paper filter using pliers. Check the condition of the O-ring too, and replace it if necessary. Change the filter and refit the cover, tighte- ning the three M6x20 bolts to 10 Nm. Refit the oil drainplug, tightening it to 20 Nm, and refill with 0.9 litres of engine oil (BARDHAL XTC60 15W50).
- Page 20 Maintenance and checks Rear brake To check the oil, simply observe the free surface level through container A. The oil level must never be lower than the mini- mum level notch marked on container A. In order to restore the level, top up the oil through filling cap B.
- Page 21 Maintenance and checks BLEEDING THE REAR BRAKE To bleed the air from the rear brake system, follow the steps below: - Remove the rubber cap C. - Take off the clutch fluid reservoir cover. - Fit one end of a small transparent tube over the bleed-nipple D, and insert the other end into a container.
- Page 22 Maintenance and checks CLUTCH MASTER CYLINDER FLUID Check the fluid in the reservoir. The level must never be below half-way up the reser- voir. To bring the clutch fluid up to the cor- rect level, refill the reservoir by unscrewing the two screws A, removing the filler cap B and topping up the fluid.
-
Page 23: Fork Oil
Maintenance and checks FORK OIL Right fork leg To change the fork oil, follow the steps be- low: 1 Take out the front wheel. 2 Remove the front mudguard. 3 Slack off the fork stanchion pinch bolts (A) and slide out the complete fork leg. 4 Unscrew the upper cap. -
Page 24: Sparkplug
Maintenance and checks LEFT SHAFT To replace the oil, proceed as follows: Remove the front wheel. Remove the front mudguard. Loosen the shaft locking screws (A). Unscrew the slider plug. Remove the spacer and the spring, com- press the fork to the end of the stroke, then empty out all the oil. -
Page 25: Air Filter
Maintenance and checks AIR FILTER To access the filter, simply unscrew the 5 locking screws (A) of the rear mudguard, then proceed as follows: Remove the mudguard by disconnecting the tail light cable. Remove the filter frame and the filter by unscrewing the 2 screws (B). -
Page 26: Ignition Generator Check
Maintenance and checks IGNITION GENERATOR CHECK To check that the current generator is operating correctly, proceed as follows: The check in question must be perfor- med while the temperature of the com- ponent is approximately 20°C. The check may also be performed with the generator mounted on the motorbike or on the engine. -
Page 27: Front Brake
Maintenance and checks FRONT BRAKE Check To check the front brake wear, simply ob- serve the caliper from the front, where it is possible to see the ends of the two pads where there should be a layer of lining which is at least 2 mm thick. -
Page 28: Rear Brake
Maintenance and checks REAR BRAKE Checking To check the rear brake wear, simply obser- ve the caliper from above, where it is possi- ble to see the ends of the two pads where there should be a layer of lining which is at least 2 mm thick. -
Page 29: Coolant
Maintenance and checks COOLANT Check the level (this must be done with cold engine) as follows: - Unscrew the filler cap (A) and visually check the fluid level. - If the level is close to the bottom of the tube, add fluid as follows: - Add the coolant to the system through the radiator. -
Page 30: Rear Suspension Linkage
Maintenance and checks REAR SUSPENSION LINKAGE To guarantee optimum operation and wor- king life of the rear suspension progressi- ve linkage, it is advisable to check that the nuts and bolts A, B, C, D and E are correctly tightened after every journey. Proceed as follows: Remove the linkage by unscrewing screws A, B, C, and D. -
Page 31: Scheduled Maintenance
Maintenance and checks SCHEDULED MAINTENANCE EVO 250 E 300 CC 4T Item end of running in (3h) after the first 10h every 30h every 60h Air filter I - P I - P I - P I - P Spark plug Petrol filter Engine oil Engine oil main filter... -
Page 32: Chapter 4: Adjustments
Chapter 4 Adjustments INDEX OF TOPICS Brake adjustment Clutch adjustment Tickover adjustment Throttle free clearance adjustment Steering play check and adjstment Chain tension Front suspension adjustment Rear shockabsorber adjustment betamotor.com... - Page 33 Adjustment BRAKE ADJUSTMENT Front brake The front brake is disc type with hydraulic control, and for this reason it requires only ordinary maintenance. If you wish to adjust the position of the lever, use adjuster screw A. It is advisable to leave a minimum of play.
-
Page 34: Checking And Adjusting Steering Clearance
Adjustment CARBURETTOR Tickover adjustment Tickover adjustment has a major influence on starting the engine. That is to say, an en- gine with a correctly adjusted tickover will be easier to start than an engine with incor- rect tickover adjustment. You adjust the tickover using the adjuster knob (A), which regulates the base position of the throttle valve. -
Page 35: Chain Tension
Adjustment - Loosen the screws (G) on the upper pla- - Recover the clearance by intervening on ring nut F. - Check that the rotation of the steering gear takes place in a fluent way. Excessive tightening of the steering gear bearings may jeopardise operation. -
Page 36: Front Suspension Adjustment
Adjustment FRONT SUSPENSION ADJUSTMENT RIDER’S WEIGHT (Kg) SPRING PRELOAD peso > 80 + 10 giri Forks 75 < peso < 80 + 5 giri - For a more reactive ride, unscrew adjuster peso < 70 knob B completely, with respect to the standard position. -
Page 37: Chapter 5: What To Do In An Emergency
Chapter 5 What to do in an emergency betamotor.com... - Page 38 What to do in an emergency PROBLEM CAUSE CURE Fuel feed system obstructed (pipes, Clean out the system fuel tank, tap) Air filter excessively dirty Follow procedure on page 65 Clean or replace the sparkplug. No current getting to the spar- If the problem persists, contact one THE ENGINE kplug...
Need help?
Do you have a question about the Evo4t 300 and is the answer not in the manual?
Questions and answers