Table of Contents
Advertisement
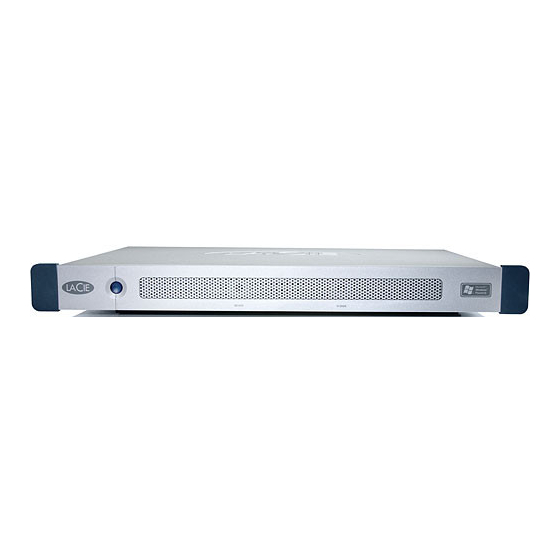
LaCie Ethernet Disk
User's Manual
How To Use This Manual
In the toolbar:
Printing:
While optimized for onscreen viewing, the pages of this manual are formatted for printing on 8
paper, giving you the option to print the entire manual or just a specific page or section.
To Exit:
From the Menu bar at the top of your screen, select: File > Quit.
Icons Used In This Manual
Italicized paragraphs feature an icon describing the type of information being given.
Important Info:
This icon refers to an important step that must be followed.
Tech Note:
This icon refers to tips to help maximize performance.
Caution!
This icon indicates a potential hazard, and gives tips on how to avoid them.
Previous Page / Next Page
How To Use This Manual
Go to Beginning / Go to End
1/2
" x 11" and A4 sized
Advertisement
Table of Contents

Related Manuals for LaCie 301297U - 1TB Ethernet Disk XP Embedded Network Attached Storage


Summary of Contents for LaCie 301297U - 1TB Ethernet Disk XP Embedded Network Attached Storage
- Page 1 How To Use This Manual LaCie Ethernet Disk User’s Manual How To Use This Manual In the toolbar: Go to Beginning / Go to End Previous Page / Next Page Printing: While optimized for onscreen viewing, the pages of this manual are formatted for printing on 8 ”...
- Page 2 5.2. Assigning A Network (IP) Address Using The LaCie Network Configurator n i t n i t h t i e i l...
-
Page 3: Table Of Contents
7.3.3. Confirmation 7.3.4. Set-up Complete 7.4. Using The Advanced Mode 7.4.1. Changing The Name And Location Of The LaCie Ethernet Disk 7.4.1.1. Changing The Name 7.4.1.2. Moving From A Workgroup To A Domain 7.4.2. Setting The Date And Time Of Your LaCie Ethernet Disk 7.4.3. - Page 4 10. Expanding Your LaCie Ethernet Disk 10.1. Adding Additional Storage Space 11. Using the LaCie Shell 11.1. Accessing the LaCie Shell using Remote Desktop (Windows) 11.2. Accessing the LaCie Shell using Remote Desktop for Mac OS X 11.3. Firewall 11.4. Diagnostics 11.4.1. System Log 11.4.2.
- Page 5 5 Copyrights Copyright © 2004 LaCie. All rights reserved. No part of this publication may be reproduced, stored in a retrieval system, or transmitted in any form or by any means, electronic, mechanical, photocopying, recording or otherwise, without the prior written consent of LaCie.
- Page 6 This Class A digital apparatus meets all requirements of the Canadian Interference-Causing Equipment Regulations. Manufacturer’s Declaration for CE Certification We, LaCie, solemnly declare that this product conforms to the following European standards: Class B EN60950, EN55022, EN50082-1, EN61000-3-2 With reference to the following conditions:...
-
Page 7: Health And Safety Precautions
General Use Precautions: • Do not expose the LaCie Ethernet Disk to temperatures outside the range of 5° C to 35° C (41° F to 95° F). Doing so may damage the LaCie Ethernet Disk or disfigure its casing. Avoid placing your LaCie Ethernet Disk near a source of heat or exposing it to sunlight (even through a window). - Page 8 With all it can do for you, we’re confident that your LaCie Ethernet Disk will quickly become an important tool in your day-to- day business and personal computing.
-
Page 9: Your Lacie Ethernet Disk
2. Your LaCie Ethernet Disk LaCie Ethernet Disk User’s Manual page 9 2. Your LaCie Ethernet Disk 2.1. Minimum System Requirements Client’s Minimum Requirements: • TCP/IP enabled network • Microsoft Windows 95, 98, Me, NT, 2000, XP • Mac OS 9.x, 10.x •... -
Page 10: Front Panel
2.3. Front Panel READY H DISK Power button – Used to turn the LaCie Ethernet Disk on and off. You can turn on the Ethernet Disk by pressing the Power button (see 4.2. Turning On Your LaCie Ethernet Disk) or using the Wake On LAN feature (see 5.3. -
Page 11: Rear Panel
Serial Number Sticker – This is where you will find your LaCie Ethernet Disk’s serial number. Write down the serial number and keep it in a safe place, because you will need to provide the number in the event you have to call LaCie Technical Support for any reason in regard to the drive’s performance. -
Page 12: Setting Up Your Lacie Ethernet Disk
Your LaCie Ethernet Disk was designed to allow for quick and easy installation. Caution! Once you have mounted the LaCie Ethernet Disk, do not set heavy objects on top of the unit (the LaCie Ethernet Disk can support up to 25 kilos). -
Page 13: Installing Your Lacie Ethernet Disk
4.2. Turning On Your LaCie Ethernet Disk Press the power button on the front of the drive and wait for the LaCie Ethernet Disk to start up. Once the Ready light is on and stays lit, the LaCie Ethernet Disk will be ready to use. -
Page 14: Configuring Your Lacie Ethernet Disk
14 5. Configuring Your LaCie Ethernet Disk Before your users can access and use the LaCie Ethernet Disk, you have to make sure the correct IP address and network settings are assigned to the unit. 5.1. Installing the LaCie Network Configurator To assist you in assigning the correct network settings, LaCie has provided you a Network Configurator program. - Page 15 5.1.3. Mac OS 10.x Users Insert the installation CD-ROM into your drive. Double-click on the Mac OS X install icon. The LaCie Network Configurator’s installer will start automatically. Click on the LaCie Network Configurator icon once it is installed to configure the network.
-
Page 16: Assigning A Network (Ip) Address Using The Lacie Network Configurator
There are two possible scenarios: If your network is DHCP enabled You will not need to modify your LaCie Ethernet Disk’s network settings. Write down the IP address and quit the Configurator. Important Info: By default, the LaCie Ethernet Disk is configured to use DHCP. - Page 17 IP address or you are moving the LaCie Ethernet Disk. Once the network parameters have been set, the LaCie Ethernet Disk is ready to be accessed by users. Users will have access to the default folder called “public.” Any user can log on as the default user, with the username “myuser” and the password “myuser.”...
-
Page 18: Accessing Your Ethernet Disk Over The Network
18 6. Accessing Your Ethernet Disk Over The Network Your LaCie Ethernet Disk appears as a drive with shared folders on the network. You can connect to the LaCie Ethernet Disk as you would with any other server. Important Info: If you have just turned on the LaCie Ethernet Disk, it may take a few minutes for the server to show up in the network. -
Page 19: Mac Users
From the Start menu, select Find and then Computer. Enter the server name and click Find Now. Windows will search your system and after a little while, the LaCie Ethernet Disk should appear in the result window. Click on the icon, and you will then be asked to enter a username and password. -
Page 20: Connecting Via Http Or Ftp
(the server_ip_address stands for the IP address assigned to your LaCie Ethernet Disk by the LaCie Network Configurator). Once the page has loaded, you can choose how you want to connect to the LaCie Ethernet Disk. Click the HTTP button to access in http mode, or FTP to access in the ftp mode. -
Page 21: Using The Web Administration Page
21 7. Using The Web Administration Page LaCie provides a Web Administration Page with utilities that allow the LaCie Ethernet Disk administrator to easily create and customize shares, add and modify users and groups, and assign user permissions. 7.1. Accessing The Web Administration Page... -
Page 22: Wizard And Advanced Modes
If you will be using your LaCie Ethernet Disk with Mac OS 9.x, the file and folder length is limited to 27 characters. If you will be using your LaCie Ethernet Disk in a network environment with Mac OS 9.x and Mac OS 10.x or Windows, the same limitation applies. -
Page 23: Username
The share that you are about to create is public – this means that anyone who has an account on the LaCie Ethernet Disk will be able to access it. To limit access, you have to create users. If you already have user accounts, you may skip this step and click on the Next button. -
Page 24: Set-Up Complete
7.4.1. Changing The Name And Location Of The LaCie Ethernet Disk 7.4.1.1. Changing The Name The server name is the one that is used to identify your LaCie Ethernet Disk on the network. By default, it is set as LACIE- XXXXXXXXX*. -
Page 25: Moving From A Workgroup To A Domain
Fig.7.5.1.2 7.4.2. Setting The Date And Time Of Your LaCie Ethernet Disk You can set the date and time of your LaCie Ethernet Disk in the Web Administration Page, under the Server section. Click on the button next to the current time, which brings you to the Edit system time page. -
Page 26: Sharing Your Lacie Ethernet Disk In Advanced Mode
7.4.3. Sharing Your LaCie Ethernet Disk In Advanced Mode Your LaCie Ethernet Disk works like a typical file sharing system: you create users and/or groups that have access to use and share data, then create a share and assign the users and/or groups rights to that share. -
Page 27: Creating Shares
If you will be using your LaCie Ethernet Disk with Mac OS 9.x, the file and folder length is limited to 27 characters. If you will be using your LaCie Ethernet Disk in a network environment with Mac OS 9.x and Mac OS 10.x or Windows, the same limitation applies. -
Page 28: Shutting Down The Ethernet Drive
In the current version of the LaCie Ethernet Disk (version 1.2 and later), you can set share permissions under Windows and the Mac OS. Use the arrow buttons to add or remove permissions. Under Apple, if enabled, the share will be accessible for any authenticated user. -
Page 29: Advanced Management Of Users, Groups And Shares
8.1. Listing Local Users A user is any individual with a valid username and password who, once authenticated, has access to those shares on the LaCie Ethernet Disk to which (s)he is allowed. In the Web Administration Page, click on Users to have access to the list of the local users on your LaCie Ethernet Disk. -
Page 30: Editing A User
In the Web Administration Page, click on the Groups tab to have access to the list of local groups on your LaCie Ethernet Disk. 8.2.1. Creating A Group In the Web Administration Page, click on the Groups tab. From... -
Page 31: Editing A Group
5) Your group is now created, and by default, it belongs to the Users group. Important Info: There are a few fixed groups on the LaCie Ethernet Disk, and they can not be deleted. They are: Administrators, Guests, Power Users and Users. -
Page 32: Listing Local Shares
The LaCie Ethernet Disk program allows you to remove the broken shares from the database. At the bottom of the Shares page, there will be a list of broken shares, if you have any. Click on the Delete button for the share(s) you want to remove. -
Page 33: Customizing Your Lacie Ethernet Disk
9. Customizing Your LaCie Ethernet Disk 9.1. Checking Your Server Configuration From the Web Administration Page, click on the Server tab to find out the configuration of your LaCie Ethernet Disk. You should see: • Machine name • Windows domain or workgroup •... -
Page 34: Checking The Adminitrator's Password
9. Customizing Your LaCie Ethernet Disk LaCie Ethernet Disk User’s Manual page 34 9.2. Changing The Administrator’s Password By default, the administrator’s password is admin. You should change this password as soon as possible, for security reasons. 1) In the Web Administration Page, click on the Users tab. -
Page 35: Rebooting Your Server
9. Customizing Your LaCie Ethernet Disk LaCie Ethernet Disk User’s Manual page 35 9.4. Rebooting Your Server 1) In the Web Administration Page, click on the Server tab. 2) At the bottom of the page, click on the Reboot button. -
Page 36: Changing Your Network Configuration
Reboot your machine page, because your LaCie Ethernet Disk will have changed to another subnet and it will appear as though you cannot access the LaCie Ethernet Disk. You will then need to use a machine on the same subnet to access the Web Administration Page of your LaCie Ethernet Disk. -
Page 37: Formatting Your Disk
User’s Manual page 37 9.7. Formatting Your Disks The LaCie Ethernet Disk allows you to format a disk. To format a disk, use the formatting tool: 1) In the Web Administration Page, click on the Disk tab. 2) Check format for the drive* that you want to format. -
Page 38: Defragmenting Your Disks
2) Check defragment for the drive* that you want to defragment. *There should only be one drive, unless you have attached an external hard disk drive to your LaCie Ethernet Disk. 3) Answer the following questions, then click on the Defragment button. -
Page 39: Backing Up Your Disks Using The Included Backup Program
9.9. Backing Up Your Disks Using The Included Backup Program The LaCie Ethernet Disk uses Microsoft’s NT Backup to perform a backup of one, many, or all directories of your drive, and can be scheduled to run every day, week or month at a predetermined time. The Backup utility helps you protect data from accidental loss if your system experiences hardware or hard disk failure. -
Page 40: Recovering Files Using The Included Backup Program
9. Customizing Your LaCie Ethernet Disk LaCie Ethernet Disk User’s Manual page 40 7) Press the Run or schedule backup job button to start the backup process. Tech Note: Backup time is dependent upon the speed of the drive that you are using, the port that you are using (internal drives are limited to 133Mb/s, Hi-Speed USB 2.0 is limited to 480Mb/s) and the amount of the data... - Page 41 9. Customizing Your LaCie Ethernet Disk LaCie Ethernet Disk User’s Manual page 41 4) Select Restore files and settings and click the Next button. Fig.9.9.2b 5) Select the file(s) or folder(s) you want to restore. 6) Click the Next button.
- Page 42 9. Customizing Your LaCie Ethernet Disk LaCie Ethernet Disk User’s Manual page 42 7) Click the Finish button. Tech Note: Clicking on the Advanced... button will allow you to specify additional restore options. (i.e. Alternate location or Single folder). Fig.9.9.2d 8) The restore progress dialog will appear.
-
Page 43: Backing Up Your Disks Using Third-Party Software Programs
LaCie Ethernet Disk over the network to a Tape Drive. Since your LaCie Ethernet Disk can be seen on the local area network (LAN), and because you can map the shares, you can backup all the data on your LaCie Ethernet Disk over the network, using the program of your choice. - Page 44 (the server_ip_address stands for the IP address assigned to your LaCie Ethernet Disk by the LaCie Network Configurator) 2) Login with the Administrator account and click the Restore button for the restore point that you would like use to rollback your system.
-
Page 45: Expanding Your Lacie Ethernet Disk
Tested, certified drives include LaCie d2 hard drives, LaCie Studio Drives and LaCie Pocket Drives. 1) Connect the hard drive to the LaCie Ethernet Disk using one of the Hi-Speed USB 2.0 ports. 2) In the Web Administration Page, click on the Disk tab. -
Page 46: Using The Lacie Shell
The host system then uses RDP to send screen and audio information back to the client system. The LaCie Ethernet Disk system does not have any sound card drivers installed and does not support the audio feature. -
Page 47: Accessing The Lacie Shell Using Remote Desktop (Windows)
2) In the Remote Desktop Connection dialog Computer field enter the IP address of the LaCie Ethernet Disk, and click Connect. 3) In the LaCie Log On dialog Type in the Administrator username and password, and click OK. The LaCie Shell then appears. -
Page 48: Accessing The Lacie Shell Using Remote Desktop For Mac Os
2) In the Remote Desktop Connection dialog Computer field enter the IP address of the LaCie Ethernet Disk, and click Connect. 3) In the LaCie Log On dialog Type in the Administrator username and password, and click OK. The LaCie Shell then appears. -
Page 49: Firewall
11.3. Firewall To configure the firewall of the Ethernet Disk 1) Click on the Firewall button. 2) In the LaCie Ethernet Disk Firewall dialog that appears select the desired settings in each section of the dialog. 3) Click Apply Settings, then... -
Page 50: Diagnostics
11. Using the LaCie Shell LaCie Ethernet Disk User’s Manual page 50 11.4. Diagnostics When you click on the Diagnostics button it displays the System Log. 11.4.1 Click on the System Log button to display system messages and errors. If you are unfamiliar with Windows error messages, or have any questions about errors you see here, contact LaCie Technical support. -
Page 51: Advanced
11.4.4 Clicking on the Backup and Restore button displays the standard Windows Backup and Restore Wizard. LaCie recommends that you use the Web Administration Backup options described in sections 9.9. -
Page 52: Logging Off The System Via Remote Desktop (Windows And Macintosh)
11. Using the LaCie Shell LaCie Ethernet Disk User’s Manual page 52 11.5 Logging Off The System via Remote Desk (Windows and Macintosh) If you click the Close button of the Remote Desktop window, you’ll be prompted to disconnect from the remote system. -
Page 53: Troubleshooting
12. Troubleshooting In the event that your LaCie Ethernet Disk is not working correctly, please refer to the following checklist to find out where the problem is coming from. If you have gone through all of the points on the checklist and your drive is still not working correctly, please have a look at the FAQs that are regularly published on our Web site –... - Page 54 LaCie Ethernet Disk on the right panel of the configurator: when you Ethernet Disk while in DCHP. open the LaCie Network Configurator, you will see a list of all of the NAS servers running on your network. When you browse through this list, all of the related information about the network, including IP addresses, will be displayed in the right panel of the window.
- Page 55 If this is the case, and the device is not plugged in, the share names will still be in the registry of your LaCie Ethernet Disk. In this instance, you will need to delete the “broken share” (see 8.3.4 Deleting A...
- Page 56 12. Troubleshooting LaCie Ethernet Disk User’s Manual page 56 Issues Possible Solutions Error messages when attempting to If you are using Mac OS 9.x, all file and folder names must be less than 27 transfer data. characters in length. Make sure that all file and folder names are under 27 characters.
-
Page 57: Contacting Customer Support
If you have asked yourself all of the pertinent questions in the troubleshooting checklist, and you still can't get your LaCie drive to work properly, contact us via the provided Web link. Before contacting us, make sure that you are in front of your computer and that you have the following information on hand: •... - Page 58 Contact Us At: Contact Us At: http://www.lacie.com/no/contact/ http://www.lacie.com/es/support/request LaCie Switzerland LaCie Sweden Contact Us At: Contact Us At: http://www.lacie.com/chfr/contact http://www.lacie.com/se/contact/ LaCie USA LaCie United Kingdom & Ireland Contact Us At: Contact Us At: http://www.lacie.com/contact/ http://www.lacie.com/uk/support/request LaCie Grand Export Contact Us At: http://www.lacie.com/intl/contact/...
-
Page 59: Restoring Your Ethernet Disk Using The Lacie Restore Cd
59 14. Restoring Your Ethernet Disk Using The LaCie Restore CD In the event that LaCie Technical Support asks you to restore your Ethernet Disk from CD please use the steps outlined below. Important Info: Restoring will erase all data from the Ethernet Disk; therefore whenever possible backup your data before restoring from CD. - Page 60 8) Use the LaCie Network Configurator to configure your Ethernet Disk. 9) Using a Web browser access the Ethernet Disk and apply any LaCie Ethernet Disk software updates needed to restore the Ethernet Disk software up to the latest version.
-
Page 61: Warranty
• The broken part is a replacement part such as a pickup tray, etc. • The tamper seal on the drive casing is broken. LaCie and its suppliers accept no liability for any loss of data during the use of this device, or for any of the problems caused as a result. -
Page 62: Glossary
Glossary LaCie Ethernet Disk User’s Manual page 62 Glossary Backup – (1) The act of creating at least one additional copy of data onto a different (and safe) storage device from where it can be retrieved at a later time if needed. (2) A copy of a file, directory, or volume on a separate storage device from the original, for the purposes of retrieval in case the original is erased, damaged, or destroyed. - Page 63 Glossary LaCie Ethernet Disk User’s Manual page 63 Data Stream – The flow of data that accomplishes a task, usually related to moving data from storage to computer RAM or between storage devices. Digital – Discrete information that can be broken down to zero or one bits.
- Page 64 Glossary LaCie Ethernet Disk User’s Manual page 64 GB (GigaByte) – This value is normally associated with data storage capacity. Basically, it means a thousand million or a billion bytes. In fact, it equals 1,073,741,824 bytes (or 1,024 x 1,024 x 1,024).
- Page 65 Glossary LaCie Ethernet Disk User’s Manual page 65 KB/s – Kilobytes per second. A means of measuring throughput. LAN (Local Area Network) – A group of computers and associated devices that share a common communication line and typically share the resources of a single processor or server within a small geographic area.
- Page 66 Glossary LaCie Ethernet Disk User’s Manual page 66 Port, number – Used to identify a specific process to which an Internet or other network message is to be forwarded when it arrives at a server. Port, software – A memory address that identifies the physical circuit used to transfer information between a microprocessor and a peripheral.
- Page 67 Glossary LaCie Ethernet Disk User’s Manual page 67 TCP/IP (Transmission Control Protocol/Internet Protocol) – This is the basic communication protocol of the Internet. TCP/IP uses the client/server model of communication, in which a client (a computer user) requests and is provided a service (such as a Web page) by another computer (a server) in the network.
Need help?
Do you have a question about the 301297U - 1TB Ethernet Disk XP Embedded Network Attached Storage and is the answer not in the manual?
Questions and answers