Table of Contents
Advertisement
Quick Links
2-WAY REMOTE
CONTROL ENGINE
STARTER
PATENT N
OS
CAN 2.105.426
USA 5.614.883 - 5.617.819 - 5.673.017 - 6.087.996
AND OTHER PATENTS PENDING
Printed in Canada
All rights reserved © Astroflex 2006
U S E R M A N U A L
MODEL 2305A
(FRANÇAIS AU VERSO)
C
ONSULT
ADDITIONAL MATERIAL
For all gas- and diesel-powered
vehicles
•
AM/FM communication
•
May control vehicle's OEM safety system or added
optional system
•
Protection mode for turbocharged engines
•
Headlight status warning
•
Pager mode
S
P
AFETY
RECAUTION SECTION
BEFORE USING THIS PRODUCT
S
OME FEATURES MAY REQUIRE
(N
July 2006
.
).
OT INCLUDED
Manufactured in Canada by:
®
193-127-317-01
Advertisement
Table of Contents

Related Manuals for AstroStart 2305A


Summary of Contents for AstroStart 2305A
- Page 1 2-WAY REMOTE ® CONTROL ENGINE STARTER U S E R M A N U A L MODEL 2305A For all gas- and diesel-powered vehicles • AM/FM communication • May control vehicle’s OEM safety system or added optional system • Protection mode for turbocharged engines •...
-
Page 2: Government Regulations
GOVERNMENT REGULATIONS This device complies with the requirements of Industry Canada (IC) - Management of Radio Frequencies, as specified in document CNR-210. Its use is authorized only on a no-interference, no-protection basis; in other words, this device must not be used if it is determined that it causes harmful interference to services authorized by IC. -
Page 3: Table Of Contents
THANK YOU FOR CHOOSING AN ASTROSTART REMOTE CAR STARTER! Like you, Astroflex is concerned with the environment. This is why we suggest using the two-minute runtime when you remote start your vehicle to warm up engine fluids. We take this opportunity to remind you to properly defrost your windows and remove all the snow from your vehicle before driving on public roads. -
Page 4: Safety Precautions
Make sure you comply with all local regulations, which may prohibit leaving your engine running when vehicle is unattended in a public place. • To ensure continued safe operation of your remote starter, ask your AstroStart dealer to periodically check and/or tune the remote starting system. •... -
Page 5: Safety Sequence For Manual Transmission Vehicles
SAFETY SEQUENCE FOR MANUAL TRANSMISSION VEHICLES Your remote starter was designed to force you to perform a series of actions that will ensure that the gearshift lever is in neutral position when you exit the vehicle. This series of actions is called a "Safety sequence" and is aimed at preventing any remote start in situations where remote starting the engine would not be safe. -
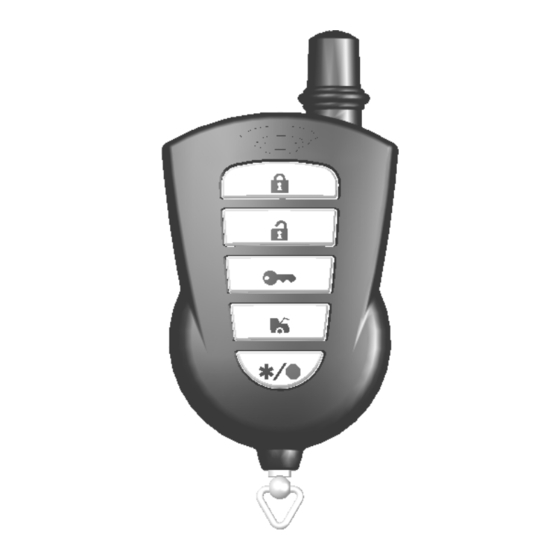
Page 6: The Remote Control
THE REMOTE CONTROL A maximum of four remote controls can be assigned to your vehicle. See your dealer for additional remote controls. NOTE: The range of your remote control can be affected by weak batteries, interference from nearby metal structures, hydro poles, or crowded parking lots. -
Page 7: Ager
EPLACING THE BATTERY When the sound becomes low-piched on a audio confirmation this means that the batteries need to be replaced. The remote control requires two 3-volt lithium batteries (CR-2430 or equivalent). We strongly recommend keeping a set of replacement batteries in your glove compartment. -
Page 8: Table Of Commands
TABLE OF COMMANDS ONFIRMATION OMMANDS BUTTONS VEHICLE REMOTE CONTROL LIGHTS SIREN UTTON TART ONTINUOUS 1-20 > 4 sec. (10 sec.) CCESS TO COMMAND GROUP > 2 sec. 1 / 3* 1 / 3 / X * RMING 2 / 4* 2 / 4 / X * NLOCK ISARMING... - Page 9 By default, the commands executed by the remote are those of Group 1. To perform a command from Group 2, you must first press the button (2 sec.), and then press the button(s) corresponding to the desired command. The remote control remains in Group 2 for 10 secondes (to execute the command). If the button is pressed (2 sec.) when the remote is in Group 2, it switches to Group 1.
-
Page 10: Start Commands
RIGGER INPUT Your remote starter is equipped with a negative trigger (pulse) input. This input can be connected to another remote control device or to an AstroStart RST-2 timer output (optional), part number 310-903-502. If this input is connected, consult this device's manual or ask your technician which command controls the Start/Stop function. -
Page 11: Turbo Mode
CONTINUOUS MODE Continuous Mode function lets you remove the key from the ignition while leaving the engine running. This convenient feature allows you to leave your vehicle for short periods while climate controls remain on. To access Continuous Mode, press on the button while engine is idling (see S TARTING THE on page 8). - Page 12 LOW TEMPERATURE MODE In Low Temperature (Sentinel) mode, system starts your engine automatically when the temperature falls below a preset level. Engine will run for programmed runtime, after which the system will wait 2½ hours and then start the engine again if temperature is still below preset level.
-
Page 13: Security System
SECURITY SYSTEM This section applies to an AstroStart safety system (optional) and should not be mistaken for the vehicle’s original system. On such a system, the remote can only warn of an alarm status (optional connections). The bi-directional remote control is in constant communication with your vehicle. Even if you do not ask for status, it will inform you by means of icons on your remote that a door has been opened for longer than 5-minutes, that the engine has stopped, etc. - Page 14 OPERATION Your alarm system has three different operating modes: active, semi-passive rearming and passive rearming depending on initial programming. See the relevant paragraph for the mode your system was configured in during installation. Following a rearming, the last remote that transmitted a command to the system will receive confirmation of the rearming. ACTIVE In active mode, the alarm must be armed using the remote (see Table of Commands on page 6).
- Page 15 The following table shows the effect that each zone has on the rearming cycle. Protection zone Effect on rearming cycle Hood Doors These four zones prolong rearming cycle as long as they remain in violation. Additional sensor (trunk) Shock sensor Activated by ignition key: Cancels rearming Ignition...
-
Page 16: Zone Codes
The following table shows the meaning of zone codes (number of flashes). ZONE CODES FLASHES ZONE INDICATED System is armed. A door is/was open. Hood is/was open. Alarm condition is/was detected on shock sensor input. Key is/was in ignition position (RUN). Alarm condition is/was detected on additional sensor input. -
Page 17: Lock/Unlock Commands And Alarm System Arming/Disarming
LOCK/UNLOCK COMMANDS AND ALARM SYSTEM ARMING/DISARMING If your vehicle is equipped with electric door locks, several functions can be operated by remote control. These features are optional and may require purchasing additional equipment. Consult your dealer for advice. Arming and disarming the security system also controls Lock/Unlock functions. The arming/disarming functions only apply to models equipped with a security system. -
Page 18: Other Commands
This type of antitheft system is armed by sending a ‘Lock’ command (unless ignition key is in ‘RUN’ position) and is disarmed by sending an ‘Unlock’ command. The indicator light (optional) blinks continuously when antitheft system is armed (if the AstroStart security system is not armed) . ALET NTITHEFT The Antitheft function can be deactivated for the same reasons and in the same way as the Antitheft system. -
Page 19: Car Finder
INDICATOR LIGHT An optional indicator light (LED) can be added to the system to show the status of the safety sequence (on vehicles equipped with a manual transmission), and the status of the safety system, the antitheft system or the Valet Mode. See ‘Indicator Light’... -
Page 20: Start Fail Codes
PANIC To activate the panic mode, press either button and hold for more than 4 seconds. This command activates all deterrents that are connected to the system, parking lights, horn, siren and dome light for 30 sec. or 60 sec. depending on programming made during installation. -
Page 21: Glossary
ALARM CONDITION CODES Use this command to identify which zone is in violation during arming or which generated alarm condition. Press (2 sec.) on the button, then press the buttons simultaneously (2 sec.). Parking lights will flash a number of times corresponding to code for protection zone in violation. If more than one zone is in violation, code for the zone with highest priority is shown. -
Page 22: Code Learning Of Additional Transmitter(S)
CODE LEARNING OF ADDITIONAL TRANSMITTER(S) Four different remote controls can be programmed for a given vehicle. If a fifth remote is added, the first remote is deleted. Note: When the first code learning command is sent, all the old codes are cleared out. therefore if you want to add a new remote, all the old ones must be reprogrammed as well. -
Page 23: Safety Checks
SAFETY CHECKS In order to maintain a high safety standard, proceed with the following checks every month. HOOD SWITCH • Remote start your vehicle. • Open hood. Engine should stop as soon as hood is opened. If engine does not stop immediately, turn main switch to OFF position and leave it off until situation is rectified. Contact your service center. -
Page 24: Gearshift Check Applicable To Manual Transmission Vehicles
GEARSHIFT CHECK APPLICABLE TO MANUAL TRANSMISSION VEHICLES Make sure the parking brake is operational, i.e. it has the capability of immobilizing the vehicle. If the parking brake cannot stop the wheels from turning, which is not safe, place the main switch in OFF position until the situation is rectified.
Need help?
Do you have a question about the 2305A and is the answer not in the manual?
Questions and answers