
Related Manuals for Electrolux 584093


Summary of Contents for Electrolux 584093
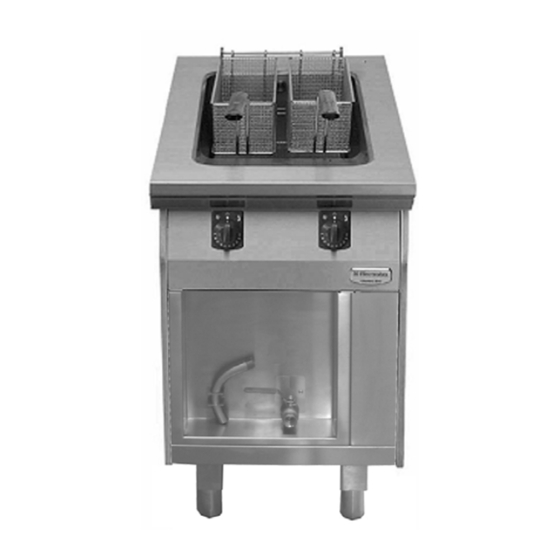
- Page 1 ELECTRIC DEEP FAT FRYERS FRITEUSEN ÉLECTRIQUES INSTALLATION- AND OPERATING INSTRUCTIONS INSTRUCTIONS D’INSTALLATION ET D’EMPLOI thermaline S90 Doc. 62.9585.01_UL Edition 1 01.2006 page 3 page 11...
- Page 2 Against wall - contre une paroi Free standing - isolé Connections - Raccordement Electricity - Electricité Fig.1 INSTALLATION DRAWINGS - PLANS D'INSTALLATION Doc. 62.9585.01_UL...
-
Page 3: Table Of Contents
CONTENTS GENERAL INFORMATION ... 3 INSTALLATION INSTRUCTIONS... 4 III. OPERATING INSTRUCTIONS... 8 SOMMAIRE INSTRUCTIONS GÉNÉRALES... 11 INSTRUCTIONS RELATIVES À L'INSTALLATION... 12 INSTRUCTIONS DE FONCTIONNEMENT ... 16 62.9585.01_UL Page 1... - Page 4 Page 2 62.9585.01_UL...
-
Page 5: General Information
The trough heating must not be switched on if there is no oil in the trough or the oil level has fallen below the minimum. Opera- ting the fryer with too low oil level is a fire risk. Food must be placed slowly in the heated trough, to prevent the oil from bubbling over. -
Page 6: Installation Instructions
II . INSTALLATION INSTRUCTIONS INSTALLATION The appliance is designed for connection to fixed lines. The appliances are suitable for setting up as single appliances or as a group of appliances. They can be set up freely in the room, side by side, at the side and/or at the back against a wall. Gaps between two appliances or appliance and sidewall should be filled with a FDA approved silicone such as Samco RTV103. - Page 7 SIDEWALL (D) Fig.2 Assemblage of sidewall The assembly kit contains two of each of the following: hexagonal screws M8x25 (1 / Fig.1), bolts with retaining rings (2 / Fig.1), mounting links (3 / Fig.1), hexagonal screws M8x16 with serrated washers and hexagonal nuts M8, hexagonal screws M5 with serrated washers (4 / Fig.2) and a fastening angle (5 / Fig.2).
- Page 8 FRONT PANELS (A) and (B) Fig.6 Front panel Unscrew screws (1 or 3). Also, in the case of a built-in oven, unscrew screws (2 and/or 4) on the inside of the oven. Pull the panel away forwards and downwards. CONTROL PANEL (C) (3c) Fig.
- Page 9 ELECTRICAL CONNECTION Each appliance is accompanied by a complete connection and wiring diagram enclosed. This contains full details of the technical specifications (electrical rating, voltage, amperage etc.) Check and ensure that the mains voltage agrees with the voltage given on the specification plate. N.B.: •...
-
Page 10: Operating Instructions
STANDBY As soon as the white operating light (4) extinguishes (the ther- mostat switches the heating off), the fryer is ready to load. If no food is placed in the oil, the heating switches on and off inter- mittently. The white operating light (4) lights up periodically and extinguishes again. - Page 11 SHUTTING DOWN The following should be observed when shutting down for a long period: Never store the fryer where the temperature can drop below 32°F (0 C°). Do not leave the troughs full of water, since this prevents the normal passivation of the steel and the surfaces are thus less resistant to corrosion.
- Page 12 OPERATING INSTRUCTIONS Page 10 62.9585.01_UL...
-
Page 13: Instructions Générales
INSTRUCTIONS GÉNÉRALES CONSIGNES DE SÉCURITÉ ET D'UTILISATION INSTALLATION ET MISE EN SERVICE Le montage, le réglage et la première mise en service de l'appareil doivent s'effectuer confor- mément aux instructions du fabricant et être confiés exclusivement à un technicien agréé. Le raccordement au réseau électrique doit être réalisé... -
Page 14: Instructions Relatives À L'installation
INSTRUCTIONS RELATIVES À L'INSTALLATION II . INSTRUCTIONS RELATIVES À L'INSTALLATION MISE EN PLACE Cet appareil est conçu pour être raccordé à des conduites fixes. Les appareils peuvent être montés individuellement ou en groupe. Ils peuvent être installés de façon indépendante, côte à... - Page 15 INSTRUCTIONS RELATIVES À L'INSTALLATION PAROI LATERALE (D) Fig.2 Montage du paroi latérale Chaque kit d'assemblage comprend respectivement deux vis hexagonales M8 x 25 (1 / Fig.1), des boulons avec circlip (2 / Fig.1), des éclisses (3 / Fig.1), des vis hexagonales M8 x 16 avec rondelles à...
- Page 16 INSTRUCTIONS RELATIVES À L'INSTALLATION PANNEAU AVANT (A) et (B) Fig.6 Panneau avant Desserrez les vis (1 et 3 Fig.5, Fig.6). Si le four est encastré, desserrez Extrayez le panneau vers l'avant et le bas. PANNEAU DE COMMANDE (C) (3c) Fig.7 Panneau de commande Enlever l'interrupteur rotatif.
- Page 17 INSTRUCTIONS RELATIVES À L'INSTALLATION BRANCHEMENT ÉLECTRIQUE Chaque appareil est accompagné d'un schéma complet des connexions et du câblage reprenant les données techniques (puissance électrique, tension, intensité de courant, etc.). Il est nécessaire de contrôler que la tension d'alimentation cor- respond aux valeurs indiquées sur la plaque signalétique. Observez ce qui suit : •...
-
Page 18: Instructions De Fonctionnement
INSTRUCTIONS DE FONCTIONNEMENT III . INSTRUCTIONS DE FONCTIONNEMENT GÉNÉRALITÉS L'appareil est employé pour la cuisson à la friteuse. Au cours du fonctionnement, le panier est suspendu. La température du bain d'huile est réglée au moyen du ther- mostat sur base de la température de travail sélectionnée. Un thermostat de sécurité... - Page 19 INSTRUCTIONS DE FONCTIONNEMENT TRAITEMENT DE L'HUILE DE FRITURE Filtrez l'huile après chaque utilisation : Tournez l'interrupteur réseau (1) sur 0. Attendez que l'huile soit refroidie. Installez la rallonge destinée à effectuer la vidange de l'huile sur le robinet de vidange. Placez le récipient de recueillement équipé...