Table of Contents
Advertisement
Advertisement
Table of Contents

Subscribe to Our Youtube Channel
Related Manuals for NEC EA294WMi-BK


Summary of Contents for NEC EA294WMi-BK
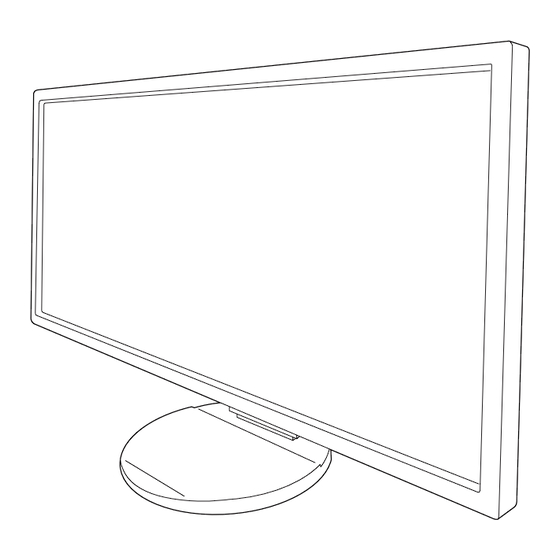
- Page 1 MultiSync EA294WMi User’s Manual...
-
Page 2: Table Of Contents
Index Warning, Caution ..........................English-1 Registration Information .......................English-2 Recommended use ........................English-3 Contents ............................English-5 Quick Start ............................English-6 Controls ............................English-11 Specifi cations ..........................English-18 Features ............................English-19 Troubleshooting ..........................English-20 Using the Auto Brightness function ....................English-22 Using Picture by Picture (PBP) Function ..................English-23 Using the Zoom Function ......................English-24 ControlSync ..........................English-26 TCO Certifi... -
Page 3: Warning, Caution
This product can only be serviced in the country where it was purchased. Windows is a registered trademark of Microsoft Corporation. NEC is a registered trademark of NEC Corporation. ErgoDesign is a registered trademark of NEC Display Solutions, Ltd. in Austria, Benelux, Denmark, France, Germany, Italy, Norway, Spain, Sweden, U.K. -
Page 4: Registration Information
This device complies with Part 15 of FCC Rules. Operation is subject to the following two conditions. (1) This device may not cause harmful interference, and (2) this device must accept any interference received, including interference that may cause undesired operation. U.S. Responsible Party: NEC Display Solutions of America, Inc. Address: 500 Park Boulevard, Suite 1100 Itasca, Illinois 60143 Tel. -
Page 5: Recommended Use
NOTE: As with all personal display devices, NEC DISPLAY SOLUTIONS recommends using a moving screen saver at regular intervals whenever the screen is idle or turning off the monitor when not in use. - Page 6 CORRECT PLACEMENT AND ADJUSTMENT OF THE MONITOR CAN REDUCE EYE, SHOULDER AND NECK FATIGUE. CHECK THE FOLLOWING WHEN YOU POSITION THE MONITOR: • For optimum performance, allow 20 minutes for the display to warm up. • Adjust the monitor height so that the top of the screen is at or slightly below eye level. Your eyes should look slightly downward when viewing the middle of the screen.
-
Page 7: Contents
Contents Your new NEC monitor box* should contain the following: • MultiSync monitor with a tilt/swivel/pivot/height adjust stand • Power Cord* • Video Signal Cable (DVI-D to DVI-D cable)* • Video Signal Cable (Mini D-SUB 15 pin to Mini D-SUB 15 pin) •... -
Page 8: Quick Start
Quick Start To attach the Base to the LCD stand: 1. Place monitor face down on a non-abrasive surface (Figure 1). NOTE: Handle with care when monitor facing down, for avoiding damage to the front control keys. 2. Please rotate the stand 90 degrees as shown in Figure 1. Control NOTE: Handle with care when pulling the stand. -
Page 9: Power Cord
3. Place hands on each side of the monitor to tilt the LCD panel 30-degree angle and lift up to the highest position. 4. Connect all cables to the appropriate connectors (Figure C.1). When using the USB cable, connect the B type connector to the USB upstream port on the right back side of the monitor and the A type connector to the downstream port on the computer (Figure C.1a). -
Page 10: Raise And Lower Monitor Screen
8. Turn on the computer, then turn on the monitor by pressing the power sign on the front bezel (Figure E.1). 9. No Touch Auto Adjust automatically adjusts the monitor to optimal settings upon initial setup. For further adjustments, use the following OSD controls: •... -
Page 11: Flexible Arm Installation
Tilt and Swivel Grasp the top and bottom sides of the monitor screen with your hands and adjust the tilt and swivel as desired (Figure TS.1). Figure TS.1 NOTE: Handle with care when tilting the monitor screen. Flexible Arm Installation This LCD monitor is designed for use with a fl... -
Page 12: Mount Flexible Arm
Mount Flexible Arm This LCD monitor is designed for use with a fl exible arm. 1. Follow the instructions on how Remove Monitor Stand for Mounting to remove the stand. 2. Use the 4 screws removed from the stand to attach the arm to the monitor (Figure F.1). Caution: Use ONLY the screws (4 pcs) that were removed from the stand to avoid damage to the monitor or stand. -
Page 13: English
Controls OSD (On-Screen Display) control keys on the front of the monitor function are as follows: To access OSD menu, touch any of the control keys. To change signal input, touch the SELECT key. NOTE: Exit OSD in order to change signal input. 1 AmbiBright Sensor Detects the level of ambient lighting, allowing the monitor to make adjustments to various Human Sensor... -
Page 14: Eco Mode
ECO TOOLS BRIGHTNESS Adjusts the overall image and background screen brightness. If ECO MODE is set to 1 or 2, a bar for CARBON FOOTPRINT will appear. CONTRAST Adjusts the overall image and background screen brightness by input signal level. ECO MODE Decreases the amount of power consumption by reducing the brightness level. - Page 15 HUMAN SENSING The human sensor on the front side of the monitor detects the movement of a person by using the HUMAN SENSING function. The HUMAN SENSING has three settings: OFF: No HUMAN SENSING. 1 (LIGHT): After it is detected that there is no person after a period of time, the monitor shifts to low brightness mode automatically to reduce the power consumption.
- Page 16 FINE (Analog input only) Improves focus, clarity and image stability by increasing or decreasing this setting. If the “AUTO ADJUST” function and the “H.SIZE” function do not give you a satisfactory picture setting, a fi ne tuning can be performed by using the “FINE” function. For this a Moiré...
- Page 17 Color Color Control System: Color presets select the desired color setting. 1, 2, 3, 5: Increases or decreases Red, Green or Blue color depending upon which is selected. The change in color will appear on screen and the direction (increase or decrease) will be shown by the bars. NATIVE: Original color presented by the LCD panel that is unadjustable.
-
Page 18: Off Timer
RESPONSE IMPROVE Turns the Response Improve function on or off. Response Improve may reduce blurring that occurs in some moving images. OFF TIMER Monitor will automatically power down when you have selected a pre-determined amount of time. Before powering off, a message will appear on the screen asking if you want to delay the turn off time by 60 minutes. Touch any OSD key to delay the power-down time. -
Page 19: Customize Setting
DATA COPY To initiate data copy from the master monitor to the sub monitor(s), select “DATA COPY” and touch “SELECT”. A “PROCEEDING...” indicator will appear on the screen. NOTE: This function is only intended for the master monitor in ControlSync. All of the settings specifi... -
Page 20: Specifi Cations
@ 60 Hz to 75 Hz 1400 x 1050* @ 60 Hz 1920 x 1080* @ 60 Hz, 30 Hz HDMI/MHL 2560 x 1080 @ 60 Hz........... NEC DISPLAY SOLUTIONS cites recommended. Active Display Area Landscape: Horiz.: 672.8 mm/26.5 inches Vert.: 283.8 mm/11.2 inches... -
Page 21: Features
Note: The manufacturing and operating carbon footprints are calculated by a unique algorithm developed exclusively by NEC for its monitors, and are accurate at the time of printing. NEC reserves the right to publish updated carbon footprint values. HDCP (High-bandwidth Digital Content Protection): HDCP is a system for preventing illegal copying of video data sent over a Digital Visual Interface (DVI). -
Page 22: Troubleshooting
NOTE: As with all personal display devices, NEC DISPLAY SOLUTIONS recommends using a moving screen saver at regular intervals whenever the screen is idle or turning off the monitor when not in use. - Page 23 No Video • If no video is present on the screen, turn the Power Key off and on again. • Make certain the computer is not in a power-saving mode (touch the keyboard or mouse). • Some video cards do not output video signal when monitor is turned OFF/ON or disconnect/connect from the AC power cord under low resolution with DisplayPort.
-
Page 24: Using The Auto Brightness Function
Using the Auto Brightness function The brightness of the LCD screen can be set to increase or decrease depending on the amount of ambient light within the room. If the room is bright, the monitor becomes correspondingly bright. If the room is dim, then the monitor will dim accordingly. The purpose of this function is to make the viewing experience more comfortable to the eye in a variety of lighting conditions. -
Page 25: Using Picture By Picture (Pbp) Function
Using Picture by Picture (PBP) Function This monitor can display split screens from two sources by using any one of the input combinations shown on page 15. NOTE: Please see PBP MODE (page 15) and PBP TYPE (page 15). The following settings are set to be the same for both screens: BRIGHTNESS, AUTO BRIGHTNESS, OFF MODE SETTING, HUMAN SENSING, VIDEO LEVEL, OVER SCAN, PROGRAMMABLE, VOLUME, SOUND INPUT, VIDEO DETECT, PBP MODE, PBP TYPE, RESPONSE IMPROVE, OFF TIMER, POWER SAVE TIMER, LED BRIGHTNESS, DDC/CI, USB POWER, LANGUAGE, OSD TURN OFF,... -
Page 26: Using The Zoom Function
Using the Zoom Function Allows you to use the entire screen area, signifi cantly expanding the size. Allows the picture displayed in the center to expand. NOTE: When in PBP MODE, the sub picture is expanded or reduced automatically. SETUP 1. - Page 27 B. The left image is set to be the main one. In this case, the priority image is set to be on the left side. The size of the image on the right side with black area is reduced. To enlarge the split images: use the following procedures to reduce the black area and enlarge the split images. 1.
-
Page 28: Controlsync
ControlSync 1. Connect the master monitor with a sub monitor via a ControlSync cable (ø 2.5) into ControlSync IN/OUT. 2. Follow the steps of DATA COPY. When the setting of the master monitor is adjusted, it will be copied and sent to the connected sub monitor(s) automatically. -
Page 29: Tco Certifi Ed Edge Displays 1.2
TCO Certifi ed Edge Displays 1.2 Congratulations! This product is TCO Certifi ed – for Sustainable IT TCO CertiÞ ed is an international third party sustainability certiÞ cation for IT products. TCO CertiÞ ed ensures that the manufacture, use and recycling of IT products reß... -
Page 30: Manufacturer's Recycling And Energy Information
Dedicated recycling sites ensure that environmentally harmful components are properly handled and securely disposed. To ensure the best recycling of our products, NEC DISPLAY SOLUTIONS offers a variety of recycling procedures and gives advice on how to handle the product in an environmentally sensitive way, once it has reached the end of its life.
Need help?
Do you have a question about the EA294WMi-BK and is the answer not in the manual?
Questions and answers