Alpine PXA-H800 Owner’s Manual
System integration audio processor
Hide thumbs
Also See for PXA-H800 Owner’s:
- Owner's manual (99 pages) ,
- Installation manual (21 pages) ,
- Service manual (89 pages)
Table of Contents
Advertisement
Quick Links
ALPINE ELECTRONICS MARKETING, INC.
1-1-8 Nishi Gotanda,
Shinagawa-ku,
Tokyo 141-0031, Japan
Phone 03-5496-8231
ALPINE ELECTRONICS OF AMERICA, INC.
19145 Gramercy Place, Torrance,
California 90501, U.S.A.
Phone 1-800-ALPINE-1 (1-800-257-4631)
ALPINE ELECTRONICS OF CANADA, INC.
777 Supertest Road, Toronto,
Ontario M3J 2M9, Canada
Phone 1-800-ALPINE-1 (1-800-257-4631)
Qingdao Dongli Xinhaiyuan Printing Co., Ltd.
No.17, jiushuidong road, Qingdao, China
SYSTEM INTEGRATION
AUDIO PROCESSOR
PXA-H800
• OWNER'S MANUAL
Please read before using this equipment.
• MODE D'EMPLOI
Veuillez lire avant d'utiliser cet appareil.
• MANUAL DE OPERACIÓN
Léalo antes de utilizar este equipo.
ALPINE ELECTRONICS OF AUSTRALIA PTY. LTD.
161-165 Princes Highway, Hallam
Victoria 3803, Australia
Phone 03-8787-1200
ALPINE ELECTRONICS GmbH
Wilhelm-Wagenfeld-Str. 1-3,
80807 München, Germany
Phone 089-32 42 640
ALPINE ELECTRONICS OF U.K. LTD.
Alpine House
Fletchamstead Highway, Coventry CV4 9TW, U.K.
Phone 0870-33 33 763
ALPINE ELECTRONICS FRANCE S.A.R.L.
(RCS PONTOISE B 338 101 280)
98, Rue de la Belle Etoile, Z.I. Paris Nord Il,
B.P. 50016, 95945 Roissy Charles de Gaulle
Cedex, France
Phone 01-48638989
R
ALPINE ITALIA S.p.A.
Viale C. Colombo 8, 20090 Trezzano
Sul Naviglio (MI), Italy
Phone 02-484781
ALPINE ELECTRONICS DE ESPAÑA, S.A.
Portal de Gamarra 36, Pabellón, 32
01013 Vitoria (Alava)-APDO 133, Spain
Phone 945-283588
ALPINE ELECTRONICS (BENELUX) GmbH
Leuvensesteenweg 510-B6,
1930 Zaventem, Belgium
Phone 02-725-13 15
Designed by ALPINE Japan
Printed in China (Y)
68-13530Z65-A
M3514447010
EN
FR
ES
Advertisement
Table of Contents

Related Manuals for Alpine PXA-H800 Owner’s


Summary of Contents for Alpine PXA-H800 Owner’s
- Page 1 Veuillez lire avant d’utiliser cet appareil. • MANUAL DE OPERACIÓN Léalo antes de utilizar este equipo. ALPINE ELECTRONICS MARKETING, INC. ALPINE ELECTRONICS OF AUSTRALIA PTY. LTD. ALPINE ITALIA S.p.A. 1-1-8 Nishi Gotanda, 161-165 Princes Highway, Hallam Viale C. Colombo 8, 20090 Trezzano...
-
Page 3: Table Of Contents
ENGLISH Contents Setting Defeat ..........12 Switching the Sources ........12 Storing the Preset Values (Preset Store) ..12 Operating Instructions Recalling a Stored Setting (Preset Call) ..13 Setting the Speaker System WARNING (Output System Select) ........ 13 Setting the Speakers (Speaker Setup)/ WARNING .......... - Page 4 Use the Multi Channel Function Setting the Subwoofer Output (SW Channel) ..........38 Setting the 2-Channel Signal Playback Mode Setting the AUX Input System (2ch Playback Mode) ........30 (AUX Input Setup) ........39 Setting the 2-Channel Signal Playback Mode (2ch Playback Mode) ....... 30 Setting the AUX Input (AUX IN) ....39 Setting EUPHONY (EUPHONY) ....
- Page 5 Mixing the Low Range Audio for the Rear (Rear Mix) ........... 55 Mixing the Low Range Audio of the Center with the Front L/R (Center Bass Split) ....56 Setting the Linear PCM (PCM Mode) ... 56 Achieving Powerful High Volume Sound (Listening Mode) ........
-
Page 6: Operating Instructions
DAMAGE. CAUTION DO NOT DISASSEMBLE OR ALTER. Alpine accepts no responsibility for lost data, etc., even if data, etc., Doing so may result in an accident, fire or electric shock. is lost while using this product. KEEP SMALL OBJECTS SUCH AS BOLTS OR SCREWS OUT OF THE REACH OF CHILDREN. -
Page 7: Getting Started
Function list Getting Started Item Page Commander Turning Power On and Off Adjusting Balance How to Read this Manual Adjusting Fader Adjusting Subwoofer Adjusting Volume The Commander (RUX-C800) for PXA-H800 is sold separately. Audio Setting Defeat setup and adjustments are performed using the RUX-C800 or a PC Adjusting the MX Plus Level –* running the Sound Manager software for PXA-H800. -
Page 8: Location Of Controls
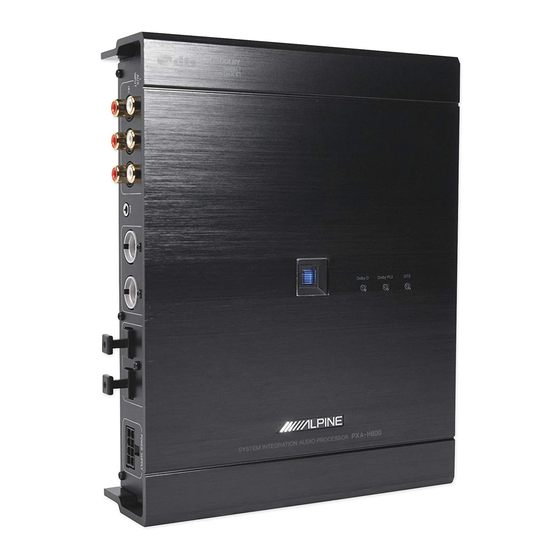
Sound Manager for PXA-H800 Location of Controls Consists of two screens: the main screen and the sub screen. The sub screen varies depending on the function. PXA-H800 <Main screen sample> <Top surface> A POWER indicator Lights when Power is on. A Menu B Dolby Digital indicator B Function switching tab... -
Page 9: Rux-C800 Commander (Sold Separately)
<Sub screen sample> RUX-C800 Commander (sold separately) About Operation on a PC • Select and click the setup item or value. • You can also use the [Tab], [ ], [ ], [ ], and [ ] keys on your PC to select the setup value or mode. •... -
Page 10: Features
MX Plus Features MX (Media Xpander) Plus enhances the vocal and instrumental sounds for each music source. MX Plus generates harmonics and compensates high frequency information. This helps improve music clarity even in a cabin with loud road noise. About Operating Graphic Equalizer The Graphic EQ divides the audio band into 31 individual bands. -
Page 11: Installing Sound Manager For Pxa-H800
About the OFFLINE mode Installing Sound Manager for PXA-H800 Sound Manager for PXA-H800 checks the connection with the PXA- H800 at startup. When the connection is detected, it starts in the online When you install Sound Manager for PXA-H800 on a PC, you can set/ mode. -
Page 12: From A Pc
From a PC Operating the Sound Manager for PXA- Basic Operation H800 Menu On the Main menu, you can upgrade the software and save/load the Initial System Start-Up setup value, etc. If the system stops working properly, turn the ignition switch to off, and Saving the Setup Data (File) then on again. -
Page 13: Loading The Imprinteq Measurement Data (File)
PC. are adjusted at the head unit and you cannot adjust the unit from the PC. • For details on the procedure, refer to the Alpine Web site. Make adjustments using [ ], [ ], [... -
Page 14: Adjusting Fader (Between Front And Rear)
From a PC Setting contents: Auxiliary*(AUX1)/Auxiliary(AUX2)/ Adjusting Fader (Between Front and Rear) Auxiliary(AUX3)/Auxiliary(Ai-NET(HU))/ Auxiliary(Ai-NET(CHG))/Auxiliary(Digital1)/ Adjust the Front and Rear speaker volume (Initial setting: “0”). Auxiliary(Digital2) Setting contents: F (Front) 15 to C (Center) 0 to R (Rear) 15 * Names selected in “Naming the AUX Input (AUX Name)” (page 16) are displayed as the source names. -
Page 15: Recalling A Stored Setting (Preset Call)
From a PC Click one from [Preset 1] to [Preset 6], and then click Click [Output System] for [Shortcut] tab in the main [OK]. menu. The Output System Select screen is displayed. • When you click [I/O Configuration] on the Function switching tab and then [Output System Select], the Output System Select screen will also be displayed. -
Page 16: Setting The Speakers (Speaker Setup)/ Setting The Subwoofers
From a PC • Speakers that cannot be turned off do not show “OFF. ” Refer to When you modify the “Front High” speaker setting to [Full Range], Table 1 (Output System) in “System Configuration” (page 60). a message to confirm the change will be displayed. To set at “Full •... -
Page 17: Setting And Adjusting The Aux Input/Digital Input (Analog Aux Input/Digital Aux Input)
From a PC Setting the Analog AUX Input • Refer to Table 2 (Input System) in “System Configuration” (page 60). Click [OK] when a confirmation message appears. Setting item: AUX 1~3* /Ai-NET(HU) * The AUX Gain Setup screen is displayed. Ai-NET(CHG) Setting contents: AUX IN/AUX IN Gain/AUX Level/AUX Click either [High] or [Low] for each AUX to set and... -
Page 18: Naming The Aux Input (Aux Name)
From a PC Naming the AUX Input (AUX Name) Automatic When you connect an external input source, you can name it with a suitable name (Initial setting: “Auxiliary”). Measurement Click [ ] for each AUX and select and click the external input product name from the pull-down Function menu. -
Page 19: Setting Imprinteq
Choose [Other] when a head unit other than an automobile factory system (commercially available unit including ALPINE products) is Turn the ignition key to ACC ON position, and start ALPINE connected. PXA-H800 Sound. If you select [Factory Audio], go to Step 7. - Page 20 From a PC Move the microphone to a spot specified in the When measurement is complete, click [Result]. screen and position it firmly. The result screen will be displayed. The adjustment result when the Target Curve is “REFERENCE” will be displayed. If you want to select another target curve, go to Step 17.
-
Page 21: Turning Imprinteq On/Off
From a PC Select and click the memory where the curve is to be • After the setting, it is recommended to store the setting contents on the unit. For details, refer to “Storing the Preset Values (Preset saved from [ImprintEQ Memory 1] or [ImprintEQ Store)”... -
Page 22: Adjusting The Time Correction Automatically (Auto Tcr)
From a PC Click [START] in the measurement start screen. Adjusting the Time Correction Countdown will start. Automatically (Auto TCR) A vehicle poses a unique listening environment. Speaker distances vary widely to each listening position. These special conditions can be overcome using the included microphone and the powerful measurement system in this processor. -
Page 23: Turning Roadeq On/Off
From a PC Click [Setup] for “RoadEQ.” Turning RoadEQ On/Off When automatic measurement is completed, RoadEQ can be turned on or off and its level can be selected. Click [RoadEQ] for [Shortcut] tab in the main menu. The Automatic Measurement tab screen will be displayed. •... -
Page 24: Audio Setup/Adjustment
From a PC DVD (Cinema, Action, Music, OFF): Audio Setup/ Cinema: Movie dialogue is clearly reproduced. Action movies are reproduced with more powerful sound. Adjustment Action: Action movies are reproduced with more powerful sound. Music: Lower register sounds (drums, bass, etc.) and vocals are Setting MX Plus (Ai-NET Mode) emphasized for clean and clear output. -
Page 25: Setting The Graphic Eq
From a PC Click [ ] for “Level Adjustment” for each external Setting the Graphic EQ input in the setup screen and select and click the level from the pull-down menu. The graphic equalizer allows you to modify the sound using 31 bands each for the front (left and right), rear (left and right) and center speakers. - Page 26 From a PC Click a frequency and drag up or down to adjust the • After the setting, it is recommended to store the setting contents on the unit. For details, refer to “Storing the Preset Values (Preset level. Store)” (page 12). Displaying the data Click [Show All Data].
-
Page 27: Setting The Parametric Eq
From a PC Click each band and drag up or down to adjust the Setting the Parametric EQ level. Drag to the right or left to adjust the frequency. Adjust the bandwidth (Q) by dragging diagonally on the curve. The frequency bands of the graphic equalizer are fixed. This makes it very difficult to correct for undesired peaks and dips at specific frequencies. -
Page 28: About The Crossover (X-Over)
Adjusting to a frequency range outside that recommended may cause damage to the speakers. For the recommended crossover frequencies of Alpine speakers, refer to the respective Owner’s Manual. We are not responsible for damage or malfunction of speakers caused by using the crossover outside the recommended value. - Page 29 From a PC : Both R and L channels are set at the same value (The initial setting). : Channels R and L can be set independently. • When you select “ ,” a message to confirm which of the R or L channel set up values is to be applied will be displayed.
-
Page 30: Adjusting The Time Correction (Tcr)
From a PC Displaying the data Concrete examples 1 Calculating the time correction value for the front left Click [Show All Data]. speaker on the diagram below. The setup values for all the channels will be displayed. Conditions: Distance between farthest speaker and listening position: 2.25 m (88-3/4") Distance between front left speaker and listening position: 0.5 m (20") - Page 31 From a PC Click either [cm] or [inch.] Entering numerical values You can directly enter the distances (actual measurements) to all the speakers to make adjustments. Click [Value Input]. cm: The unit for the time correction becomes “cm.” inch: The unit for the time correction becomes “inch.” Drag [ ] of the channel you want to adjust to the right or left.
-
Page 32: Use The Multi Channel Function
From a PC • If the setting of Rear Fill is made when Rear Mix is ON, sound is Use the Multi unchanged in the rear fill setting because Rear Mix is given priority during 2 channel decoder other than linear PCM. Channel Function Setting EUPHONY (EUPHONY) EUPHONY creates 5.1 channel surround using Adaptive Surround... -
Page 33: Using Dolby Pro Logic Ii (Dolby Pro Logic Ii)
From a PC Customizing EUPHONY Click [Store] for “Custom Memory” to save the settings. You can customize the sense of ambience (localization and ambience) The Memory selection screen is displayed. of the cabin sound field and the balance (Level) between surround channels and save the settings. -
Page 34: Multi Channel Function Adjustment Procedure
From a PC Adjusting the Center Width (Center Width) When you select “Music” for “Dolby Pro Logic II,” you can further adjust the center width in the following steps. This function offers the Mixing the Low Range Audio for the Rear (Rear Mix) (page 33) optimum vocal position by adjusting the center channel position Achieving smooth sound in the rear seat by mixing the front between the center speaker and the L/R speaker. -
Page 35: Adjusting The Speaker Volume Level
From a PC When setting is complete, click [Close Window]. Adjusting the Acoustic Image (BI- • After the setting, it is recommended to store the setting contents on PHANTOM) the unit. For details, refer to “Storing the Preset Values (Preset Store)”... -
Page 36: Mixing The Low Range Audio Of The Center
From a PC • Avoid stopping, pausing, switching the disc, cueing, fast-forwarding Achieving Powerful High Volume Sound or switching the audio channel of this unit while making this (Listening Mode) adjustment. The setting is cancelled if the decode mode is switched. •... -
Page 37: From The Commander
From the Commander • Please refer to the Owner's Manual of the head unit. Basic Operation Turning Power On and Off FUNC. When you turn on the power for the first time, to protect the speakers, SOURCE no sound is output until you select the system in “Setting the Speaker System (System Select)”... -
Page 38: Adjusting The Mx Plus Level (Mx Plus Setup/Level Adjustment)
From the Commander Press [SOURCE]. Adjusting the MX Plus Level (MX PLUS Each push switches the source. SETUP/LEVEL ADJUSTMENT) AUX1 AUX2 AUX3 Ai-NET(HU) Ai-NET(CHG) DIGITAL1 DIGITAL2 AUX1 Adjust the MX Plus level. In the Ai-NET mode, the adjustment is • The number of analog signal inputs varies depending on the setting performed for the current source (Initial setting: “OFF”... -
Page 39: Recalling A Stored Setting (Preset Call)
From the Commander Only for the initial startup: Press the [FUNC.] or [Rotary encoder]. The Output System selection screen is displayed. Go to Step 3. Select one from “P.1” through “P.6” by rotating the [Rotary encoder], and press the [Rotary encoder]. Press [FUNC.]. -
Page 40: Setting The Speakers (Speaker Setup)
From the Commander Rotate the [Rotary encoder] to select “ON” or “OFF,” When you modify the “FRONT HIGH” speaker setting to [Full], a message to confirm the change will be displayed. To set up at “Full etc., and then press the [Rotary encoder]. Range,”... -
Page 41: Setting The Aux Input System (Aux Input Setup)
From the Commander When the setting is complete, press and hold [ The “Turn ACC Off” screen will be displayed. Turn for at least 2 seconds. the ignition key to and then on again. The settings become effective. • Only when two subwoofers are connected in “Setting the Speaker System (System Select)”... -
Page 42: Setting The Digital Input (Digital Aux)
From the Commander Select the AUX you want to set by rotating the Setting the Digital Input (Digital AUX) [Rotary encoder], and press the [Rotary encoder]. Settings item: AUX 1, AUX2, AUX 3 A TV or VCR with RCA audio output can be connected to the unit. •... -
Page 43: Naming The Aux Input (Aux Name)
From the Commander When the setting is complete, press and hold [ Mixing Navi Audio Guidance (Navi Mix for at least 2 seconds. Setup) • If [ ] is pressed during setting, the unit returns to the previous item. • After the setting, it is recommended to store the setting contents on When a navigation system is connected, its voice guidance will be the unit. -
Page 44: Automatic Measurement Function
From the Commander Measurement sequence for the automatic measurement Automatic functions Perform the automatic measurement in the following sequence. Measurement When ImprintEQ is used: First, ImprintEQ, then RoadEQ. When ImprintEQ is not used: Function First, AutoTCR, then RoadEQ. • When ImprintEQ is used, AutoTCR is not required. •... -
Page 45: Adjusting For Road Noise (Roadeq)
From the Commander Rotate the [Rotary encoder] to select “Auto TCR,” Rotate the [Rotary encoder] to select “RoadEQ,” and and then press the [Rotary encoder]. then press the [Rotary encoder]. Rotate the [Rotary encoder] to select “Calibration,” and then press the [Rotary encoder]. The AUTO TCR screen is displayed. -
Page 46: Audio Setup/Adjustment
From the Commander Select one from “OFF” and “Level 1” through “Level Audio Setup/ 3” by rotating the [Rotary encoder], and press the [Rotary encoder]. Adjustment CHANNEL Level 1: Low correction level. Suitable for quiet vehicles. Level 2: Moderate correction level. Level 3: High correction level. -
Page 47: Setting The Mx Plus (Standalone Mode)
From the Commander Press [ ] twice to go back to the screen for Step 3. Setting the MX Plus (Standalone Mode) Rotate the [Rotary encoder] to select “Level Adjustment,” and then press the [Rotary encoder]. MX (Media Xpander) Plus enhances the vocal and instrumental sounds for music sources such as radio/CD/MP3, by generating harmonics lost Select the source for the head unit by rotating the during digital processing. -
Page 48: Setting The Equalizer Mode (Eq Mode)
From the Commander Select the level you want by rotating the [Rotary encoder], and press the [Rotary encoder]. Compressed 1 to 3: This corrects information lost in the compression process. This reproduces a well-balanced sound close to the original. By supplementing mid- to high- frequency sound data, the sound is G.EQ: Graphic EQ is used. -
Page 49: Setting The Parametric Eq
From the Commander Select the channel you want to adjust by pressing Setting the Parametric EQ [CHANNEL]. L+R selected: FRONT REAR CENTER The frequency bands of the graphic equalizer are fixed. This makes it SUBWOOFER* FRONT difficult to correct for undesired peaks and dips at specific frequencies. L or R selected: FRONT L FRONT R REAR L... -
Page 50: About The Crossover (X-Over)
For the recommended crossover frequencies of Alpine speakers, refer • After the setting, it is recommended to store the setting contents on to the respective Owner’s Manual. We are not responsible for the unit. -
Page 51: Adjusting X-Over And Switching The Phases
From the Commander Select the channel you want to adjust by pressing Adjusting X-Over and Switching the [CHANNEL]. Phases L+R selected: FRONT HIGH FRONT MID FRONT LOW REAR CENTER SUBWOOFER* FRONT HIGH This section describes how to adjust X-Over. Before working on this, L or R selected: FRONT L HIGH FRONT R HIGH refer to “About the Crossover (X-Over)”... -
Page 52: Adjusting The Time Correction (Tcr)
From the Commander To adjust another channel, repeat Steps 5 through In other words, setting the time correction value for the front left speaker to 5.1 (ms) sets a virtual distance matching the distance to the farthest speaker. • You can mute the channel you are adjusting. 1 Press [MUTE] while in the adjustment mode to mute the channel. -
Page 53: Setting The Time Correction Adjustment Unit (Tcr Parameter)
From the Commander When the setting is complete, press and hold [ • When you switch from “L or R” to “L+R,” choose which adjustment of the R and L channels to be applied. for at least 2 seconds. 1 Select either “L R”... -
Page 54: Use The Multi Channel Function
From the Commander • If the setting of Rear Fill is made when Rear Mix is ON, sound is Use the Multi unchanged in the rear fill setting because Rear Mix is given priority during 2 channel decoder other than linear PCM. •... -
Page 55: Using Dolby Pro Logic Ii (Dolby Plii)
From the Commander When the setting is complete, press and hold [ When the setting is complete, press and hold [ for at least 2 seconds. for at least 2 seconds. • If [ ] is pressed during setting, the unit returns to the previous •... -
Page 56: Multi Channel Function Adjustment Procedure
From the Commander Multi Channel Function Adjustment Adjusting the Speaker Volume Level Procedure (Output Level) Make the adjustments described below in order to reproduce Dolby The test tones help to make the volume adjustments of the different Digital and DTS sound with greater accuracy. speakers. -
Page 57: Adjusting The Acoustic Image (Bi-Phantom)
From the Commander Adjusting the Acoustic Image (BI- Mixing the Low Range Audio for the Rear PHANTOM) (Rear Mix) To install a center speaker, it must be located in the dash, an equal This function mixes the front channel audio signals to the audio signals distance between the Left and Right speakers. -
Page 58: Mixing The Low Range Audio Of The Center With The Front L/R (Center Bass Split)
From the Commander Rotate the [Rotary encoder] to select “Multi Ch. Mixing the Low Range Audio of the Setup,” and then press the [Rotary encoder]. Center with the Front L/R (Center Bass Rotate the [Rotary encoder] to select “PCM Mode,” Split) and then press the [Rotary encoder]. -
Page 59: Adjusting The Dvd Level (Dvd Level)
From the Commander When the setting is complete, press and hold [ Other Useful for at least 2 seconds. • If [ ] is pressed during setting, the unit returns to the previous item. Features • This feature is effective only for Dolby Digital. •... -
Page 60: Setting The Color For The Commander Illumination Button (Illumination)
From the Commander When the setting is complete, press and hold [ Setting the Color for the Commander for at least 2 seconds. Illumination Button (ILLUMINATION) • If [ ] is pressed during setting, the unit returns to the previous item. -
Page 61: Switching The Display
From the Commander Switching the Display You can select the display mode you want. Press [VIEW]. The display mode switches for every push. ALPINE LOGO Source display* Voltage/Temperature display Power voltage Temperature inside the unit Currently playing input audio stream channel information display... -
Page 62: Information
Information System Configuration Table 1 (Output System) Speaker System CH-1(L) CH-2(R) CH-3(L) CH-4(R) CH-5(L) CH-6(R) CH-7(L) CH-8(R) Front2Way Rear Subwoofer F-2way+R+SW (4.2ch system) Front High(L) Front High(R) Front Low(L)* Front Low(R)* Rear(L) Rear(R) Subwoofer(L) Subwoofer(R) Front3Way Subwoofer F-3way+SW (2.2ch system) Front High(L) Front High(R) Front Mid(L)* Front Mid(R)* Front Low(L) Front Low(R) Subwoofer(L) Subwoofer(R) Front3Way Rear... -
Page 63: Terminology
Dolby Pro Logic II Terminology Dolby Pro Logic II provides multichannel surround sound from any 2 channel source. It reproduces extended bandwidth playback with 5.1 channels. Dolby Digital This is made possible by an advanced matrix surround decoder. Dolby Digital is a digital audio compression technology This new decoder is able to draw out spatial characteristics of developed by Dolby Laboratories that allows large quantities of the recording without adding tonal coloration or artificial delays... -
Page 64: In Case Of Difficulty
This guide will help you isolate the problem if the unit is at fault. Otherwise, make sure the rest of your system is properly An error during Automatic ImprintEQ adjustment has connected or consult your authorized Alpine dealer. occured. No function or display. -
Page 65: Specifications
10 bands Graphic EQ boost cut range ±12 dB (in 0.5 dB steps) • Unit internal voltage is abnormal. Parametric EQ number of bands - Turn off the system immediately and contact an Alpine dealer. Front/Rear/Center 10 bands Subwoofer 5 bands... - Page 66 Dimensions PXA-H800 Width 169 mm (6-3/4") Height 50.8 mm (2") Depth 215 mm (8-1/2") RUX-C800 Width 161 mm (6-3/8") Height 40 mm (1-5/8") Depth 28 mm (1-1/8") <Components> Parts name Quantity Parts for mounting ......... 1set Manual ............1set Microphone ........... 1set CD-ROM ..........
Need help?
Do you have a question about the PXA-H800 Owner’s and is the answer not in the manual?
Questions and answers