Table of Contents
Advertisement
Quick Links
Advertisement
Table of Contents

Related Manuals for Audiovox SIRPNP1 - Sirius Satellite Radio Tuner


Summary of Contents for Audiovox SIRPNP1 - Sirius Satellite Radio Tuner
- Page 1 Shuttle User Guide SIR-PNP1 128-6812 1 of 24...
- Page 2 ESPN, ABC, CNBC, Bloomberg, Discovery and Radio Disney are developing news, sports and entertainment programming. Your Audiovox Shuttle receiver must be used with an adapter kit, such as the Audiovox Home kit or Vehicle Kit as required by your specific installation needs. These kits are available at retailers where Audiovox main units are sold.
-
Page 3: Table Of Contents
Contents User Preference Menu ........14 Sirius ID ............14 Display Options ..........15 Cautions and Warnings ........4 FM Transmitter Option ........15 Shuttle System Components ......4 Add or Skip ............ 16 Introduction ............5 Lock Options ..........16 Enjoying Your Sirius Shuttle ........ -
Page 4: Cautions And Warnings
Cautions and Warnings Shuttle System Components 1. Do not install the Shuttle in a position that hinders your view through the windshield, or obstructs view- ing of the dashboard indicators and displays. 2. Do not install the unit where it may obstruct the Shuttle Unit operation or deployment of safety devices, such as airbags, etc. -
Page 5: Introduction
Introduction 1. Set up your Audiovox Shuttle using the installa- tion instructions included in your Home Kit or The Audiovox SIRIUS® Shuttle processes the satellite Vehicle Kit, or with the help of a professional signals received by the externally mounted antenna installer. -
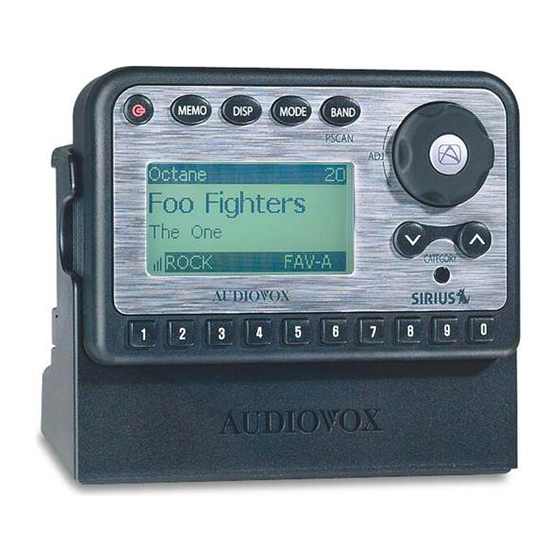
Page 6: Sirius Shuttle Controls
CATEGORY TITLE 2. Press and hold the power button for 3 seconds to turn the receiver off. While the unit powers down, SIGNAL BAND/PRESET STRENGTH the Audiovox logo appears and the unit turns off. NUMBER INDICATOR 128-6812 6 of 24... - Page 7 MEMO Encoder Knob and Select ( ) Button: - Memory (MEMO) Button (Memory Function): The encoder (ADJ) knob is the primary control for navi- This feature allows the user to capture and store the cur- gating through the various lists and option menus avail- rent program data information (Stream Name &...
-
Page 8: Basic Operation
Button for 3 seconds initiates preset scanning that will Tuning By Category scan all banks, FAV-A, FAV-B and FAV-C in sequence. When in Category Tuning Mode, each momentary Preset scanning continues within that band until the press of the Category Up/Down Button(s) advances user decides to terminate this function by pressing the through the available Genres and preset banks: Select Button. - Page 9 When the default screen is displayed on the LCD, Listing - 3 pressing the MODE Button will display all the avail- able stream numbers and stream names. Listing - 1 STREAM NAME STREAM NUMBER While the preceding screens are displayed, rotating the encoder knob allows navigation through the list.
-
Page 10: Direct Tuning
Direct Tuning Screen While the contents of the Favorites listing is displayed, rotate the Encoder knob to navigate through the list. When the desired selection is highlighted, press the Select Button and the stream will be played. Another way to access the Favorites selection is to press and hold the BAND button. -
Page 11: Memory (Memo) Button (S-Seek Function)
1. While the Shuttle is in either of the two standard display modes; momentarily pressing and releas- Large Character Screen ing the MEMO button stores the current program data information within the Shuttle’s memory. A Memory Stored pop-up screen will appear for approximately 2 seconds confirming your selection has been saved. - Page 12 a. If one or more matches are found, a display list appears, and allows you to scroll through the list of songs using the Rotary Encoder Knob (ADJ). Once a song is found, it can be selected by pressing the Select Button ( 3.
- Page 13 overwriting a memory space with new informa- tion. Memory Full will flash on the display for 1 second, followed by a pop-up screen presenting the Replace-Cancel options. This prompt allows you to make the following Replace/Cancel choices: a. By selecting Replace, the S-Seek list will appear, and you can use the Rotary Encoder Knob (ADJ) rotary encoder to select...
-
Page 14: User Preference Menu
User Preference Menu selected function, the unit exits the menu screen To enter the User Preference Menu, press and hold function and reverts to the default screen display. the MODE Button for 3 seconds. The menu MODE Sirius ID options list will appear on the LCD display. Displays your 12 digit Sirius ID number. - Page 15 FM Transmitter Options “-” sign to the left and a “+” sign to the right. The The following adjustments are possible: current setting is indicated on the bar graph. FM On/ Off Rotating the encoder knob adjusts the bar graph Upon entering this mode, rotating the Rotary indication and function accordingly.
- Page 16 Lock Options Add or Skip Upon entering this mode for the first time, the Upon entering this mode, a stream list shall be user is prompted to enter the four digit numerical displayed with the current stream in play high code that is used to lock/ unlock stream access.
- Page 17 to this menu and going through the same process to Edit Code return the stream to the list). Upon adding a stream, the Upon entering this mode, the user is prompted to text “Lock” is removed from alongside the stream enter the current four digit numerical code being used number/name.
- Page 18 Antenna Aiming Audio Level Upon entering this mode, a 10 segment horizontal Upon entering this mode, a 10 segment horizontal bar graph is displayed with a “-“ sign to the left bar graph is displayed with a “-“ sign to the left and a “+” and a “+”...
- Page 19 Memory Options Memory Options In this mode, the user can turn the Memory Search Function (S-Seek) ON or OFF. In addition, all 10 Memory Locations can be cleared. On the display, the top line displays the text, Memory Options. The following adjustment options are possible: 1.
- Page 20 Factory Default Factory Default Option The following adjustments are possible: Yes/No Upon entering this mode, rotating the encoder knob toggles between the “Yes” or “No” function/display selection. If “Yes” is chosen, the unit reverts to the original factory settings for the following parameters: All Presets revert to stream 184 Display dimming to 75%...
-
Page 21: Remote Control
1. POWER - Turns the Shuttle on and off. Remote Control Unit 2. Presets 0-9- These buttons are used to directly enter a desired stream number. They are also used when entering and recalling preset stream numbers into memory. 3. DISPLAY- allows the user to choose one of three ways of presenting the Artist and Song title information on the LCD screen. -
Page 22: Troubleshooting
Troubleshooting Specifications Audio Output 650mV RMS Maximum e l t y l r (100-250 ohms) i l l i l l Fuse 3A Slow Blow e l t Power Supply 10-16V, Negative Ground, DC l l a y t l Dimensions 132mm W x 86.5mm H x 37mm D (5.19”... -
Page 23: Warranty
12 MONTH LIMITED WARRANTY AUDIOVOX CORPORATION (the Company) warrants to the original retail purchaser of this product that should this product or any part thereof, under normal use and conditions, be proven defective in material or workmanship within 12 months from the date of original purchase, such defect(s) will be repaired or replaced with new or reconditioned product (at the Company's option) without charge for parts and repair labor. - Page 24 © 2003 Audiovox Electronics Corporation 128-6812 128-6812 24 of 24...
Need help?
Do you have a question about the SIRPNP1 - Sirius Satellite Radio Tuner and is the answer not in the manual?
Questions and answers