Table of Contents
Advertisement
Advertisement
Table of Contents

Related Manuals for Audiovox VME 8013


Summary of Contents for Audiovox VME 8013
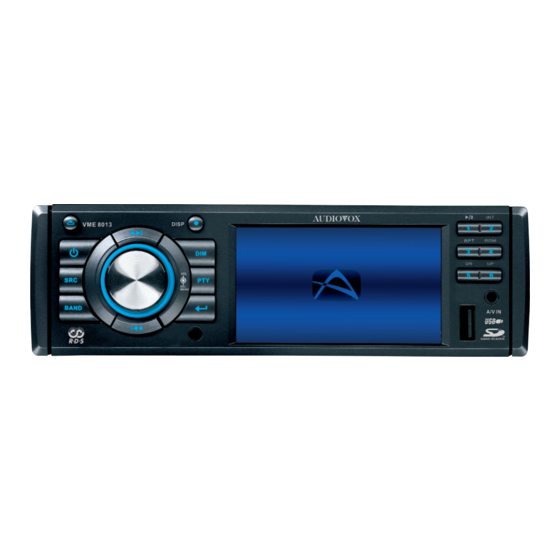
- Page 1 VME 8013 Multimedia Receiver...
-
Page 2: Table Of Contents
Thank you for choosing a Audiovox product. We hope you will find the instructions in this owner’s manual clear and easy to follow. If you take a few minutes to look through it, you’ll learn how to use all the features of your new Audiovox VME 8013 Mobile Multimedia Receiver for maximum enjoyment. -
Page 3: Introduction
Introduction Congratulations on your purchase of the Audiovox VME 8013 Mobile Multimedia Receiver. It’s a good idea to read all of the instructions before beginning the installation. We recommend having your Audiovox VME 8013 installed by a reputable installation shop. - Page 4 6. Secure the rear of the unit to the car body Spring Clip 7. Test the radio using the “Operation” instructions that follow. Kit Installation If your vehicle requires the use of an installation kit to mount this radio, follow the instructions included with the installation kit to attach the radio to the mounting plate supplied with the kit.
-
Page 5: Wiring
Wiring Diagramm... -
Page 6: Front Panel Release
2. Gently press the right side of the panel until the mechanism locks it into place. 3. Lift upward to close the panel. REMOTE CONTROL The remote control will allow you to control the advanced functions of the VME 8013. CLEAR GOTO... - Page 7 Butto n Tuner ZOOM Magnify Image TITLE Vi ew DVD Title Screen Power Power On Power On Power On Press and hold to Power Press and hold to Power Press and hold to Power SETUP Display Set up M enu Display Set up M enu Di splay Setup Menu Navi gati on Arrows...
-
Page 8: Operation
OPERATION Power Press the (power) button to turn the unit on. Press and hold the power button again to turn the unit off. D IM NOTE: LCD panels may take longer to respond when subjected to cold temperatures for an extended period of time. In addition, the visibility of the numbers on the LCD may decrease slightly. - Page 9 Menu Operation Press and hold the VOL/SEL/MENU button for more than two seconds to access the menu. Press the VOL/SEL/MENU button to move through the following menu options: Equalizer, Loud Set, Beep Set, 12/24 Mode (clock), AF, TA, Region, TA Set, Retune, Mirror Image, Vol Mode, A-VOL, Sub LPF and Area Set.
-
Page 10: Radio Operation
Reset Button The RESET button is located behind the front panel and can only be accessed with the front panel opened. Resetting the unit will erase the time and preset memories. It should only be activated upon initial installation after all wiring is complete, or if there is a malfunction of any of the switches on the unit. In these circumstances, pressing the RESET button will clear the system and return the unit to default operation. - Page 11 Preset Stations Up to six stations on each band can be stored as presets, which can then be instantly recalled by pressing the associated preset button. To store a station, turn the radio on and select the desired band and station. Press and hold the desired preset button (numbered one through six on the face of the radio or remote control) for more than two seconds.
-
Page 12: Disc/Mp3/Wma Playback
DISC/MP3/WMA PLAYBACK Inserting and Ejecting a Disc Press the button (4) to flip the front panel down. Insert a disc, label side up, into the disc slot (20). To stop disc play and eject the disc, press the button to flip the front panel down and then press the eject button (21). NOTE: The unit is designed for play of standard 5”... - Page 13 Folder Search, File Search or Folder Select as shown below. The VME 8013 player will only recognize three folder levels and does not display folders containing only other folders. In the example above, the unit will display folders 3, 4, 6, and 8, but not 2 and 7 since they do not contain any tracks directly.
- Page 14 D I M Changing the Source If a disc is already in the disc slot but is not playing, press the SRC button on the front panel or remote control (14) to switch to the DISC source. To play files from an SD or USB that is already inserted, choose the CARD or USB source. The MP3 playback screen is indicated below: 1.
- Page 15 Press once for 1/2 speed. Press additional times for 1/4, 1/6, or 1/8 speed. Press the play/pause >/|| button (8) to end fast forward or reverse and resume normal playback. NOTE: Feature availability is dependent on DVD embedded information. NOTE: The VME 8013 does not support Surround Sound decoding.
-
Page 16: Setup Menu
SETUP MENU During disc play, press the SETUP button (4) on the remote control to access the SYSTEM SETUP menu. Use the 56,43 , or cursor buttons to choose between LANGUAGE, VIDEO, AUDIO, RATING or MISC setup options. OSD la nguage English Select the appropriat e onscreen G erman... - Page 17 Audio Menu English Selec t the appropriat e audio G erman language for the DVD. Spanis h Italian French Set Password _ _ _ _ Ent er a 4-digit password to activate the “Rating” feature. The original password is “0000” and must be entered before you can change the password to a diff erent 4- digit code.
-
Page 18: Care And Maintenance
CARE AND MAINTENANCE DVD Player The following guidelines will help you extend the life of your DVD player: 1. When cleaning the vehicle interior, do not get water or cleaning fluids on the unit. 2. The DVD player will not operate properly in extreme hot/cold or under damp conditions. In case of such conditions, wait until the vehicle interior reaches a normal temperature or any condensation on the disc player lens has evaporated before using the player. - Page 19 TROUBLESCHOOTING Problem Cause Corrective Action GENERAL Does not operate (display No power to yellow wire; no power Check connection with test light; check vehicle does not light) to red wire fuse with test light Fuse blown Replace fuse No power on unit Fuse blown Check/replace fuse No/low audio output...
-
Page 20: Specifications
SPECIFICATIONS Power Output......................13 watts RMS X 4 channels into 4-ohms @ < 1% THD+N Signal to Noise Ratio....................70dBA below reference (reference: 1 watt, 4-ohms) Frequency Response....................20Hz to 20kHz (-3dB), Auxiliary input used as source reference Reference Supply Voltage..................14.4VDC DVD/CD Player Compatible Disc Media....................DVD + R / RW and CD-R / RW Compatible Media Formats ..................CD-DA, MP3, WMA, VCD, SVCD, AVI, MPEG1 / 2, XviD and Kodak picture CD (JPEG) - Page 21 Congratulations! You have made a wise selection in becoming the owner of a Audiovox Mobile Video equipment. Due to high quality Audiovox products have earned an excellent reputation through the western world. And this high quality standard enables us to grant a 2-years warranty for Audiovox Mobile Video products.
- Page 22 ARANTIEKARTE ARRANTY Typ/ Type Serien-Nr./Serial-No. Name und Anschrift des Händlers /Stempel Name and address of the dealer/stamp Käufer/Customer Name/Name Straße/Street PLZ, Ort /City Land /Country Kaufdatum / buying date Nur gültig in Verbindung mit Ihrer Kaufquittung! No warranty without receipt!
- Page 23 Audiovox Audio Produkte GmbH Lise-Meitner-Str. 9 · 50259 Pulheim Tel.: +49 2234/807-0 · Fax: + 49 2234/807-399 www.audiovox-germany.de...
Need help?
Do you have a question about the VME 8013 and is the answer not in the manual?
Questions and answers