Konica Minolta bizhub C35 User Manual
Facsimile user guide
Hide thumbs
Also See for bizhub C35:
- Reference manual (510 pages) ,
- User manual (394 pages) ,
- Service manual (330 pages)
Table of Contents
Advertisement
Quick Links
Advertisement
Table of Contents

Related Manuals for Konica Minolta bizhub C35


Summary of Contents for Konica Minolta bizhub C35
- Page 1 User’s Guide [Facsimile]...
-
Page 2: Thank You
Thank You Thank you for purchasing a bizhub C35. You have made an excellent choice. This User’s Guide describes operating procedures and precautions for the use of the Fax functions. Be sure to read this User’s Guide before starting any machine operations. -
Page 3: Manual Notice
Manual Notice KONICA MINOLTA BUSINESS TECHNOLOGIES, INC. reserves the right to make changes to this guide and to the equipment described herein without notice. Considerable effort has been made to ensure that this guide is free of inaccuracies and omissions. However, KONICA MINOLTA BUSINESS TECHNOLOGIES, INC. -
Page 4: Table Of Contents
Contents 1 Introduction ....................1-1 Machine Parts ....................1-2 Front View ....................1-2 Rear View....................1-2 About the Control Panel ................1-3 Touch panel ....................1-6 Home screen....................1-6 Initial Fax screen ..................1-8 Keys and icons that appear in the screens ..........1-9 User authentication and account track ............. - Page 5 Internet fax settings................... 1-14 [TCP/IP Settings] ................1-14 [Network Fax Functions Settings] ............1-14 [E-mail TX (SMTP)]................1-14 [E-mail RX (POP)]................1-14 [Subject] ....................1-14 [Text] ....................1-14 Useful functions ................... 1-15 2 Fax Settings screen ..................2-1 [Fax Settings] (User Settings) ..............2-2 Settings .......................
- Page 6 Selecting with an LDAP search..............3-10 Specifying scan settings ................3-11 [Original Type]................... 3-11 [Resolution] ....................3-11 [Separate Scan] ..................3-11 Procedure ................... 3-12 [Density] ....................3-12 [Background Removal]................3-12 [Sharpness] ....................3-12 Specifying communication settings (G3 fax) ..........3-13 [ECM OFF] ....................
- Page 7 Closed network reception (G3 fax).............. 4-7 Fax forwarding (G3 fax/Internet fax) ............4-8 E-mail forwarding (G3 fax/Internet fax) ............4-8 Remote reception (G3 fax)................4-9 Giving the reception command from an external telephone ....4-9 Night reception (G3 fax/Internet fax) ............4-10 Printing received faxes ................
- Page 8 Changing group membership.............. 5-17 Changing a group name ..............5-17 Creating a folder ................. 5-17 Searching for personal information ............. 5-17 Receiving a PC fax ..................5-18 Using received documents................ 5-18 Uninstalling the fax driver ................5-19 6 Registering destinations ................6-1 Destination registration ................
- Page 9 8 Troubleshooting .................... 8-1 Problems when sending faxes ..............8-2 G3 fax......................8-2 Internet fax ....................8-4 PC fax ......................8-4 Problems when receiving faxes ..............8-6 G3 fax......................8-6 Internet fax ....................8-7 Other problems ....................8-8 Error messages ....................8-9 9 Appendix ......................A-1 Technical specifications ................A-2 G3 fax......................A-2...
-
Page 10: Introduction
Introduction... -
Page 11: Machine Parts
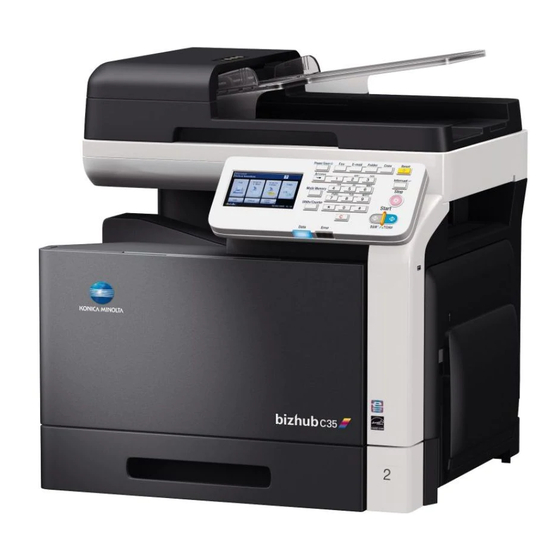
Machine Parts The parts of the machine referred to throughout this manual are illustrated below. Please take some time to become familiar with them. Front View 1: Control panel 2: Automatic Document Feeder (ADF) 2-a: ADF feed cover 2-b: Document guide 2-c: Document feed tray 2-d: Document output tray 2-e: Document stopper... -
Page 12: About The Control Panel
About the Control Panel Name Function Touch panel Displays various screens and messages. Specify the various settings by directly touch- ing the panel. [Power Save] key/ Press to enter Power Save mode. While the indicator machine is in Power Save mode, the indicator on the [Power Save] key lights up in green and the touch panel goes off. - Page 13 Name Function [Reset] key Press to clear the settings (except pro- grammed settings) of all displayed functions. [Interrupt] key/indica- Press to enter Interrupt mode. While the machine is in Interrupt mode, the indicator on the [Interrupt] key lights up in green. To cancel Interrupt mode, press the [Interrupt] key again.
- Page 14 Name Function [Mode Memory] key Press to store the desired settings for copy, fax or scan operations. In addition, stored settings can be recalled. [Access] key If user authentication or account track settings have been applied, press the [Access] key after entering the user name and password (for user authentication) or the account name and password (for account track) in order to log on...
-
Page 15: Touch Panel
Touch panel Home screen Indication Description Status Displays messages about the current operat- ing status. [Fax] Press to enter Fax mode. [Scan to E-mail] Press to enter Scan to E-mail mode. For details, refer to the [Printer/Copier/Scanner User’s Guide]. [Scan to Folder] Press to enter Scan to Folder mode. - Page 16 Indication Description [Status] Press to view information on consumables and devices. [Job] Press to check a print, transmission, reception or storing job. Toner supply indica- Shows the amount of toner remaining for yel- tors low (Y), magenta (M), cyan (C) and black (K). Touch panel...
-
Page 17: Initial Fax Screen
Initial Fax screen Indication Description [Favorites] Press to display frequently used destinations. [Direct Input] Press to directly enter a destination address. [Others] Press to select a destination from the log. Doc- uments saved on the machine’s memory can also be used. [Off-Hook] Press to send or receive a fax manually. -
Page 18: Keys And Icons That Appear In The Screens
Keys and icons that appear in the screens Icon Description If the screen has multiple pages, press [ ] or [ ] to select a different page. If values appear between [ ] and [ ], the current page number/total number of pages is indicated. If there are tabs that are not displayed, press [ ] or [ ] to... - Page 19 Icon Description Appears when using a G3 fax connection. Appears when there are documents queued for a timer transmission. Appears when there are fax documents received with mem- ory reception or PC faxing. Appears when data or documents are being sent from this unit.
-
Page 20: User Authentication And Account Track
User authentication and account track If user authentication or account track settings have been specified on the machine, the user name or account name and the password must be entered in the Login screen in order to log on. The following procedures describe how to log on when user authentication or account track setting have been specified. -
Page 21: With Account Track
With account track Specify an account and password for [Account] and [Password]. Press [Login]. If authentication was successful, the functions of this machine can be used. 1-12 User authentication and account track... -
Page 22: Initial Settings
Initial settings After installation, settings must be specified for the following in order to use the fax functions. Be sure to specify these settings correctly, otherwise fax transmissions cannot be performed. G3 fax settings [Date & Time Settings] Specify the current date and time. For details on the settings, refer to the [Printer/Copier/Scanner User’s Guide]. -
Page 23: Internet Fax Settings
Internet fax settings Settings for using Internet fax functions are specified from PageScope Web Connection. For details on the settings, refer to the [Reference Guide]. [TCP/IP Settings] Specify the necessary settings in order to use this machine in a TCP/IP net- work environment. -
Page 24: Useful Functions
Useful functions By registering destinations where faxes are frequently sent, recipients can be recalled allowing a fax to easily be sent. Address Book Register information of destinations (fax numbers and e-mail addresses, etc.) where data is frequently sent. Group Register multiple address book destinations together in a group. Program Register destinations where faxes are frequently sent together with fax settings ([Scan Settings], [Comm. - Page 25 1-16 Useful functions...
-
Page 26: Fax Settings Screen
Fax Settings screen... -
Page 27: [Fax Settings] (User Settings)
[Fax Settings] (User Settings) The parameters available on the [Fax Settings] screen ([User Settings]) are described below. User Settings Machine Settings Copy Settings Scan Settings Print Settings Fax Settings Remote RX Enabled Remote RX No. Default Fax Settings Display Fax Activity Settings Press the [Utility/Counter] key. - Page 28 Item Description [Default Fax Settings] Settings [Factory Default] / [Current Setting] Select the default settings for the parameters on the [Scan Settings], [Comm. Settings] and [Original Set- tings] screens that are selected when the machine is turned on or the [Reset] key is pressed. [Factory Default]: The default settings are the manu- facturer’s default settings.
-
Page 29: [Fax Settings] (Admin Settings)
[Fax Settings] (Admin Settings) The parameters available on the [Fax Settings] screen ([Admin Settings]) are described below. Admin Settings Machine Settings Administrator Registration Address Registration Authentication Setting Ethernet External Memory Print Job Timeout Copy Settings Print Settings Sender Settings Fax Settings Sender Maintenance Sender Fax No. - Page 30 Comm. Settings PB/DP HDD Format RX Mode Paper Empty Restriction Number of RX Code Settings Call Rings Redial Redial Interval Line Monitor Line Monitor Volume Ring Pattern Manual RX V.34 Function Inch Paper Settings Priority Paper Priority Print Paper Size Tray Selection for RX Print Min.
- Page 31 Fax Function F-Code TX Settings Dest. Check Display Func. Confirm Addr (TX) Confirm Addr (Register) Restrict Fax TX Restrict Fax RX Restrict PC-Fax Restrict Inter- net Fax TX Restrict Inter- net Fax RX Memory RX Memory RX Password Closed Network Enable RX Password Password...
- Page 32 Remote RX Remote RX Settings Enabled Remote RX No. PC-Fax RX PC-Fax RX Settings Setting PC-Fax RX Print Nighttime RX Night Fax RX Settings Print Night RX Start Time Night RX End Time PBX Connection PBX Function Settings PBX Number Fax Report Activity Report TX Result...
-
Page 33: Settings
I-Fax RX Error Report List Print Fax Setup Pg Fax Target Fax Factory Default Fax Image Initialized Settings Press the [Utility/Counter] key. Press [Admin Settings]. Type in the administrator password (Default: 12345678), and then press [OK]. The Admin Settings screen appears. Press [Fax Settings]. -
Page 34: [Header/Footer Settings]
[Header/Footer Settings] Item Description [Header Position] Settings [Inside Body Text] / [Outside Body Text] / [OFF] Select the position for the transmitting subscriber identification added to documents sent from this machine. The added transmitting subscriber identification is printed as a part of the image in the received docu- ment. -
Page 35: [Comm. Settings]
Item Description [Footer Position] Settings [Inside Body Text] / [Outside Body Text] / [RX Ft. OFF] Select the position for the reception information (reception time and reception number) printed in doc- uments received by this machine. If [RX Ft. OFF] is selected, the reception information is not printed. - Page 36 Item Description [Redial] Settings [0] - [10] ([1]) Specify the number of times this machine automati- cally redials when a fax could not be sent correctly, for example, if the line is busy or a communication error occurred. The available settings and the default setting differ depending on the setting selected for [Admin Settings] - [Fax Settings] - [Fax Target].
-
Page 37: [Function Settings]
Item Description [Manual RX V.34 Settings [Yes] / [No] OFF] Select whether or not V.34 is automatically turned off during manual reception. [Function Settings] Item Description [Inch Paper Priority] Settings [ON] / [OFF] Select whether or not paper sizes in inches are given priority when printing received documents. -
Page 38: [Fax Function Settings]
Item Description [Tray Selection for Settings [Auto] / [Tray 1] / [Tray 2] / [Tray 3] / RX Print] [Tray 4] Select the paper drawer to be used when a specific paper drawer is used for printing received docu- ments. [Tray 3] and [Tray 4] do not appear if the optional lower feeder units have not been installed. - Page 39 Item Description [Cofirm Addr (TX)] Settings [ON] / [OFF] Select whether or not the destination address must be entered a second time for confirmation when directly typing in the address. Requiring that the address be entered twice reduces misdirected faxes caused by the address being mistyped.
-
Page 40: [Memory Rx]
[Memory RX] Item Description [Memory RX] Settings [ON] / [OFF] Select whether or not the memory reception function is used. If [ON] is selected, received documents are saved in the machine’s memory and are not automatically printed. [Password] Specify the password (up to 8 digits) for allowing doc- uments saved in the memory to be used. -
Page 41: [Remote Rx Settings]
Item Description [Forward & Print] Settings [Forward & Print] / [Forward & Print (If TX Fails)] Select whether or not this machine also prints the fax when it is forwarded. [Forward & Print]: Normally prints the fax at the same time that is forwarded. -
Page 42: [Nighttime Rx Settings]
[Nighttime RX Settings] Item Description [Night Fax RX Print] Settings [ON] / [OFF] Select whether or not to prohibit printing of docu- ments received during the night. [Night RX Start Time] Specify the start time for the night. [Night RX End Time] Specify the end time for the night. The function specified from this screen cannot be used at the same time as a function specified from the [Forward TX Settings], [Memory RX] and [PC-Fax RX Settings] screens. -
Page 43: [Fax Report]
[Fax Report] Item Description [Activity Report] Specify the settings for printing activity reports. [Output Settings] Settings [Every 100 comm.] / [Every Day] / [100/Daily] / [No] Select the conditions for printing. [Every 100 comm.]: Prints after every 100 com- munication jobs. [Every Day]: Prints at the specified time every day. -
Page 44: [List Print]
[PC-Fax TX Error Report] Settings [ON] / [OFF] Select whether or not an error report is printed with PC fax transmissions. [Broadcast Report] Settings [ON] / [OFF] Select whether or not a results report is printed with broadcast transmissions. [Broadcast Result Report] Settings [All Dest.] / [Mode Once] Select the conditions for printing the results... -
Page 45: [Fax Target]
[Fax Target] Description Settings [U.S.A.] / [Canada] / [Mexico] / [Austria] / [Belgium] / [Denmark] / [Finland] / [France] / [Germany] / [Greece] / [Ireland] / [Italy] / [The Netherlands] / [Nor- way] / [Poland] / [Portugal] / [Spain] / [Sweden] / [Swit- zerland] / [The U.K.] / [Russia] / [Argentina] / [Brazil] / [South Africa] / [Australia] / [New Zealand] / [China] / [Hong Kong] / [Malaysia] / [Singapore] / [Korea] / [Tai-... -
Page 46: Sending Faxes
Sending faxes... -
Page 47: General Operation
General operation The general procedure for sending G3 faxes and Internet faxes is described below. Press [Fax] or press the [Fax] key to display the initial Fax screen. – For details on the initial Fax screen, refer to “Initial Fax screen” on page 1-8. - Page 48 – For details on the [Original Settings] screen, refer to “Specifying docu- ment settings” on page 3-18. Press the [Start] key. – The fax is sent in black and white regardless of whether the [Start (Color)] key or the [Start (B&W)] key is pressed. After all document pages have been scanned, the fax is sent.
-
Page 49: Positioning The Original Document
Positioning the original document With this machine, the document can be placed in the ADF or on the original glass. Using the ADF If the ADF is used, documents containing multiple pages can be automatically scanned and faxed. In addition, double-sided documents can also be faxed. Place the document face up in the ADF. -
Page 50: Using The Original Glass
Do not load more than 50 sheets; otherwise an original document mis- feed or damage to the document or machine may occur. If the original document is not loaded correctly, it may not be fed in straight, or an original document misfeed or damage to the document may occur. - Page 51 Carefully close the ADF. When using the original glass to scan a document containing multiple pages, the document can be divided and scanned separately. For details, refer to “[Separate Scan]” on page 3-11. Positioning the original document...
-
Page 52: Specifying Destinations
Specifying destinations Use any of the following methods to specify destinations. “Selecting from the registered destinations” on page 3-7 “Directly typing in the address” on page 3-8 “Selecting from the log” on page 3-9 “Selecting with an LDAP search” on page 3-10 Selecting from the registered destinations An address book destination or group destination can be selected from those previously registered on the machine. -
Page 53: Selecting By Searching For A Destination Type Or Name
Select the destination, and then press [OK]. – To specify multiple destinations for a broadcast transmission, select all destinations where the fax is to be sent. Selecting by searching for a destination type or name Destinations can be selected by searching for their type or name. In the initial Fax screen, press Press [Search]. -
Page 54: Internet Fax
Press [OK]. If [Admin Settings] - [Fax Settings] - [Fax Function Settings] - [Cofirm Addr (TX)] is set to [ON], the fax number must be entered again after [OK] is pressed. To specify multiple destinations for a broadcast transmission, press [Next Dest.] after the fax number was entered, and then type in the next fax number. -
Page 55: Selecting With An Ldap Search
The following types of transmissions are not recorded in the log. · PC faxing · Fax forwarding and E-mail forwarding · Transmissions recovered after the machine is turned off, then on again · Transmissions where the address is directly typed in while the machine is off-hook Selecting with an LDAP search Destinations can be selected after searching an LDAP server. -
Page 56: Specifying Scan Settings
Specifying scan settings From the [Scan Settings] screen, settings for scanning the document can be specified. [Original Type] Select the appropriate image quality setting according to your document. Item Description [Text] Select this setting when scanning documents con- taining only text. [Text/Photo] Select this setting when scanning documents con- taining a combination of text and photos. -
Page 57: Procedure
Procedure Press [Fax] or press the [Fax] key to display the initial Fax screen. Place the document in the ADF or on the original glass. Specify the destination. Press [Settings]. Press [Scan Settings]. Set [Separate Scan] to [ON]. Press the [Start] key. The document is scanned. -
Page 58: Specifying Communication Settings (G3 Fax)
Specifying communication settings (G3 fax) With [Line Settings] in the [Comm. Settings] screen, settings for the transmis- sion line can be specified. [ECM OFF] The error correction mode (ECM) is turned off when data is being sent. ECM is an error correction mode defined by ITU-T (International Telecommu- nication Union - Telecommunication Standardization Sector). -
Page 59: Useful Transmission Functions (G3 Fax)
Useful transmission functions (G3 fax) With [Comm. Method] in the [Comm. Settings] screen, useful transmission functions can be specified. For details on [Polling RX], refer to “Polling reception (G3 fax)” on page 4-6. [Timer TX] A timer transmission can be specified. Timer transmission is the function for sending a fax at a specified time. -
Page 60: [Password Tx]
[Password TX] A password transmission can be specified. Password transmission is the function for sending a fax with a password applied. This function can be used if the recipient’s fax machine is compatible with closed network receptions. If the recipient’s fax machine is set for closed network receptions, this machine must transmit with the same password as the closed network recep- tion password specified on the recipient’s machine. - Page 61 Relay transmission is the function for sending a document to a relay station, which then broadcasts the document to the recipients. In order to send a relay transmission, a relay box number, relay password and destination group number must be specified on the recipient’s machine used as a relay station.
-
Page 62: Specifying E-Mail (Internet Fax) Settings
Specifying e-mail (Internet fax) settings With [E-mail Settings] in the [Comm. Settings] screen, specify the file name, subject, From address and body text for sending Internet fax (e-mail) mes- sages. Item Description [File Name] Type in the document name for the scan data. [Subject] Type in the subject for e-mail messages. -
Page 63: Specifying Document Settings
Specifying document settings From the [Original Settings] screen, settings can be specified for the docu- ment to be faxed. [Original Size] Specify the size of the document that is to be faxed. Item Description [Standard Size] When sending a document of a standard size, press [Standard Size], and then select the docu- ment size. -
Page 64: [Binding Position]
[Cover + 2-sided] Select this setting when scanning a double-sided document with a cover page. Only the front side of the first page will be scanned, and then both the front and back sides of the remaining pages will be scanned. -
Page 65: Sending To Multiple Destinations (Broadcast Transmissions)
Sending to multiple destinations (broadcast transmissions) The same document can be sent to multiple destinations with a single opera- tion. If all of the desired destinations are selected when sending the fax, the same document will be sent to each of the specified destinations. A broadcast transmission can be specified as a timer transmission. -
Page 66: Selecting A Program Destination
Selecting a program destination A fax can be sent with a program destination registered on the machine. Program destinations are registered with destinations where faxes are fre- quently sent together with fax settings ([Scan Settings], [Comm. Settings] and [Original Settings] screens) allowing a fax to easily be sent without the trouble of specifying the various settings. -
Page 67: Faxing Manually (G3 Fax)
Faxing manually (G3 fax) If a fax is sent manually, the status of the recipient can be confirmed before the fax is sent. In order to send a fax manually, the following requirements must be met. The document cannot be divided and scanned separately. If the original glass is being used, the document being sent can contain only one page. -
Page 68: If The Fax Cannot Be Sent (Automatic Redialing) (G3 Fax)
If the fax cannot be sent (automatic redialing) (G3 fax) If the fax could not be sent correctly, for example, if the line is busy or a com- munication error occurred, a message appears, informing that the number will be redialed after a certain length of time. A fax that could not be sent becomes a queued transmission, and the machine automatically redials the number after a certain length of time has passed. -
Page 69: Adding The Transmitting Subscriber Identification
Adding the transmitting subscriber identification The transmitting subscriber identification can be added to documents sent from this machine. This information is printed in the header of the received document as a part of the image. For details on the settings for specifying where to print the transmitting subscriber identification and for printing the recipient information in the transmitting subscriber identification, refer to “[Header/Footer Set- tings]”... -
Page 70: Receiving Faxes
Receiving faxes... -
Page 71: Receiving G3 Faxes
Receiving G3 faxes The following reception modes are available with this machine. Select the one that fits your environment. “Automatic reception” on page 4-2 “Manual reception” on page 4-3 “DRPD” on page 4-4 When the machine is turned off, faxes cannot be received. Therefore, be sure to leave the machine turned on. -
Page 72: Manual Reception
Manual reception Select this mode if an external telephone is connected and it is frequently used to make phone calls. Manual reception can be performed either with the control panel of this machine or with an external telephone. In order to receive faxes manually, the following settings in the [Fax Settings] screen ([Admin Settings]) must be specified. -
Page 73: Drpd
DRPD Select this mode when using DRPD (Distinctive Ring Pattern Detection). If the receiver rings with the pattern selected from the four ring patterns avail- able, the incoming call is automatically received as a fax. In order to use DRPD, the following settings in the [Fax Settings] screen ([Admin Settings]) must be specified. -
Page 74: Receiving Internet Faxes
Receiving Internet faxes Settings for receiving Internet faxes (e-mail) must first be specified from the [E-mail RX (POP)] page of PageScope Web Connection. For details of the settings on the [E-mail RX (POP)] page, refer to the [Reference Guide]. This machine connects to the POP server at a fixed interval to check if an Internet fax has arrived. -
Page 75: Useful Reception Functions
Useful reception functions The various useful reception functions available with this machine are described below. Polling reception (G3 fax) Polling reception is the function where a document queued for polling trans- mission by the sender or a document saved on the sender’s bulletin board is sent with a command from the recipient. -
Page 76: Memory Reception (G3 Fax/Internet Fax)
Memory reception (G3 fax/Internet fax) Memory reception is the function for saving received documents in the machine’s memory. Documents saved in the memory can be printed or retrieved. In order to use memory reception, the following settings in the [Fax Settings] screen ([Admin Settings]) must be specified. -
Page 77: Fax Forwarding (G3 Fax/Internet Fax)
Set [Closed Network RX Password] - [Enable] to [Yes]. With [Closed Network RX Password] - [Password], specify the password for allowing the machine to be used with closed network receptions. For details on the settings, refer to “[Closed Network RX Password]” on page 2-15. -
Page 78: Remote Reception (G3 Fax)
With [Forward TX Settings] - [Forward & Print], select whether or not this machine also prints the fax when it is forwarded. For details on the settings, refer to “[Forward TX Settings]” on page 2-15. This function cannot be used together with PC fax reception, memory reception or night reception. -
Page 79: Night Reception (G3 Fax/Internet Fax)
Night reception (G3 fax/Internet fax) Night reception is the function for prohibiting printing of received documents during the specified night times. Documents received during the time that printing is prohibited are all printed when the machine is finally able to print. In order to use night reception, the following settings in the [Fax Settings] screen ([Admin Settings]) must be specified. -
Page 80: Printing Received Faxes
Printing received faxes This section describes how received faxes are printed. Determining the paper size The following describes the guidelines for determining the most suitable paper size and the size of paper that will be printed on. For details on the paper settings for printing received documents, refer to “[Function Settings]”... -
Page 81: Step 2: Determining The Actual Paper Size Used For Printing
Step 2: Determining the actual paper size used for printing The machine checks if paper of the most suitable size determined in step 1 is loaded. If paper of the most suitable size is loaded, printing begins. If paper of the most suitable size is not loaded, or if the Auto Tray Switch function is disabled, the machine checks for paper of the next most suit- able size in the order listed in the following table, starting from the top. -
Page 82: When [Min. Reduction For Rx Print] Is Set To [100%]
When [Min. Reduction for RX Print] is set to [100%] The pages cannot be split. The image is not reduced. [Tray Selection for RX Print] is set to [Auto]. Received documents are printed at full size on paper that fits the length of the received image minus 20 mm. -
Page 83: Adding Reception Information
Adding reception information Reception information can be added to documents received at this machine. This information is printed in the footer of the received document. The following information can be printed as the reception information. Reception date/time Communication number Page number/total number of pages For details on the settings for specifying whether or not reception information is printed and where to print the reception information, refer to “[Header/Footer Settings]”... -
Page 84: Sending/Receiving A Pc Fax
Sending/ receiving a PC... -
Page 85: Sending A Pc Fax
Sending a PC fax Using the fax driver, a G3 fax can be sent from this machine through opera- tions performed on the computer without using any paper. In order to perform a PC-Fax operation, the fax driver must be installed. -
Page 86: Selecting A Recipient From The Phone Book
– To add the entered name and fax number to the [Simple Entry] folder of the phone book, click [Register To Phone Book]. Click [Add Recipients]. – To send a fax to multiple recipients, repeat steps 6 and 7. Up to 100 recipients can be registered. -
Page 87: Selecting A Recipient From The Address Book
Selecting a recipient from the address book By clicking [Add from Address Book] in the [FAX Transmission Popup] dialog box, the recipients of the PC fax can be selected from the address book des- tinations registered on this machine. In order to select recipients from the address book of this machine, your computer must be connected to this machine and be able to com- municate with it. -
Page 88: Creating A Fax Cover Sheet
Item Description [SUB Address] If the fax is to be sent using F-codes, specify the SUB address. (up to 20 digits) [Sender ID] If the fax is to be sent using F-codes, specify the sender ID. (up to 20 digits, including numbers, # and *) When faxing with a timer transmission, make sure that the time set on the computer matches the time set on this machine. -
Page 89: [Basic] Tab
[Basic] tab Item Description [Style] Select the desired cover sheet design. [Subject] Enter the subject of the fax to be sent. (up to 64 characters) [Date] Specify the date. Select a specific format, or enter the date as desired. (up to 20 characters) [Pages] Specify the number of pages to be sent. -
Page 90: [Sender] Tab
[Sender] tab Item Description [Sender Information Set- Enter the appropriate sender information in the tings] [Company], [Department], [Name], [Phone], [FAX Number] and [E-mail] boxes. Select the check boxes for the items to be added, and then type in the text. (up to 80 characters) [Image] tab Item Description... -
Page 91: Fax Driver Settings
Fax driver settings This section describes the settings and buttons common to tabs of the [Print- ing Preferences] or [Properties] dialog box of the fax driver. For details on installing the driver, refer to the [Installation Guide]. [Printing Preferences] dialog box Settings for machine-specific functions can be specified. -
Page 92: Common Settings
Common Settings The buttons described below appear on all tabs. Item Description [OK] Click this button to apply changes to the settings and close the dialog box. [Cancel] Click this button to cancel changes to the settings and close the dialog box. [Help] Click this button to display the Help for the items in the displayed dialog box. -
Page 93: [Fax] Tab
[FAX] tab The settings available on the [FAX] tab are described below. Item Description [Resolution] Select a resolution for the fax. Selecting a higher resolution may increase the communication time. [Print Recipient File] Select this check box to print the original document after a fax is sent. -
Page 94: [Basic] Tab
When faxing with a timer transmission, make sure that the time set on the computer matches the time set on this machine. If the specified transmission time is earlier than the current time set on this machine, the fax will be sent on the following day. [Basic] tab The settings available on the [Basic] tab are described below. -
Page 95: [Authentication/Account Track] Dialog Box
[Authentication/Account Track] dialog box Item Description [User Authentication] If user authentication settings have been specified on this machine, select [Recipient User], and then specify in the [User Name] and [Password] boxes the settings specified on the machine. (up to 64 characters) If public user access is allowed on this machine, the printer can be used when [Public User] is... -
Page 96: [Configure] Tab
[Configure] tab The settings available on the [Configure] tab are described below. Item Description [Device Option] Specify the status of the options installed on this machine and user authentication/account track settings. Select the status of each item in the [Set- ting] box. -
Page 97: Saving Fax Driver Settings
Saving fax driver settings The settings specified in the [Printing Preferences] dialog box of the fax driver can be saved as favorite settings. Saved settings can be recalled at any time by selecting them from the [Favor- ite Setting] list in the [Printing Preferences] dialog box. Saving the settings After changing the fax driver settings, click [Add] in the [Favorite Setting] box. -
Page 98: Using The Phone Book
Using the phone book Adding frequently used recipients to a phone book allows you to recall them when sending faxes. Use the [FAX] tab of the fax driver to add recipients to a phone book. Adding recipients to a phone book The procedure for adding recipients to the phone book is described below. -
Page 99: Editing A Phone Book
Click [OK]. The personal information is registered and displayed under [Personal List]. If groups have been selected for the recipient, the recipient will appear in the list for those groups. Click [OK]. If recipients have already been added to the phone book, editing of the phone book is finished. -
Page 100: Changing Group Membership
To delete a recipient, select the name of the recipient under [Personal List] on the left side of the phone book, and then click [Delete]. At the same time, that recipient is deleted from all groups it belongs to. Names and fax numbers that have been added using [Register To Phone Book] when sending faxes appear in the [Simple Entry] folder of the phone book. -
Page 101: Receiving A Pc Fax
Receiving a PC fax When this machine receives a PC fax, the received document is saved in the machine’s memory in the TIFF format. Documents saved in the memory can be printed or retrieved. In order to use PC fax reception, the following settings in the [Fax Settings] screen ([Admin Settings]) must be specified. -
Page 102: Uninstalling The Fax Driver
Uninstalling the fax driver If the fax driver must be removed, for example, when reinstallation of the driver is necessary, remove the driver using the following procedure. Click [Start], and then click [All Programs] (or [Programs]) - [KONICA MINOLTA] - [xxxxx (model name)] - [Uninstall Printer Driver]. Select the components to be removed, and then click [Uninstall]. - Page 103 5-20 Uninstalling the fax driver...
-
Page 104: Registering Destinations
Registering destinations... -
Page 105: Destination Registration
Destination registration By registering destinations where faxes are frequently sent, recipients can be recalled allowing a fax to easily be sent. With this machine, address book destinations (Address Book), group destinations (Group) and program desti- nations (Program) can be registered. Address Book The information for destinations where faxes are frequently sent can be regis- tered. -
Page 106: Registering An Address Book Destination
Registering an address book destination The procedure for registering an address book destination is described below. G3 fax Address book destinations can be registered from the control panel of this machine or from PageScope Web Connection. The following procedure describes how to register from the control panel of this machine. For details on registering from PageScope Web Connection, refer to the [Reference Guide]. -
Page 107: Settings
Settings Item Description [Name] Type in the registration name for the address book destination. [Fax number] Type in the fax number of the recipient. [Tone]: Press to send push-button tones when pulse dialing is being used. [T] appears in the screen. [Pause]: Press to insert a pause when dial- ing. -
Page 108: Internet Fax
Item Description [Line Settings] Configure the line used to send faxes. [ECM OFF] The error correction mode (ECM) is turned off to shorten the transmission time. ECM is an error correction mode defined by ITU-T (Inter- national Telecommunication Union Telecom- munication Standardization Sector). -
Page 109: Registering A Program Destination
Registering a program destination The procedure for registering a program destination for fax transmission is described below. Program destinations can be registered from the control panel of this machine or from PageScope Web Connection. The following procedure describes how to register from the control panel of this machine. For details on registering from PageScope Web Connection, refer to the [Reference Guide]. -
Page 110: Communication Management
Communication management... -
Page 111: Checking A Job
Checking a job From the Job screen, the status of transmission/reception jobs and results of jobs can be viewed. In the home screen, press [Job] to display the Job screen. For details on the Job screen, refer to the [Printer/Copier/Scanner User’s Guide]. -
Page 112: Checking The Job Log
Checking the job log Press [Log] in the Job screen to display the job log. If [Admin Settings] – [Security Settings] – [Security Details] – [Disable Job History Display] is set to [ON], the job log cannot be displayed. Transmission jobs Press [Send] to view the log for transmission jobs. -
Page 113: Printing Reports/Lists
Printing reports/lists This section describes the fax-related reports and lists that can be printed by this machine. Types of reports The following types of fax-related reports can be printed by this machine. Report name Description Activity Report This report provides a record of transmissions and receptions. -
Page 114: Types Of Lists
Report name Description I-Fax RX Error Report This report is printed if reception of an Internet fax failed. Types of lists The following types of fax-related lists can be printed by this machine. List name Description Address Book List This list contains the information registered for address book destinations. -
Page 115: Activity Report
Activity Report This report provides a record of transmissions and receptions. Results can be viewed of the last 100 transmissions/receptions. Transmission results and reception results are printed separately. The Activity Report is printed automatically. With [Admin Settings] - [Fax Settings] - [Fax Report] - [Activity Report], the conditions for printing can be specified. -
Page 116: Tx Result Report
TX Result Report This report provides a record of the transmission results. If necessary, a reduced image of the first page of the sent document can be printed in the report. The TX Result Report is printed automatically when transmission is com- pleted. -
Page 117: Reservation Tx Report
Reservation TX Report This report provides a detailed record of timer transmissions. The Reservation TX Report is printed automatically when a timer transmis- sion is queued. With [Admin Settings] - [Fax Settings] - [Fax Report] - [TX Reserve], whether or not to print the Reservation TX Report can be specified. For details, refer to “[Fax Report]”... -
Page 118: Broadcast Result Report
Broadcast Result Report This report provides a record of the results of broadcast transmissions. The Broadcast Result Report is printed automatically when a broadcast transmission is completed. With [Admin Settings] - [Fax Settings] - [Fax Report] - [Broadcast Report], whether or not to print the Broadcast Result Report can be specified. -
Page 119: Broadcast Reservation Report
Broadcast Reservation Report This report provides a detailed record of broadcast timer transmissions. The Broadcast Reservation Report is printed automatically when a broadcast timer transmission is queued. With [Admin Settings] - [Fax Settings] - [Fax Report] - [TX Reserve], whether or not to print the Broadcast Reservation Report can be spec- ified. -
Page 120: Pc-Fax Tx Error Report
PC-Fax TX Error Report This report is printed if an error occurred, preventing a PC fax transmission from being completed correctly. With [Admin Settings] - [Fax Settings] - [Fax Report] - [PC-Fax TX Error Report], whether or not to print the PC fax transmission error report can be specified. -
Page 121: Address Book List/Group List/Program List
Address Book List/Group List/Program List These lists contain the information registered for the various destinations. The procedure for printing a destinations list is described below. Press the [Utility/Counter] key. Press [Admin Settings]. Type in the administrator password, and then press [OK]. Press [Address Registration]. -
Page 122: Troubleshooting
Troubleshooting... -
Page 123: Problems When Sending Faxes
Problems when sending faxes For details on the error messages, refer to “Error messages” on page 8-9. For details on troubleshooting procedures for document misfeeds, paper misfeeds, poor print quality, or empty toner, refer to the [Printer/Copier/Scanner User’s Guide]. If the fax cannot be sent correctly, refer to the following table, and then per- form the indicated operation. - Page 124 Symptom Cause Solution Transmission is not pos- The transmission proce- Check the transmission sible. dure may have been procedure, and then try performed incorrectly. sending the fax again. The fax number may be Check the fax number. wrong. The address book desti- Check that the destina- nation, group destination tions were correctly reg-...
-
Page 125: Internet Fax
Internet fax Symptom Cause Solution Transmission is not pos- The network settings are Check that the settings sible. not specified correctly. in “Initial settings” on page 1-13 have been correctly specified. The e-mail address for Check that the regis- the destination is incor- tered destination infor- rect. - Page 126 Symptom Cause Solution Print processing on the The fax driver specified Check the specified computer finished, but when sending may not printer name. transmission does not be supported by the start. printer controller. The network or USB Check that the cable is cable may be discon- correctly connected.
-
Page 127: Problems When Receiving Faxes
Problems when receiving faxes If the fax cannot be received correctly, refer to the following table, and then perform the indicated operation. If the fax still cannot be received correctly, even after performing the described operations, contact your technical repre- sentative. -
Page 128: Internet Fax
Symptom Cause Solution Reception is not possi- The fax may have been If an incorrect Sub ble. sent with an incorrect address is received, a Sub address for the communication error specified F-code. occurs and the fax can- not be received. Have the sender check the Sub address on their fax machine. -
Page 129: Other Problems
Other problems Symptom Cause Solution The number of docu- Memory is full. During batch transmis- ment pages indicated in sions, the number of the transmission results document pages indi- report is different from cated in the transmis- the number of pages in a sion results report may batch transmission. -
Page 130: Error Messages
Error messages If a machine malfunction occurs, the error screen appears with one of the fol- lowing error messages. Refer to the following table, and then perform the indicated operation. If fax transmissions/receptions still cannot be performed correctly, even after performing the described operations, contact your technical representative. - Page 131 Error message Cause Solution [I-Fax RX failed] An error occurred while This error is automati- an Internet fax is being cally cleared. received. 8-10 Error messages...
-
Page 132: Appendix
Appendix... -
Page 133: Technical Specifications
Technical specifications G3 fax Item Specifications Compatible lines PSTN (Public Switched Telephone Network) PBX (Private Branch eXchange) Compatibility ECM/Super G3 Modem speed 2.4 kbps - 33.6 kbps Fax transmission speed 3 sec/page (at A4, 33.6 kbps, JBIG, V.34) Coding method MH, MR, MMR or JBIG Fax memory 256 MB for G3 fax and Internet fax TX/RX... -
Page 134: Pc Fax (Fax Driver
Item Description Resolution (Transmission) Standard: 200 × 100 dpi Fine: 200 × 200 dpi Resolution (Reception) 200 × 100 dpi, 204 × 98 dpi (80 × 38.5 dot/cm) 200 × 200 dpi, 204 × 196 dpi (80 × 77 dot/cm) 300 ×... -
Page 135: Text Input
Text input The procedure for using the keyboard screen is described below. Entering text In the keyboard screen, press the character that you want to enter. To enter uppercase letters, press [ To enter symbols, press [ To enter special characters, such as accented characters, press [ To delete the character to the right of the cursor, press [Delete]. - Page 136 Index Account track ....1-11, 1-12 E-mail forwarding ......4-8 Address Book .......6-2 E-mail Settings ......3-17 Address Registration ....6-3 ADF ..........3-4 Fax driver ........5-8 Authentication/ Canceling ........3-23 Account Track ......5-12 Closed network reception ....4-7 Basic ........5-11 Comm. Method ......3-14 Configure ........
- Page 137 Fax Settings (Admin Settings) ..2-4 Lists ..........7-5 Closed Network Address Book List ....7-12 RX Password ......2-15 Fax Setup Information List ..7-12 Comm. Settngs ......2-10 Fax Factory Default ....2-20 Fax Function Settings ....2-13 Machine Parts ......1-2 Fax Image Initialized ....2-20 Memory reception ......
- Page 138 Reports ..........7-4 Activity Report ......7-6 Broadcast Reservation Report ........7-10 Broadcast Result Report .....7-9 I-Fax RX Error Report ....7-11 PC-Fax TX Error Report ...7-11 Reservation TX Report ....7-8 TX Result Report ......7-7 Scan Settings ......3-11 Background Removal ....3-12 Density ........3-12 Original Type ......3-11 Resolution .........3-11 Separate Scan ......3-11 Sharpness .........3-12...
- Page 139 Index...
- Page 140 http://konicaminolta.com Copyright A121-9562-13A 2011. 1 2009...
Need help?
Do you have a question about the bizhub C35 and is the answer not in the manual?
Questions and answers