Table of Contents
Advertisement
Quick Links
Advertisement
Table of Contents

Related Manuals for Sim2 HT300 XTRA


Summary of Contents for Sim2 HT300 XTRA
- Page 1 User and Installation Manual The home theater projector HT300 XTRA...
- Page 2 BACK LIGHT Turn on the back light STAND-BY LIGHT Switches off to stand-by. 0-9 Keys Switch on from stand-by and allow direct source SOURCE selection. Displays the Source ESCAPE Selection menu. Deactivates the On Screen Display. Not active Up/Down/Left/Right Arrow keys in this model.
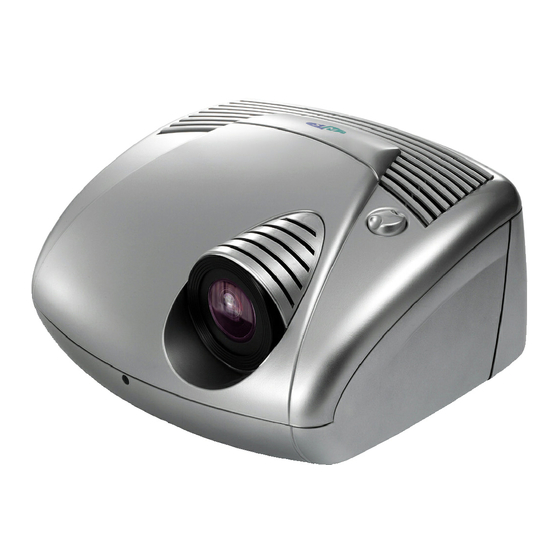
- Page 3 XTRA 1 INTRODUCTION Congratulations and thank you for choosing the HT 300 XTRA, a SIM2 Multimedia SpA product (Fig. 1) .
- Page 4 The long throw zoom lens allows the position of the projector to of a good quality screen and surround-sound system. Contact be located behind the viewer, thus reproducing a cinema-like your nearest authorized SIM2 Multimedia dealer for further installation (Fig. 2) . details.
- Page 5 XTRA Projection lens Lens shift knob Cooling air inlet vents Remote control IR sensor Cooling air outlet vents Adjustable carry-handle Adjustable levelling feet Ceiling/wall bracket fixing holes Fused power socket 12 11 13 17 Main power switch Remote control rear IR sensor Green LED Red LED Rear keyboard pad...
-
Page 6: Important Safety Instructions
XTRA 2 IMPORTANT SAFETY INSTRUCTIONS ATTENTION: To reduce the risk of electric shock, disconnect the CAUTION power supply cable on the rear panel before removing the top cover of the projector. RISK OF ELECTRIC SHOCK! DO NOT REMOVE THE TOP COVER Refer to trained, authorised personnel for technical assistance. - Page 7 XTRA Please follow carefully the warnings listed below, to ensure safe and long term performance of your projector. • Connect the projector to a power supply with a nominal voltage within the following values: 100-240 Vac, 50/60 Hz, 250 V earthed (Fig.
-
Page 8: Packaging And Contents
XTRA • Take care not to shake the projector whilst carrying it by the • For installations using a ceiling or wall-mounted bracket, handle. carefully follow the installation and safety instructions provided with the bracket’s literature. • Always position the projector away from direct heat sources. •... - Page 9 ZOOM ZOOM will find in the box together with the bracket. If you F O C U S use a bracket different to the one supplied by SIM2 FOCUS F O C U S FOCUS Multimedia, you must make sure that the projector...
- Page 10 XTRA KEYSTONE C-SYNC Fig. 11 Fig. 9 The output is activated (Voltage: 12 Vdc) when the projector is switched on and is de-activated (no Voltage output) when the The Orientation adjustment in the Set up menu will allow the projector is in stand-by mode. projector to be used for desktop front, ceiling front, desktop rear and ceiling rear installations (Fig.
-
Page 11: Switching On And Off The Projector
XTRA which is undesirable for a large audience. image. For the true cinema experience best results are Preferably, use a screen with black, non-reflecting borders, achieved with little or no ambient light. which will perfectly frame the projected image. Furniture and other objects with reflecting surfaces, as well as Avoid light shining directly on the screen during projection as light coloured walls should be avoided, as they are likely to this will reduce contrast and black level detail on the projected... - Page 12 XTRA The fans will continue to work until the lamp has cooled down SWITCHING OFF AND RETURNING TO STAND-BY (red and green LEDs flashing) and will stop automatically after this period. By remote control: press By keyboard: press key LED INDICATORS When switching off, the projector goes in to stand-by The LED indicators, located in the top-rear of the projector, memorising the input selection at the time of switch-off.
- Page 13 XTRA 100 Hz. Computer Resolutions of VGA, SVGA, XGA, SXGA and COMPOSITE VIDEO INPUT UXGA can be displayed. CVBS COMPOSITE VIDEO Fig. 17 This input is suitable for a “Composite Video CVBS” via a cable Fig. 19 with an RCA/Phono connector (Fig. 17) . This input is suitable for a RGB video signal, or for a Component (YCrCb) type, with composite synchronisation on the green S-VIDEO INPUT...
- Page 14 XTRA Only horizontal scanning frequencies of 15 kHz (standard vi- CAUTION: This is not a VESA “Plug & Display” deo resolution) or 32 kHz (high definition video, with progressi- connector. Never connect a computer to this socket ve scanning) can be applied to this input. as the projector and the computer may be damaged (Fig.
-
Page 15: Keyboard Pad
XTRA The output can be used to control a screen masking system; its output can be set with the “Screen control” adjustment in the “Aspect” menu. This output allows reduction in the area of a 16:9 screen, into a 4:3 format, by activating a screen masking system (refer to screen manufacturer for further information). -
Page 16: Remote Control
XTRA 8 REMOTE CONTROL Insert the batteries, taking care to match the polarity, as The remote control sends commands to the projector via indicated in the battery recess of the remote (Fig. 26) . infrared signals. It is possible to control the projector by pointing the remote control at the screen;... -
Page 17: On Screen Menus
XTRA 9 ON SCREEN MENUS SOURCE SELECTION Video The Source Selection menu is recalled by pressing the key: NTSC/60Hz 0/AV of the remote control or the Up/Down Arrow key of the Normal keyboard pad. The selected source will be highlighted in yellow. Use Up and Down Arrow keys to browse sources. - Page 18 XTRA COLOR PICTURE Use this control to adjust the colour level. This menu features adjustments relating to the projected image TINT quality. Controls the purity of the colours, to NTSC coded signal standards. Tint is only applicable to video input with NTSC stan- dard, to RGB 15kHz and YCrCb 15kHz inputs and YCrCb 32kHz (no RI2).
-
Page 19: Image Adjustments
XTRA INPUT SIGNALS AND ADJUSTABLE/SETTING ITEMS SOURCE Video RGBS 15kHz ADJUSTMENTS RGBS 32 kHz YCrCb 32 kHz RGB Graphics DVI-D S-Video YCrCb 15kHz BRIGHTNESS CONTRAST COLOR TINT (NTSC) SHARPNESS SHARPNESS MODE FILTER CINEMA MODE VIDEO TYPE HORIZONTAL POSITION VERTICAL POSITION FREQUENCY PHASE not adjustable/can not be set... - Page 20 XTRA POSITION or down. Use this adjustment to position the image vertically and Image is projected in the center of screen. horizontally. User 1, 2, 3 Should you wish to use a format different to those preset, go to HORIZONTAL: User menus.
- Page 21 XTRA Phase There are three fixed colour temperature settings, which are: The phase adjustment determines the stability and sharpness High (9000÷9500 degrees K), Medium (circa 6500 degrees of the vertical lines in the projected image. K), Low (circa 5000 degrees K). The User option will allow you to select the colour temperatu- ADVANCED SETTINGS re of your choice.
- Page 22 XTRA ORIENTATION Select the option that best describes the installation i.e. desktop front, ceiling front, desktop rear and ceiling rear. ORIENTATION FLOOR CEILING FLOOR-REAR CEILING-REAR Select Pan (zoom button on the remote control) to choose the area of image to enlarge, using all four arrow keys. HORIZONTAL / VERTICAL KEYSTONE To obtain maximum quality of the projected image, we recommend the installation of the projector on a level platform...
- Page 23 XTRA TEST PATTERNS Displays a series of five test patterns, useful for the installation of the projector. KEYSTONE Press Up and Down Arrow keys to browse pattern. HORIZONTAL VERTICAL PROJECTION LENS To adjust Focus and Size of the projected image, use the lens settings.
-
Page 24: Quick Menus
XTRA LANGUAGE Lists the languages options available for the On Screen Display Info menus. Mode Source Video Standard Video NTSC 60Hz/4.43MHz Horiz Frequency 15.7kHz Video Type Normal LANGUAGE Aspect Panoramic ENGLISH Color Temperature ITALIANO Lamp Hour Meter FRANCAIS Software Version 2.08 H P (038) DEUTSCH ESPANOL... -
Page 25: Cleaning And Maintenance
XTRA - Check the integrity of cables used to connect various Out of range sources. - If you are using the Remote Input Interface, do not to confuse Either the resolution or the horizontal/vertical frequency of the the menu for selection of projector’s inputs (Source input signal is too high. - Page 26 XTRA Image is disturbed, unstable or noisy Graphic image with poor quality vertical detail - Verify compatibility of video/graphic signals with the technical - Verify compatibility of video/graphic signals with technical specifications of the projector. specifications of your projector. - Check the integrity of cables connecting projector to various - Press Auto (on your remote or keypad) to execute sources.
-
Page 27: Optional Accessories
XTRA 12 OPTIONAL ACCESSORIES You can purchase the following optional accessories at your Use only original, or SIM2 Multimedia approved, Dealer: accessories. CAUTION: for ceiling/wall installation, by means of - Remote Input Interface with 10 m Cable. suspension bracket, carefully follow the instructions - Wall/Ceiling Bracket Kit. - Page 28 XTRA gross weight, including Low Voltage Power Output: two 12 Vdc output, 100 mA max on accessories: jack connectors 8 kg (17.7 lbs); recyclable packaging material GENERAL ENVIROMENTAL Supply: from 100 to 240 Vac, -10% +6% tolerance Operation temperature: 0 to 35°C (32° to 95°F) Frequency: from 48 to 62 Hz Transportation temp.:...
-
Page 29: Projection Distances
XTRA C PROJECTION DISTANCES Follow the table below to determine the optimal projection distance (between the screen and the center of the lens). This will help you to obtain the desired screen size. 16/9 Screen Screen Min projection distance Max projection distance size width (diagonal) - Page 30 XTRA Screen Screen Min projection distance Max projection distance size width (diagonal) min. DP max CC max. DP max CC ft. in. ft. in. ft. in. ft. in. 50" 1’ 1” 40” 1’ 7” 8’ 0” 11’ 0” 1’ 4” 60"...
-
Page 31: Table Of Contents
XTRA INDEX 1 INTRODUCTION 9 ON SCREEN MENUS 2 IMPORTANT SAFETY INSTRUCTIONS Source selection 3 PACKAGING AND CONTENTS Main menu 4 INSTALLATION Picture 5 SWITCHING ON AND OFF THE PROJECTOR Image adjustments Switch on from stand-by Setup Switching off and returning to stand-by Menu CONNECTIONS Info... - Page 32 S.p.a. Phone +39.434.383.253-256 • Fax +39.434.383260-261 www.sim2.com • e-mail: info@sim2.it SIM2 USA Inc. • 10108 USA Today Way • 33025 Miramar FL - USA Phone +1.954.4422999 • Fax +1.954.4422998 www.sim2usa.com • e-mail: sales@sim2usa.com SIM2 Deutschland GmbH • Gewerbepark, 17 D-35606 Solms Phone 0800.800.7462 •...
Need help?
Do you have a question about the HT300 XTRA and is the answer not in the manual?
Questions and answers