
Related Manuals for Eiki Multimedia Projector LC-X1UA


Summary of Contents for Eiki Multimedia Projector LC-X1UA
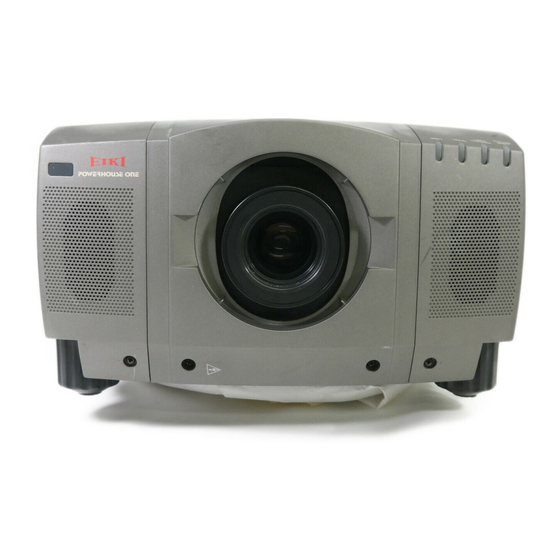
- Page 1 MULTIMEDIA PROJECTOR LC-X1UA MODEL LC-X1UL OWNER’S INSTRUCTION MANUAL (Without Lens)
-
Page 2: Safety Precautions
INFORMATION TO THE USER NOTE: This equipment has been tested and found to comply with the limits for a Class A digital device, pursuant to Part 15 of the FCC Rules. These limits are designed to provide reasonable protection against harmful interference when the equipment is operated in a commercial environment, This equipment generates, uses, and can radiate radio frequency energy and, instruction manual, may cause harmful interference to radio communications. -
Page 3: Important Safety Instructions
IMPORTANT SAFETY INSTRUCTIONS All the safety and operating instructions should be read before the product is operated. Read all of the instructions given here and retain them for later use. Unplug this projector from AC power supply before cleaning. Do not use liquid or aerosol cleaners. -
Page 4: Table Of Contents
INTRODUCTION COMPATIBILITY IMAGE RESOLUTION UNPACKING THE PROJECTOR TRADEMARKS POWER REQUIREMENT DESCRIPTION SETTlNG-UP THE PROJECTOR POSITIONING ROOM LIGHT LEVELING AND ELEVATING ADJUSTMENTS VENTILATION MOVING THE PROJECTOR CONNECTING THE PROJECTOR CONNECTING THE COMPUTER Connecting an IBM-compatible desktop computer Connecting a Macintosh desktop computer Connecting an IBM-compatible laptop computer Connecting a Macintosh PowerBook computer CONNECTING THE VIDEO EQUIPMENT... -
Page 5: Introduction
The multimedia projector that combines powerful and sophisticated features with easy-to-use, intuitive controls. Built- multimedia features include audio, a palette of 16.77 million colors and active matrix liquid crystal display (LCD) technology. The projector is ideal for high-performance business, training and imaging applications that demand cob quality COMPATABILITY The projector is compatible with many different types of personal computers and video devices, including;... -
Page 6: Description
DESCRIPTION... -
Page 7: Settlng-Up The Projector
SETTING-UP THE PROJECTOR POSITIONING; • This projector is basically designed to project on a flat projection surface. projector can be focused from 3.6’ • This • Refer to the figure below as an example when positioning the projector to the screen. THIS PROJECTOR SHOULD BE SET IN THE WAY INDICATED. -
Page 8: Ventilation
• Do not transport the projector by using a courier or transport service in an unsuitable transport case. This may cause damage to the projector. To transport the projector through a courier or transport service, use a Eiki recommended Case. -
Page 9: Connecting The Projector
CONNECTING THE PROJECTOR CONNECTING THE COMPUTER CONNECT NC TO THE COMPU ER. PUT 1 Personal computers can be connected to the computer input (Red, Green, Blue, Horiz. Sync. and Vert. Sync.) on the projector. • Connect the computer to these jacks using the BNC cables (not provided). CONNECTING TO THE COMPUTER INPUT 2 TERMINAL {HDB1 5-PIN (VGA)} Personal computers can be connected to the HDB1 5-pin (VGA) terminal on the projector. - Page 10 CONNECTING TO THE COMPUTER AUDIO MONITOR OUTPUT (VARIABLE) JACKS These jacks will contain the audio information of the selected program source being viewed on the screen (Computer 1 or Computer 2). If you have selected program source Computer 2 the audio signal connected to the Computer 2 audio input jack will be available at the computer audio monitor output jacks.
-
Page 11: Connecting An Ibm-Compatible Desktop Computer
CAUTION The hook up should be done as per the above illustration. After hook up~ turn on the projector, monitor, computer, in that order. -
Page 12: Connecting A Macintosh Desktop Computer
CAUTION illustration. After hook up, The hook up should be done as per the above turn on in that order. the projector, monitor, computer,... -
Page 13: Connecting An Ibm-Compatible Laptop Computer
CAUTION The hook up should be done as per the above illustration. After hook up, turn on the projector, computer, in that order. -
Page 14: Connecting A Macintosh Powerbook Computer
CAUTION The hook up should be done as per the above illustration. After hook up, turn on the projector, computer, in that order. -
Page 15: Connecting The Video Equipment
CONNECTING THE VIDEO EQUIPMENT CONNECTING TO THE VIDEO INPUT JACKS (1 and 2) BNC TYPE x 3 Connect to the video outputs of a VCR, video disc player, DVD player, video camera, satellite TV tuner or other AV equipment. Connect video output from AV equipment to these jacks using the BNC cables. The video input can be selected 3 type of the input. - Page 16 NOTE: The hook up should be done as per the above illustration. After hook up, turn on the projector, video equipment, in that order.
-
Page 17: Operation Of Controls
OPERATION OF CONTROLS... -
Page 18: Select Button
LAMP REPLACEMENT INDICATOR Light is orange when projection lamp is nearing end of service life. TEMPERATURE WARNING INDICATOR Rashes red when internal projector temperature is too high. READY INDICATOR Light is green when projector lamp is ready to be turned on. LAMP POWER INDICATOR Light is dim when the projector is on. - Page 19 COMPUTER INPUT-i JACKS (BNC TYPE x 5) Used to connect a computer to the projector. COMPUTER INPUT-2 TERMINAL (VGA HDB15) Used to connect a computer to the projector. MONITOR OUTPUT TERMINAL (VGA HDB15) Used to connect a monitor to the projector. COMPUTER AUDIO INPUT-i JACKS (R and L) Used to connect an audio output from the computer to the projector.
-
Page 20: Side Of The Projector
SIDE OF THE PROJECTOR (CONNECT THE VIDEO EQUIPMENT) VIDEO INPUT JACKS-1 (BNC TYPE x 3) Used to connect a video source to the projector. S-VIDEO INPUT JACK-1 Used to connect a S-VHS video source to the projector. AUDIO INPUT JACKS-1 (R and L) Used to connect an audio source to the projector. -
Page 21: Operation Of Remote Control
OPERATION OF REMOTE CONTROL (Wireless) This remote control unit can be used not only as a remote control for the projector operation but also as a wireless mouse for PC. The remote control unit has a pointing pad and two click buttons. - Page 22 MODE BUTTON Used to select source. (Computer 1, Computer 2, Video 1 or Video 2 Input) LAMP POWER ON/OFF BUTTON Used to turn the projection lamp on or off. VOLUME BUTTONS Used to adjust volume. ZOOM BUTTON Used to select power zoom lens adjust P-TIMER BUTTON Used to operate the P-TIMER function.
-
Page 23: Remote Control Battery Installation
REMOTE CONTROL BATTERY INSTALLATION USING THE REMOTE CONTROL UNIT Point the remote control toward the projector (Receiver widow) whenever pressing the buttons. Maximum operating range for the remote control is about 16.4’ (5 m) and 60 To insure safe operation, please observe the following precautions: •Use (2) AA type alkaline batteries. -
Page 24: Wireless/Wired Remote Control Unit
OPERATION OF REMOTE CONTROL (Wireless/Wired) WIRED REMOTE JACK When using the wired remote control, connect the remote cable to this jack. MODE BUTTON Used to select source. (Computer 1, Computer 2, Video 1 or Video 2 Input) LAMP POWER ON/OFF BUTTON Used to turn projection lamp on or off VOLUME BUTTONS Used to adjust volume. - Page 25 REMOTE CONTROL The remote control unit can be used as wireless or wired remote control. USING THE REMOTE CONTROL UNIT (wireless) Point the remote control toward the projector (Receiver window) whenever pressing the buttons. Maximum operating range for the remote control is about 16.4’ (5 m) and 60 USING THE REMOTE CONTROL UNIT (wired) Connect a remote control cable to R/C jacks located on the wireless/wired remote control unit and the side of the projector.
-
Page 26: Wireless Remote Control Unit
The projector has two types of operation: DIRECT OPERATION and MENU OPERATION. DIRECT OPERATION allows you to operate the projector by using one button without showing the MENU. In MENU OPERATION mode, you display menus where you can adjust the projector’s settings. Follow the instruction for each control. DIRECT OPERATION ADJUST ITEM TOP CONTROL OF... -
Page 27: Menu Operation
MENU OPERATION ADJUST ITEM MODE SELECT 1. COMPUTER/VIDEO MODE ADJUST ITEM TOP CONTROL OF THE PROJECTOR MENU SOUND SOUND VOLUME POINT LEFT/RIGHT SELECT TREBLE BASS POINT UP/DOWN BUILT-IN SP. SELECT SOUND MUTE LANGUAGE MENU SETTING BLUE BACK POINT LEFT/RIGHT SELECT DISPLAY REVERSE T/B POINT UP/DOWN... -
Page 28: Menu Operation
3. COMPUTER MODE ADJUST ITEM TOP CONTROL OF THE PROJECTOR COMPUTER SYSTEM MENU POINT LEFT/RIGHT SELECT POINT UP/DOWN SELECT AUTO IMAGE MENU FINE SYNC POINT LEFT/RIGHT SELECT TOTAL DOTS POINT UP/DOWN POSITION SELECT MENU PICTURE IMAGE POINT LEFT/RIGHT FINE SYNC SELECT TOTAL DOTS POINT UP/DOWN... -
Page 29: Using The Projector
TO TURN ON THE PROJECTOR Connect the projector to a video source (Computer, VCR, Video Camera, Video Disc Player, etc.) using the appropriate terminals on the side of the projector (See “CONNECTING THE PROJECTOR” section on pages 9-16). Connect the projector’s AC power cord into a wall outlet and turn the MAIN ON/OFF switch (located on the side of the projector) to the ON position. -
Page 30: Sound Volume Adjustment
SOUND VOLUME ADJUSTMENT Press the VOLUME buttons (located on remote control unit or on the projector) to adjust the volume. The volume display will be displayed on the screen for a few seconds. Pressing volume (÷) will increase volume and increase the number on the screen. Pressing volume (-) will decrease volume and decrease the number on the screen. -
Page 31: Menu Operation
MENU OPERATION In MENU OPERATION mode, you can adjust the projector. You can use the TOP CONTROL OF THE PROJECTC or the REMOTE CONTROL UNIT. MODE SELECT You can select a mode used in the MENU among computer 1, computer 2, video 1 and video 2. 1. -
Page 32: Sound Adjustment
SOUND ADJUSTMENT You can adjust the volume, treble, bass levels and Built-in SP., Sound Mute ON/OFF switch in the MENU display. sound 1. Press the MENU BUTTON and the MAIN MENU DISPLAY dialog box will appear. 2. Press the POINT LEFT/RIGHT BUTTON(s) to select SOUND and press the SELECT (REAR CLICK) BUTTON. Another dialog box SOUND ADJUST DISPLAY will appear. -
Page 33: Menu Exit
MENU EXIT To close the MENU display, press the POINT RIGHT BUTTON to select right end ICON and then press the SELECT (REAR CLICK) BUTTON. NOTE: Press the MENU BUTTON during the appearing of the MENU display on the screen, the MENU display is disappeared. COLOR SYSTEM SELECT (VIDEO MODE) This projector is compatible with the six major broadcast video standards: PAL, SECAM, NTSC, NTSC 4.43, PAL-M or PAL-N (COLOR SYSTEMs). -
Page 34: Video Source Adjustment
VIDEO SOURCE SELECT (VIDEO MODE) 1. Connect the video equipment to the PROJECTOR, and turn them on. 2. Set MODE SELECT to ‘VIDEO MODE”. 3. Press the MENU BUTTON and the MAIN MENU DISPLAY dialog box will appear. 4. Press the POINT LEFT/RIGHT BUTTON(s) to select VIDEO SOURCE and press the SELECT (REAR CLICK) BUTTON. Another dialog box VIDEO SOURCE DISPLAY will appear. -
Page 35: Picture Image Adjustment
PICTURE IMAGE ADJUSTMENT (VIDEO MODE) Picture adjustments have been preset at the factory. If you want to change the setting, operate the projector as follows. 1. Press the MENU BUTTON and the MAIN MENU DISPLAY dialog box will appear. 2. Press the POINT LEFT/RIGHT BUTTON(s) to select IMAGE and press the SELECT (REAR CLICK) BUTTON. Another dialog box IMAGE ADJUST DISPLAY will appear. -
Page 36: Picture Screen Adjustment
PICTURE SCREEN ADJUSTMENT (VIDEO MODE) This projector has the Wide image function, which enables you to view a wider video image. WIDE image function This projector is designed to project a normal video image (with 4 x 3 aspect ratio). In addition, with the WIDE function, the projector can project a wider video image by compressing 4 x 3 image. -
Page 37: Computer System Select
COMPUTER SYSTEM SELECT (COMPUTER MODE) This projector is designed to accept different types of computer display signals based on VGA, SVGA, XGA or SXGA (See “COMPATIBLE COMPUTER SPECIFICATIONS” on the next page). If you set MODE SELECT to “COMPUTER”, the projector will automatically process the incoming signal and project the proper image without any special setting. -
Page 38: Compatible Computer Specification
COMPATIBLE COMPUTER Specifications are subject to change without notice. NOTE: Basically this projector can accept the signal from all computers with the above mentioned V, H-Frequency and less than 135 MHz of Dot Clock. -
Page 39: Auto Image Function
AUTO IMAGE FUNCTION (COMPUTER The Auto image function can automatically adjust the Fine sync., Total dots and Screen 1. Press the MENU BUTTON and the MAIN MENU DISPLAY dialog box will appear. Press the POINT LEFT/RIGHT BUTTON(s) to select AUTO IMAGE and press the SELECT (REAR CLICK) BUTTON. -
Page 40: Picture Image Adjustment
PICTURE IMAGE ADJUSTMENT (COMPUTER MODE) Picture adjustments have been preset at the factory. If you want to change the setting, operate the projector as follows. Press the MENU BUTTON and the MAIN MENU DISPLAY dialog box will appear. Press the POINT LEFT/RIGHT BUTTON(s) to select IMAGE and press the SELECT (REAR CLICK) BUTTON. Another dialog box IMAGE ADJUST DISPLAY will appear. -
Page 41: Picture Position Adjustment
PICTURE POSITION ADJUSTMENT (COMPUTER MODE) 1. Press the MENU BUTTON and the MAIN MENU DISPLAY dialog box will appear. 2. Press the POINT LEFT/RIGHT BUTTON(s) to select POSITION and press the SELECT (REAR CLICK) BUTTON. Another dialog box POSITION SETTING DISPLAY will appear. 3. -
Page 42: Pc Adjustment
PC ADJUSTMENT This projector can automatically detect the most display signals in most personal computers currently existing in the market. However, some computers output a special signal format which is different from the standard ones and may not be detected by this projector. - Page 43 6. Another dialog box “PC ADJUSTMENT DISPLAY 1” will appear and the parameter data for the Mode you have selected is shown in this dialog box. 7. The parameters will be filled with the data determined by the projector according to the present signal input. 8.
- Page 44 17. Another dialog box “PC ADJUSTMENT DISPLAY 2” will appear and the parameter data for the Mode you have selected is shown in this dialog box. 18. Move the arrow to an adjusting item you want to adjust by pressing the POINT UP/DOWN BUTTON(s). 19.
-
Page 45: Mode Free
MODE FREE The Mode free function is designed to delete the parameter data produced by PC ADJUST. 1. Press the MENU BUTTON and the MAIN MENU DISPLAY dialog box will appear. 2. Press the POINT LEFT/RIGHT BUTTON(s) to select PC ADJUST and press the SELECT (REAR CLICK) BUTTON. Another dialog box “... -
Page 46: Picture Screen Adjustment
PICTURE SCREEN ADJUSTMENT (COMPUTER MODE) This projector has a picture screen resize function, which enables you to project the image different size. 1. Press the MENU BUTTON and the MAIN MENU DISPLAY dialog box will appear. 2. Press the POINT LEFT/RIGHT BUTTON(s) to select SCREEN and press the SELECT (REAR CLICK) BUTTON. Another dialog box SCREEN ADJUST DISPLAY will appear. -
Page 47: Other Function Setting
OTHER FUNCTION SETTING This projector has other function settings; Blue back, Display, Reverse T/B, Reverse R/L, Split wipe and Lamp age. BLUE BACK When this function is in the “On” position, the projector will project a blue image without video noise on the screen when the video source is unplugged or turned off. - Page 48 BLUE BACK, DISPLAY, REVERSE T/B, REVERSE L/R AND SPLIT WIPE 1. Press the MENU BUTTON and the MAIN MENU DISPLAY dialog box will appear. 2. Press the POINT LEFT/RIGHT BUTTON(s) to select SETTING and press the SELECT (REAR CLICK) BUTTON. Another dialog box SETTING DISPLAY will appear.
-
Page 49: Lampage
LAMP AGE NOTE: Do not reset the LAMP REPLACEMENT MONITOR TIMER, except after the lamp is replaced. 1. Press the MENU BUTTON and the MAIN MENU DISPLAY dialog box will appear. 2. Press the POINT LEFT/RIGHT BUTTON(s) to select SETTING and press the SELECT (REAR CLICK) BUTTON. Another dialog box SETTING DISPLAY will appear. -
Page 50: Air Filter Care And Cleaning
AIR FILTER CARE AND CLEANING The removable air filter prevents dust from accumulating on the surface of the projection lens and projection mirror. Should the air filter become clogged with dust particles, it will reduce the cooling fan’s effectiveness and may result in internal heat build up and reduce the life of the projector. -
Page 51: Lamp Replacement
If the lamp fails to come on and the lamp monitor on the projector light is orange, you must replace the bulb. •For continued safety, replace with a lamp assembly of the same type. •Allow the projector to cool for at least 45 minutes before you open the lamp cover, The inside of the projector can become very hot. -
Page 52: Cleaning The Lens
Follow these steps to clean the projection lens: 1. Apply a non-abrasive camera lens cleaner to a soft, dry cleaning cloth. Avoid using an excessive amount of cleaner. Abrasive cleaners, solvents or other harsh chemicals might scratch the lens. 2. Lightly wipe the cleaning cloth over the lens. 3. - Page 53 Problem: Picture is T/B inverted. Picture is LJR Reversed. Some displays are not seen during the operation. No Sound. Remote control unit doesn’t work. Wireless mouse function does not work. Try these Solutions: Check Reverse T/B feature. (See “OTHER FUNCTION SETTING” section on pages 47— 48).
-
Page 54: Technical Specifications
Projector Type Dimensions (W x H x D) Net Weight LCD Panel System Number of Pixels Color System Scanning Frequency Projection Image Size (Diagonal) Contrast Ratio Horizontal Resolution Projection Lens Motorized Lens Shift Throw Distance Projection Lamp Projection Mirror AV Input jacks Video Monitor Output Jack Audio Monitor Output Jack Computer Input 1 Jack... - Page 55 -MEMO-...
- Page 56 Audio Visual/Video Products EIKI INTERNATIONAL, INC. 26794 Vista Terrace Drive, Lake Forest, CA. 92630-8113 TEL (949) 457-0200 FAX (949) 457-7878 IN CANADA, EIKI CANADA 865 Heritage Drive P.O. Box 156 Midland Ontario L4R 4K8 Canada TEL (705) 527-4084 FAX 527-4087...
Need help?
Do you have a question about the Multimedia Projector LC-X1UA and is the answer not in the manual?
Questions and answers