Kyocera KM-3035 Operation Manual
Print/scan system (u) network scanner
Hide thumbs
Also See for KM-3035:
- Service manual (352 pages) ,
- Operation manual (296 pages) ,
- Command reference manual (410 pages)
Table of Contents

Related Manuals for Kyocera KM-3035


Summary of Contents for Kyocera KM-3035
-
Page 1: Network Scanner
Print/Scan System (U) KM-3035/4035/5035 Network Scanner Operation Guide <Set-up Edition> ALWAYS read this Operation Guide thoroughly before use. After reading, maintain it in good condition and keep it together with the Operation Guide for your copier. - Page 3 Trademark Information • Microsoft, Windows, Windows NT and Internet Explorer are registered trademarks of Microsoft Corporation of America and other countries. • Windows Me and Windows XP are trademarks of Microsoft Corporation. • Ethernet is a registered trademark of Xerox Corporation. •...
- Page 4 About this Operation Guide This Operation Guide is meant to be read when the Scanner Interface Card is installed and your copier is to be used as a network scanner. It explains set-up procedures and other related operation on the machine. As the required set-up in order to use the copier as a scanner may differ depending upon the environment in use in the connected computer, please read those sections related to your specific computer environment and perform the appropriate set-up procedures explained there.
- Page 5 Important: • The use of scanned legally copyrighted materials, such as documents, musical scores, pictures, woodblock prints, maps, drawings and photographs, for any intent other than your own personal or home use, or other such purpose, is prohibited under the copyright law without prior permission from the legal copyright owner. Simply scanning the following items may result in legal penalty: •...
- Page 6 Getting connected The following procedures are required in order to use this machine as a scanner. Connect the scanner to your computer <Example connection> Connecting the scanner to your computer network with a network cable Page 2-2 (100BASE-TX and 10BASE-T) ....Network cable Perform the required operation at the scanner Basic scanner settings...
-
Page 7: Table Of Contents
Table of contents 1. Preparations ......................1-1 1-1 Names of parts ............................1-1 • Main body ............................1-1 • Operation panel ........................... 1-2 1-2 Accessories ............................1-3 1-3 Utilities and other software (the main content of the included CD-ROMs) ..........1-3 1-4 Required items ............................ -
Page 8: Preparations
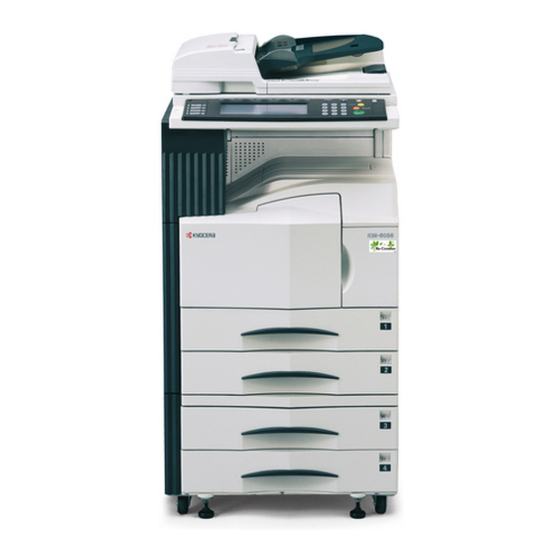
1. Preparations 1-1 Names of parts • Main body 1 Original cover 4 Operation panel Open and close this cover when setting an original on the Perform operations here. 5 Main switch platen. 2 Platen Turn this switch ON in order to use the scanner. 6 Scanner interface connector Set the original to be scanned face-down in the left-rear portion of the platen. -
Page 9: Operation Panel
1. Preparations • Operation panel 1 Default Setting/Counter key Press this key when you want to change default settings for the scanner as well as register new users. 2 Reset key Press this key when you want to cancel default and scan settings, as well as when you want to clear selected destination folders and computers. -
Page 10: Accessories
1. Preparations 1-2 Accessories Prior to using the scanner for the first time, verify that the following accessories are included with this product. • 1 CD-ROM (Scanner Library) • 1 CD-ROM (TWAIN-compatible application) • Operation Guide 1-3 Utilities and other software (the main content of the included CD-ROMs) •... -
Page 11: Set-Up
2. Set-up 2-1 Setting up the scanner (1) Outline and network configuration Example of transmission modes for data scanned using the Scan System and the required software The software indicated in the thick-lined balloons is included with this product. Install the software that is appropriate to your operating environment and needs. -
Page 12: Connecting The Scanner To Your Computer Network
2. Set-up (2) Connecting the scanner to your computer network (3) Making settings from the touch panel Turn the main switch located on the right side of the This section explains the default settings as well as user scanner OFF. registration procedures required to use the scanner. - Page 13 2. Set-up Use the numeric keys on the keypad to enter the • Registering and editing user information administrator password number. The factory default The following explains the procedure to use the scanner’s setting for 30 ppm machines is “3000”, for 40 ppm touch panel to register and edit user information.
- Page 14 2. Set-up • Editing the shared Address Book Select the shared Address Book that you want to edit. The following explains the procedure to use the scanner’s The registration and edit screen for the Address Book touch panel to edit the shared Address Book. will appear.
- Page 15 2. Set-up Group registration Touch the “Information” tab and the names of the registered groups will be displayed. If you want to change a registered name, use the “L” and “M” cursor keys to select the name that you want to edit and then touch the “Change #”...
- Page 16 2. Set-up • Date/Time and Time Difference Use the “s” and “t” cursor keys to select “Time Sets the required area information for the Send E-mail difference” and then touch the “Change #” key. The function. Time Difference Setting screen will appear. The time of day when email is sent from the scanner is included in the header of that email message as the trans- mission time.
-
Page 17: Setting Up The Scanner Software
2. Set-up 2-2 Setting up the scanner software (1) System requirements IBM PC/AT or compatible Windows 95 (OSR2), Windows 98 (Second Edition), Windows NT (Service Pack 5 or later), Windows 2000 (Service Pack 2 or later), Windows Me or Windows XP System environment Pentium 133 MHz or faster 64 MB or more... -
Page 18: Installing The Utilities
2. Set-up (3) Installing the utilities (4) Installing the TWAIN source The following utilities are contained on the [Software Library] In order to scan originals using PaperPort, TWAIN Source CD-ROM that is included with this product. must be installed PRIOR to installing the PaperPort * Refer to the On-Line Manual <Functions Edition>... -
Page 19: Performing The Required Operation At The Scanner
3. Performing the Required Operation at the Scanner 3-1 Scanning under the Scan to PC and Send E-mail functions Use the “L” and “M” cursor keys to select your user (1) Before using the Scan to PC function name and then touch the “Enter” key. The Scan to PC or Send E-mail screen, as appro- Be sure to perform the following settings in order to use the priate, will appear. - Page 20 3. Performing the Required Operation at the Scanner If you want to manually enter an email address, touch Touch the “Common book” tab or the “Private book” the “Enter dest.” key. The Enter E-mail Destination tab, as appropriate. The destinations registered in screen will appear.
- Page 21 3. Performing the Required Operation at the Scanner • Scan settings If you select “ON” under “Batch scanning” in the Scan The Scan Settings menu is displayed in the right Settings menu, a message that asks whether or not portion of the touch screen. If you want to change you want to continue scanning will appear after any settings, touch the key that corresponds to that scanning of the original is complete.
-
Page 22: Scanning With Twain
3. Performing the Required Operation at the Scanner 3-2 Scanning with TWAIN The following explains the settings that need to be made in • When performing the scanning operation at your the scanner in order to scan using the TWAIN function. computer Run the TWAIN Source in the corresponding •... - Page 23 3. Performing the Required Operation at the Scanner...
-
Page 24: Setting Up The Database Connection Function
3. Performing the Required Operation at the Scanner 3-3 Setting up the Database Connection function Use the L or the M cursor key to select your sender (1) Preparations name and then touch the “Enter” key. The “Destination of input data” screen will be First, perform the following set-up procedure in order to use displayed. - Page 25 3. Performing the Required Operation at the Scanner In the “Folder select” screen, if you want to save the Select the item that you want to register the keyword data into the currently highlighted folder, touch the under and then touch the “Enter” key. The input “Enter”...
- Page 26 3. Performing the Required Operation at the Scanner An asterisk (“*”) will be displayed next to each item Once the scanning operation is complete, the that you have entered or changed the information for. following screen will be displayed. If there are no Once you have finished registering information, touch more originals to be scanned, touch the “Input data the “Enter”...
-
Page 27: Troubleshooting
4. Troubleshooting 4-1 Error messages If one of the following message appears during scanning, perform the corresponding procedure. Message Procedure Unable to use scanner. Check to make sure that the network cable is connected securely and properly. If this message appears immediately after turning the scanner ON, wait for awhile (approx. - Page 28 4. Troubleshooting Message Procedure The file was not saved. If the amount of data exceeds the maximum hard disk capacity as Check the destination PC. registered in the Scanner File Utility on the destination computer, increase the available space on your computer’s hard disk and then try the operation again.
-
Page 29: Specifications
5. Specifications 5-1 Scanner specification Operating Environment ....IBM PC/AT or compatible OS: Windows 95 (OSR2), Windows 98 (Second Edition), Windows NT (Service Pack 5 or later), Windows 2000 (Service Pack 2 or later), Windows Me or Windows XP CPU: 133 MHz Pentium or faster (266 MHz Celeron recommended) RAM: 64 MB or more recommended Available hard disk space: 20 MB or more (300 MB or more recommended) CD-ROM drive: One... - Page 32 2003. 9 3H980020A...
Need help?
Do you have a question about the KM-3035 and is the answer not in the manual?
Questions and answers