
Related Manuals for Nextar Q4-01


Summary of Contents for Nextar Q4-01
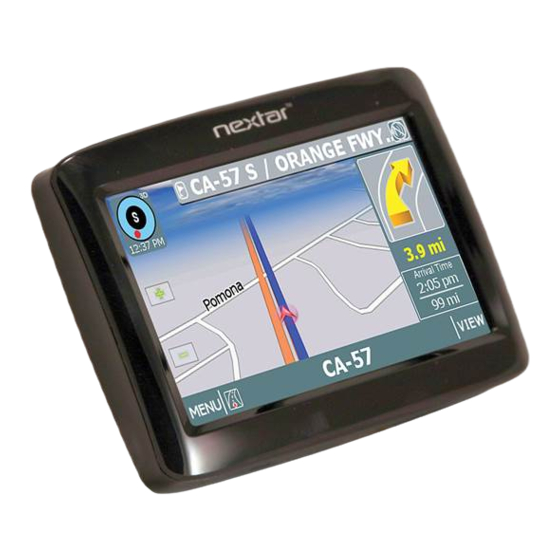
- Page 1 (<8 • ITEM# Q4-01 • a:;; nextar'~ <C AUTOMOTIVE NAVIGATION SYSTEM (GPS)
- Page 2 Important Safety Instructions CAUTION: TO REDUCE THE RISK OF ELECTRIC SHOCK, DO NOT REMOVE COVER (OR BACK). NO USE-SERVICEABLE PARTS INSIDE. REFER SERVICING TO QUALIFIED SERVICE PERSONNEL. The lightning flash with arrowhead symbol, within an equilateral triangle, is intended to alert the user to the presence of uninsulated “dangerous voltage” within the product’s enclosure that may be of sufficient magnitude to constitute a risk of electric to persons.
- Page 3 Important Safety Instructions NOTES Read these instructions. Keep these instructions. Heed all warnings. Follow all instructions. Do not use this apparatus near water. Clean only with a damp cloth. Do not block any of the ventilation openings. Install in accordance with the manufacturer's instructions.
- Page 4 Important Safety Instructions Warning Failure to avoid the following potentially hazardous situations may result in injury or property damage. The unit is designed to provide you with route suggestions. It does not reflect road closures or road conditions, traffic congestion, weather conditions, or other factors that may affect safety or timing while driving.
- Page 5 Important Safety Instructions Note: This equipment has been tested and found to comply with limits for Class B digital device, pursuant to part 15 of the FCC Rules. These limits are designed to provide reasonable protection against harmful interference in a residential installation. This equipment generates, uses and can radiate radio frequency energy and, if not installed and used in accordance with the instructions, may cause harmful interference to radio or television reception, which can be determined by turning the equipment off and on, the...
-
Page 6: Accessories
Accessories Accessories List ITEM NAME Owner’s Manual AC Adaptor Car Adaptor Mounting Bracket USB Cable Mounting cradle Touch Pen Dashboard mount disk SD Card Pouch NOTE Accessories and their part number are subject to modification without prior notice due to improvements. -
Page 7: Table Of Contents
Contents …………………………………..……..…..1 Important Safety Instructions ……………………………….……….…..5 Accessories ……………………………….………..…...7 View of Main Unit ………………………………..…………..8 System Connections ……………………………….…….….….10 Power Supply Preparation …………………………….……….….….12 General Setup ……………………………….……….…..16 MP3 Player …………………………….……………...18 Photo Viewer ……………………………….……….…..20 Use of the Mount Accessories ……………………………….……….…..21 Troubleshooting ……………………………….……….…..23 Specifications... -
Page 8: View Of Main Unit
View of Main Unit POWER Button Press for a longer time to enter or exit the standby mode. Card Port Insert the SD card into the slot. Earphone Jack Connect earphone for private listening. When the earphone is connected to this jack, the speaker will be turned off automatically. -
Page 9: System Connections
-50 MB available hard drive space -Available serial port and/or USB Port -256-color display adapter and monitor (16 bit color required) In the near future map updates will be available for down load from our website. Please check www.nextar.com periodically for the information on downloads. - Page 10 System Connections Inserting SD Card The unit is designed with SD Card jack which allows you to insert the SD card into the unit as shown below: To remove the card, gently press the card in with your fingernail. The card unlocks and protrudes slightly.
-
Page 11: Power Supply Preparation
Power Supply Preparation Using the AC Adaptor The unit is supplied with an AC adaptor for powering it and charging its battery. 1. Connect AC adaptor to the right side of the unit in the USB port, as shown on the right. 2. - Page 12 Power Supply Preparation About Rechargeable Battery Your portable GPS device comes with a built-in rechargeable battery. Charge the battery fully before initial use. Charging time is normally about 3.5 hours. A fully charged battery delivers about 2.5 hours of use. Working conditions and precautions for the rechargeable battery ¾...
-
Page 13: General Setup
General Setup System Main Menu When in navigation mode, Tap MENU button, and then choose SETTINGS. In the SETTINGS menu, tap EXIT, a confirmation message appears. Tap Exit in the confirmation message to return to the system main menu, as shown below. In the main menu, there are four items for selecting. - Page 14 General Setup Language in the settings menu to enter Language settings menu for language selecting, as shown below: Tap the buttons to select language. Then tap to confirm or tap cancel. Backlight in the settings menu to enter Backlight settings menu for backlight adjusting, as shown below: Tap the first group buttons to adjust the backlight level.
- Page 15 General Setup Date & Time in the settings menu to enter Date & Time settings menu for changing to the current time zone, as shown below: Tap the buttons to select the proper Time Zone. Tap the buttons of Date group to change the corresponding date and tap the buttons of Time group to change the corresponding time.
- Page 16 General Setup Screen in the settings menu, the screen will display as below: This item is used to calibrate the sensitivity of the touch screen. Tap the center of “+” as it moves around the screen. If you touch the center of “+” every time, it will disappear after having moved through a cycle (center top left corner bottom left corner bottom right corner top right corner).
-
Page 17: Playing Music
Playing Music The unit is designed with SD card slot. You can insert the SD card with MP3 and WMA files. It supports MP3, WMA format files playback. Note: Do not store MP3 and WMA format files in the Flash storage, for the flash storage is used to store map data, any attempt to open the Flash storage may result in the map data missing and lost. - Page 18 Playing Music When you open the play list, the system will look for audio files on its SD memory card and create a play list automatically. If the play list consists of more than one screen, tap the up arrow for the previous page and the down arrow for the next page.
-
Page 19: Photo Viewer
Photo Viewer The unit is designed with SD card slot. You can insert the SD card with JPEG files. It supports JPEG format files playback. Note: Do not store JPEG format files in the Flash storage, for the flash storage is used to store map data, any attempt to open the Flash storage may result in the map data missing and lost. - Page 20 Photo Viewer If the pictures list consists of more than one screen, tap the up arrow for the previous page and the down arrow for the next page. Tap to return to previous menu. Tap a picture to select it and tap to confirm your selection.
-
Page 21: Use Of The Mount Accessories
Use of the Mount Accessories When using the unit in vehicle, you can use the supplied mount accessories (mount bracket, mount cradle and dashboard mount disk) to mount the unit in the vehicle. Take the following steps to operate: See Fig. 1 to slide the mount cradle onto the end of the mount bracket. See Fig. -
Page 22: Troubleshooting
Troubleshooting Take steps described in the tables below to solve simple problems before contacting customer service. If you suspect something wrong with this unit, immediately turn the power off and disconnect the power connector from the unit. Never try to repair the unit yourself because it is dangerous to do so. - Page 23 Troubleshooting POSSIBLE CAUSE POSSIBLE SOLUTION PROBLEM The built-in rechargeable Use the adaptor to supply battery is weak. power or charge the battery. The unit can receive signals The unit may be obstructed now but can’t Remove the veil. by veil, such as heat then or signals insulation paper.
-
Page 24: Specifications
70dB (1kHz) Dynamic Range 80dB (1kHz) Power AC 100-240V 50/60Hz ; DC 5V Power Consumption < 8W Dimensions 117mmX80mmX20mm (L*W*D) Weight About 0.17Kg Design and specifications are subject to change without notice. Nextar , a trademark of Nextar (Hong Kong) Limited. - Page 27 (<8 • ITEM# Q4-01 In· ::> nextar'~ AUTOMOTIVE NAVIGATION SYSTEM (GPS)
-
Page 28: Important Safety Instructions
This product is intended to provide turn-by-turn instructions to safely guide you to your desired destination. Please make sure that all persons using this navigation software carefully read these precautions and the operating instructions in the Nextar Software Manual. Nextar cannot accept any responsibility whatsoever for accidents resulting from failure to observe these precautions. - Page 29 • The database utilized by this software is the most accurate and up-to-date database available. Because of road closures, construction, weather, new roads and other conditions, the database might not contain accurate information regarding all streets and locations. If so, the system might not be able to correctly guide you on your route or may inaccurately estimate the time needed to reach your destination.
-
Page 30: Points To Observe For Safe Usage
• Read this manual carefully and make sure you understand the cautions. Nextar is not responsible for problems resulting from failure to observe the precautions, warnings, and instructions in this manual. Store this guide where it will be accessible at all times, for example in your glove compartment. - Page 31 Contents Chapter 1 – Introduction……………………………………………………………………6 Summary of Features…………………………………………………………………...6 About This Guide………………………………………………………………………...7 Chapter 2 - Quick Start Examples………………………………………………………...8 Setting a Destination Using a Street Address………………………………………..8 Setting a Destination Using a Point of Interest (POI)……………………………….9 Chapter 3 - GPS Basics……………………………………………………………..…….11 Main Screen Components…………………………………………………………….12 Changing Map Display Modes………………………………………………………..13 Browsing the Map Display…………………………………………………………….15 Selecting Options and Entering Data………………………………………………..16...
- Page 32 Setting a Destination Using an Item in the History List……………………………37 Chapter 5 - Other Options………………………………………………………………...38 Configuring Map Display Settings……………………………………………………38 Selecting a Language………………………………………………………………….40 Viewing GPS Status……………………………………………………………………41 Setting Default Route Calculation Criteria…………………………………………..42 Setting Origin…………………………………………………………………………...43 Previewing a Route Using Demo Mode…………………………………..………...44 Viewing Program Version Information……………………………………………….45 Exiting the Application…………………………………………………………………46 Chapter 6- Technical Reference…………………………………………………………47 Menu Commands………………………………………………………………………47...
-
Page 33: Chapter 1-Introduction
If you leave your route, Nextar GPS automatically calculates a new route to your destination. -
Page 34: About This Guide
About This Guide This manual is organized as follows: Chapter 1—Introduction introduces the GPS application. Chapter 2—Quick Start Examples provides two quick start examples that are for users who simply want to jump right in. Chapter 3—GPS Basic describes how to use the GPS to calculate a route. Chapter 4—Setting Destinations provides visual quick reference to the GPS screens and options. -
Page 35: Chapter 2-Quick Start Examples
Chapter 2—Quick Start Examples This chapter provides two quick start examples (1) Setting a Destination Using a Street Address; and (2) Setting a Destination Using a Point of Interest (POI). Setting a Destination Using a Street Address To set a destination using an address From the main screen, tap the GO TO button. -
Page 36: Setting A Destination Using A Point Of Interest (Poi)
Next— Tap GO to calculate the route and start the turn-by-turn instructions. —Or— Tap SAVE & GO to save the destination location in the Favorites list before receiving turn-by-turn instructions. The system will prompt you to enter a location name. The system will then provide turn-by-turn instructions to that destination from your current location. - Page 37 Tap on the city name that matches the one you are looking for. At this point, two possible things will happen. The system will display the list of matching POIs for the selected category. —OR— The system prompts you to enter the POI name. Begin spelling out the item. Within a few characters, the system will display the matching list.
-
Page 38: Chapter 3-Gps Basics
Chapter 3—GPS Basics To introduce you to key features and common functions in the GPS, this chapter covers— • Starting the GPS • Main Screen Components • Changing Map Display Modes • Browsing the Map Display • Selecting Options and Entering Data •... -
Page 39: Main Screen Components
Main Screen Components On startup, the GPS main screen displays your current position, street names, and Point of Interest icons. (See below.) Current Position Icon Map Display Mode Button Compass and GPS Status Point of Interest Icons Map Zoom Level Buttons (+) and (-) Tap icon to view name of Current Road or Upcoming... -
Page 40: Changing Map Display Modes
Once you set a destination and tap GO, the map displays your route in blue, along with turn-by-turn and trip information on the right. As shown below, map icons display Points of Interest along the way. Other controls allow you to change the map display mode, zoom in or out, view the name of the current street or upcoming crossroad, and turn voice guidance on or off. - Page 41 In Heading Up mode, the vehicle icon faces up, i.e., forward in the direction of travel, and the map display rotates under it as the system tracks your route. (See below.) Map Display Mode - Heading Up In North Up mode, the map scrolls so that North on the map is oriented to the top of the display.
-
Page 42: Browsing The Map Display
Note that not all map display modes are supported in all zoom levels. The map can display 3D at scales below 500 ft (Community zoom level). If the map display mode is 3D, the map switches from 3D to 2D mode when you zoom out to 500 ft. The program will not allow you to change the map display mode to 3D at the 500 ft scale and higher. -
Page 43: Selecting Options And Entering Data
Selecting Options and Entering Data The GPS’s patented and patent-pending destination entry interface utilizes statistical and probability analysis to improve efficiency and ease-of-use. This predictive method of selecting and entering data makes setting destinations fast and easy. (See example below.) For example, when entering a destination, you first specify how you want to enter the destination... - Page 44 When you tap the LIST button, the screen displays a list of available selections based on the characters you have entered so far. At this point, you can select an item from the list, or tap KEYS to return to the previous screen and continue entering more characters.
-
Page 45: Setting Destinations
Setting Destinations To calculate a route and get visual and voice-based turn-by-turn instructions, you must first set a destination. When calculating a route, GPS assumes that the starting point is your current GPS-determined location. To begin, tap GO TO. The Enter Destination screen opens. -
Page 46: Selecting And Working With Turn-By-Turn Views
When you tap GO, voice guidance will issue the first maneuver while the screen displays route and turn-by-turn instructions. (See the example below.) Street name for next Current Time maneuver (per database) Current Vehicle Position Indicator Next maneuver, distance to next maneuver, and estimated distance and Toggle between Current time of arrival to... -
Page 47: Main Turn-By-Turn View
Main Turn-by-Turn View Blue line shows travel route. Arrow indicates the next maneuver; tap on this arrow to repeat the voice instruction. Distance to go to make the next maneuver. Estimated arrival time and distance to destination Tap VIEW to cycle to the next guidance Main Turn-by-Turn View view. -
Page 48: Maneuvers List View
Maneuvers List View Next maneuver. List of maneuvers required for calculated route. Tap to jump to first maneuver in the list. Tap to scroll up. Tap to scroll down. Tap to jump to last maneuver in the list. Tap VIEW to cycle to the next guidance view. Maneuvers List View The Maneuvers List View replaces the map display with a scrollable list of the calculated maneuvers. -
Page 49: Canceling A Route
Canceling a Route The Cancel Route button in the Settings screen terminates the voice guidance and visual instructions for the current, in-progress route. Note. This option is available only when you are en-route to a selected destination or when you are in Demo mode. To cancel the route that is currently in progress Tap MENU, and then choose SETTINGS. -
Page 50: Setting And Using Your Home Location
Setting and Using Your Home Location The GPS allows you to label an address or destination as a “home” location. Your “home” can be any address that you want to use as a base location—such as your residence, your office, or your hotel. To set the home location •... -
Page 51: Planning A Route Using A Different Starting Point
Planning a Route Using a Different Starting Point The SET ORIGIN option in the GPS allows you to set the car position manually in order to plan or preview a route from a different starting point. You can also use this option to set the vehicle position manually when GPS data is not available. -
Page 52: Managing Favorites
Managing Favorites To store a location as a destination in the GPS Favorites list— • Set a destination and then tap SAVE & GO. As prompted, enter a location name, and then tap OK. —Or— • Browse to a location on the map, tap MENU and then tap SAVE TO FAVORITES. -
Page 53: Chapter 4-Setting Destinations
Chapter 4—Setting Destinations This chapter describes how to set destinations. The main topics cover— • Setting a Destination Using an Address • Setting a Destination Using a Point of Interest • Setting a Destination Using Crossroads • Setting a Destination Using an Entry in the Favorites List •... - Page 54 CITY CENTER—to set a destination to the center of a city or town you specify. Upon setting a destination point, tap GO to start turn-by-turn instructions to the selected location. Alternatively, tap SAVE & GO if you first want to save the destination as a location in the Favorites list before getting turn-by-turn instructions to the selected location.
- Page 55 • Next, enter the street name. Matching street names appear in the mini-list. Enter the street name • Enter the building number, and then tap OK when you are done. The system next shows the Destination Confirmation for the selected destination. Close button returns you to previous screen.
- Page 56 Example 2 • Tap CITY CENTER. The Enter City Center screen opens. • Enter the name of the city or town whose city center you want to set as the destination. (See the example below.) Tap the city name • Select the appropriate city or town from the list of names displayed by the program.
-
Page 57: Setting A Destination Using A Point Of Interest (Poi)
• At this point— Tap GO to calculate the route and start the turn-by-turn instructions. —Or— Tap SAVE & GO to save the destination location in the Favorites list before receiving turn-by-turn instructions. The system will prompt you to enter a location name. - Page 58 Select an option button for selecting a POI. You can locate a POI starting with any one of the following— POI BY CITY—locate a POI by entering the city location, and then the POI name POI BY NAME—locate a POI by entering the POI name POI NEAR VEHICLE—locate a POI that is close to your current vehicle position POI NEAR DESTINATION—locate a POI that is close to your destination...
- Page 59 • Tap out the city name starting with the first letter. The screen next displays and highlights the most likely characters. (See the example below.) Tap the Backspace button to erase a character entered in error. Data entry screen with highest probability characters highlighted in color The characters you select appear in the edit field along the top of the screen.
-
Page 60: Setting A Destination Using Crossroads
If the latter happens, begin spelling the POI name. Within a few characters, the system will display the matching list. • Select the desired POI from the displayed list. • Tap GO to calculate the route and view the turn-by-turn instructions. —Or—... - Page 61 Select an option button for entering the crossroads. You can enter street names starting with any one of the following— START WITH CITY—to define the primary street by entering a city name and then the street name START WITH STREET—to define the primary street by entering the street name Upon setting a destination point, tap GO to start turn-by-turn instructions to the selected location;...
- Page 62 • The characters you select appear in the edit field along the top of the screen. If you need to delete a character you may have entered incorrectly, tap the Backspace button. Within a few characters, the system lists possible matches for city names and displays them on the screen.
-
Page 63: Setting A Destination Using An Entry In The Favorites List
Setting a Destination Using an Entry in the Favorites List This procedure describes how to calculate a route from your current location to a location in the Favorites list. To set a destination using the Favorites list From the main screen, tap MENU, and then choose GO TO. The Enter Destination screen opens. -
Page 64: Setting A Destination Using An Item In The History List
• Tap GO to calculate the route and start the turn-by-turn instructions. —Or— Tap SAVE & GO to save the destination as a location in the Favorites list before receiving turn-by-turn instructions. The system will prompt you to enter a location name. -
Page 65: Chapter 5-Other Options
Chapter 5—Other Options This chapter describes how to use the options in the Settings screen to configure navigation, set preferences, cancel a route in progress, exit the application, and more. The main topics cover— • Configuring Map Display Settings • Selecting a Language •... - Page 66 Tap the MAP SETTINGS button. The Map Settings screen opens. (See below.) Map Settings screen In the Map Mode section, check the default (startup) map display mode as follows: HEADING UP—This option places the vehicle indicator arrow facing up, i.e., forward in the direction you are heading, and the map display rotates under it as the system tracks your route.
-
Page 67: Selecting A Language
Selecting a Language Use the LANGUAGE option in the Settings screen to select a language. To configure language settings for your device Choose MENU and then SETTINGS. The Settings screen opens. (See below.) Settings screen Tap the LANGUAGE button. The Language / Voice settings screen opens. (See below.) Language / Voice screen Select a language setting, and then tap OK. -
Page 68: Viewing Gps Status
Viewing GPS Status The GPS Status screen displays detailed satellite detection, speed, heading, and positioning information. To configure connection settings for your device Choose MENU, and then SETTINGS. The Settings screen opens. (See below.) Settings screen Tap the GPS STATUS button. The GPS Status screen opens. (See below.) GPS Status screen When you are finished, tap the MAP button to return to the map display;... -
Page 69: Setting Default Route Calculation Criteria
Setting Default Route Calculation Criteria Use the ROUTE SETTINGS option in the Settings screen to configure default route calculation criteria. You can also specify the measuring system—Imperial or Metric— that you want navigation software to use when displaying distance units. To set route calculation criteria Tap MENU, and then SETTINGS. -
Page 70: Setting Origin
Setting Origin The SET ORIGIN feature allows you to set the car position manually. This is useful for planning and previewing a route using a starting point you specify; or, if you want to set the current car position manually when GPS data is not available. To set an alternate point of origin •... -
Page 71: Previewing A Route Using Demo Mode
Previewing a Route Using Demo Mode Demo mode enables you to preview a route. This mode involves manually setting an origination and destination points. When you tap Go, the program simulates vehicle progress and announces turn-by-turn instructions associated with the route you set. A GPS signal is not necessary to use this mode. -
Page 72: Viewing Program Version Information
Viewing Program Version Information The ABOUT option in the Settings screen displays software version and copyright information. To view program version information Tap MENU, and then SETTINGS. The Settings screen opens. (See below.) Settings screen Tap ABOUT. The About screen opens.and displays copyright and version information. -
Page 73: Exiting The Application
Exiting the Application To exit and close the GPS Tap MENU, and then choose SETTINGS. The Settings screen opens. (See below.) Settings screen In the Settings screen, tap EXIT APP. A confirmation message opens. (See below.) Tap here to cancel the operation. Tap Exit to close the application. -
Page 74: Chapter 6-Technical Reference
Chapter 6—Technical Reference Menu Commands Description Control Name Tap to show the menu command buttons. MENU Tap to select or enter a destination. GO TO Tap to calculate a route to the location stored as GO HOME “Home.” (Available only after you select and store a location using the “SET AS HOME”... -
Page 75: Screen Icons And Controls
Screen Icons and Controls Compass and GPS Icon Name Description Heading-up Mode Places the vehicle indicator arrow facing up, i.e., forward in the direction you are heading, and the map display rotates under it as the system tracks your route. North-up Mode Orientates the map so that North is always on the top of the display. -
Page 76: User Interface Controls And Icons
User Interface Controls and Icons Name Description Control or Icon Current Vehicle Indicates the current car position and Position and heading on the map display. Heading Icon Scroll or Browse Scroll map by pressing on the map and Cursor dragging. Pressing any location on the map will re-center the map to the selected location. - Page 77 Name Description Control or Icon Map Button Immediately displays the main map. Auto-complete Key Displays only the valid next characters Button with the three highest probable characters. Highlighted Displays the full keyboard with the valid keyboard letters next characters highlighted. List Button Lists all possible selections based on the characters entered thus far.
- Page 78 Name Description Control or Icon List Selection Selects the displayed item and Button advances to the next form. (Example Shown at left) OK Button Accepts entered text and advances to the next form. VIEW Options Cycles the main display through three Button views: Main Turn-by-Turn, Split Map, and Maneuvers List.
-
Page 79: General Turn-By-Turn Symbols
General Turn-By-Turn Symbols Control Description Turn-by-Turn Begin Turn-by-Turn End Next Maneuver a distance away. (The arrow points left or right as appropriate.) Next Maneuver closing in. (The arrow points left or right as appropriate.) Next Maneuver imminent. (The arrow points left or right as appropriate.) The street name on which you will be turning next appears at the top of the display. -
Page 80: Faq's
This cancels the current operation and returns you to the opening screen. Q. How do I switch to other applications without having to exit Nextar GPS? A. To switch to other programs on your handheld device while keeping Odyssey open, press the ENTER or Program Navigation Keys on your device as appropriate. -
Page 81: Copyright
Copyright No part of this manual may be copied, republished, reproduced, transmitted or distributed in any way without prior written consent of Nextar, Inc. Any unauthorized distribution of this manual is expressly forbidden. Nextar may find it necessary to modify, amend, otherwise change, or update this manual. - Page 84 DO NOT RETURN PRODUCT TO STORE. please visit us at http://www.nextar.com/sulWort arM~al Call nr::>x USA/Canada: 1-888-849-0846 0800-047-0126 for Technical Assistance and Customer Service...
- Page 85 ThiS will allow us to serve you the most effiCient manner You may register by: • Visiting nextar com (Preferred method) • Mailing this card to Nextar (Please allow 4 to 6 weeks to process your product registration) First Name Las! Name Tel. No. Email (optional)
- Page 86 Place Postage Here n.::>~" PRODUCT REGISTRATION 1661 FAIRPLEX DRIVE, LA VERNE, CA 91750, USA...
- Page 87 To obtain repairs or replacement within the terms of this warranty, please visit USA. www.nextar.comorcontactusatI661FairplexDrive.LaVerne.CA 91750, Proof of warranty coverage (i.e. - dated bill of sale) is required. This Warranty does not apply to any product or part thereof which, in the opinion...
Need help?
Do you have a question about the Q4-01 and is the answer not in the manual?
Questions and answers