Table of Contents
Advertisement
Service
This manual is to be used by qualified appliance
technicians only. Maytag does not assume any
responsibility for property damage or personal
injury for improper service procedures done by
an unqualified person.
Ice and Water
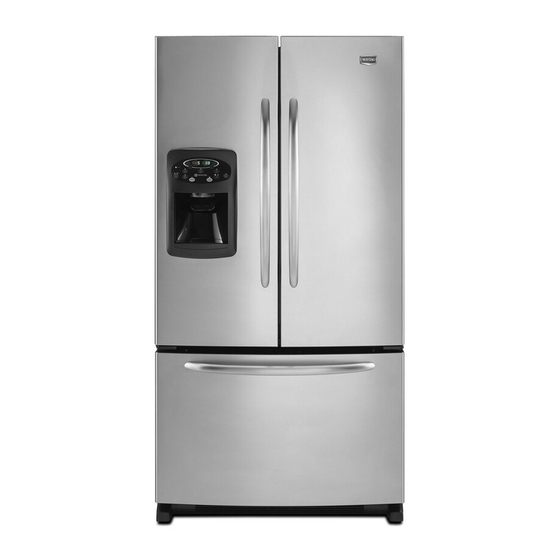
Bottom Mount
Refrigerators
This Base Manual covers general information
Refer to individual Technical Sheet
for information on specific models
This manual includes, but is
not limited to the following:
Amana
AFI2237AE*
AFI2538AE*
AFD25BCZX*
AFD25WBZX*
Maytag
MFI2067AE*
MFI2266AE*
MFI2568AE*
16026312
February 2006
Advertisement
Chapters
Table of Contents
Troubleshooting

Related Manuals for Maytag MFI2266AES


Summary of Contents for Maytag MFI2266AES
- Page 1 Refer to individual Technical Sheet This manual is to be used by qualified appliance for information on specific models technicians only. Maytag does not assume any responsibility for property damage or personal This manual includes, but is injury for improper service procedures done by not limited to the following: an unqualified person.
-
Page 2: Important Information
Important Notices for Servicers and Consumers Maytag will not be responsible for personal injury or property damage from improper service procedures. Pride and workmanship go into every product to provide our customers with quality products. It is possible, however, that during its lifetime a product may require service. -
Page 3: Table Of Contents
Appendix A Refrigerator Compartment Owner’s Manual ..........A-1 Upper Light Bulb Cover .......... 30 Light Bulb Assembly ..........30 Light Bulb Sockets ..........30 Light Switches ............30 Fresh Food Thermistor ........... 31 Water Tank ............31 16026312 ©2006 Maytag Services... -
Page 4: Product Design
Fresh food compartment temperature should be between 38°F and 40°F. Evaporator and Ice Box Fans are multiple speed low voltage fans that change speeds depending on conditions changing in refrigerator. 16026312 ©2006 Maytag Services... -
Page 5: Component Testing
After refrigerant is recovered, repeat compressor direct wire test. If compressor runs after recovery but would not run when direct wired before recover, a restriction in sealed system is indicated. • If compressor does not run when wired direct after recovery, replace faulty compressor. 16026312 ©2006 Maytag Services... - Page 6 From condenser the refrigerant flows into a post condenser loop which helps control exterior condensation on flange, center mullion, and around freezer door. Refrigerant flows through the drier to evaporator and into compressor through suction line. 16026312 ©2006 Maytag Services...
- Page 7 Light Switch completes circuit for light when door is Switch arm depressed open. “C” and “NC” terminals Open “C” and ”NO” terminals Closed Switch arm up “C” and “NC” terminals Closed “C” and “NO” terminals Open 16026312 ©2006 Maytag Services...
- Page 8 Opens and breaks circuit when thermostat senses preset high temperature. After defrost thermostat opens, thermostat remains open until end of defrost cycle and refrigerator starts cooling again. Defrost thermostat senses a preset low temperature and resets (closes). 16026312 ©2006 Maytag Services...
- Page 9 Mullion Heater Mullion Heater is controlled by Control Use control board testing to check operation of heater. Board. If heater does not operate check for voltage at heater. If no voltage at heater replace Control Board. 16026312 ©2006 Maytag Services...
-
Page 10: Service Procedures
• Dry nitrogen 99.5% minimum purity, with -40°F or lower dew point • Crimp tool • Tube bender • Micron vacuum gauge • Process tube adaptor kit • Heat trap paste • ICI appliance grade HFC134a 16026312 ©2006 Maytag Services... -
Page 11: Refrigerant Precautions
If motor does not run when wired direct after recovery, on compressor. replace faulty compressor. • Start lead on test cord attaches to S terminal on compressor. • Run lead on test cord attaches to R terminal on compressor. 16026312 ©2006 Maytag Services... -
Page 12: Dehydrating Sealed Refrigeration System
1. Stop unit operation (turn refrigerator off). 2. Holding leak detector exploring tube as close to system tubing as possible, check all piping, joints, and fittings. NOTE: Use soap suds on areas leak detector cannot reach or reliably test. 16026312 ©2006 Maytag Services... -
Page 13: Restrictions
(if restriction is severe, frost may form at point of restriction and extend down in direction of refrigerant flow in system). Go to step 5. 16026312 ©2006 Maytag Services... -
Page 14: Evacuation And Charging
Invert charging cylinder and open charging cylinder valve “F” to add partial charge for leak checking. With leak detector, check manifold connections and system for leaks. After locating leak, capture refrigerant, repair leak, and begin at step 1. 16026312 ©2006 Maytag Services... -
Page 15: Charging
Repeat until high side pinch-off does not leak. 7. Pinch-off compressor process tube and remove charging hose. Braze stub closed while compressor is operating. 8. Disconnect power. Remove charging hose and braze high side drier process tube closed. 9. Recheck for refrigerant leaks. 16026312 ©2006 Maytag Services... -
Page 16: Hfc134A Service Information
(1/4" O.D. X 18" length) and part #R0174076 (5/16" O.D. X 24" length) must be used when replacing tubing. • Avoid system contamination by using Towerdraw E610 evaporating oil, part # R0157532, when flaring, swaging, or cutting refrigeration tubing. 16026312 ©2006 Maytag Services... -
Page 17: Replacement Service Compressor
• Wattage reading must be recorded in conjunction with temperature test to confirm proper operation. • Suction and head pressures are listed on “Temperature and Relationship Chart”. Normally these are not required for diagnosis but used for confirmation on systems which have been opened. 16026312 ©2006 Maytag Services... -
Page 18: Refrigerant Flow 20, 22, 25 Cu. Ft
Note: Capillary Tube and Suction Tube are located under Fresh Food floor. SUCTION TUBE CONDENSER EVAPORATOR POST CONDENSER TUBE COMPRESSOR DISCHARGE DRYER TUBE PRO CESS TUBE 20, 22, 25 cu. ft. Bottom Mount Refrigerant Flow Diagram 16026312 ©2006 Maytag Services... -
Page 19: Cabinet Air Flow 20, 22, 25 Cu. Ft
Cabinet Air Flow 20, 22, 25 cu. ft. Bottom Mount Cabinet Air Flow Diagram 16026312 ©2006 Maytag Services... -
Page 20: Cu. Ft Machine Compartment Air Flow Diagram
Machine Compartment Air Flow COMPRESSOR DRIP PAN CONDENSER CONDENSER FAN ASSEMBLY 20, 22, 25 cu. ft. Model Bottom Mount Machine Compartment Air Flow Diagram 16026312 ©2006 Maytag Services... -
Page 21: Water Dispenser Flow
Water Filter Water Solenoid Water Solenoid to Ice Maker & to Ice Maker & Dispenser Dispenser Water Tank to Ice Maker & Dispenser Water Line 20, 22, 25 cu. ft. Model Bottom Mount Water Flow Diagram 16026312 ©2006 Maytag Services... -
Page 22: Water Flow Schematic
Water Flow Schematic 1/4 “ 1/4 “ O.D. PLASTIC TUBING 20, 22, 25 cu. ft. Model Bottom Mount Water Flow Schematic 16026312 ©2006 Maytag Services... -
Page 23: Typical External Sweat Pattern
1 = Haze or Fog 2 = Beading 3 = Beads or small drops 4 = Drops running together Conditions after 4 hour Laboratory Sweat Test: Ambient 90 dF Relative humidity 84% Refrigerator Temp. 40 dF Freezer Temp. 0 dF 16026312 ©2006 Maytag Services... -
Page 24: Troubleshooting Chart
Turn control setting to colder position. Faulty condenser fan or evaporator Use Control Board Service Mode to check motor. Check fan and wiring. Replace if necessary. Faulty compressor Use Control Board Service Mode to check motor. Replace compressor. 16026312 ©2006 Maytag Services... - Page 25 Mounting hardware grommets if necessary. loose or missing Free or loose parts causing or Inspect unit for parts that may have allowing noise during operation worked free or loose or missing screws. Repair as required. 16026312 ©2006 Maytag Services...
- Page 26 O p e n c irc u it (w irin g o r m a in c o n tro l c irc u it. b o a rd ) fro m n e u tra l to lig h t s o ck e ts . 16026312 ©2006 Maytag Services...
-
Page 27: System Diagnosis
- probably in a vacuum - and the head pressure gauge will be higher than normal. It will probably continue to become higher because air drawn in through the leak is compressed by the compressor and accumulates in 16026312 ©2006 Maytag Services... - Page 28 Do not attempt to purge off the air compressor and the first half of the condenser. because this could result in the system being undercharged. It is best to discharge, replace drier, evacuate and recharge with the specified refrigerant charge. 16026312 ©2006 Maytag Services...
- Page 29 Compartment temperatures, power consumption, discharge, and suction pressures are all affected by heat load. Pressures will be higher than normal under heavy heat load. 16026312 ©2006 Maytag Services...
- Page 41 ® I c e & Wa t er i n Fren c h D o or Refrigerator Use & Care Guide Important Safety Instructions ......1-2 Quick Reference Guide........3 Installation ............4-9 Using the Controls ........10-11 Ice And Water ..........12-13 Water Filter .............
-
Page 42: Important Safety Instructions
Important Safety Instructions DANGER Installer: Please leave this guide with this appliance. Consumer: Please read and keep this Use & Care To reduce risk of injury or death, follow basic precautions, including the following: Guide for future reference; it provides the proper use and maintenance information. - Page 43 Important Safety Instructions WARNING 13. Always disconnect refrigerator from electrical To reduce risk of fire, electric shock, serious injury or death when using your refrigerator, supply before attempting any service. Disconnect power cord by grasping the plug, not the cord. follow these basic precautions, including the following: 14.
-
Page 44: Quick Reference Guide
Quick Reference Guide Quick Reference Guide Temperature Control Use to control the temperature in the refrigerator and freezer compartments. Temperatures are preset at the factory at 38° F (3° C) in the refrigerator compartment and 0° F (-17° C) in the freezer compartment. -
Page 45: Installation
Installation Your refrigerator was packed carefully for shipment. Leveling Remove and discard shelf packaging and tape. Do not To enhance the appearance and maintain performance, remove the serial plate. the refrigerator should be level. CAUTION Location To protect property and refrigerator from •... -
Page 46: Door And Drawer Removal
Installation 6. Remove top hinge cover Door and Drawer Removal from left side refrigerator Some installations require door/drawer removal to door by removing Phillips transport the refrigerator to its final location. screws. Retain screws and cover for later use. WARNING 7. - Page 47 Installation Door Reinstallation Pullout Freezer Drawer 1. Install hinge assemblies: WARNING • Install center hinge with To avoid electrical shock which can cause severe Phillips screws. personal injury or death, disconnect power to 2. Place hinge side of refrigerator refrigerator before removing doors. After replacing door on center hinge pin.
- Page 48 Installation To Install: To Install: 1. The handles are to be oriented as 1. Pull both rails out to full shown. extension. 2. While supporting door 2. Align door handle clip with the door studs. front, hook supports into slots located on inside of each slide.
-
Page 49: Connecting The Water Supply
Installation Connecting the Water Supply 3. Rotate the handle so that the handle is flat against the door. WARNING 4. Grasp the handle firmly and slide handle to the right and remove from surface. To reduce the risk of injury or death, follow basic precautions, including the following: To Remove: •... - Page 50 Installation Materials Needed: 6. Pull on tubing to confirm connection is secure. Connect • ” outer diameter flexible copper tubing ⁄ tubing to frame with water • Shut-off valve (requires a ” hole to be drilled into ⁄ tubing clamp (C). Slide water supply line before valve attachment) waterline into retainer, then turn •...
-
Page 51: Using The Controls
Using the Controls Initial Temperature Setting Front Fill Button (select models) The Front Fill Button works independently of Temperatures are preset at the factory at 38° F (3° C) the dispenser controls, providing an up-front in the fresh food compartment and 0° F (-18° C) in the alternative to the dispenser pad for freezer compartment. - Page 52 Using the Controls • Activate the Sabbath Mode. To Activate Continuous Light: To access the User Preferences menu, press and hold Press Light pad again. The On indicator light will the Door Alarm pad for three seconds. When in the illuminate.
-
Page 53: Ice And Water
Ice and Water Dispenser Lock/Unlock Note: During initial use of water dispenser and The Dispenser Lock/Unlock prevents ice ice maker, there will be a one to two minute delay or water from being dispensed. while water tank fills before water dispenses or ice is made. -
Page 54: Operating Instructions
Ice and Water • Press the switch ON to activate ice maker. Slide bin WARNING into guide rails located on either side of the enclosure. Push the ice bin in until resistance is felt. To avoid personal injury or property damage, Raise the front slightly and push the ice bin observe the following: completely in. -
Page 55: Water Filter
Water Filter Water Filter Removal Replacing Water Filter and Installation Important: Air trapped in system may cause water and cartridge to eject. Always dispense WARNING water for at least 2 minutes before removing the filter for any reason. Use caution when removing. To avoid serious illness or death, do not use refrigerator where water is unsafe or of unknown 1. -
Page 56: Specifications
Water Filter System Specification and Performance Data Sheet Refrigerator Water Filter Cartridge Model UKF8001AXX Specifications Service Flow Rate (Maximum)..........0.78 GPM (2.9 L/min) Rated Service Life UKF8001AXX-750 (Maximum) ..750 gallons /2838 liters Maximum Operating Temperature ........100° F / 38° C 1000 Apollo Road Minimum Pressure Requirement........35 psi / 241 kPA Eagan, Minnesota 55121-2240 Minimum Operating Temperature ........33°... -
Page 57: Fresh Food Features
Fresh Food Features Shelves Door Storage CAUTION Dairy Center To avoid personal injury or property damage, The dairy center provides observe the following: convenient door storage for spreadable items such as butter • Never attempt to adjust a shelf that is loaded with and margarine. -
Page 58: Beverage Chiller
Fresh Food Features Chef’s Pantry Drawer Accessories The Chef’s Pantry drawer is a full-width drawer with Grip Pads (select models) adjustable temperature control. This drawer can be used for large party trays, deli items, beverages or The grip pads prevent objects from miscellaneous sliding in the door buckets. -
Page 59: Freezer Features
Freezer Features Lower Freezer Drawer Freezer Bin Note: To Remove: See pages 6-7 for complete information on lower drawer and drawer removal. • Pull upper drawer out to full extension and lift out to remove. To Install: • Slide upper drawer into freezer. -
Page 60: Food Storage Tips
Food Storage Tips • Most dairy foods such as milk, yogurt, sour cream Fresh Food Storage and cottage cheese have freshness dates on their • The fresh food compartment of a refrigerator should cartons for appropriate length of storage. Store these be kept between 34°-40°... -
Page 61: Food Storage Chart
Food Storage Tips Food Storage Chart Storage times are approximate and may vary depending on type of packaging, storage temperature, and the quality of the food when purchased. FOODS REFRIGERATOR FREEZER STORAGE TIPS DAIRY PRODUCTS Butter 1 month 6 to 9 months Wrap tightly or cover. - Page 62 Food Storage Tips FOODS REFRIGERATOR FREEZER STORAGE TIPS VEGETABLES Store in Crisper Drawer Asparagus 1 to 2 days 8 to 10 months Do not wash before refrigerating. Store in crisper. Brussels sprouts, broccoli, 3 to 5 days 8 to 10 months Wrap odorous foods.
-
Page 63: Care And Cleaning
Care and Cleaning WARNING CAUTION To avoid electrical shock which can cause severe To avoid personal injury or property damage, personal injury or death, disconnect power to observe the following: refrigerator before cleaning. After cleaning, connect • Read and follow manufacturer’s directions for all power. -
Page 64: Removing Odors From Refrigerator
Care and Cleaning Removing Odors Energy Saving Tips from Refrigerator • Avoid overcrowding refrigerator shelves. Overcrowding reduces air circulation around food WARNING and causes refrigerator to run longer. To avoid electrical shock which can cause severe • Avoid adding too much warm food to refrigerator at personal injury or death, disconnect power to one time. -
Page 65: Replacing Light Bulbs
Care and Cleaning Replacing Light Bulbs Fresh food enclosure light 1. Pull cover out, press along upper edge and WARNING roll light cover up and To avoid electrical shock which can cause severe forward to remove. personal injury or death, disconnect power to 2. -
Page 66: Preparing For Vacation
Care and Cleaning Preparing for Vacation Upon your Return After a Short Vacation or Absence: CAUTION • Reconnect the water supply and turn on supply valve If there is any possibility that the temperature can (see pages 8-9). drop below freezing where the refrigerator is located, the water supply system (including the •... -
Page 67: Operating Sounds
Operating Sounds Improvements in refrigeration design may produce sounds in your new refrigerator that are different or were not present in an older model. These improvements were made to create a refrigerator that is better at preserving food, is more energy efficient, and is quieter overall. Because new refrigerators run quieter, sounds may be detected that were present in older refrigerators, but were masked by higher sound levels. -
Page 68: Troubleshooting
Troubleshooting PROBLEM POSSIBLE CAUSES WHAT TO DO Freezer control and • Refrigerator is in defrost mode. • Normal operation. lights are on, but Wait 40 minutes to see if refrigerator restarts. compressor is not operating Temperature- • Control settings are too low. •... - Page 69 Troubleshooting PROBLEM POSSIBLE CAUSES WHAT TO DO • • Water droplets form Humidity levels are high or door has See pages 10 and 11 to adjust your controls. on inside of been been opened frequently. • Reduce time door is open. refrigerator •...
- Page 70 Troubleshooting Ice and Water PROBLEM POSSIBLE CAUSES WHAT TO DO Refrigerator is • Plastic tubing was used to complete • The manufacturer recommends using copper tubing leaking water water connection. for installation. Plastic is less durable and can cause leakage. The manufacturer is not responsible for property damage due to improper installation or water connection.
- Page 71 Troubleshooting PROBLEM POSSIBLE CAUSES WHAT TO DO • Ice maker switch is not ON Ice maker is not • Confirm ice maker switch is ON. See Automatic Ice Maker, pages 12-13. producing ice • Household water supply is not • See Connecting the Water Supply, pages 8-9. reaching water valve.