Table of Contents
Advertisement
Available languages
Available languages
Quick Links
Advertisement
Chapters
Table of Contents

Related Manuals for HP sd828a1 - Smart WiFi Digital Photo Frame


Summary of Contents for HP sd828a1 - Smart WiFi Digital Photo Frame
- Page 1 HP Smart Wi-Fi Display User Manual Manuel de l'utilisateur Revision 1.0...
-
Page 3: Table Of Contents
FCC Compliance Statement............3 What’s in the Box..............4 Getting Started .................5 Remote Control .................6 Description of Buttons ..........7 General Navigation ..........9 Rotating Pictures ...........9 Quadrant Display ..........9 Single Display ........... 10 Standby ............10 Picture Frame ................. 1 1 Top View ............1 1 Left Side ............ - Page 4 Adding Another Frame to your www.hpframe.com Account ............27 Managing your www.hpframe.com Account ....28 Online Services..........29 Recent Updates ..........33 Streaming Media from your PC to your HP Smart Wi-Fi Display ...34 Enabling Windows Media Player 1 1 UPnP....34 Connecting your HP Smart Wi-Fi Display to your Computer with the USB Cable ..................38 Using Headphones or Speakers with your HP Smart Wi-Fi Display..38 Resetting the Frame..............39...
-
Page 5: Fcc Compliance Statement
FCC Compliance Statement Note: This equipment has been tested and found to comply with the limits for a Class B and Class C digital device, pursuant to Part 15 of the FCC Rules. These limits are designed to provide reasonable protection against harmful interference in a residential installation. -
Page 6: What's In The Box
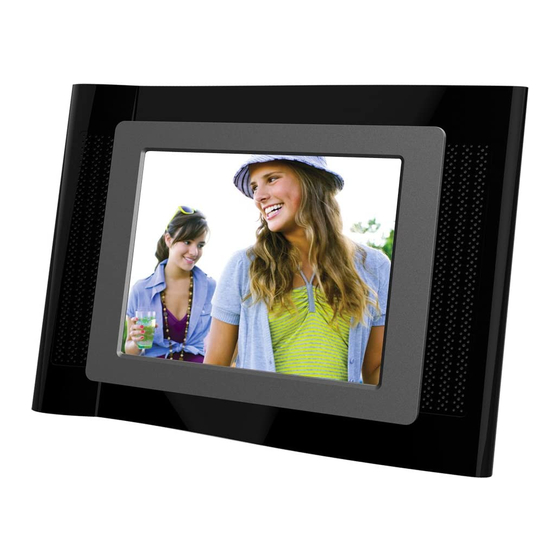
What’s in the Box Item Image HP Smart Wi-Fi Display Remote Control (Replacement Battery = CR2025) Universal Power Adapter USB 2.0 Cable User Manual Quick Start Guide Warranty Document Declaration of Conformity... -
Page 7: Getting Started
Getting Started Connect the adapter into a power outlet and then plug the power cord into the DC input of the HP Smart Wi-Fi Display. Unfold the attached stand to its extended position and rotate 90°, then slide the Power switch on the back of the HP Smart Wi-Fi Display to the ON position. -
Page 8: Remote Control
Remote Control Before you start, pull the tab from the remote control to activate it. Note: If a replacement battery is required, purchase battery #CR2025. -
Page 9: Description Of Buttons
Description of Buttons Back: Press to return to previous menu screen. Standby: Press to put the display into standby mode or take it out of standby mode. Home: Press to return to Main Menu. Time: Press to display Time menu. Photo Rotate: Press to rotate photo 90°... - Page 10 Select: Press to select highlighted item. Right: Press to move right. Down: Press to move down. Play/Pause: Press to play or pause music, video or slide shows. Volume Up/Mark: Press to increase volume, or, depending on the active screen, to mark a menu item. Options: Press to display available options.
-
Page 11: General Navigation
General Navigation In most cases you can use the navigation buttons (Up, Down, Left, Right) and the Select button to navigate through the different menus. Sometimes, however, it may be quicker to use one of the specific menu buttons, such as the Home, Favorites, or Music buttons, which take you to the menu you want with a single press. -
Page 12: Single Display
Single Display By default, the HP Smart Wi-Fi Display will show photos in Single display mode, meaning that the slide show will display one photo at a time. If you have changed to Quadrant display and would now like to return to viewing one photo at a time, then you can return to single display. -
Page 13: Picture Frame
Picture Frame Top View Slideshow Back Select Down Play/Pause Left Side Remote control holder... -
Page 14: Right Side
Right Side CF Card Slot MS/SD/MMC/xD Card Slot USB connector Mini-USB connector Power Input Headphone jack Back Stand Power switch... -
Page 15: Initial Frame Setup
Initial Frame Setup The following instructions are shown using the remote control unit. Some of these functions can also be accessed via the control keys located on the back of the HP Smart Wi-Fi Display. Clock Info The date and time are automatically set when your HP Smart Wi-Fi Display connects to the Internet. - Page 16 Note: Alternatively, you can configure your HP Smart Wi-Fi Display using Windows Connect Now (WCN) technology. To do so, run the Wireless Network Configuration Wizard on your computer and insert the WCN USB flash disk into the HP Smart Wi-Fi Display once the wizard is complete. For more information on running the Wireless Network Configuration Wizard on your computer, see “Running the Wireless Network Configuration Wizard on your Computer (optional)”...
-
Page 17: Running The Wireless Network Configuration Wizard On Your Computer (Optional)
Running the Wireless Network Configuration Wizard on your Computer (optional) As an alternative to manually entering Wi-Fi details into your HP Smart Wi-Fi Display, you can use the Wireless Network Configuration Wizard on your computer. Windows XP (Service Pack 2 or later) On your computer, click Start >... - Page 18 Windows Vista On your computer, click Start > Network. The Network folder opens. Click Add a wireless device. The Add a wireless device to the Network screen is displayed. Click I want to add a wireless device or computer that is not on the list, using a USB flash drive.
-
Page 19: Local Settings
Local Settings The Local Settings menu lets you configure various settings on your HP Smart Wi- Fi Display. From the Setup menu, navigate to Local Settings and press the Select button. The following options are displayed. Use the navigation buttons to highlight the option you wish to change, then use the Select button to change the setting. -
Page 20: Description Of Main Menu
Description of Main Menu The Main Menu can be accessed by pressing the Home button on the remote control. To navigate through the menu, use the directional buttons on the remote control, then press the Select button to choose the highlighted item. The Main Menu has six main icons: Frame Content, Internet Content, Home Network, Favorites, Time, and Setup. -
Page 21: Internet Content
Internet Content Internet Content describes the content which is available to you through the Internet. Before you use the Internet Content features on your HP Smart Wi-Fi Display, you should set up your www.hpframe.com account. For more information see “Setting Up your www.hpframe.com Account” on page 24. On your HP Smart Wi-Fi Display, from the Main Menu, navigate to Internet Content and press the Select button. -
Page 22: Time
Navigate to the photo you would like to add to favorites and press the Options button on the remote control. Select Add to Favorites. You can now access this photo directly by going to Main Menu > Favorites > Photos, where you will find a direct link to the photo. Time The Time menu lists several time and date options. -
Page 23: Network Signal Icon
Network Signal Icon When you have access to a wireless network, the network signal icon appears in the top right corner of the Main Menu and is shown below. It consists of three bars, each of which can be gray or blue. The more blue bars appear, the stronger the signal, so three blue bars would indicate a strong signal. -
Page 24: Viewing Photos
Viewing Photos Photo/Picture Slide Show Slide show modes Slide show mode will begin automatically a few seconds after the HP Smart Wi-Fi Display is powered on if an external memory card/USB flash drive is inserted. If more than one memory card or USB flash disk is inserted, then the contents of the most recently inserted one will be shown. -
Page 25: Photo Viewing Options
Photo Viewing Options There are two ways to choose photo viewing options: Setup menu • Navigate to the Setup menu and then Local Settings. For more information, see “Local Settings” on page 17. Options button • Press the Options button while viewing photos. You will be given most of the same options as in Local Settings, with the addition of Copy File. -
Page 26: Configuring Access To Online Content
Configuring Access to Online Content The HP Smart Wi-Fi Display can stream media from the Internet, including photos from various photo hosting sites, video from YouTube, Internet radio, the weather, and Tweets from Twitter. The streamed media can then be accessed on your frame by going to the Main Menu and then selecting Internet Content. - Page 27 Click Set up your display now to proceed. You will now see the following screen: Click to continue. The following screen appears:...
- Page 28 Fill in the required information and click to continue. Note: One item you will need to enter on this page is the Frame Authorization Code. This is displayed when you complete the Setup Wizard on your HP Smart Wi-Fi Display. See “Setup Wizard” on page 13 for more details.
-
Page 29: Adding Another Frame To Your Www.hpframe.com Account
Click to continue. The following screen appears: Choose the online photo sharing services you use and would like to view on your HP Smart Wi-Fi Display. You can also change this list after your www.hpframe.com account is set up. Click to continue. -
Page 30: Managing Your Www.hpframe.com Account
Managing your www.hpframe.com Account You can manage your www.hpframe.com account via a computer at any time by going to http://www.myframemanager.com and logging in using the user name and password you specified when setting up your www.hpframe.com account. Once logged in, you will see a screen similar to the following: In the upper portion of the screen, you will see which services you have already selected. -
Page 31: Online Services
Online Services Music Skins To customize the look of the music player on your HP Smart Wi-Fi Display, click on Music Skins in your www.hpframe.com account. You will see various different styles available. Click add below the one you prefer and in a few moments the look of your HP Smart Wi-Fi Display’s music player will be updated. - Page 32 To add a station, simply click add beside the station(s) you like. The station(s) will be added to the playlist on the right of the screen, and a few moments later the list of radio stations will be updated on your HP Smart Wi-Fi Display. Note: To listen to Internet radio on your HP Smart Wi-Fi Display navigate to Internet Content >...
- Page 33 Allowing specific cell phones to send you pictures You can receive pictures from specific cell phones on your HP Smart Wi-Fi Display. To set up the SMS/MMS photo service, click the SMS/MMS Photos icon in your www.hpframe.com account, as shown below: You will then see the following screen: Enter the cell phone number of the cell phone you wish to have permission to send photos to your HP Smart Wi-Fi Display, choose the cell phone provider from the pull-...
- Page 34 Internet Gadgets You can add gadgets, such as the weather, to your HP Smart Wi-Fi Display. Weather Gadget To set up the weather gadget, click the Weather icon in your www.hpframe.com account, as shown below: You can enter up to three ZIP Codes and choose whether to display temperatures in Fahrenheit or Celsius.
-
Page 35: Recent Updates
Twitter If you have an account with Twitter, you can stream Tweets to your HP Smart Wi-Fi Display, as follows: Ensure that you have added Twitter to your list of enabled services (see “Managing your www.hpframe.com Account” on page 28 for more information). -
Page 36: Streaming Media From Your Pc To Your Hp Smart Wi-Fi Display
Streaming Media from your PC to your HP Smart Wi-Fi Display Your HP Smart Wi-Fi Display can play the media files (photos, music, and video) stored on your PC or network attached storage device. The HP Smart Wi-Fi Display uses the Universal Plug and Play (UPnP) A/V streaming protocol to automatically find your PCs and servers, and will coordinate the streaming process between your PC/ server and the HP Smart Wi-Fi Display. - Page 37 In Windows Media Player 1 1, select Tools from the menu bar and then select Options from the Tools menu. Note: If the menu bar is not visible, right-click on a blank area of the options menu and choose Tools, then Options from there. options menu Select the Library Select Configure...
- Page 38 Click to place a checkmark next to Share my media, then click OK. You will now see the following screen. Note: If Windows Media Player has detected the HP Smart Wi-Fi Display, it may list it as an unknown device. Select Settings You may have to select the device and then click the Allow button on the screen...
- Page 39 If you have multiple HP Smart Wi-Fi Display devices, you can enable Windows Media Player 1 1 to automatically share the music with all of them or you can enable it to share the music individually. If you select the Allow new devices... check box, the following message will be displayed.
-
Page 40: Cable
Connecting your HP Smart Wi-Fi Display to your Computer with the USB Cable You can connect your HP Smart Wi-Fi Display to your computer with the mini-USB to USB cable, as follows. Ensure that the HP Smart Wi-Fi Display is correctly configured for PC connection by going to Setup >... -
Page 41: Resetting The Frame
Resetting the Frame You can reset your HP Smart Wi-Fi Display to factory default settings, as follows: From the Main Menu, navigate to Setup and press the Select button. Navigate to Factory Defaults and press the Select button. You will be asked to confirm that you want to reset your HP Smart Wi-Fi Display. Select Yes. -
Page 42: Feedback
Feedback Feedback about this User Manual If you find an error in this user manual or just have a suggestion, send an e-mail to manuals@hp.com. The information you send is used to help to develop future revisions of this manual. You will not get a response to your e-mail. If you require customer support, go to the website www.hp.com/support. - Page 43 Contact/phone Support: Country Language Number Europe Region (EMEA) België Dutch and German + 32 2700 1724 FRANCE French + 33 171230454 DEUTSCHLAND German + 49 6950073896 IRELAND English + 353 1850882016 ITALIA Italian + 39 269682189 NETHERLANDS Dutch + 31 202015093 ESPAÑA Spanish + 34 914533458...
-
Page 44: Specifications
Specifications Panel Specification Size 8” Aspect ratio Resolution 800x600 pixels Contrast ratio 400:1 Power External Power Adapter 12V, 1.2A Audio Internal speakers Stereo External headphone/speaker connector 3.5 mm stereo jack Connectivity USB Ports 2 (STD 2.0 Host, Mini B Device) Storage/Media Internal memory 512 MB... -
Page 45: Frequently Asked Questions
Frequently Asked Questions Question Answer How far away can I use the remote 2.5 meters control? Some photo/image file formats are Why can’t I display some of my not supported. Please refer to the Photos? specifications. Some music file formats are not Why can’t I play some of my music supported. - Page 46 When you insert a memory card or USB flash drive into your HP Smart Wi-Fi Display, it will create database (.DB) files and backup database files (.BAK). These are nothing to be worried about and should not be Some .DB and .BAK files have deleted.
-
Page 47: Troubleshooting
Troubleshooting I can’t switch my HP Smart Wi-Fi Display on The power supply may not be correctly connected. Ensure that it is connected to a working power outlet, and that the other end is connected to the DC-in connector on the HP Smart Wi-Fi Display. - Page 48 When I connect my frame to my PC, the PC doesn’t show any drive letters, or the frame appears as a “PTP/MTP Device” Your frame may be configured for a PictBridge printer connection instead of a PC connection. To correct this, follow these steps: Disconnect the frame from your computer, Go to the Main Menu of the frame, select Setup, then Local Settings.
- Page 49 I can’t remember the password for my wireless network Consult your router documentation to determine how to find the network name and password. I am using an ASCII key for WEP security on my wireless network The HP Smart Wi-Fi Display only supports WEP key entry as hex digits (0 through 9, A through F).
- Page 50 If you are already connected to a wireless network, then go into Setup > Networking, and exit the network configuration process before it is complete, you will be taken back to the Main Menu, but the network may be disconnected. In order to correct this, try one of the following: Go back into the networking configuration screen and complete the network •...
- Page 51 Déclaration de conformité de la FCC ..........51 Contenu de l'emballage ............52 Mise en route .................53 Télécommande ...............54 Description des boutons........55 Nagivation générale ...........57 Rotation des photos ..........57 Écran Quadrant ..........57 Écran Unique.............58 Veille...............58 Cadre photo ................59 Vue de dessus............59 Vue de gauche ..........59 Vue de droite.............60 Précédent ............60...
- Page 52 Ajouter un autre cadre à votre compte www.hpframe.com..........75 Gérer votre compte www.hpframe.com.....76 Services en ligne ..........77 Mises à jour récentes........... 81 Tranmission de contenu multimédia en continu de votre ordinateur vers votre HP Smart Wi-Fi Display............82 Activer Windows Media Player 1 1 UPnP ....82 Connexion de votre HP Smart Wi-Fi Display à...
-
Page 53: Déclaration De Conformité De La Fcc
Déclaration de conformité de la FCC Remarque: Cet appareil a été testé et déclaré conforme avec les limites d'un appareil numérique de Classe B et de Classe C, en accord avec la Partie 15 des Règles de la FCC. Ces limites sont conçues pour fournir une protection raisonnable contre les interférences nuisibles dans une installation résidentielle. -
Page 54: Contenu De L'emballage
Contenu de l'emballage Qté Article Image HP Smart Wi-Fi Display Télécommande (Pile de rechange = CR2025) Adaptateur d'alimentation universel Câble USB 2.0 Manuel de l'utilisateur Guide de démarrage rapide Document de garantie Déclaration de conformité... -
Page 55: Mise En Route
Mise en route Connectez l'adaptateur à la prise de courant et branchez le cordon d'alimentation à l'entrée CC du HP Smart Wi-Fi Display. Déployez le support du cadre et faites le pivoter de 90 degrés, puis positionnez l'interrupteur à l'arrière du HP Smart Wi-Fi Display sur la position MARCHE. -
Page 56: Télécommande
Télécommande Avant de commencer, tirez sur l'onglet de la télécommande pour l'activer. Remarque: Si une pile de rechange est nécessaire, achetez une pile CR2025. -
Page 57: Description Des Boutons
Description des boutons Précédent: Pour revenir au menu précédent. Veille: Pour mettre l'écran en mode veille ou pour le « réveiller » du mode veille. Accueil: Pour revenir au menu principal. Heure: Pour afficher le menu de l'heure. Pivoter photo: Pour la rotation d'une photo de 90 degrés dans le sens contraire des aiguilles d'une montre. - Page 58 Sélectionner: Pour sélectionner l'élément en surbrillance. Droite: Pour déplacer vers la droite. Bas: Pour déplacer vers le bas. Lecture/Pause: Pour lire ou mettre en pause la musique, la vidéo ou les diaporamas. Volume+/Cocher: Pour augmenter le volume, ou, suivant l'écran actif, pour sélectionner l'élément d'un menu.
-
Page 59: Nagivation Générale
Nagivation générale Dans la plupart des cas vous pouvez utiliser les boutons de navigation (Haut, Bas, Gauche, Droite) et le bouton Sélectionner pour naviguer à travers les différents menus. Parfois, cependant, il peut être plus rapide d'utiliser l'un des boutons de menu spécifique, comme les boutons Accueil, Favoris, ou Musique, ouvrant le menu souhaité... -
Page 60: Écran Unique
Écran Unique Par défaut, le HP Smart Wi-Fi Display affichera les photos en mode écran Unique, signifiant que le diaporama affichera une photo à la fois. Si vous êtes en mode écran Quadrant et souhaitez revenir à l'affichage des photos une par une, alors vous pouvez revenir à... -
Page 61: Cadre Photo
Cadre photo Vue de dessus Diaporama Précédent Haut Sélectionner Lecture/Pause Vue de gauche Support de la télécommande... -
Page 62: Vue De Droite
Vue de droite Logement de carte CF Logement de carte SD/MMC/MS/xD Connecteur USB Connecteur mini-USB Entrée d'alimentation Prise pour écouteur Précédent Support Interrupteur d'alimentation... -
Page 63: Installation Initiale Du Cadre
Installation initiale du cadre Les instructions suivantes s'affichent en utilisant la télécommande. L'accès à certaines de ces fonctions est possible au moyen des touches de contrôle situées à l'arrière du HP Smart Wi-Fi Display. Info de l'horloge La date et l'heure sont automatiquement définies quand vous connectez votre HP Smart Wi-Fi Display à... - Page 64 Remarque: Autrement, vous pouvez configurer votre HP Smart Wi-Fi Display en utilisant la technologie Windows Connect Now (WCN). Pour cela, lancez l'Assistant de configuration de réseau sans fil sur votre ordinateur et insérez la clé USB WCN dans le HP Smart Wi-Fi Display une fois que vous avez terminé...
-
Page 65: Lancement De L'assistant De Configuration Réseau Sans Fil Sur Votre Ordinateur (Optionnel)
Lancement de l'assistant de configuration réseau sans fil sur votre ordinateur (optionnel) Une solution alternative à la saisie manuelle des informations du Wi-Fi dans votre HP Smart Wi-Fi Display, vous pouvez utiliser l'assistant de configuration réseau sans fil sur votre ordinateur. Windows XP (Service Pack 2 ou supérieur) Sur votre ordinateur, cliquez sur Démarrer >... - Page 66 Windows Vista Sur votre ordinateur, cliquez sur Démarrer > Réseau. Le dossier Réseau s'ouvre. Cliquez sur Ajouter un nouveau périphérique sans fil. L'écran Ajouter un périphérique sans fil au réseau s'affiche. Cliquez sur Je souhaite ajouter un périphérique sans fil ou un ordinateur qui n'est pas dans la liste, en utilisant une clé...
-
Page 67: Paramètres Locaux
Paramètres locaux Le menu Paramètres locaux vous permet de configurer les divers paramètres de votre HP Smart Wi-Fi Display. À partir du menu Installation, allez à l'Assistant d'installation et appuyez sur le bouton Sélectionner. Les options suivantes s'affichent. Utilisez les boutons de navigation pour mettre en surbrillance l'option que vous souhaitez changer, puis utiliser le bouton Sélectionner pour changer la paramètre. -
Page 68: Description Du Menu Principal
Description du menu principal L'accès au menu principal est possible en appuyant sur le bouton d'Accueil sur la télécommande. Pour parcourir le menu, utilisez les boutons directionnels sur la télécommande, puis appuyez sur le bouton Sélectionner pour choisir l'élément mis en surbrillance. Le Menu principal a six icônes principales: Contenu du cadre, Contenu Internet, Réseau à... -
Page 69: Contenu Internet
Contenu Internet Contenu Internet décrit le contenu disponible via l'Internet. Avant d'utiliser les fonctions du Contenu Internet de votre HP Smart Wi-Fi Display, vous devez configurer votre compte www.hpframe.com. Pour plus d'informations, voir ”Configurer votre compte www.hpframe.com” en page 72. Sur votre HP Smart Wi-Fi Display, à... -
Page 70: Heure
Sélectionner Toutes les photos. Allez sur la photo que vous souhaitez ajouter aux favoris et appuyez sur le bouton Options de la télécommande. Sélectionnez Ajouter aux favoris. Vous pouvez maintenant accéder à cette photo en allant au Menu principal > Favoris >... -
Page 71: Icône Du Signal Réseau
Icône du signal réseau Quand vous accédez à un réseau sans fil, l'icône du signal réseau apparaît dans le coin supérieur droit du menu principal et est illustré ci-dessous. Il se compose de trois barres, chacune pouvant être grise ou bleue. Plus la barre est bleue, plus fort est le signal, donc trois barres bleues indiquent un fort niveau de signal. -
Page 72: Afficher Les Photos
Afficher les photos Diaporama photo/image Modes de diaporama Le mode de diaporama commencera automatiquement quelques secondes après que le HP Smart Wi-Fi Display ait été allumé si une carte mémoire externe/clé USB est insérée. Si plus d'une carte mémoire ou clé USB sont insérées, alors le contenu de la carte la plus récemment insérée s'affichera. -
Page 73: Options D'affichage Des Photos
Options d'affichage des photos Il y a deux façons de choisir les options d'affichage des photos: Le menu Installation. • Naviguez vers le menu Installation puis Paramètres locaux. Pour plus d'informations, voir ”Paramètres locaux” en page 65. Bouton Options. • Appuyez sur le bouton Options pendant l'affichage des photos. -
Page 74: Configurer L'accès Au Contenu En Ligne
Configurer l'accès au contenu en ligne Le HP Smart Wi-Fi Display peut transmettre des contenus multimédia en continu (streaming) à partir d'Internet, y compris des photos provenant des divers sites d'hébergement de photos, vidéo de YouTube, radio Internet, météo, et Tweets de Twitter. - Page 75 Cliquez sur Configurer votre écran maintenant pour continuer. Vous verrez alors l'écran suivant: Cliquez sur pour continuer. L'écran suivant apparaît:...
- Page 76 Remplissez les informations requises et cliquez sur pour continuer. Remarque: Un élément que vous devez entrer sur cette page est le Code Authentification du Cadre. Il s'affiche quand vous terminez l'Assistant d'installation sur votre HP Smart Wi-Fi Display. Voir ”Assistant d'installation” en page 61 pour plus de détails.
-
Page 77: Ajouter Un Autre Cadre À Votre Compte
Cliquez sur pour continuer. L'écran suivant apparaît: Choisissez les services de partage de photos en ligne que vous utilisez et souhaitez afficher sur votre HP Smart Wi-Fi Display. Vous pouvez également changer cette liste une fois que votre compte est configuré www.hpframe.com. Cliquez sur pour continuer. -
Page 78: Gérer Votre Compte Www.hpframe.com
Gérer votre compte www.hpframe.com Vous pouvez gérer votre compte www.hpframe.com au moyen d'un ordinateur en allant à http://www.myframemanager.com et en vous connectant avec le nom de l'utilisateur et le mot de passe que vous avez spécifiés lors de la configuration de votre compte www.hpframe.com. -
Page 79: Services En Ligne
Services en ligne Habillage musical Pour personnaliser l'apparence du lecteur de musique de votre HP Smart Wi-Fi Display, cliquez sur Habillage musical dans votre compte www.hpframe.com. Vous verrez différents styles disponibles. Cliquez sur ajouter en dessous de celui que vous préférez et, en un instant, l'apparence de votre lecteur de musique HP Smart Wi-Fi Display sera mis à... - Page 80 Un nouvel écran apparaîtra. À gauche de l'écran vous verrez une liste de stations radio disponibles. Au-dessus de cette liste se trouvent les menus déroulants pour changer le Pays, la Ville, le Genre et la Langue, modifiant la liste des stations radio qui vous sont offertes. À droite de l'écran vous verrez les stations que vous avez déjà...
- Page 81 Autoriser des téléphones portables spécifiques pour l'envoi de vos photos Vous pouvez recevoir des photos provenant de téléphones portables spécifiques sur HP Smart Wi-Fi Display. Pour configurer le service photo SMS/MMS, cliquez sur l'icône Photos SMS/MMS dans votre compte www.hpframe.com, comme illustré ci-dessous: Vous verrez alors l'écran suivant: Entrez le numéro de téléphone portable duquel vous souhaitez avoir la permission...
- Page 82 Gadgets Internet Vous pouvez ajouter des gadgets, comme la météo, à votre HP Smart Wi-Fi Display. Gadget météo Pour configurer le gadget météo, cliquez sur l'icône Météo dans votre compte www.hpframe.com, comme illustré ci-dessous: Vous pouvez entrer jusqu'à trois codes postaux et choisir d'afficher les températures en Fahrenheit ou Celsius.
-
Page 83: Mises À Jour Récentes
Twitter Si vous avez un compte Twitter, vous pouvez transmettre en continu des vidéos vers votre HP Smart Wi-Fi Display, comme suit: Assurez-vous d'avoir ajouté YouTube à votre liste de services activés (voir ”Gérer votre compte www.hpframe.com” en page 76 pour plus d'informations). Une fois que le service Twitter apparaît dans votre liste de services activés, cliquez sur son icône, qui est montrée ci-dessous: Sur la page qui apparaît, connectez-vous à... -
Page 84: Tranmission De Contenu Multimédia En Continu De Votre Ordinateur Vers Votre Hp Smart Wi-Fi Display
Tranmission de contenu multimédia en continu de votre ordinateur vers votre HP Smart Wi-Fi Display Votre HP Smart Wi-Fi Display peut lire des fichiers multimédia (photos, musique, et vidéos) stockés sur votre ordinateur ou périphérique de stockage connecté au réseau. Le HP Smart Wi-Fi Display utilise le protocole de streaming A/V Plug & Play Universel (UPnP) pour trouver automatiquement vos ordinateurs et serveurs, et coordinera le process de streaming entre votre ordinateur/serveur et le HP Smart Wi-Fi Display. - Page 85 Dans Windows Media Player 1 1, sélectionnez Outils à partir de la barre de menu puis sélectionnez Options dans le menu Outils. Remarque: Si la barre de menu n'est pas visible, cliquez-droit dans une zone vide du menu options et choisissez Outils, puis Options à partir de là. menu des options Sélectionnez...
- Page 86 Cliquez pour cocher Partager mon média, puis cliquez sur OK. Vous verrez alors l'écran suivant: Remarque: Si Windows Media Player a détecté le HP Smart Wi-Fi Display, il peut le lister en tant que périphérique inconnu. Sélectionnez les Paramètres Vous pouvez sélectionner l'appareil puis cliquez sur le bouton Autoriser à...
- Page 87 Si vous avez plusieurs appareils HP Smart Wi-Fi Display, vous pouvez activer Windows Media Player 1 1 pour partager la musique automatiquement avec tous les appareils ou vous pouvez l'activer pour partager la musique individuellement. Si vous sélectionnez Autoriser les nouveaux appareils... cochez la case, le message suivant s'affichera.
-
Page 88: Câble Usb
Connexion de votre HP Smart Wi-Fi Display à votre ordinateur avec le câble USB Vous pouvez connecter votre HP Smart Wi-Fi Display à votre ordinateur avec le câble mini-USB vers USB, comme suit. Vérifiez que le HP Smart Wi-Fi Display est correctement configuré pour la connexion à... -
Page 89: Réinitialiser Le Cadre
Réinitialiser le cadre Vous pouvez réinitialiser votre HP Smart Wi-Fi Display aux paramètres d'usine par défaut, comme suit: À partir du Menu principal, allez à Installation et appuyez sur le bouton Sélectionner. Allez à Paramètres par défaut et appuyez sur le bouton Sélectionner. Il vous sera demandé... -
Page 90: Commentaires
Commentaires Commentaire à propos de ce manuel de l'utilisateur Si vous trouvez une erreur dans ce manuel de l'utilisateur ou si vous avez des suggestions, envoyez un email à manuals@hp.com. Vos informations seront utilisées pour développer les futures révisions de ce manuel. Vous ne recevrez pas de réponse à... - Page 91 Contact/téléphone pour vous assister: Pays Langue Numéro Région Européenne (EMEA) Hollandais et Belge + 32 2700 1724 allemand FRANCE Français + 33 171230454 ALLEMAGNE Allemand + 49 6950073896 IRLANDE Anglais + 353 1850882016 ITALIE Italien + 39 269682189 PAYS-BAS Hollandais + 31 202015093 ESPAGNE Espagnol...
-
Page 92: Spécifications
Spécifications Spécifications du panneau Dimension 8” Format d'écran Résolution 800x600 pixels Rapport de contraste 400:1 Alimentation Adaptateur d'alimentation externe 12V, 1,2A Audio Haut-parleurs internes Stéréo Connecteur pour écouteur/haut-parleurs Prise stéréo 3,5 mm externes Connectivité Ports USB 2 (STD 2.0 Host, appareil Mini B) Stockage/Multimédia Mémoire interne 512 Mo... -
Page 93: Questions Fréquemment Posées
Questions fréquemment posées Question Réponse Jusqu'à quelle portée puis-je utiliser la 2,5 mètres télécommande? Certains format de fichier photo/ Pourquoi est-ce que je ne peux pas image ne sont pas pris en charge. afficher certaines de mes photos? Veuillez vous référer aux spécifications. - Page 94 Quand vous insérez une carte mémoire ou une mémoire flash USB dans votre HP Smart Wi-Fi Display, des fichiers (.DB) de base de données et de sauvegarde (.BAK) seront créés. Ces fichiers ne doivent pas vous inquiéter et ne doivent pas être supprimés.
-
Page 95: Dépannage
Dépannage Je ne peux pas allumer mon HP Smart Wi-Fi Display L'alimentation n'est peut-être pas bien connectée. Assurez-vous qu'elle est branchée à une prise de courant, et que l'autre extrémité est branchée au connecteur d'entrée CC (DC-in) sur le HP Smart Wi-Fi Display. L'interrupteur d'alimentation du HP Smart Wi-Fi Display est peut être sur la position arrêt. - Page 96 Quand je connecte mon cadre à mon ordinateur, l'ordinateur n'affiche aucune lettre de lecteur, ou le cadre apparaît comme un “Périphérique PTP/MTP” Votre cadre peut-être configuré pour une connexion d'imprimante PictBridge au lieu d'une connexion d'ordinateur. Pour corriger cela, suivez les étapes suivantes: Déconnectez le cadre de votre ordinateur, Allez au menu principale du cadre, sélectionnez Installation, puis Paramètres locaux.
- Page 97 Je ne me rappelle pas le mot de passe de mon routeur sans fil Consultez la documentation de votre routeur pour déterminer comment trouver le nom du réseau et le mot de passe. J'utilise une clé ASCII pour la sécurité WEP sur mon réseau sans fil Le HP Smart Wi-Fi Display prend en charge uniquement la saisie de la clé...
- Page 98 Si vous êtes déjà connecté à un réseau sans fil, allez dans Installation > Réseau, et quittez la procédure de configuration du réseau avant qu'elle soit terminée, vous serez alors ramené au Menu principal, mais le réseau risque d'être déconnecté. Afin de corriger ceci, essayez l'une des choses suivantes: Retournez à...
- Page 100 7525C00047A...
Need help?
Do you have a question about the sd828a1 - Smart WiFi Digital Photo Frame and is the answer not in the manual?
Questions and answers