Gigabyte GSmart i350 User Manual
User manual - gsmart i350 english version
Hide thumbs
Also See for GSmart i350:
- User manual (60 pages) ,
- Quick manual (45 pages) ,
- Update (3 pages)
Table of Contents
Advertisement
Quick Links
Download this manual
See also:
Quick Manual
Copyright
All mobile products by GIGA-BYTE Communications mentioned in this document, including the
device, accessories, software, text, music, and pictures, are owned by, or authorized by original
manufacturers to GIGA-BYTE Communications. Reproduction, transfer, distribution, or storage of
part or all of the contents in this document in any form without the prior written permission of
GIGABYTE Communications Inc. is prohibited.
GIGA-BYTE Group, GIGA-BYTE Communications Inc.
2007. 06
Advertisement
Table of Contents

Related Manuals for Gigabyte GSmart i350


Summary of Contents for Gigabyte GSmart i350
- Page 1 GIGA-BYTE Communications. Reproduction, transfer, distribution, or storage of part or all of the contents in this document in any form without the prior written permission of GIGABYTE Communications Inc. is prohibited. GIGA-BYTE Group, GIGA-BYTE Communications Inc. 2007. 06...
-
Page 2: Safety Information
Safety Information This chapter contains important information on safe and efficient operation. Please read this information before using the device. Exposure to Radio Frequency (RF) Energy The device contains a transmitter and a receiver. When it is ON, it receives and transmits RF energy. -
Page 3: General Information
General Information This chapter contains important information on safe and efficient operation. Please read this information before using the device. Ignorance of the following notices may lead to violations of the law. • Before using the device, please make sure you have fully charged the battery. •... -
Page 4: Table Of Contents
Table of Contents Copyright…………………………………………………………………………………………..…………1 Safety Information…………………………………………………………………………………………..2 General Information…………………………………………….…………………………………….…….3 Chapter 1 Getting Started……………………………………………………………...………………1-1 1.1 Getting to Know Your Device ……………………………………………………………………….1-2 1.2 Key Definition…………………………………………………………………………………………1-3 1.3 Accessory……………………………………………………………………………………………..1-3 1.4 Install and Charge Battery …………………………………………………………………………..1-3 1.5 Using Stylus ………………………………………………………………………………………….1-3 1.6 Screen Alignment and Settings……………………………………………………………………..1-3 1.7 Time and Date Settings………………………………………………………………………………1-4 1.8 Power On/Off, Sleep Mode………………………………………………………………………….1-4 1.9 My Information Setup ………………………………………………………………………………..1-4 1.10 Password Setup……………………………………………………………..………………………1-5... - Page 5 4.4 Wise Talk..........................4-1 4.5 Change Settings........................4-3 4.6 Hints or Alert ...........................4-3 4.7 Power Setup ...........................4-3 4.8 Backlight ..........................4-4 4.9 Search for a File or Information....................4-4 4.10 Pop-Up Menu ........................4-4 4.11 Shortcut Key..........................4-4 4.12 Phone Settings ........................4-4 Chapter 5 ActiveSync Synchronization Tool ................5-1 5.1 Install and Use ActiveSync ....................5-1 5.2 Synchronize via Bluetooth ....................5-2 Chapter 6 Connections .......................6-1...
- Page 6 Chapter 10 Embedded Programs ....................10-1 10.1 Calendar..........................10-1 10.2 Contacts ..........................10-1 10.3 Tasks ..........................10-2 10.4 Notes ...........................10-3 10.5 Word Mobile ........................10-3 10.6 Excel Mobile.........................10-4 10.7 PowerPoint Mobile ......................10-4 10.8 Windows Media Player......................10-4 10.9 Internet Explore........................10-5 10.10 Calculator...........................10-6 10.11 Games..........................10-6 10.12 STK (SIM Tool Kit) ......................10-6 10.13 Zip............................10-6 10.14 SD Add-Ons........................10-6 10.15 GPS Tracking …........................10-6...
-
Page 7: Chapter 1 Getting Started
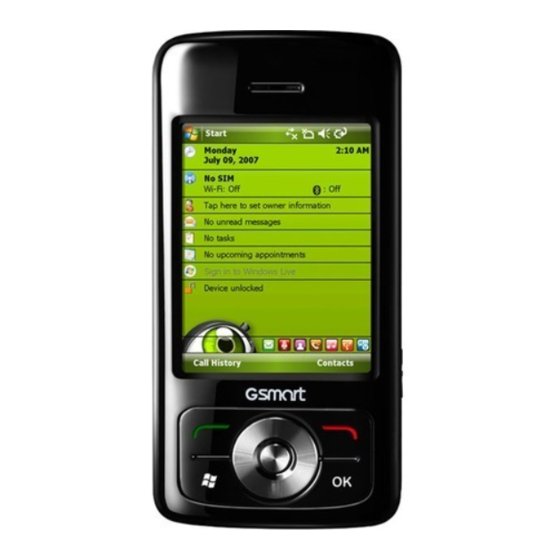
1 Getting Started 1.1 Getting to Know Your Device This chapter introduces you to the hardware of the device and its function keys. detected Item Function You can hear caller’s Press and hold the power Receiver voice through receiver. Power On / button for a few seconds to turn on / off your Screen... -
Page 8: Key Definition
1.2 Key Definition Receive your voice and Microphone conversation Press this key to end a Function End Key call. 5-Way Navigation Move cursor up Press: execute the Key - Up 10 OK Key function of the top-right 5-Way Navigation Move cursor down screen(OK or X) Key - Down You can insert your Mini... -
Page 9: Install And Charge Battery
start charging automatically. Item Function 3. It takes 3 hours to fully charge your battery with a traveler charger for the first time. On Provide power to a deskstand, it takes 6-8 hours to fully Battery your device. charge your battery for the first time. Unplug the device from the charger when charging Charger Charges the battery... -
Page 10: Time And Date Settings
You can also choose your screen display in Sleep Mode Portrait or Landscape. 1. Sleep Mode is a power saving mode designed to reserve battery power. After 1. Press and hold OK any time when the idling for a period of time, the device device is on to switch your screen display automatically enters Sleep Mode. -
Page 11: Password Setup
Information” and “Note”. 6. Select “OK” to finish setup and save it. Unlock device: 1. Tap “Unlock” on the bottom left of the screen, or press the left function key. 2. Tap the “Unlock” button on the newly 1.10 Password Setup appeared screen and the device is unlocked. -
Page 12: Traveling Advice
To maintain the device in the best condition, please follow the suggestions below: 1. Please avoid exposing your device to extreme environment (too hot/ too old/ high/ humidity). 2. Please keep the device away from rain and water. 3. Please keep the device away from direct exposure to the sun and ultraviolet rays. -
Page 13: Chapter 2 Using The Mobile Device
2 Using the Mobile Device 2.1 Today Screen Icon Description All sound alerts are on. 1. Start Menu: Tap to open the start menu list. 2. Battery Status: Shows the current battery Sound alerts off. status. 3. Connection Status: Shows the connection No SIM card. -
Page 14: Start Menu List
2.3 Applications GPS tracking is connected. You will see many application icons on your Programs screen. From the Programs screen, Note: There are several shortcuts on the you may touch on the application icon that you bottom right of Today screen. You desired to use to execute the applications. -
Page 15: Settings
Search for all appearance and display Search data, programs, items. and files. This is your Select Start > Settings > System Tab gateway to help Windows Live with Live Search. Program Description Download updates for Contains information of the About Windows device. -
Page 16: Input Method
Recognizer screen. The device will display Settings for Bluetooth Bluetooth the letters/numbers that you had just input function. in the Letter Recognizer fields. Settings and management 3. Tap the ← key to delete an input. Connections for modem connections. Basic settings for GPRS Block Recognizer GPRS Wizard connection. - Page 17 Chinese (Singapore), Chinese (Taiwan), Croatian, Czech, Danish, Dutch (Belgium), Dutch (Netherlands), English (Australia), English (Belize), English (Canada), English (Caribbean), English (Ireland), English (Jamaica), English (New Zealand), English (Philippines), English (South Africa), English (Trindad), English (United Kingdom), English (United States), English (Zimbabwe), Estonian, Faroese (Faroe Islands), Finnish, French (Belgium), French (Canada), French (France), French (Luxembourg), French (Monaco),...
-
Page 19: Chapter 3 Phone Functions
3 Phone Functions Press Call Key, to enter phone function. Please to call. insert a SIM card before using phone. 5. Press End Key to end the call. 3.1 Insert and Remove a SIM Card 3.3 How to Use Your Phone 1. -
Page 20: Contacts
side manually or tap to adjust incoming call volume. 3. If you press the volume adjustment key on the side of this device or tap > icons during a call, you may adjust the in - call volume of the phone. You can only adjust it when during a call. -
Page 21: Call History
the new contact and exit. the bottom right of the screen. Select Options > Phone tab from unfolded options. 3.7 Call History 1. You may select preferred ringer method. 2. If you want to download ringtones, please use ActiveSync program in computer and Call History contains all outbound calls, copy the ringtone file to Application Data / incoming calls and missed calls. - Page 22 1. Check “Block all unknown calls” or tap “Menu” and select “Add Block List” to add a number you would like to block. 2. Select “OK” to save the settings. Alternatively, tap “Contacts” on Today screen, highlight the contact you would like to block and tap “Menu”.
-
Page 23: Chapter 4 Personal Settings
4 Personal Settings 3. Background Effects Tab: You may enable / 4.1 Restore to Factory Settings disable Background Effect canned Sound Effect, choose preferred background effect You can restore the system to factory settings sound, or adjust volume. by tapping this program. When you format the 4. - Page 24 Greeting Setup: 1. Select Start > Settings > Personal tab > You can assign different greetings to different Wise Talk >Background Effects tab. contacts here. Tap “Greeting Setup” to go to 2. Check “Enable Overdub” to activate Greetings Setup screen. Tap “Add” to add a background mixed sound function.
-
Page 25: Change Settings
4. Press “OK” to validate the settings and exit. selecting the items to be shown in the You may find the recorded files in “My menu. ․ “My Information”: Input your contact Phone Recording” folder. When phone recording is activated, press Camera key to information. -
Page 26: Backlight
provided in each program is different. Tap and 4.8 Backlight hold and then lift the stylus to open a pop-up Menu. Select an item from the Menu to 1. Select Start > Settings > System tab > execute. If you do not want to execute any item, Backlight tap anywhere outside the Menu to cancel. - Page 27 Note: All services in Services are provided by operators. Please contact your operator for enquiries regarding these Network: Select Start > Settings > Personal tab > Phone > Network tab ․Under Current network, tap “Find Network” to automatically search for the network in use.
-
Page 29: Chapter 5 Activesync Synchronization Tool
5 ActiveSync Synchronization Tool You may use Microsoft ActiveSync to 1. ActiveSync Installation: synchronize data in this device with personal Use the enclosed CD to install Microsoft computer. ActiveSync in your personal computer. This device already has built-in ActiveSync. • You can synchronously update Outlook 2. -
Page 30: Synchronize Via Bluetooth
5.2 Synchronize Via Bluetooth Instead of using a USB cable, you may also synchronize data via Bluetooth. Select Start > Programs > ActiveSync > Menu, then select “Connect via Bluetooth” and tap ”Synchronize” in this device to process synchronization. For descriptions regarding synchronization through Bluetooth device, please refer to “Synchronizing Your Information >... -
Page 31: Chapter 6 Connections
6 Connections When using GPRS and Internet connection, you will not be able to answer a call. If you want to make a call, your device will automatically disconnect to the Internet and reconnect to the Internet at the end of conversation. -
Page 32: Gprs Wizard
4. Or you may select Start > Settings > connection in this device, please see “Chapter Connections tab > Connections > Tasks 8 Using Bluetooth”. tab > Manage Existing Connection; tap and hold on a connection to open pop-up menu 6.7 Internet Sharing and select “Connect”. -
Page 33: Wi-Fi
files to and from your mini SD card. Note: Before you tap Connect, please make sure that your have installed a GPRS SIM card, and that you have connected this phone to your PC/Notebook by USB cable or Bluetooth and disabled ActiveSync. 6.8 Wi-Fi Wi-Fi allows this device to connect to detected network through Wi-Fi. -
Page 35: Chapter 7 Receive And Send Message
7 Receive and Send Message 7.1 Email & Message Before receiving and sending your email or message, please make sure that this device has connected to a network. When you are connected to a network, you may go to “Messaging” to receive and send your email or message. -
Page 36: Directly Connect To Email Server
1. See “6.1 Internet Access”. Please select a > Menu > Tools > Options, and change email desired cooperation relationship on “New account setup by requirement. Partnership” screen in computer to synchronously transmit information. 7.4 Establish Email Service 2. If you choose not to perform synchronization, you may manually copy or move email messages between this device If you have email accounts from ISP or... - Page 37 Connect with Email Server: Compose and send mail: 1. Select Messaging > Menu > Send and Select Messaging > New to write a new mail. Receive. After writing a new mail, select “Send” on the 2. Select Messaging > Menu > Tools > bottom left of screen and send this new mail.
-
Page 38: How To Use Push Email
When reading mail, you can: 1. Tap on a contact in “To, CC, BCC” fields to save this contact as a new contact. 2. Tap “Reply” to compose a reply email. 3. Select the icon on the bottom center of the screen to activate or disable screen keypad. -
Page 39: How To Use Mms
5. Set the Peak times to “As items arrive” and 2. Tap “ Subject” field to input a subject for the Off-peak times sync time to “As items your new message. arrive”. Tap “OK”. 3. Tap “ Insert picture / video…” or ”Insert audio…”... -
Page 40: Messenger
Adding text: You can use the playback controls to preview You can either enter in new text with the the audio: keyboard, or use "My Text" to add text to any (Play/Pause and Stop controls are slide. You can also insert an emotion icon or a available.) favorite website link into your message. - Page 41 3. Enter your MSN or Hotmail email address Compose Hotmail: and password. 1. After signing in Messenger, wait for the 4. Select “Sign In”. sync to finish and then select Start > Messaging. 2. Select Windows Live Inbox from the drop down menu on the top left corner.
-
Page 43: Chapter 8 Using Bluetooth
8 Using Bluetooth When you want to form connection through Bluetooth, please make sure the device you would like to make connections with is also equipped with Bluetooth. 8.1 Bluetooth Connection Settings When Bluetooth is activated, tap icon on Today screen, and you will see icon in the pop-up window. -
Page 44: Com Ports
3. Select “Finish”. 6. On Devices tab screen, select the device to be connected, and then select “Next“. The screen will prompt for password. After inputting password on password input screen, select “Next“. 7. If the password entered is correct, the connection will be form. -
Page 45: Chapter 9 Multimedia
9 Multimedia 7. Timer Countdown: Off, 5 seconds, 10 9.1 Camera seconds. 8. Sequential Shoot: 18, 12, 6, 3, Off You may use camera function in this device to 9. Flash: Auto, On, Off. capture important moments. 10. Shutter sound: On, Off 11. -
Page 46: Video Mode
miniSD card if the miniSD card is plugged 5. Tap the button to view the photo you in before launching video Recorder). just took in “Pictures & Videos”. 6. Flicker Frequency: Auto, 50Hz, 60Hz 7. Confirm Frame: You can choose to For your ease of use, the filename of photos continue shooting, send MMS, not to save it, with coordinates always ends with (GPS) on... -
Page 47: Pictures & Videos
Menu > Exit to stop recording and exit. 9.6 JAVA 8. When recording in the background, tap to return to Recorder. Tap to stop This device supports JAVA, providing you the freedom of using JAVA applications and recording. games. Note: If there is incoming call during 9.7 Audio Mixer recording, answering the call will automatically terminate recording. -
Page 49: Chapter 10 Embedded Programs
10 Embedded Programs Notifications. 10.1 Calendar View and Update Calendar: Appointments and Meetings: Select an appointment on the calendar to view You may use “Calendar” to arrange appointment summary. If you want to change appointments, meetings, and other events. the details of an appointment, select “Edit”. You may view your appointments in different display modes. -
Page 50: Tasks
1. Tap on “Enter a name…” field to input part View and Update New Contacts: of name or desired or phone number to Select a contact in the contact list to view search for that contact in the contacts list. contact summary screen. -
Page 51: Notes
Check and Update Tasks: and your computer. You may select a task from tasks list to view task summary. To change the details of this You may use your Word Mobile to generate task, select “Edit”. documents like letters, meeting minutes and reports. -
Page 52: Excel Mobile
PowerPoint Mobile, the screen will show your 10.6 Excel Mobile PowerPoint files list, from which select the file you want to open. You may use Excel Mobile in this device with 1. Select the folder type demonstrated in the Microsoft Excel in your computer to easily copy list display field. -
Page 53: Internet Explore
browsing content. ․Tap to return to previous page. ․Tap “Menu” to open Menu. ․Select and hold any location of website content to open pop-up menu. View Favorites: 1. On browser screen, select “Menu” > “Favorites”. 2. On Favorites screen, select the website you want to view. -
Page 54: Calculator
Unzipping Files: 1. To unzip a file, select Start > Programs > Note: When you check or uncheck “Menu Tools > Zip Magnifier” the new settings will take 2. Tap the “Unzip” button on the pop-up effect after a system reboot. window. -
Page 55: Gsmart Bt Application
1. Tap Start > Programs > Phone Manager > 5. Tap to stop recording routes. On the SIM Manager. pop-up window, you may choose to save or 2. Select the desired item, or select all SIM cancel the records. If you want to save the contacts by tapping Menu >... -
Page 57: Chapter 11 Device Maintenance
11 Device Maintenance Memory Card” and E-mail attachments will 11.1 Memory Management automatically be saved to memory card. Select Start > Settings > System Tab > Select Start > Internet Explorer > Menu > Tools Memory > Options > Memory Tab. Select “Clear History”... - Page 58 program, an error message will show on the Select the programs you would like to delete screen and tell you that this program is from “Programs in storage memory” list, and invalid, which is not suitable for your then select “Remove” to delete highlighted computer.
-
Page 59: Chapter 12 Specifications
12 Specifications Item Specification System Information Operating System Windows Mobile 6 Professional Processor Marvell PXA 270 520 MHz Memory 256 MB ROM, 64MB RAM Size Dimensions (mm) 110 x 54 x 18 mm Weight (in grams) 130 g (Including Battery) Battery Battery Capacity Li-Ion 1300 mAh... - Page 60 Resolution 480*640 pixels Band Band GSM 850/900/1800/1900 Connectivity Bluetooth Bluetooth 2.0 Modulation: GFSK Band:2.4 - 2.4835GHz Output power:0dbm (Typical) WLAN WLAN 802.11b/g Wireless Technology: OFDM and DSSS Operating frequency: 2.412 - 2.462GHz Output power:12dbm (Typical) GPRS GPRS Class B, Class 10 WAP 2.0 Modem dial-up Mini USB 2.0...
-
Page 61: Digital Camera
Max Size (per) Depends on available RAM Audio Format WMA, MP3, MID, AMR, WAV,AAC Max Size Depends on available RAM Video Format 3GP, MPEG4, WMV Max Size Depends on available RAM Phonebook Size Depends on available RAM Ringtone Type MP3, WMA, AMR Polyphone 192 polyphonic mid file Digital Camera... -
Page 62: External Memory
Macro Mode Video Recording Message Windows Live E-Mail Messenger External Memory Type Mini SD Card Max Size No Limit Operating Temperature -10℃~45℃ Temperature Note: Specifications may vary in some regions. 12-4 i350... -
Page 63: Chapter 13 Faq
13 FAQ Why can’t I turn on the device? Why would the screen darken automatically? Please make sure that the device has sufficient power, and that the battery is secured in the This is a power saving mechanism. You can device. - Page 64 computer. You can find ActiveSync in the installation CD, or you can download the latest version from Microsoft’s website. Please make sure you have connected the device to the computer by plugging in the USB cable to both the device and the computer. Make sure that you are not running another program that is using the same serial port.
Need help?
Do you have a question about the GSmart i350 and is the answer not in the manual?
Questions and answers