Table of Contents
Advertisement
Quick Links
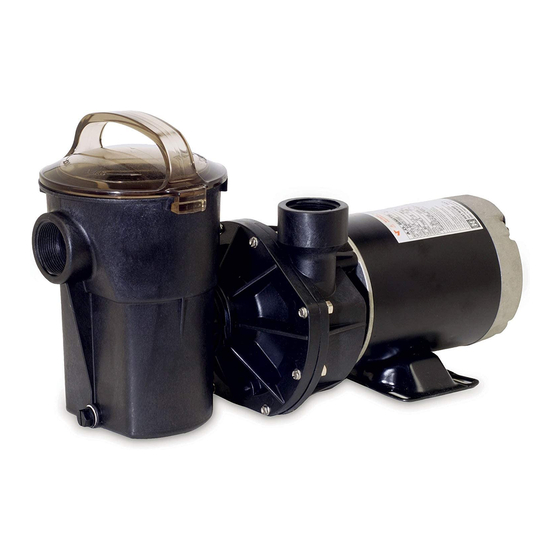
HAYWARD HIGH-PERFORMANCE PUMPS
INSTALLATION AND OPERATING INSTRUCTIONS
IMPORTANT SAFETY INSTRUCTIONS
When installing and using this electrical equipment, basic safety precautions should always be followed,
READ AND FOLLOW ALL INSTRUCTIONS
1.
WARNING - To reduce risk of injury, do not permit children to use this product unless they are closely supervised at all times.
2.
CAUTION - This pump is U.L. listed for permanently installed pools and may also be used with hot tubs and spas if so marked.
It is not U.L. listed for storable pools. A permanently installed pool is constructed in or on the ground and cannot be readily
disassembled for storage. A storable pool is constructed so that it may be readily disassembled for storage and reassembled to
its original integrity.
3.
If installed within an outer enclosure or beneath the skirt of a hot tub or spa, adequate ventilation and free circulation of air must
be provided to prevent overheating of the motor.
4.
Use motor bonding lug to connect the motor with other bonding parts using a #8 AWG conductor as required by electrical codes.
NOTE: If your pump is equipped with a 3 ft. (1 m) cord and twist lock plug, items 5 through 8 apply.
5.
WARNING - Risk of Electric Shock. Connect only to a grounding-type receptacle protected by a ground fault circuit interrupter
(GFCI). Contact a qualified electrician if you cannot verify that the receptacle is protected by a GFCI.
6.
Do not bury cord. Locate cord to minimize abuse from lawn mowers, hedge trimmers, and other equipment.
7.
WARNING - To reduce the risk of electric shock, replace damaged cord immediately.
8.
WARNING - To reduce the risk of electric shock, do not use extension cord to connect unit to electric supply; provide a properly
located outlet.
GENERAL TIPS ON PUMP INSTALLATION
For best pump performance, locate the system below the
pool water line and as close to the pool as practical. If
you own an above-ground pool, please see Note: NSPI-4
Article V, for safe and proper installation of the equipment
package. Make sure suction joints are tight. Suction pipe
should be as large or larger than discharge pipe.
Damp, non-ventilated locations should be avoided.
Motors require free circulation of air to aid in cooling.
Insure that the electrical supply available agrees with the
motor's voltage, phase and cycle, and that wire size is
adequate for the HP (KW) rating and distance from power
source. Motor must always be properly grounded. If cord
connected, use only a properly grounded outlet. Electrical
circuits must be protected by proper size ground fault
circuit interrupter (GFCI) as required by applicable
electrical codes. All electrical wiring must be performed
by qualified personnel, and must conform to local codes
and regulations.
including the following: Failure to follow instructions may result in injury.
SAVE THESE INSTRUCTIONS
STARTING AND PRIMING INSTRUCTIONS
Fill strainer housing with water to suction pipe level.
Never operate the pump without water. Water acts as a
coolant and lubricant for the mechanical shaft seal.
Open all suction and discharge lines and valves, as well
as air bleed (if available) on filter. (The air that is to be
displaced from the suction line must have some place to
go.)
CAUTION: All suction and discharge valves must be
open when starting the system. Failure to do so could
result in severe personal injury and/or property
damage.
Turn on power and allow a reasonable time for priming.
Priming time depends on suction lift and horizontal length
of suction piping. If the pump will not start, or will not
prime, see TROUBLE SHOOTING GUIDE on back page.
NOTE: NSPI-4 Article V, standard for above-ground and
on-ground pools, advises that components such as the
filtration system, pumps and heater be positioned so as to
prevent their being used as a means of access to the pool
by young children.
IS-1580-TL-98
Advertisement
Table of Contents

Related Manuals for Hayward Power-Flo LX


Summary of Contents for Hayward Power-Flo LX
- Page 1 IS-1580-TL-98 HAYWARD HIGH-PERFORMANCE PUMPS INSTALLATION AND OPERATING INSTRUCTIONS IMPORTANT SAFETY INSTRUCTIONS When installing and using this electrical equipment, basic safety precautions should always be followed, including the following: Failure to follow instructions may result in injury. READ AND FOLLOW ALL INSTRUCTIONS WARNING - To reduce risk of injury, do not permit children to use this product unless they are closely supervised at all times.
- Page 2 PART NUMBER DWG. MODEL MODEL MODEL DESCRIPTION REQ’D. SP-1575LXTL SP-1580X15TL SP-1580TL Bolt, No. 10-24 Hex. Head SPX1500-N2 SPX1500-N2 SPX1500-N2 Housing Cover SPX1580-BP SPX1580-BP SPX1580-BP Housing O-Ring SPX1580-Z-1 SPX1580-Z-1 SPX1580-Z-1 Impeller SPX1500-F SPX1500-L SPX1500-L Seal Assembly SPX1250-XZ-2 SPX1250-XZ-2 SPX1250-XZ-2 Pump Housing SPX1580-AAP SPX1580-AAP SPX1580-AAP...
-
Page 3: Seal Change
SEAL CHANGE INSTRUCTIONS Power Flo™ LX Series with Twist Lock Cord GENERAL Exercise extreme care in handling and installing the new seal and ceramic seat assembly. The lapped and polished surfaces may easily be damaged by dirt or scratching. For safety, all service must be performed with all power shut off. Remove pump and motor assembly from piping Press the new spring portion of the assembly system. - Page 4 See instructions. SERVICE & REPAIRS Consult your local authorized Hayward dealer or service center. No pumps or motors may be returned directly to the factory without the expressed written authorization of Hayward Pool Products, Inc. © 1998 Hayward Printed in U.S.A.
Need help?
Do you have a question about the Power-Flo LX and is the answer not in the manual?
Questions and answers
why does our pump stop pumping after one hour?