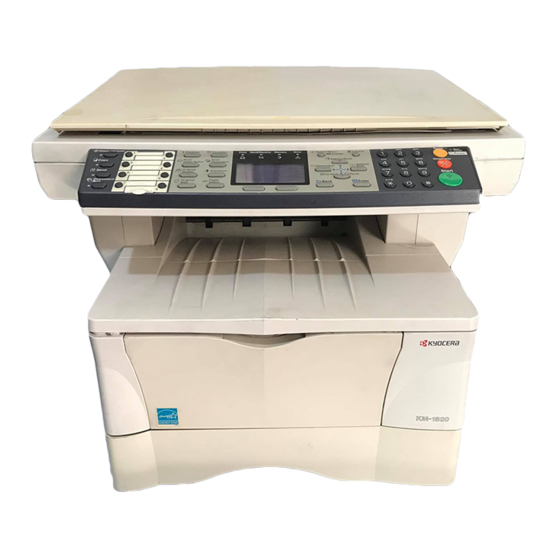
Kyocera KM-1820 User Manual
Kx driver operation guide rev. 6.50 for the km/cs-1820
Hide thumbs
Also See for KM-1820:
- Service manual (274 pages) ,
- Advanced operation manual (147 pages) ,
- Setup manual (34 pages)
Table of Contents
Advertisement
Advertisement
Table of Contents

Related Manuals for Kyocera KM-1820


Summary of Contents for Kyocera KM-1820
- Page 1 KX Driver User Guide...
-
Page 2: Legal Notes
Models supported by the KX printer driver KM-1820 FS-1118MFP CS-1820 The explanatory screens shown in this guide may differ from your printing system. Copyright © 2008 KYOCERA Corporation Copyright © 2008 Revised Edition KYOCERA MITA Corporation All rights reserved. TC Rev. 6.5... -
Page 3: Table Of Contents
Table of Contents Chapter 1 Installation Express Installation ........... . . 1-2 Windows XP and Vista . - Page 4 Manual Duplex Printing ..........3-5 Collate .
- Page 5 Edit Security Watermark ..........7-13 Delete Security Watermark .
-
Page 6: Installation
Installation 1 Installation A printer driver is an application that sends documents to a printer and manages communication between a printer and your computer. Install the printer driver from the supplied Product Library CD-ROM. Once installed, a variety of printer settings can be configured. - Page 7 To use the Custom method, see Custom Installation on page 1-3. Note: In Windows Vista, the Kyocera Scanner Driver and WIA driver are installed with the printer driver. Windows XP and Vista In Windows Vista, the installation dialog boxes have a slightly different appearance, but the steps are the same.
-
Page 8: Custom Installation
Installation Windows XP - USB The Installation Wizard page appears with this message: Installation Completed. Click Finish to exit the Printer Installation Wizard and return to the CD-ROM main menu. The installation of the printer is now complete. If prompted, restart your system. Custom Installation When using the Custom method you can specify the printer port and choose which software packages to install. -
Page 9: Windows Xp - Network Connection
Windows XP - Network Connection Installation In Printer Settings you can assign a name to the printing system. This is the name that appears in Windows Printers and Faxes and in the printer lists in applications. Here you can also choose to share this printer with others or set this printer as the default printer. -
Page 10: Windows Vista - Network Connection
Installation Windows Vista - Network Connection In the Custom Installation page, ensure that the KX Driver is selected as the product. If you intend to use the scanner, also check that the scanner driver is selected. To install fonts or utilities, click the Utility tab, and select from the options there. -
Page 11: Installing Optional Components
Windows Vista - Network Connection Installation To find a printing system already turned on and connected to the network, click Discover, select the printing system, and go to step If Discovery does not find your printing system, a message box appears. Ensure that your printer is properly connected by the network cable and that it is powered on, and then close the message box and retry Discovery. -
Page 12: Product Library Cd
Installation Windows Vista - Network Connection The Select Printer page appears. From the list, select the machine you want to install and click Next. The Select Components page appears. Select the components to install, and click Next. In any Select pages that appear make your selections and click Next. In the Confirm Settings page, click Install if the settings are correct. -
Page 13: Windows Vista Add Printer Wizard
Windows Vista - Network Connection Installation When the Completing the Add Printer Wizard page appears, installation of the printer driver is now complete. To close the Add Printer Wizard, click Finish. If prompted, restart your system. Windows Vista Add Printer Wizard This section describes how to install a printer driver using the Add Printer Wizard in Windows Vista. -
Page 14: Printer Properties
Printer Properties 2 Printer Properties This chapter contains the following sections: • Accessing Printer Properties • Installing Optional Devices • Administrator Settings • User Settings • Page Description Language (PDL) • Compatibility Settings • About Follow the steps below to set your preferred options as the default settings. These default settings can be changed temporarily when printing from Windows-based applications. -
Page 15: Auto Configure
Printer Properties Auto Configure Auto Configure detects the installed device options on the printing system if it is connected over a network. This button appears in the Device Settings > Properties tab. Auto Configure can detect printing system devices such as input devices, output devices, and hard disk size. -
Page 16: Device Options
Printer Properties When the Windows Security Alert dialog box appears, click Unblock to allow communication between the printing system and your computer. When you click Unblock, Auto Configure is added to the Windows Firewall > Exceptions > Programs and Services list. The Windows Firewall is accessed through the Control Panel. - Page 17 Printer Properties Users added in the printer driver should also be manually registered at the printing system’s operation panel. The settings selected here are applied to every print job sent from this computer. The available options are as follows: • Use specific login user name Select this option and type a user name and password to use the same user login for every print job.
-
Page 18: Job Accounting
Printer Properties The name and password are case-sensitive. The name and password can each be up to 64 alphanumeric characters. The user name is automatically filled in with the Login User Name by default, but can be changed. The user name can be up to 20 characters. -
Page 19: Administrator Password
Printer Properties the printer driver. For complete information about the job accounting features of the printing system, please see the Operation Guide for your particular model. Note: User login and job accounting cannot be used at the same time in the driver. Job accounting includes the following options: Use specific account ID: This option can be used to specify a single account ID to manage the print jobs of a specific user. -
Page 20: User Settings
Printer Properties Click OK. User Settings The following user information can be configured by selecting User in the Device Settings tab. • Identification • Units • Language Preference Identification In this dialog box, type user name and department information. In the Device Settings tab, click User. The User Settings dialog box appears. -
Page 21: Page Description Language (Pdl)
PDL in the Device Settings tab. You can choose from PCL XL, PCL 5e, KPDL (Kyocera Page Description Language), or PDF (Portable Document Format). The default is PCL XL, which is suitable for most printing purposes. After you select a PDL, the selection appears in the lower corner of the Preview image. - Page 22 Printer Properties Option Description Lets you print or save documents from multiple sources to Adobe PDF format. The PDF format is independent of the operating system and application software used to create documents. Output to PDF is a plug-in that lets you print or save documents from multiple sources to Adobe PDF format.
-
Page 23: Compatibility Settings
Printer Properties Options Description Security Settings Lets you select an encryption level and create passwords for the generated PDF file. To access the Security Settings dialog, follow these steps: 1. Open Printer Properties/Device Settings 2. Click on the PDL button 3. -
Page 24: About
Printer Properties In the Device Settings tab, click Compatibility. The Compatibility Settings dialog box appears. From the Media source enumeration list, select the paper supply method. The current value is listed in the Enumerated value box. Type a new Enumerated value for the media source and click OK. You can also restore all the parameters to the default by clicking Reset. -
Page 25: Plug-In
Printer Properties Plug-in To display installed plug-in modules, click Properties > Device Settings > About, or from any Printing Preferences tab, click About. Click Plug-in to view the following driver information: • Module • Description • Version Note: Adding or deleting plug-in modules can only be accessed from Properties > Device Settings. -
Page 26: Printing Basics
Printing Basics 3 Printing Basics This chapter describes the following printing tasks when printing from Microsoft Windows applications. • Basic Printing Tasks • Printing on Paper of Non-Standard Sizes • Manual Duplex Printing • Collate Basic Printing Tasks The steps required to print a document created with an application are explained below. - Page 27 Printing Basics In the Basic tab, click Page Sizes to open the Page Sizes dialog box. In the Select page size list, select a page size for the print job. Click OK to return to the Basic tab. For best results when printing on transparencies or recycled paper (the back side of paper which has already been printed on), from the Media type list select the media type.
- Page 28 Printing Basics In the Basic tab, click the Print Size list and select the preferred output paper size.4 Confirm the proper paper size is loaded. Click OK to return to the Print dialog box. Click OK to start printing. The source document is automatically scaled to fit the output paper size. Media Types The printing system automatically selects the paper size specified in the Page Sizes setting in the Basic tab by default when you are printing on regular paper.
-
Page 29: Printing On Paper Of Non-Standard Sizes
Printing Basics Load the paper in a paper cassette or the MP tray. Note: Use the MP tray in cassette mode (the default). For further details on media types and MP tray modes, refer to the printing system's Operation Guide. In the print application, select File >... -
Page 30: Manual Duplex Printing
Some Kyocera printing systems have a manual duplex setting in Printing Properties in the Basic tab. Instructions for using this method for manual duplex printing are below. -
Page 31: Collate
Printing Basics Select the Print on both sides (manual duplex) check box. Select Flip on Long Edge or Flip on Short Edge. Select Print manual duplex instructions to print an instruction sheet. Follow the printed instructions for placing the pages back into the cassette after the first side is printed. -
Page 32: Chapter 4 Layout
Layout 4 Layout In the Layout tab you can arrange document data on printed pages without changing the original document. • Multiple pages per sheet prints more than one document page on a single sheet. • Poster prints a large banner using several sheets of paper. •... -
Page 33: Poster
Layout • If Auto is selected, the pages are arranged from the top left corner to the bottom right corner. Select the Print borders check box to print a border around each document page.7 Poster You can print a document in a larger size than the paper supported for the printing system. -
Page 34: Scaling
Layout • Overlap edges Select this option to duplicate the edges of document data on adjoining sheets. Poster appearance is improved when the edges overlap slightly. Select the check box, then type or select a value between 0.00 and 1.20 inches (0.0 and 30.4 mm). -
Page 35: Chapter 5 Imaging
Description High quality Uses the highest printing system resolution. Proof Uses the second highest printing system resolution. Draft Uses a resolution of 600 dpi. Custom Choose your own combination of settings for Resolution, Kyocera image refinement, and EcoPrint. User Guide... -
Page 36: Custom Print Quality Settings
The Fonts feature lets you specify how TrueType fonts are sent to the printing system. The chosen method affects the speed and quality of the print job. Note: All of Kyocera's device fonts are TrueType fonts; do not disable them in the driver. - Page 37 Imaging Select one of the methods for sending TrueType fonts, and then click OK to save your selection: Fonts Option Description Download as outlines Best suited for large documents or print jobs using multiple fonts and font sizes. Print speeds are faster because of the optimization features in this setting.
-
Page 38: Font Substitution
Imaging Font Substitution With Substitute with device fonts selected as the font setting, click Fonts to open the Font Substitution dialog box. The System fonts list shows the fonts installed on your computer. The printing system fonts are listed in the Available device fonts list. Select the system font, and then the available device font to be substituted. -
Page 39: Pattern Scaling
Imaging Pattern Scaling Adjust the pattern scaling to improve visual compatibility between screen and print output. If printed patterns and fills do not match the appearance of that on the screen, use this feature to select a different print density. Pattern Scaling Option Description... -
Page 40: Halftone Screen
Imaging Halftone Screen An experienced user can adjust Halftone Screen settings to create shades of gray in graphic images. The Halftone Screen process breaks down the image into dots. Larger dots spaced close together create darker shades, and smaller dots spaced farther apart create lighter shades. - Page 41 Imaging Halftone Screen Option Description Shape Select the shape of the halftone dot. The choice for the best halftone shape depends on the pattern and number of colors for your image. Ellipse Resists optical jump, which is when areas of an image that should be smooth suddenly become darker.
- Page 42 Imaging Drag the Contrast slider right or left to increase or decrease proportion of light to dark in the graphic images of the print job. A high contrast setting decreases the grayscale spectrum, making light grays lighter and dark grays darker. A low contrast setting increases the grayscale spectrum, making light grays darker and dark grays lighter.
-
Page 43: Chapter 6 Publishing
Publishing 6 Publishing This section describes the Cover mode, Page insert, and Transparency interleaving features of the printer driver. When these options are used with the MP tray, cassette mode (the default setting) must be set. For further details, refer to the printing system's Operation Guide. -
Page 44: Cover Printing Options
Publishing Select the Cover mode check box. Select from the page arrangements described in the table below. Cover Printing Options Check Box Selection Cover Insertion Type Front Inserts a blank front cover. Front cover Front Prints on the outside surface of the front cover. Front Outside Front cover... -
Page 45: Edit Cover Printing Options
Publishing Check Box Selection Cover Insertion Type Prints on the inside surface of the back cover and Front and Back inserts a blank front cover. Back Inside Back cover Front cover Edit Cover Printing Options From the Media for cover list, select the media type or source cassette for the front and back covers. -
Page 46: Combinations
Publishing duplexing is not possible and is unavailable in the Basic tab.) To print on the front of the inserted page, enable the Print onto front check box. Check Box Options Page Insertion Types Page insert Inserts a blank page before the second page. Inserted page Page insert... -
Page 47: Transparency Interleaving
Publishing Transparency Interleaving Transparency interleaving inserts a page between each transparency in a print job to prevent damaging the transparencies. This function is only available when printing on transparencies supplied from the MP tray. On these inserted pages you can print the same content as for the transparencies. -
Page 48: Chapter 7 Advanced
Advanced 7 Advanced The Advanced tab contains special features that extend the capabilities of the printing system. Click the button at the left of the feature name to open a dialog box containing options for that feature. • Prologue/Epilogue inserts PRESCRIBE printing system language commands into specified pages or locations of a print job. -
Page 49: Select Prologue/Epilogue File To Insert
Advanced specific task), settings for printing system emulation, an electronic form, or a graphic object such as a logo or signature. You can add or delete command file names in the list, or select a file to edit. • To insert a command file into the print job and enable the features in the Prologue/Epilogue dialog box, select a file name from the list. -
Page 50: Insertion Point
Advanced Insertion Point Each file in the list can be assigned only one insertion point. Choose one of the following insertion point options: Unassigned The selected command file is not inserted into the print job. This is useful if the list contains several command files, and you want to print some but not others. -
Page 51: Watermark
Advanced If the Pages option is selected and you click OK without entering any numbers, you are prompted to specify page numbers. Watermark Use the Watermark feature to create, arrange, and print semitransparent text in the background of a document. You can choose one of the standard watermarks or create your own text. -
Page 52: Add Watermark
Advanced If the Only on specified pages option is selected and you click OK without entering any numbers, you are prompted to specify page numbers. Print onto front outside cover Select Print onto front outside cover to print the watermark on a separate front cover page before the document prints. - Page 53 Advanced Use the preview area and the Position or Angle features to adjust where the watermark prints on the page. Position Click the position button to change the position of the watermark without changing the angle. Position the cursor anywhere in the preview area. Click and hold as you move the mouse, adjusting the watermark image as you want it to appear on the printed page.
-
Page 54: Edit Watermark
Advanced Edit Watermark The Edit Watermark feature lets you select an existing watermark and make changes to its appearance and properties. For standard watermarks, the Watermark name and Watermark text cannot be changed. From the Select watermark list, select a watermark to edit. Click Edit to open the Edit Watermark dialog box. - Page 55 Booklet set to Off • Watermark set to Off • Poster set to Off • Kyocera Image Refinement set to Off • Resolution set to 600 dpi • EcoPrint set to Off • Monochrome Brightness and Contrast set to 0 The Select security watermark list is constrained to [None] if any of these settings are changed.
-
Page 56: Select Security Watermark
Watermark set to Off • Poster set to Off • Print Quality - Custom is constrained as follows: • Kyocera Image Refinement set to Off • Resolution set to 600 dpi • EcoPrint set to Off • Monochrome Brightness and Contrast set to 0. -
Page 57: Add Security Watermark
Advanced When printing is specified for the first page under Page Selection and Front outside is selected In the Publishing tab, Print onto front outside cover is automatically selected by the driver. (Even though the check box shows as selected, the option is disabled.) If you want, in the Publishing tab you can also select different media for the covers than that used for the rest of the print job. -
Page 58: Additional Options
Advanced To add the new custom security watermark, click OK. To quit the dialog box without saving the watermark, click Cancel. Additional Options Fonts Select a font for the new watermark from the Font list. The Security Watermark feature uses only TrueType fonts. Select a font Size and Style. To adjust the Angle of the text on the page, select from the list. - Page 59 Advanced Adjust Calibration Use this option to set and make adjustments to the Pattern shading and Text contrast for each individual security watermark. You can print sample calibrations to help you determine the appearance of the security watermark. The quality and effectiveness of the printed and photocopied security watermark is dependent on the particular printing system and the settings used.
-
Page 60: Edit Security Watermark
Advanced Edit Security Watermark The Edit Security Watermark feature lets you select an existing watermark and make changes to its appearance and properties. For standard security watermarks, the Security watermark name and Line 1, 2, and 3 text cannot be changed. From the Select security watermark drop-down list, select a watermark to edit. -
Page 61: Chapter 8 Profile
Profile 8 Profile This feature lets you save printer driver settings as a profile. You can select multiple options in the Printing Preferences tabs, save them to a profile, and use all of them at once when you apply the profile. For example, you can save a profile with selected options for Print on both sides, landscape, and rear tray destination. -
Page 62: Edit Profile
Profile Type a Name for the profile, select an Icon, and type an optional Description. The name can be up to 31 characters, the description can be up to 255 characters. Click OK to save the profile. Click Apply to activate the selected profile to the current print job. Note: To reset the printer driver to default settings, select the Factory Default profile and click Apply. -
Page 63: Delete Profile
Profile Delete Profile In the Printing Preferences dialog box, at the bottom of any tab, click Profile. In the Profile dialog box, click Import. The Import Profile dialog box appears. Select profiles and click Delete. Click Yes to delete the profiles. Import and Export Profile You can export and save a profile on your computer and transfer it to other computers, then use it with other printing systems. -
Page 64: Glossary
Shading can be varied by adjusting the number of rows of dots, the angle at which rows of dots are placed, and the shape of the dots. Kyocera image refinement Imaging feature that smoothes the edges of text and vector graphics. - Page 65 25 times larger than the original document size. PRESCRIBE Kyocera's Scripting language that you can use to embed commands into specified locations in a print job. See also Prologue/Epilogue. Profile A set of user defined driver settings that you save as a group.
-
Page 66: Index
Index About EcoPrint 5-2 Plug-in 2-12 EMF spooling 7-13 Version 2-11 About (dialog box) 2-11 Accessing Printer Properties 2-1 Fast printing 5-5 Add Printer Wizard 1-8 Firewall 2-3 Administrator Settings 2-3 Font Substitution 5-4 job accounting 2-5 Fonts 5-2 password 2-6 native download 5-3 Advanced tab 7-1 Found New Hardware Wizard 1-1... - Page 67 Kyocera Image Refinement 5-2 PDF 2-9 Security Settings, passwords 2-10 settings 2-9 PDL 2-8 Language Preference Selection 2-7 PDL settings 2-1 Layout 4-1 Plug-in 2-12 License Agreement 1-1 – Poster 4-2 assembly marks 4-3 crop marks 4-3 settings 4-2 Macros 7-1...
- Page 68 Transparency 3-2 Version 2-11 Transparency Interleaving 6-5 Vista 1-2 Unit of Measurement 2-7 Watermark 7-4 – USB 1-1 add watermark 7-5 User login 2-3 additional text options 7-5 User Settings 2-7 delete watermark 7-7 Identification 2-7 edit watermark 7-7 language preference 2-7 page selection 7-4 measurement 2-7 Windows 2000 1-1...
- Page 69 91194 GIF-SUR-YVETTE Denmark France Telephone: +45.5687.1100 Telephone: +33.1.6985.2600 Kyocera Mita Espana S.A. Kyocera Mita Portugal, IDA. Edificio Kyocera, Avda de Manacor No. 2 Rua do Centro Cultural, 41 (Alvalade) 1700-106 28290 Las Matas (Madrid) Lisbon, Spain Portugal Telephone: +34.91.631.8392 Telephone: +351.21.842.9100 Kyocera Mita Finland OY Kyocera Mita South Africa (PTY) LTD.
- Page 70 Kyocera Mita Australia Pty, LTD. Kyocera Mita Hong Kong, LTD. Level 3, 6-10 Talavera Road, North Ryde, 11/F Mita Centre N.S.W. 2113 Australia 552-566, Castle Peak Road Telephone: (02) 9888.9999 Tsuen Wan, New Territories, Hong Kong Telephone: 24297422 Kyocera Mita New Zealand, LTD.
- Page 71 KYOCERA MITA CANADA, LTD. 6120 Kestrel Road, Mississauga, Ontario L5T 1S8, Canada Telephone: (905) 670.4425 Fax: (905) 670.8116 KYOCERA MITA AMERICA MEXICO, S.A. DE C.V. Av. 16 de Septiembre #407 Col. Santa Ines Azcapotzalco Mexico, D.F. 02130, Mexico Telephone: (55) 5383.2741...
- Page 72 6.5_2008.04.18...
Need help?
Do you have a question about the KM-1820 and is the answer not in the manual?
Questions and answers