Kyocera Fax Operation Manual
Kyocera fax system operation guide
Hide thumbs
Also See for Fax:
- Operation manual (146 pages) ,
- Service manual (97 pages) ,
- Service manual (372 pages)
Table of Contents
Advertisement
Advertisement
Table of Contents
Troubleshooting

Related Manuals for Kyocera Fax


Summary of Contents for Kyocera Fax
- Page 1 FAX System (K) Operation Guide...
-
Page 3: Table Of Contents
Entering Fax Information (Local Information) ........ - Page 4 Initial FAX System Settings ........
-
Page 5: Fax System
1. This equipment complies with Part 68 of the FCC rules and the requirements adopted by the ACTA. On the rear side of the equipment to install FAX System (K) is a label that contains, among other information, a product identifier in the format US:AAAEQ##TXXXX. If requested, this number must be provided to the telephone company. - Page 6 10. The Telephone Consumer Protection Act of 1991 makes it unlawful for any person to use a computer or other electronic device, including FAX machines, to send any message unless such message clearly contains in...
-
Page 7: Important Safety Instructions
IMPORTANT SAFETY INSTRUCTIONS IMPORTANTES MESURES DE SECURITE OPERATION GUIDE When using your telephone equipment, basic safety precautions should always be followed to reduce the risk of fire, electric shock and injury to persons, including the following: CAUTION: To reduce the risk of fire, use only No.26 AWG or larger UL listed or CSA certified telecommunication line cord. -
Page 8: Specifications
CANADIAN IC REQUIREMENTS CONDITIONS DE L'IC CANADIENNE Safety Instructions Regarding the Disconnection of Power "This product meets the applicable Industry Canada technical specifications" "The Ringer Equivalence Number is an indication of the maximum number of devices allowed to be connected to a telephone interface. The termination on an interface may consist of any combination of devices subject only to the requirement that the sum of the RENs of all the devices does not exceed five."... -
Page 9: Legal And Safety Information
WE SHALL HAVE NO LIABILITY FOR LOSS, WHETHER OR PARTIAL, OF RECEIVED DOCUMENTS WHEN SUCH LOSS IS CAUSED BY DAMAGES TO THE FAX SYSTEM, MALFUNCTIONS, MISUSE, OR EXTERNAL FACTORS SUCH AS POWER OUTAGES; OR FOR PURELY ECONOMIC LOSSES OR LOST PROFITS RESULTING FROM MISSED OPPORTUNITIES ATTRIBUTABLE TO MISSED CALLS OR RECORDED MESSAGES RESULTING THEREFROM. - Page 10 viii Symbols symbol indicates that the related section includes safety warnings. Specific points of attention are indicated inside the symbol..[General warning] ... [Warning of danger of electrical shock] ... [Warning of high temperature] symbol indicates that the related section includes information on prohibited actions.
-
Page 11: Important! Please Read First
Important! Please Read First. OPERATION GUIDE This Operation Guide includes information on using the facsimile functions of this machine. Be sure to read the Operation Guide as well. Keep both guides near the machine for ready reference. During use, refer to the Operation Guide for your machine to obtain the following information. -
Page 12: Installation Precautions
Installation Precautions Power supply/Grounding the product Precautions for Use Do not connect this product to the same outlet as an air conditioner or copier, etc. • Do not open the top cover, turn off the power switch, or pull out the power plug while transmitting, receiving, or copying. -
Page 13: Menu Flowcharts
Chapter 5: Advanced Functions Describes more advanced fax functions. Chapter 6: Network Fax Describes the setup procedure and how to prepare the FAX System for network fax. Chapter 7: FAX System Settings Describes mechanical and functional settings and usage reports. -
Page 14: Conventions
Conventions Convention Italic Typeface Notes Important Caution Warning This manual uses the following conventions: Description Used to emphasize a key word, phrase, or message. (Also used to indicate references to other manuals.) Additional or useful information about a function or feature. May contain references to other manuals. -
Page 15: Operation Panel
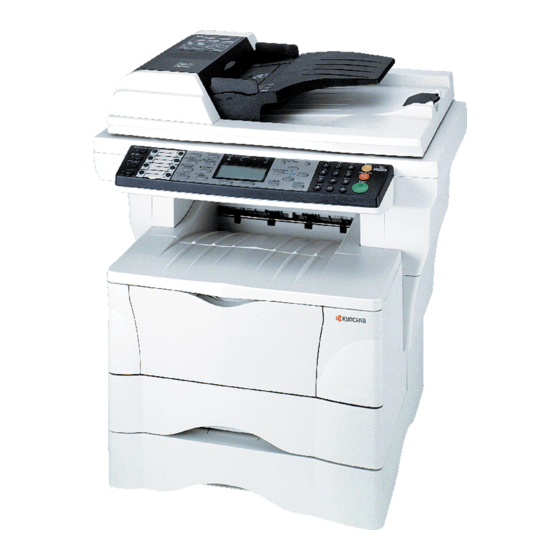
OPERATION GUIDE 1 FAX System Parts This chapter identifies and describes FAX System parts and Operation Panel keys: • FAX System... 1-2 • Operation Panel ... 1-3... -
Page 16: Fax System
Document Processor (Option) Automatically feeds and scans multiple sheet documents. IMPORTANT: Keep in mind that documents cannot be received when the main power switch is off ( ). Press the Power key to turn off the FAX System. OPERATION GUIDE... -
Page 17: Operation Panel
The Status/Job Cancel indicator remains on while in Status/Job Cancel mode. Send Key and Indicator Press this key to enter Send mode for fax and scanning. The Send indicator remains on while in Send mode. Document Box Key and Indicator Press this key to enter Document Box mode. - Page 18 Reset/Power Key Press this key to cancel the setting and return to the basic screen. Hold the key for more than 2 seconds to turn the FAX System into Auto Sleep. Original Quality Key and Indicator Press this key to set the document image quality.
- Page 19 Press this key to move the cursor down on the message display or to place the FAX System in off-hook mode when transmitting/ receiving the fax manually. You also can use this key to insert a pause when entering another party’s number.
- Page 20 FAX System Parts OPERATION GUIDE...
-
Page 21: Preparing To Fax
OPERATION GUIDE 2 Preparing to Fax Perform the required settings described in this chapter before sending a fax for the first time. This chapter discusses the following topics: • Menu Table... 2-2 • Selecting the Line Type (Inch Model Only)... 2-3 •... -
Page 22: Menu Table
Hour: 00 – 23 Minute: 00 – 59 Second: 00 – 59 to select the menu/ Reference Description Set up the FAX System page 2-3 for the line type corresponding to the telephone service. Set up printing details for page 2-4 the Transmit Terminal Identifier (TTI). -
Page 23: Selecting The Line Type (Inch Model Only)
Selecting the Line Type (Inch Model Only) OPERATION GUIDE Choose the line type corresponding to your telephone service. Note that the FAX System cannot send or receive faxes if this setting is incorrect. Press System Menu/Counter. Press to select FAX Setting. Press Enter. -
Page 24: Configuring Tti Settings
TTI (Transmit Terminal Identifier) information identifies the time of transmission, number of pages, and your station name and fax number. It can be sent automatically to the other party’s FAX System to be printed on the faxed document. This FAX System lets you choose whether to send TTI information. -
Page 25: Entering Fax Information (Local Information)
Entering your fax number Entering your station name OPERATION GUIDE Enter identifying information about your station (fax number, station name, and station ID) here to send this information to the other party automatically (it will be printed on the faxed documents). - Page 26 The local station ID is used for secure communications involving passwords. For more information, refer to Password-based Communications on page 5-31. Press to select Local FAX ID. Press Enter. Use the numeric keys to enter a four-digit station ID. Press Enter to complete the station ID setting.
-
Page 27: Setting The Current Date And Time (Date & Time Setting)
Setting the Current Date and Time (Date & Time Setting) Setting the time zone Setting date and time OPERATION GUIDE Set the date and time to appear in the message display. Confirm that the date and time set here are correct (they will serve as the basis for all scheduled transmissions). - Page 28 Press to set the current hour. Press Press to set the current minute. Press Press to set the current second. Press Enter to complete the time setting. Press right Select to return to the basic screen. Time Setting Hour Min. Second Time Zone Estn Time) Cancel...
-
Page 29: Basic Operation
• Menu Table... 3-2 • Sending Documents ... 3-4 • Select the Original Size ... 3-13 • Select the Size for Fax ... 3-14 • Zoom Transmission ... 3-15 • Continuous Scanning ... 3-16 • Automatic Fax Reception ... 3-17 •... -
Page 30: Menu Table
(Numerical Entry) Menu – to select the menu/ Description Add a destination to the Address Book. Enter recipient names. Enter destination fax numbers. Assign addresses. Enter subaddresses. Enter subaddress passwords. Set up encrypted communication. Select the encryption key. Set up an encryption box. - Page 31 Main Menu Sub Menu1 Edit Address Menu † book Edit Address (Group book Selection) (Group † Selection) Select †. Press right OPERATION GUIDE Sub Menu2 Options Add Address – (Text Entry) (Assigning Members) 001 – 120 † Detail (Text Entry) (Editing Members) Menu...
-
Page 32: Sending Documents
Memory transmission mode The FAX System scans the original document into memory before dialing the other party’s fax number. You can choose multiple recipients in this convenient mode. When the FAX System finishes scanning the original document into memory, the document is ejected while transmission is underway. - Page 33 The scan resolution is set to 200 × 200 Fine. Document exposure must be set manually. Select this mode if the original contains mainly text. For fax transmissions, this setting is equivalent to Text. For fax transmissions, this setting is equivalent to Text.
- Page 34 (e.g. 300 × 300 is changed to 200 × 400 Sup Fine.) when you select fax as a destination. In addition, if you choose Photo in original quality setting, the resolution is fixed to 200 × 200 Fine.
- Page 35 Destination. NOTE: If you select FAX in the initial destination settings, the message display changes to a fax number entry screen when you enter the first fax number using the numeric keys. For details, refer to the Advanced Operation Guide.
- Page 36 To configure the detailed transmission settings such as subaddresses, perform the procedure given in Detailed Transmission Settings on page 3-8. Besides entering the other party’s fax number using the numeric keys, you can dial using the following methods: • Dialing from the Address Book...page 3-24 •...
- Page 37 Press Enter. Enter the number for Password. Press Enter. Press Enter to return to the destination fax input screen. Enter the encryption key and encryption box for encrypted communication. For details on encrypted communication, refer to chapter 5 Advanced Functions.
-
Page 38: Encryption Box
Press Enter. NOTE: When sending the documents to the same model as the FAX System in encrypted communication, be sure the encryption box setting is set to Off. Press Enter to return to the destination fax input screen. - Page 39 Press to select the desired initial communication speed. Press Enter. Press Enter to return to the destination fax input screen. Select whether to use ECM (Error Correction Mode) when sending documents. Press right Select on the destination fax input screen.
- Page 40 Basic Operation Press Enter to return to the destination fax input screen. 3-12 OPERATION GUIDE...
-
Page 41: Select The Original Size
Select the Original Size OPERATION GUIDE The original size is the physical size of the original. Since this setting defines the area to be scanned, it must match the physical size of the original. The following sizes are supported: Letter, Legal, Statement, A4, A5, A6, B5, B6, Folio, OficioII, Executive, ISO B5, 16K, Envelope #10, Envelope #9, Envelope Monarch, Envelope #6, Envelope C5, Envelope DL, Hagaki, Oufukuhagaki, Youkei 2, Youkei 4, and Custom... -
Page 42: Select The Size For Fax
OficioII, Executive, ISO B5, 16K, Envelope #10, Envelope #9, Envelope Monarch, Envelope #6, Envelope C5, Envelope DL, Hagaki, Oufukuhagaki, Youkei 2, Youkei 4, and Custom NOTE: When sending fax, we recommend you to select Same as Original. Press Send. Press Function. -
Page 43: Zoom Transmission
100% Auto OPERATION GUIDE Follow these steps to scan the document in enlarged or reduced format for fax. The following zoom options are available. Mode Fax at original size. Automatically adjust the size as faxed to match the document size. -
Page 44: Continuous Scanning
Continuous Scanning 3-16 Use Continuous Scan to send multiple original document placing on the platen. NOTE: For instructions on using continuous scanning mode, refer to Sending Documents on page 3-4. Press Send. Press Function. Press to select Continuous Scan. Press Enter. Press to select On. -
Page 45: Automatic Fax Reception
Delayed delivery If received documents cannot be output because the FAX System has run out of paper or due to paper jam, the FAX System will temporarily store received documents in memory. The documents are printed later when printing becomes available. -
Page 46: Canceling Memory Transmission
Perform the following procedure to cancel the transmission. Press Send. The Send indicator is lit and the FAX System enters Send mode. The transmission status is shown on the message display. Confirm the details. - Page 47 OPERATION GUIDE Press left Select or Stop/Clear to stop transmission. Any documents placed in the document processor are ejected. Scanning. Job No. 0007 Job No.: Cancel 3-19...
-
Page 48: Entering Characters
Entering Characters Input screen and key functions 3-20 To edit Address book, etc., the characters are entered using the numeric keys. To move the cursor, use This section explains screen elements and the functions of keys on the control panel during character entry. Contact Name h_offic Cancel... - Page 49 Character Input Modes Mode Alphabetic/Symbol Text Numeric Text Symbol Text Symbols List of Character Assignments OPERATION GUIDE Back key Press this key to go one level back (higher) from the current menu. Press this key to move the cursor up in the message display. Press this key to move the cursor down in the message display.
-
Page 50: Character Input Procedure
Character Input Procedure 3-22 Input mode Alphabetic/Symbol Numeric Alphabetic/Symbol Numeric Alphabetic/Symbol Numeric Alphabetic/Symbol Numeric Alphabetic/Symbol Numeric Alphabetic/Symbol Numeric Alphabetic/Symbol Numeric Alphabetic/Symbol Numeric Alphabetic/Symbol Numeric Alphabetic/Symbol Numeric Alphabetic/Symbol/Numeric Follow the steps given below to enter characters for destination names and other text input. This example uses the List of Character Assignments on page 3-21 to enter the destination name (h_office show room). -
Page 51: Contact Name
OPERATION GUIDE The following procedure illustrates how to enter a destination name. (You must first access the Contact Name screen.) The procedure for accessing the Contact Name screen is described on page 3-25. Press the key 2 times. h is displayed. Press the key 4 times. -
Page 52: Address Book
Scan to PC. To select a fax destination from the Address Book, perform the following procedure. Press Send. The Send indicator is lit, and the FAX System enters Send mode. Press Address Book. -
Page 53: Search(Name)
Press Enter. After confirming the information to be entered, press Enter to add the party. To enter fax recipients in the Address Book, perform the following procedure. Press System Menu/Counter. Press to select Edit Addressbook. Press Enter. - Page 54 Name. Press right Select. Enter the destination name. Press Enter. NOTE: For detailed information on entering characters, refer to Entering Characters on page 3-20. Press to display FAX Number. Press right Select. Add Address Contact Group Cancel Detail Contact Name...
- Page 55 OPERATION GUIDE Enter the fax number using the numeric keys. Press Stop/Clear to delete the entire number. Press pause to insert a 3- second pause when dialing the fax number. Use this function to set a wait time in an automatic response sequence.
- Page 56 To enter another destination, repeat steps 3 to 14. Press left Select to complete the entry. The message display returns to the basic screen. When entering fax number, you can also configure settings for the subaddress, encrypted communication, transmission speed, and ECM communication.
- Page 57 Enter the number for Subaddress. Press Enter. Enter the number for Password. Press Enter. Press Enter to return to the destination fax input screen. Setting up encrypted communication Enter the encryption key and encryption box for use in encrypted communication.
- Page 58 Press Enter. NOTE: When sending the documents to the same model as the FAX System in encrypted communication, be sure the encryption box setting is set to Off. Press Enter to return to the destination fax input screen.
- Page 59 Press to select the desired initial transmission speed. Press Enter. Press Enter to return to the destination fax input screen. Setting up ECM communication For fax communication, enables or disables ECM (Error Correction Mode). Press right Select on the destination fax input screen.
-
Page 60: Editing Destinations In The Address Book
On or Off. Press Enter. Select On to enable ECM communication. Press Enter to return to the destination fax input screen. Edit destinations in the Address Book as follows: Press System Menu/Counter. Press to select Edit Addressbook. Press Enter. - Page 61 Deleting Destinations from the Address Book Entering Group Destinations in the Address Book OPERATION GUIDE To edit another destination, repeat steps 3 to 5. Press left Select to save your changes and return to the basic screen. Delete destinations from the Address Book as follows: Press System Menu/Counter.
- Page 62 3-34 Press to select Group. Press Enter. Press to select Group Name. Press right Select. Enter a group name. Press Enter. NOTE: For more information on entering characters, refer to Entering Characters on page 3-20. Press to select Group Member. Press right Select. Add Address Contact Group...
- Page 63 OPERATION GUIDE Press right Select. Press to select Add Member. Press Enter. Press to select the destination to register to the group. Press Enter. Press Enter. To delete a registered member, press to select the member. Press right Select. Group Member Exit Menu Menu...
-
Page 64: Menu : Detail
3-36 Press to select Delete. Press Enter. Repeat steps 9 to 14 to register other destinations to the group. When you are finished registering group destinations, press left Select. Press to display Address Number. Press right Select. Enter the address number to register using the numeric keys. - Page 65 Editing Group Destinations in the Address Book Deleting Group Destinations from the Address Book OPERATION GUIDE Press Enter. Press left Select to return to the basic screen. Edit group destinations in the Address Book as follows: Press System Menu/Counter. Press to select Edit Addressbook.
- Page 66 3-38 Press to select the group destination to delete. Press right Select. Press to select Delete. Press Enter. Press left Select. To delete another group destination, repeat steps 3 to 5. Press left Select to confirm the deletions and return to the basic screen. Menu Detail/Edit Delete...
-
Page 67: Address Recall
Refer to Redial on page 7- 10 for more information. If the other party’s fax machine fails to respond to a transmission or if you want to transmit another fax to the same party, press to view the most recently dialed number. - Page 68 Basic Operation 3-40 OPERATION GUIDE...
-
Page 69: Basic Functions
Broadcast Transmission... 4-4 • Direct Transmission... 4-7 • Interrupt Transmission... 4-8 • Timer-based Transmission ... 4-9 • Deleting a Job in Memory...4-11 • Manual Fax Transmission ... 4-13 • Manual Fax Reception ... 4-14 • One-Touch Keys... 4-15 • Programs... 4-23... -
Page 70: Menu Table
Menu Table Main Menu Sub Menu1 Common One Touch Setting Keys Common One Touch Setting Keys Common One Touch Setting Set. Program (Program Setting Selection) Program (Program Setting † Selection) Select †. Press right For the system setting menu using in this chapter, refer to the Menu Table below. -
Page 71: Standby Transmission
Standby Transmission OPERATION GUIDE Standby Transmission refers to loading another job while the FAX System is processing the current job. After the destination fax number is entered and the documents are loaded, the documents are faxed automatically when the current job is completed. -
Page 72: Broadcast Transmission
The FAX System temporarily stores the documents to be faxed in memory, then automatically dials the fax numbers and transmits a copy to each destination. NOTE: Up to 100 destinations can be set for Broadcast Transmission. - Page 73 Press Enter. Press to select the destination party. Press Enter. Press to select the destination fax number. Press Enter. Repeat steps 1 to 3 until all desired destination fax numbers have been specified. to select Address Book ABCDE FGHIJ Cancel Menu...
- Page 74 Basic Functions Press Start to start fax. OPERATION GUIDE...
-
Page 75: Direct Transmission
If another page is not loaded within 15 seconds after the alarm (or within the time set for Auto Reset), the FAX System assumes that the job has no other pages and ends the fax transmission. -
Page 76: Interrupt Transmission
You can use one-touch dial, Address Book, or chain dial to enter the destination fax number. Press Start to start dialing the destination fax number. The FAX System begins loading the document after establishing a connection. FAX Direct TX Cancel... -
Page 77: Timer-Based Transmission
The fax memory can hold up to 30 jobs for timer-based transmission at once. Be sure that the correct time is set for the FAX System before sending faxes using this method. To adjust the time, refer to Setting the Current Date and Time (Date &... - Page 78 Min. Press Enter. Press right Select. Enter the destination fax number. You can use one-touch dial, Address Book, or chain dial to enter the destination fax number. Press Start to start loading the document and transmit the document at the time specified.
-
Page 79: Deleting A Job In Memory
Deleting a Job in Memory Reviewing the transmission details of jobs in memory Deleting a Job in Memory OPERATION GUIDE Enables reviewing or deleting jobs in memory. Check the details of jobs in memory. Press Status/Job Cancel. Press to select Scheduled Job. Press Enter. Press to select the job whose transmission details to review. - Page 80 4-12 Press to select the job to delete. Press left Select. Press left Select once again. The selected job is deleted. Press Reset to return to the basic screen. Scheduled Job 0011 Broadcast 0017 0324256345 0018 0756545865 Cancel Menu Cancel Job. Are you sure? 0017 OPERATION GUIDE...
-
Page 81: Manual Fax Transmission
Sending documents without talking to the other party Place the original documents to transmit in the document processor or on the platen. Press Send. Press On-Hook. Enter the destination number. When the other party’s fax machine responds, press Start to start fax. 4-13... -
Page 82: Manual Fax Reception
Start. Use this mode to talk to the other party before receiving their fax transmission. NOTE: To receive documents manually, set Manual as described in Fax Reception Mode on page 7-14. When an incoming call arrives, the telephone connected to the FAX System will ring. -
Page 83: Setting Up One-Touch Keys
OPERATION GUIDE To send documents to frequent recipients more convenient, assign one- touch keys to fax and scanning destinations in the Address Book. You can also set one-touch keys for chain dialing. One-touch keys can be used to recall destinations or programs. - Page 84 Press Enter. Press to select the destination fax number. Press Enter. If you try to assign a one-touch key that’s already assigned, a dialogue will ask if you want to overwrite the one already assigned.
- Page 85 Checking Details of Assigned Keys Clearing Assigned Keys OPERATION GUIDE Perform the following procedure to check destinations assigned to one- touch keys. Follow steps 1 to 3 in Assigning Destinations on page 4-15. Press to select the one- touch key to check (1-8). Press right Select.
-
Page 86: Chain Dial
Press left Select to clear the destination previously assigned. Press left Select to return to the basic screen. Perform the following procedure to send a fax using one-touch keys. Press a one-touch key previously assigned to a destination. Press Start to begin sending the fax. - Page 87 Checking Details of Assigned Keys OPERATION GUIDE Press System Menu/Counter. Press to select Common Setting. Press Enter. Press to select One Touch Keys. Press Enter. Press to select an unassigned number for a one- touch key. Press Enter. The one- touch key number is displayed as ---.
- Page 88 Clearing Assigned Keys 4-20 Press to select the one- touch key to check (1-8). Press right Select. Press to select Detail. Press Enter. Press Enter. Press left Select to return to the basic screen. Perform the following procedure to clear numbers assigned for chain dialing with one-touch keys.
- Page 89 Press the one-touch key set up for chain dial. Press the one-touch key assigned to a recipient. Press Start to begin sending the fax. Chain dial key + Address Book Press a one-touch key previously set up for chain dial.
- Page 90 Press Enter. Press to select the number. Press Enter. Press Start to begin sending the fax. Chain dial key + numeric keys Press a one-touch key previously set up for chain dial. Press to select FAX No. Entry. Press Enter.
-
Page 91: Programs
Stores combinations of frequently used destinations and functions as programs. Up to eight programs can be stored; up to four of these can incorporate fax or scanning functions. One-touch keys can be used to recall destinations or programs. For more information, refer to Setting Up One-Touch Keys on page 4-15. -
Page 92: Recalling Programs
Recalling Programs 4-24 Press System Menu/Counter. Press to select Program Setting. Press Enter. Press to select the program number to delete. Press right Select. Press to select Delete. Press Enter. Press left Select to delete the program. Press left Select to return to the basic screen. Perform the following procedure to recall programs. -
Page 93: Advanced Functions
Remote Switching ... 5-5 • Polling Communication... 5-7 • Subaddress Communications ...5-11 • Subaddress-based Confidential Communications ... 5-12 • Fax Forwarding ... 5-24 • Password-based Communications... 5-31 • Encrypted Communication ... 5-38 • E-mail Notification of Job Results... 5-45 •... -
Page 94: Menu Table
Menu Table Main Menu Sub Menu1 FAX Setting FAX RX Setting Doc. Box Polling Setting Setting Sub Address For the system setting menu using in this chapter, refer to the Menu Table below. To access the system setting menu, press System Menu/Counter. - Page 95 5-27 forwarding. Schedule when page 5-27 forwarding starts. Schedule when page 5-27 forwarding ends. Print from the FAX page 5-29 System during forwarding. For designating the file page 5-29 format to forward. For fax forwarding (On/ page 5-30 Off).
- Page 96 Select †. Press right ††. If a password is set, it must be entered Sub Menu2 Options TX/RX (Numerical Restrict. Entry of Fax No.) (Numerical Entry of Fax No.) – 0000 – 9999 0000 – 9999 – User Permit List, Off...
-
Page 97: Receiving Faxes Remotely
Receiving Faxes Remotely OPERATION GUIDE Remote switching lets you receive faxes by forwarding the fax signal from a telephone connected to the FAX System. This function is convenient if you are using a regular phone at another location, allowing you to use that phone to receive faxes as well. - Page 98 Pick up the receiver. If you hear a fax tone, dial the two-digit remote switching number. NOTE: The default remote switching number is 55. The incoming fax will be switched to the FAX System, and reception will start automatically. OPERATION GUIDE...
-
Page 99: Polling Communication
Polling Communication Storing Documents for Polling OPERATION GUIDE With polling, fax transmissions are initiated by the recipient, not the sending party. The recipient can receive the fax at him/her convenience. NOTE: Polling generally incurs telephone charges for the receiving party, since they must make a call to receive the fax. - Page 100 Press left Select to return to the document box basic screen. Perform the following procedure to print documents stored in polling box: Press Document Box. Press to select FAX Polling Box. Press Enter. Press to select the file to print. Press Enter.
-
Page 101: Receiving Documents By Polling
Press Enter. Press left Select to delete the selected file. Press left Select to return to the document box basic screen. In polling reception, calling another fax machine triggers transmission of documents stored on that machine. Press Send. Press Function. -
Page 102: Polling Transmission Settings
Polling Transmission Settings 5-10 Press to select FAX RX Polling. Press Enter. Press to select On. Press Enter. Press right Select. Enter the other party’s fax number. To enter the number, use the one-touch dial keys, the Address Book, or chain dial keys. -
Page 103: Subaddress Communications
The FAX System uses subaddresses as well as passwords for subaddress communication. Subaddresses When specifying a receiving party to receive a confidential fax, you must enter their subaddress, just as they must specify yours when sending to you. Subaddresses must also be specified for subaddress boxes where confidential faxes are received. -
Page 104: Subaddress-Based Confidential Communications
Confidential fax protects document confidentiality when you do not want unauthorized parties to view certain documents. If subaddresses are used for confidential fax, the faxed documents are not printed after reception. Instead, they are stored in subaddress boxes. Documents in subaddress boxes can be printed later when the appropriate party specifies them. -
Page 105: Modifying Subaddress Boxes
Modifying Subaddress Boxes OPERATION GUIDE Enter the subaddress of the box to set up. Press Enter. Enter the box name. Press Enter. NOTE: For instructions on entering characters, refer to Entering Characters on page 3-20. Use the numeric keys to enter the box number. - Page 106 5-14 If the box is password-protected, use the numeric keys to enter the password. Press Enter. Changing Subaddresses Change subaddresses as follows: Press to display Sub Add. Entry. Press right Select. Use the numeric keys to enter the new subaddress. Press Enter. Renaming Boxes Change box names as follows: Press...
- Page 107 OPERATION GUIDE Changing Passwords Perform the following procedure to change the passwords used to print from subaddress boxes or to change box settings: Press to display Password. Press right Select. Use the numeric keys to enter the password. Press Enter. Re-enter the password for confirmation.
- Page 108 5-16 Press to enter the box number. Press Enter. Changing Users Change users as follows: NOTE: This setting is displayed only when user login is specified. Press to display User Name. Press right Select. Press to select the user. Press Enter. Changing Usage Restrictions These boxes are displayed only when the user registered in User Name is logged in.
-
Page 109: Deleting Subaddress Boxes
Deleting Subaddress Boxes OPERATION GUIDE Press to display Permission. Press right Select. Press to select All or User Only. Press Enter. Choose All to allow all user to access this subaddress box. Choose User Only to allow the only user to access this subaddress box. -
Page 110: Paper Setting For Printing From Boxes
For example, if you use this setting to assign a desired paper cassette to Custom 1, that paper cassette will be used for printing. NOTE: This setting is displayed only when the FAX System is equipped with an optional paper cassette. Press System Menu/Counter. Press to select Doc. - Page 111 NOTE: Before sending, confirm the recipient’s subaddress specified for the target subaddress box. If the recipient’s fax machine requires you to enter a password, confirm the password as well. Place the original documents into the document processor or on the platen.
- Page 112 Enter the password and press Enter. NOTE: You will be prompted to enter a password only if such is required by the other party’s fax machine. Press Enter. Press Enter to return to the basic screen. Press Start to load stored documents from memory.
- Page 113 Editing Documents from Subaddress Boxes OPERATION GUIDE To print all documents in the box, press right Select. On the next screen, press to select Print All File. Press Enter. Press Start to print all documents in the box. NOTE: Document data remains in subaddress boxes after printing. To delete the document data, refer to Deleting Documents from Subaddress Boxes on page 5-22.
-
Page 114: Printing Lists Of Subaddress Boxes
Deleting Documents from Subaddress Boxes Printing Lists of Subaddress Boxes 5-22 Perform the following procedure to delete documents from subaddress boxes. Press Document Box. Press to select Sub Address Box. Press Enter. Press to select the box in which the documents to delete are stored. - Page 115 Advanced Functions Press left Select to print the list. OPERATION GUIDE 5-23...
-
Page 116: Fax Forwarding
Fax forwarding may be unavailable when combined with other functions, such as encrypted communication. Fax forwarding must be activated in advance. For more information, refer to Activating Fax Forwarding on page 5-30. Perform the following procedure to register forwarding destinations: Press System Menu/Counter. - Page 117 OPERATION GUIDE Press to select Forward Dest. Press Enter. Press to select Register. Press Enter. Press to select Address Entry or Address Book. Press Enter. If you select Address Book, specify the recipient from the Address Book. NOTE: For instructions on using the Address Book, refer to Address Book on page 3-24.
-
Page 118: Changing Forwarding Destinations
5-26 If you select Address Entry, press to select FAX, E-mail, or Folder, press Enter. If you select FAX, use the numeric keys to enter the recipient’s fax number. If you select E-mail or Folder, refer to the Operation Guide and specify the recipient’s e-mail... -
Page 119: Specifying The Fax Forwarding Period
Specifying the Fax Forwarding Period OPERATION GUIDE Press to select Edit. Press Enter. Make the desired changes in destination information. Press Enter. NOTE: For instructions on editing information, refer to Detailed Transmission Settings on page 3-8. Press left Select twice after specifying the destination and returning to the Forward Dest screen. - Page 120 Time Specificat. Press Enter. Choose Time Specificat. to specify the start and end times for fax forwarding. Choose All day to set fax forwarding throughout the day. On the next screen, press right Select to return to the basic screen.
- Page 121 Specifying the File Format of Forwarded Files OPERATION GUIDE Press right Select to return to the basic screen. Perform the following procedure to specify whether the FAX System is to print forwarded faxes: Follow steps 1 to 4 in Registering Forwarding Destinations on page 5-24.
-
Page 122: Activating Fax Forwarding
TIFF or PDF. Press Enter. Press right Select to return to the basic screen. Perform the following procedure to activate fax forwarding: Follow steps 1 to 4 in Registering Forwarding Destinations on page 5-24. Press to select Forward. -
Page 123: Password-Based Communications
This function restricts access to transmission and reception, requiring users to meet password requirements. Password-based communications lets you restrict the sending and receiving of faxes with the FAX System to authorized individuals. Passwords are registered in advance for authorized telephone numbers and authorized IDs, after which these functions are activated. - Page 124 5-32 Press to select Permit No. List. Press Enter. Press right Select. Press to select Add FAX Number. Press Enter. Use the numeric keys to enter the authorized fax number. Press Enter. Repeat steps 6 to 8 to enter all authorized fax numbers.
-
Page 125: Deleting Authorized Telephone Numbers
Press to select the authorized telephone number to be changed. Press Enter. Re-enter the fax number. Press Enter. Press left Select to return to the basic screen. Perform the following procedure to delete authorized telephone numbers: Follow steps 1 to 5 in Registering New Authorized Telephone Numbers on page 5-31. -
Page 126: Registering New Authorized Ids
You can register up to 5 authorized ID numbers. Press System Menu/Counter. Press to select FAX Setting. Press Enter. Press to select FAX RX Setting. Press Enter. Press to select TX/RX Restrict. Press Enter. Press to select Permit ID List. Press Enter. -
Page 127: Modifying Authorized Ids
Enter. Press left Select to return to the basic screen. Perform the following procedure to delete authorized ID numbers: Follow steps 1 to 5 in Registering New Authorized IDs on page 5-34. Permit FAX ID (0000 ~ 9999) 0000 Cancel... - Page 128 You can restrict transmission, reception, or both. NOTE: Even if you activate this setting, authorized telephone numbers or IDs must be registered in the FAX System in advance. Otherwise, the system will not verify passwords. Press System Menu/Counter. Press to select FAX Setting.
- Page 129 OPERATION GUIDE Press to select TX Restriction. Press Enter. Press to select Use Permit List or Off. Press Enter. Choose Use Permit List to check passwords during transmission. Press to select RX Restriction. Press Enter. Press to select Use Permit List or Off. Press Enter. Choose Use Permit List to check passwords during reception.
-
Page 130: Encrypted Communication
This function encrypts documents before transmission, protecting document contents from viewing by unauthorized third parties, even if transmission is intercepted. After reception, documents are decrypted by the recipient and printed. This is a very effective way to fax documents for which confidentiality is essential. NOTE: Encrypted communications require the other fax machine to have compatible encryption functions. -
Page 131: Registering New Encryption Keys
For example, encrypted communication is possible and documents can be successfully printed if the sender specifies encryption key ID 18 (for which the encryption key is ABFE468C2569D341) to fax a document using encrypted communication, while the recipient uses encryption key ID 09, which is assigned to the same encryption key. The encryption keys match, although the recipient assigned encryption key ID 09 to this encryption key in the encrypted reception setting. -
Page 132: Checking Or Deleting Encryption Keys
Checking or Deleting Encryption Keys 5-40 Use the numeric keys to enter the encryption key (16 digits). Press Enter. NOTE: Encryption keys consist of a series of any 16 characters consisting of numbers (0 to 9) and the letters A through F. Use the numeric keys to enter the following characters. -
Page 133: Setting Up Encrypted Reception
To receive encrypted transmissions, complete the encrypted reception setting and specify the encryption key. Press System Menu/Counter. Press to select FAX Setting. Press Enter. Press to select FAX RX Setting. Press Enter. Press to select Encryption RX. Press Enter. Menu Register Detail... -
Page 134: Sending Encrypted Faxes
Address Book entries, no special steps are required when sending encrypted faxes. Press to select FAX. Press Enter. Use the numeric keys to enter the fax number, then press right Select. Encryption RX Cancel Encryption Key... - Page 135 Choose Off if the recipient does not support encryption box. Choose On if the recipient supports encryption box. On the next screen, use the numeric keys to enter the box number. Press Enter. FAX Detail Encryption 2/ 4 Cancel Edit Encryption Cancel Encrypt.
-
Page 136: Receiving Encrypted Faxes
Receiving Encrypted Faxes 5-44 NOTE: When sending the documents to the same model as the FAX System in encrypted communication, be sure the encryption box setting is set to Off. Press Enter. Press Enter to return to the basic screen. -
Page 137: E-Mail Notification Of Job Results
E-mail Notification of Job Results OPERATION GUIDE Set up the FAX System to notify you of the results of fax jobs by e-mail. Press Send. Press Function. Press to select Job End Report. Press Enter. Press to select On. Press Enter. -
Page 138: Displaying Job Status
Displays jobs that are currently printing or queued (printouts from received faxes, from the subaddress box, from reports, from copies, or when the FAX System is used as a printer). You can check job details and delete jobs as necessary. Refer to Print Job Status on page 5-47 for more information. -
Page 139: Print Job Status
Send Job Status OPERATION GUIDE Displays faxed jobs. This information includes the transmission status and destination. Refer to FAX TX Log on page 5-50 for more information. FAX RX Log Displays received jobs. This information includes the reception status and destination. -
Page 140: Scheduled Job Status
Store Job Status Scheduled Job Status 5-48 Job details are displayed. Press to display details of each job sequentially. After reviewing the jobs, press Reset to return to the Status Menu screen. Perform the following procedure to display the Store Job Status screen. Press Status/Job Cancel. -
Page 141: Print Job Log
Print Job Log Send Job Log OPERATION GUIDE Press to select the job to check. Press Enter. NOTE: To cancel jobs, select the jobs to delete and press left Select. On the next screen, press left Select. Press to select Detail. Press Enter. Job details are displayed. -
Page 142: Store Job Log
After reviewing the jobs, press Reset to return to the Status Menu screen. Perform the following procedure to display the FAX TX Log screen. Press Status/Job Cancel. Press to select FAX. Press Enter. -
Page 143: Fax Rx Log
After reviewing the jobs, press Reset to return to the Status Menu screen. Perform the following procedure to display the FAX RX Log screen. Press Status/Job Cancel. Press to select FAX. Press Enter. - Page 144 5-52 Press to display the record of faxes received sequentially. After reviewing the jobs, press Reset to return to the Status Menu screen. RX Log 1/50 0123456789 Detail OPERATION GUIDE...
-
Page 145: Printing Fax Tx Reports
Print reports of the faxes that were sent or received. Perform the following procedure to print details of the 50 most recent transmissions. Press Status/Job Cancel. Press to select FAX. Press Enter. Press right Select. Press to select FAX TX Report. Press Enter. - Page 146 5-54 Press to select FAX RX Report. Press Enter. Press left Select to print the report. RX Log FAX TX Report FAX RX Report Cancel Print. Are you sure? FAX RX Report OPERATION GUIDE...
-
Page 147: User Login Screen
User Login Screen OPERATION GUIDE When User Login function is indicated on the FAX System, you prompt to enter your User ID and password to use the FAX System. The factory default setting of User ID and Password is 1118. -
Page 148: Job Accounting Screen
ID-code for each account. NOTE: For further information and instructions for Job Accounting, refer to the Advanced Operation Guide. Perform the following procedure to use the FAX System in Job Accounting mode. Enter the account ID using the numeric keys. - Page 149 OPERATION GUIDE Press left Select. The job accounting report is printed. Press right Select to return to the basic screen. Print. Are you sure? All Accounts 5-57...
- Page 150 Advanced Functions 5-58 OPERATION GUIDE...
-
Page 151: Initial Fax System Settings
OPERATION GUIDE 6 Network Fax This chapter discusses the following topics: • Overview of Network Fax ... 6-2 • Initial FAX System Settings ... 6-4... -
Page 152: Overview Of Network Fax
Perform the following procedure to set up network fax. Specify the computer to receive fax data and the file format for reception. For more information, refer to Initial FAX System Settings on page 6-4. Install and configure the Network Fax driver. For more information, refer to the Network Fax Online Manual. -
Page 153: Network Fax Settings Report
CD-ROM. Connect the modular cord (same as used for telephones) to the Line jack on the FAX System. Connect the network cable to the network interface port. Check the Network Fax settings from the Status Page. For instructions on printing the Status Page, refer to the Advanced Operation Guide. -
Page 154: Initial Fax System Settings
You can also specify e-mail forwarding. For more information, refer to Registering Forwarding Destinations on page 5-24. Reception Period Specify to receive faxes using network fax reception all day long or only during specified periods. For more information, refer to Specifying the Fax Forwarding Period on page 5-27. -
Page 155: Fax System Settings
Volume ... 7-8 • Redial ... 7-10 • Fax Media Type...7-11 • Number of Rings ... 7-12 • Fax Reception Mode ... 7-14 • Reception Date and Time... 7-18 • 2in1 Reception ... 7-19 • Bulk Printing ... 7-20 •... -
Page 156: Menu Table
Off, On, For printouts of reception results On(Conditions) (On/Off). Off, Minimum, Adjust the speaker level and Middle, volume of the fax monitoring tone. Maximum Off, Minimum, Adjust the volume of the built-in Middle, speaker during auto-transmission in Maximum off-hook mode when not pressed. - Page 157 1 – 15 Rings Specify the number of rings in auto reception mode. 1 – 15 Rings If the FAX System is set to enable automatic switching between the fax and answering machine (when used with a regular telephone answering machine), this setting...
-
Page 158: Printing Reports
Fax TX Report Prints communication details after the specified number of transmissions. For instructions on using this feature, refer to Fax TX Report and Fax RX Report Settings on page 7-4. Fax RX Report Prints communication details after the specified number of receptions. -
Page 159: Fax Rx Result Settings
Perform the following procedure to set up printing of reception results. Press System Menu/Counter. Press to select Report. Press Enter. Press to select Result Rep. Set. Press Enter. Press to select FAX RX Result. Press Enter. FAX TX Report Cancel Send Result *Off On(Conditions) Cancel... - Page 160 On (Conditions). Press Enter. If you select Off, skip to the step 8. Choose On (Conditions) to print the report of reception result when an error occurs in fax reception. Press to select Report Print or E-mail. Press Enter. If you select Report Print, skip to the step 8.
- Page 161 FAX System Settings If you select Address Entry, enter Address Entry the e-mail address. Press Enter. Cancel Text NOTE: For instructions on entering e-mail addresses, refer to Entering Characters on page 3-20. Press right Select to return to the basic screen.
-
Page 162: Volume
Volume Adjusting Speaker Levels Adjusting the Monitor Tone Volume Adjust the speaker level and volume of the fax monitoring tone. Switch off sound setting if no tone or speaker output is needed. NOTE: Refer to the Advanced Operation Guide for instructions on adjusting the volume for warning tones (after errors) and confirmation tones for operation panel keys. - Page 163 OPERATION GUIDE Press to adjust the volume. Press Enter. Press right Select to return to the basic screen. FAX Monitor 1 Minimum 2 Middle 3 Maximum Cancel...
-
Page 164: Redial
The available range varies depending on countries. Press System Menu/Counter. Press to select FAX Setting. Press Enter. Press to select FAX TX Setting. Press Enter. Press to select Retry Times. Press Enter. Use the numeric keys to specify the number of redial attempts. -
Page 165: Fax Media Type
Custom 1, that paper cassette will be used to print faxes. NOTE: This setting is displayed only when the FAX System is equipped with an optional paper cassette. Press System Menu/Counter. -
Page 166: Number Of Rings
Setting the Number of Rings (TAD Reception) 7-12 Perform the following procedure to specify the number of rings. When the FAX System is set for automatic fax reception, specify 1-15 rings before fax reception. For more information, refer to Automatic Fax Reception on page 3-17. - Page 167 System is used with a regular telephone, specify 0-15 rings until fax reception begins. After the specified number of rings, reception of the faxed document will begin. If the call is a telephone call rather than a fax transmission, the FAX System will continue to ring. For more information, refer to Auto Fax/Tel Switching on page 7-14.
-
Page 168: Fax Reception Mode
Automatic Fax Reception Choose automatic fax reception mode to use the FAX System exclusively as a fax machine. No special operations are required for incoming faxes. For more information, refer to Automatic Fax Reception on page 3-17. Manual Fax Reception In this mode, you can confirm the connection with the other party before receiving faxes by pressing Start. -
Page 169: Tad Reception
Other party sends a fax using automatic manually. transmission. The incoming call or fax is received without the FAX System ringing audibly. (Calling charges are incurred from this point.) The FAX System rings twice. (Audible only to the sender.) The faxed document is The FAX System rings audibly. -
Page 170: Fax Reception Mode Setting
Each number is given a different ring pattern so that the fax machine can differentiate between incoming calls. Assign one of the numbers to the FAX System and set up the desired ring pattern in advance for automatic fax reception whenever the FAX System detects that ring pattern. - Page 171 OPERATION GUIDE Press to select a reception mode. Press Enter. Option Auto(Normal) Automatic Fax Reception Auto(FAX/TEL) Auto Fax/Tel Switching Auto(TAD) TAD Reception † Auto(DRD) DRD Reception Manual Manual Fax Reception †. This option is available only for certain destination. If you selected Auto(DRD), press to select the ringing pattern.
-
Page 172: Reception Date And Time
Reception Date and Time 7-18 A FAX System feature lets you print the date and time of reception, sender identification, and the page number at the top of each page. This feature always lets you see the local time at which the fax was received, convenient when the fax is sent from a different time zone. -
Page 173: 2In1 Reception
11 × 8 Press System Menu/Counter. Press to select FAX Setting. Press Enter. Press to select FAX RX Setting. Press Enter. Press to select 2in1 RX. Press Enter. Press to select On or Off. Press Enter. -
Page 174: Bulk Printing
7-20 Activate this setting to print all fax image data together upon completed reception by the FAX System. The incoming fax will be held until it is completely received. This frees the FAX System for copying and other functions during that time. -
Page 175: Remote Diagnosis
Remote Diagnosis OPERATION GUIDE In case of the malfunction occurs with the FAX System, use this feature to give the service center computer access to the FAX System via the telephone line for updating the software when you contact a service agent. -
Page 176: Remote Diagnosis Id
Remote Diagnosis ID 7-22 To enable remote diagnosis, you must enter the FAX System’s unique ID as instructed by the service agent. This function must also be enabled in the FAX System, as described in Remote Diagnosis on page 7-21. -
Page 177: Troubleshooting
OPERATION GUIDE 8 Troubleshooting This chapter discusses the following topics: • Memory Indicator... 8-2 • Warning and Maintenance Messages ... 8-3 • Troubleshooting Table ... 8-5... -
Page 178: Warning And Maintenance Messages
NOTE: The Memory indicator flashes while receiving documents or scanning documents into memory. FAX Communicating Errors Fax communicating errors may trigger an audible alarm and cause the Error indicator to flash. If the Error indicator remains lit, check the message display for error details and perform the corrective action. -
Page 179: Warning And Maintenance Messages
Legal (8 × 14")/Folio original is scanned when the document size is selected as Letter (8 The subaddress or polling box for fax is full. Press right Select to cancel the job. You have exceeded 50 jobs combined for timer-based, standby, or interrupt transmission. - Page 180 Message The encryption key is not registered. Description and Corrective Action No encryption key is specified for the destination set for encrypted communication. Be sure the encryption key is entered correctly for the selected destination. Reference Page page 5-38 OPERATION GUIDE...
-
Page 181: Troubleshooting Table
Refer to your telephone user’s manual. Check the registered number. (Default: 55) If fax forwarding is on, contact the recipient at the forwarding address regarding the documents. Reference Corrective Action... - Page 182 Ask the other party to check their fax machine. Ask the other party to check their fax machine. If the setting is correct on the FAX System, ask the other party to check their fax machine. If the setting is correct on the FAX System, ask the other party to check their fax machine.
-
Page 183: Reference Information
OPERATION GUIDE 9 Reference Information This chapter includes the following reference information: • Specifications ... 9-2 • Menu Flowcharts ... 9-3 • Error Code Table ... 9-7... -
Page 184: Specifications
256 levels (Error diffusion) Max. 8 destinations (1-8) Max. 100 destinations Max. 1 location 3.5 MB Communication Management Report, FAX Tx Report, FAX Rx Report, Status Page, Subaddress Box List, NW Status Page Description × 14", 5 × 8 "... -
Page 185: Menu Flowcharts
For reference, the menu structures for function keys on the operation panel are as follows: Send Size Zoom Continuous Scan Job End Report FAX Delayed TX FAX Direct TX FAX RX Polling Destination Confirmation Address Book External Address Book TX Log... - Page 186 Document Box Function Sub Address Box FAX Polling Box Program System Menu/Counter Report Date/Timer Setting Common Setting Continued Continuous Scan Job End Report Report Print Subaddress Box List Report Setting FAX TX Report FAX RX Report Result Report Setting Send Result...
- Page 187 Continued from previous page FAX Setting Continued OPERATION GUIDE FAX Common Setting Encryption Key FAX TX Setting TTI (Transmit Terminal Identifier) Local FAX Name Local FAX ID Local FAX Number FAX Line Setting Retry Times FAX RX Setting FAX Media Type...
- Page 188 Continued from previous page Document Box Setting Edit Addressbook Program Setting Service Setting Box Media Type Sub Address Box Polling Setting FAX Country Code Remote Diagnosis Setting Remote Diagnosis ID OPERATION GUIDE...
-
Page 189: Error Code Table
(such as polling reception), the FAX System was unable to transmit to all destinations due to a communication interruption. The destination FAX System is out of paper. Contact the recipient. The sender established a connection but could not send the document because the FAX System are incompatible. - Page 190 The recipient’s FAX System is compatible with the FAX System, but subaddress-based confidential transmission to send documents to their subaddress box failed because the subaddress box number you entered is not set in their FAX System. Transmission to a subaddress box or other box failed because the other FAX System does not support subaddress- based confidential reception.
- Page 191 Communication failed because the other party’s FAX System uses an incompatible communication protocol. (The other party is using a G2 FAX System.) Reception to a subaddress box failed because FAX System memory is full. Print stored documents and try again, or cancel subaddress-based confidential reception.
- Page 192 Reference Information 9-10 OPERATION GUIDE...
-
Page 193: Index
Checking Details of Assigned Keys 4-19 Clearing Assigned Keys 4-20 Dialing with Chain Dial 4-21 Communication Management Reports 5-53 Printing FAX RX Reports 5-53 Printing FAX TX Reports 5-53 Continuous Scanning 3-16 Date & Time Setting 2-7 Deleting a Job in Memory 4-11... - Page 194 Fax Forwarding 5-24 Activating Fax Forwarding 5-30 Changing Forwarding Destinations 5-26 Printing from the FAX System during Fax Forwarding 5-29 Registering Forwarding Destinations 5-24 Specifying the Fax Forwarding Period 5-27 Specifying the File Format of Forwarded Files 5-29 Fax Information 2-5...
- Page 195 Changing the Remote Switching Number Receiving Faxes Remotely 5-5 OPERATION GUIDE Scan Resolution Mode 3-6 Select the Original Size 3-13 Select the Size for Fax 3-14 Sending Documents 3-4 Setting the communication speed 3-10 Specifications 9-2 Standby Transmission 4-3 Subaddress Communications 5-11...
- Page 196 Warning and Maintenance Messages 8-3 Zoom Transmission 3-15 Index-4 OPERATION GUIDE...
- Page 197 MEMO...
- Page 198 MEMO...
- Page 200 2005.3 303JG80011 2005 KYOCERA MITA Corporation All rights reserved.
Need help?
Do you have a question about the Fax and is the answer not in the manual?
Questions and answers