Table of Contents
Advertisement
Advertisement
Table of Contents

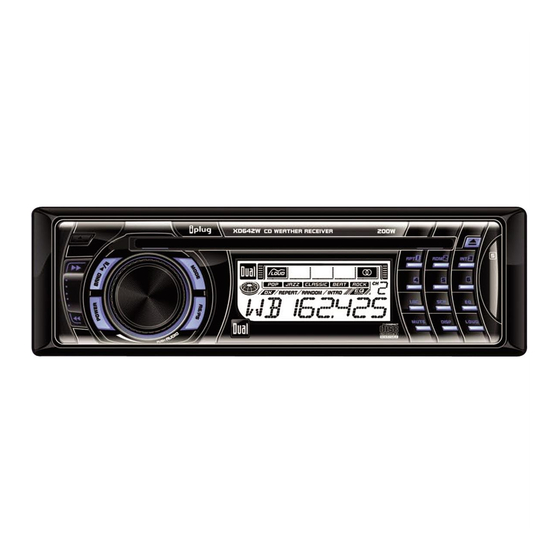
Summary of Contents for Dual IPLUG XD642W
- Page 1 XD642W INSTALLATION/OWNER'S MANUAL AM/FM/WB Weather Receiver with Detachable Face...
- Page 2 XD642W INSTALLATION Preparation Please read entire manual before installation. Before You Start • Disconnect negative battery terminal. Consult a qualified technician for instructions. • Avoid installing the unit where it would be subject to high temperatures, such as from direct sunlight, or where it would be subject to dust, dirt or excessive vibration. Getting Started •...
-
Page 3: Wiring Diagram
XD642W INSTALLATION Wiring Diagram FUSE When replacing the fuse, make sure new fuse is the correct type and amperage. Using an incorrect fuse could damage the radio. The XD642W uses one 10 amp ATM fuse located beside the wiring connector. -
Page 4: Control Locations
XD642W OPERATION Control Locations Release Band/Play/Pause Volume Mode Preset 4 Preset 1/Repeat Preset 5 Preset 2/Random Preset 3/Intro Eject Preset 6 Loudness Display Tuner Scan Mute Local/Distance Auto Store/Preset Scan Power Tune/Track Down Tune/Track Up... -
Page 5: General Operation
XD642W OPERATION General Operation Faceplate Removal Press RELEASE and pull away from the left side to remove. To re-install, insert right side of faceplate first then push left side to secure. Semi-permanent Remove trim ring and install supplied #1 x 7/32” Phillips Faceplate Installation head screw through left side of mounting frame into faceplate. - Page 6 XD642W OPERATION General Operation Programmable Display Priority Programmable Clock Priority Reset Confirmation Beep Mute In tuner mode, press and hold DISP then press TUNE to select function priority display. “FREQ” will momentarily appear in the display. Note: "FUNC" will appear in CD or AUX modes. Radio frequency (tuner mode), CD track/elapsed time (CD mode) or AUX (AUX mode) will be displayed by default.
- Page 7 XD642W OPERATION General Operation Audio Press rotary encoder to select between Volume (default), Bass, Treble, Balance & Fader. VOLUME BASS TREBLE BALANCE FADER Bass Press rotary encoder until BAS appears Rotate encoder left/right to adjust ( -6 minimum / +6 maximum) Treble Press rotary encoder until TRE appears Rotate encoder left/right to adjust ( -6 minimum / +6 maximum) Balance...
-
Page 8: Tuner Operation
XD642W OPERATION Tuner Operation Seek Tuning Manual Tuning Scan Tuning Local/Distance Band Frequency Spacing Storing and Recalling Station Presets Automatically Store Stations Preset Scan Press TUNE or TUNE next strong station. Press TUNE or TUNE then release. "MANUAL" will momentarily appear in the display. Press TUNE move radio frequency up or down one step at a time. Press and hold to advance quickly. - Page 9 Weatherband Tuner Operation Press TUNE Manual Tuning next weatherband station. Press preset 1-6 or BAND to directly access the Direct Tuning 7 weatherband stations. Refer to the table below. Weatherband Stations - Direct Tuning Table Button Preset 1 Preset 2 Preset 3 Preset 4 Preset 5 Preset 6 BAND XD642W OPERATION or TUNE ...
-
Page 10: Cd Player Operation
XD642W OPERATION CD Player Operation Insert CD Eject CD Track Select Fast Forward and Reverse Pause Intro Repeat Random CD-R/CD-RW Compatibility With the label facing up, insert a standard size CD into the CD slot. The CD will automatically begin playback. Press EJECT to eject the CD. The unit will change to previous mode of operation (AM, FM, or auxiliary input). -
Page 11: Limited One Year Warranty
This warranty gives you specific legal rights. You may also have other rights which vary from state to state. Dual Electronics Corp. warrants this product to the original purchaser to be free from defects in material and workmanship for a period of one year from the date of the original purchase. -
Page 12: Specifications
XD642W OPERATION Specifications Power Output: 17 Watts RMS x 4 channels at 4 ohms and < 1% THD+N Signal to Noise Ratio: 80dBA (reference: 1 watt into 4 ohms) CD Player Frequency response: Channel separation @ 1kHz: D/A converter: FM Tuner Tuning range: Usable sensitivity: 50dB quieting sensitivity: Stereo separation @ 1kHz:... -
Page 13: Troubleshooting
Troubleshooting Problem Unit will not turn on Yellow wire not connected or incorrect voltage (no power) Red wire not connected or incorrect voltage Black wire not connected Fuse blown Unit has power Speaker wires not connected (but no sound) One or more speaker wires touching each other or touching chassis ground Unit blows fuses Yellow or red wire touching chassis ground Speaker wires touching chassis ground... - Page 14 Dual Electronics Corp. Toll Free: 1-866-382-5476 www.dualav.com ©2006 Dual Electronics Corp. All rights reserved. NSA 1106 - V1.1...


Need help?
Do you have a question about the IPLUG XD642W and is the answer not in the manual?
Questions and answers