Dual IPLUG XDMR7710 Installation & Owner's Manual
Xm ready multimedia receiver with detach face
Hide thumbs
Also See for IPLUG XDMR7710:
- Installation & owner's manual (25 pages) ,
- Installation & owner's manual (25 pages)
Table of Contents
Advertisement
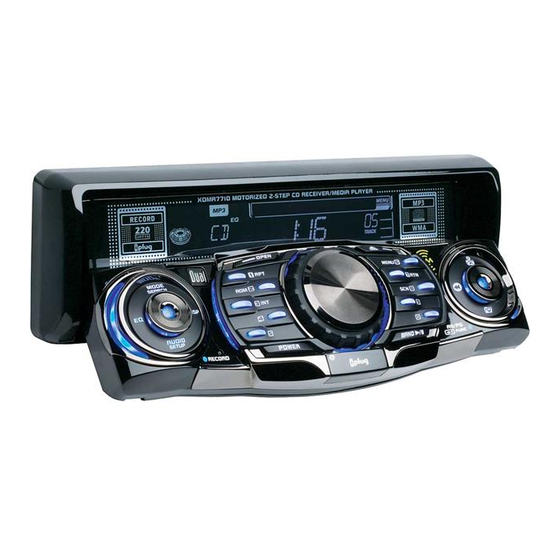
XDMR7710
INSTALLATION/OWNER'S MANUAL
XM Ready Multimedia Receiver with Detach Face
An optional XM Satellite Radio Receiver may be connected to the XDMR7710.
XM subscription is required for reception. For more information, visit XM's website
at www.xmradio.com or call 1-877-XM-RADIO. Not available in Alaska or Hawaii.
Advertisement
Table of Contents

Related Manuals for Dual IPLUG XDMR7710


Summary of Contents for Dual IPLUG XDMR7710
- Page 1 XDMR7710 INSTALLATION/OWNER’S MANUAL XM Ready Multimedia Receiver with Detach Face An optional XM Satellite Radio Receiver may be connected to the XDMR7710. XM subscription is required for reception. For more information, visit XM’s website at www.xmradio.com or call 1-877-XM-RADIO. Not available in Alaska or Hawaii.
- Page 2 XDMR7710 Preparation Please read entire manual before installation. Before You Start • Disconnect negative battery terminal. Consult a qualified technician for instructions. • Avoid installing the unit where it would be subject to high temperatures, such as from direct sunlight, or where it would be subject to dust, dirt or excessive vibration. Getting Started •...
-
Page 3: Wiring Diagram
XDMR7710 INSTALLATION Wiring Diagram FUSE When replacing the fuse, make sure new fuse is the correct type and amperage. Using an incorrect fuse could damage the radio. The XDMR7710 uses one 10 amp ATM fuse located beside the wiring connector. -
Page 5: Control Locations - Remote
XDMR7710 Control Locations - Remote *Key/Preset #9 *Key/Preset #8/Tuner Scan *Key/Preset #7/Return Preset #5 Preset #4 Preset #1/Repeat Mode/Search Tune/Track Down Band/Play/Pause/Scroll OPERATION... -
Page 6: General Operation
XDMR7710 General Operation Front Panel Note: Front Panel Removal Power On/Off Mode Volume Programmable Turn-On Volume Preset EQ Curves Display Set the Clock OPERATION The front panel is semi-permanently attached during assembly. Please refer to the separate yellow instructions (before installation) to make the front panel removable. With the unit off, press OPEN to allow the front panel to slide down. - Page 7 12/24-hour Clock Setup Menu Menu Function Options Loudness Curve LOUD OFF LOUD ON Clock Display FUNC PRI Priority CLK PRI Tuner Frequency FREQ USA Spacing FREQ EUR Clock Display CLK OFF CLK ON Auxiliary Mode AUX ON AUX OFF Beep BEEP OFF Confirmation BEEP ON...
- Page 8 XDMR7710 General Operation Audio Bass Treble Balance Fader Source Audio Memory Reset Record Menu Return OPERATION Press AUDIO momentarily to select between Volume (default), Bass, Treble, Balance, & Fader. VOLUME BASS TREBLE Press AUDIO until BAS appears then rotate encoder left/right to adjust ( -6 minimum / +6 maximum).
-
Page 9: Am/Fm Tuner Operation
Seek Tuning Press TUNE next strong station. Manual Tuning Press TUNE then release. "MANUAL" will momentarily appear in the display. Press TUNE move radio frequency up or down one step at a time. Press and hold to advance quickly. If tuning is not adjusted for 5 seconds, the unit will return to seek tuning mode (default). -
Page 10: Xm Radio Activation
XDMR7710 XM Radio Activation Activating Your XM Receiver (when connected) XM Radio Operation Tuning Modes Basic Channel Selection Direct Channel Selection Category Recall OPERATION 1. Press MODE to select XM Radio. 2. Verify channel 1 (XM Preview Channel) is playing. 3. - Page 11 XDMR7710 OPERATION XM Radio Operation Press FUNC once, the CATEGORY icon will appear on the Channel Search by display. Press to choose a different category, then Category press TUNE or TUNE to choose a channel within that category. Press FUNC for 3 seconds to select the desired channel.
-
Page 12: Cd Player Operation
XDMR7710 CD Player Operation Insert CD Eject CD Track Select Fast Forward and Reverse Pause Scan Repeat Random CD-R/CD-RW Compatibility OPERATION With the label facing up, insert a standard size CD into the CD slot. The CD will automatically begin playback. Press EJECT to eject the CD. - Page 13 CD Player Operation - MP3/WMA Files Playing an MP3/WMA Disc MP3 Icon WMA Icon Folder Icon Displaying Information Character Support XDMR7710 When an MP3/WMA encoded disc is first inserted, “READING” will appear in the display. Depending on the number of files and folders, this may take several seconds. icon will illuminate anytime a valid MP3 encoded disc is inserted and flash in MP3 search/navigate modes.
- Page 14 XDMR7710 CD Player Operation - MP3/WMA Files Refer to the following button function table when selecting, searching or navigating MP3/WMA files and folders: MP3/WMA Button Function Table Button SEARCH Preset #1 Preset #2 Preset #3 Preset #4 Preset #5 Preset #6 Key #7 Key #8 Key #9...
- Page 15 CD Player Operation - MP3/WMA Files Alphanumeric File Press SEARCH for more than 3 seconds, then release. or Folder Search Press SEARCH again, an " Step 1 Use the buttons in the table on page 14 (32 character maximum input) or the rotary encoder to enter the desired alphanumeric search characters.
- Page 16 XDMR7710 CD Player Operation - MP3/WMA Files Navigating Note *Folder Access File Repeat File Repeat (Current Folder Only) Disc Random Folder Random Disc Intro Folder Intro OPERATION After navigating by direct select, alphanumeric search or file/folder navigate modes, the track number and elapsed time will be displayed by default.
- Page 17 CD Player Operation - MP3/WMA Files Media Compatibility The following types of discs/files are compatible: • CD-ROM (ISO), CD-R, CD-RW • CD-DA • MP3 data • WMA data The following types of discs/files are not compatible: • WMA files that are protected by DRM (Digital Rights •...
- Page 18 XDMR7710 CD Player Operation - MP3/WMA Files Additional MP3/WMA Information Sampling Frequency Rates Transfer Bit rates MP3 Tag Display Recommended Settings OPERATION An internal buffer provides ESP (Electronic Skip Protection) to virtually eliminate skipping. When playing a disc recorded with regular audio files (CD-DA or .WAV) and MP3/WMA files, the unit will play the MP3/WMA files only.
-
Page 19: Limited One Year Warranty
This warranty gives you specific legal rights. You may also have other rights which vary from state to state. Dual Electronics Corp. warrants this product to the original purchaser to be free from defects in material and workmanship for a period of one year from the date of the original purchase. -
Page 20: Specifications
XDMR7710 Specifications CD Player FM Tuner AM Tuner General Power Output: 17 Watts RMS x 4 channels at 4 ohms and < 1% THD+N Signal to Noise Ratio: 80dBA (reference: 1 watt into 4 ohms) OPERATION Frequency response: Channel separation @ 1kHz: D/A converter: 1 Bit Tuning range:... -
Page 21: Troubleshooting - General
Problem Unit will not turn on Yellow wire not connected or incorrect voltage (no power) Red wire not connected or incorrect voltage Black wire not connected Fuse blown Unit has power Speaker wires not connected (but no sound) One or more speaker wires touching each other or touching chassis ground Unit blows fuses Yellow or red wire touching chassis ground... - Page 22 XDMR7710 Troubleshooting - XM Radio Problem You can not receive any Your XM Radio receiver is not activated XM channels You can not tune into a You may not be authorized to receive that specific XM channel channel NO SIGNL appears on The XM signal is blocked display This message may appear when driving inside...
- Page 23 XDMR7710 OPERATION Notes...
- Page 24 Toll Free: 1-866-382-5476 www.dualav.com ©2006 Dual Electronics Corp. All rights reserved. Windows Media and the Windows logo are trademarks, or registered trademarks of Microsoft Corporation in the United States and or other countries. The XM name and related logos are trademarks of XM Satellite Radio Inc.
Need help?
Do you have a question about the IPLUG XDMR7710 and is the answer not in the manual?
Questions and answers