Table of Contents
Advertisement
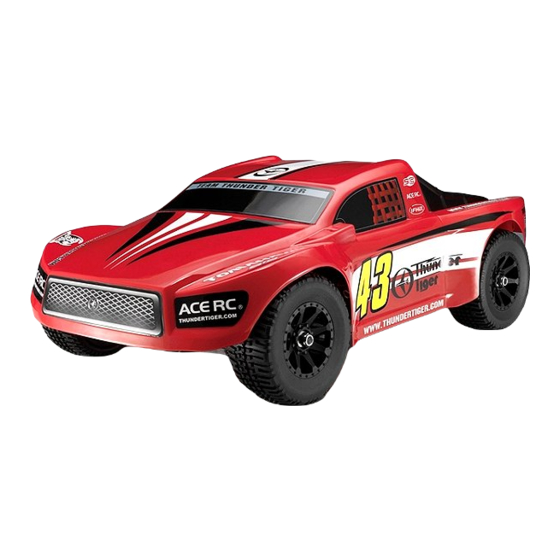
1/10 NITRO-POWERED 4WD SHORT COURSE TRUCK
This radio control model car is not a toy! Before beginning operation, please read this manual thoroughly.
The contents are subject to change without prior notice due to product improvements and specificatrion changes.
Thunder Tiger Corporation guarantees this model kit to be free from defects in both material and workmanship. The total monetary value under
warranty will in no case exceed the cost of the original kit purchased. This warranty does not cover any components damaged by use or
modification. Part or parts missing from this kit must be reported within 60 days of purchase. No part or parts will be sent under warranty without
proof of purchase. To receive part or parts under warranty, the service center must receive a proof of purchase and/or the defective part or parts.
Should you find a defective or missing part, contact the authorized Thunder Tiger Service/Distributor nearest you. Under no circumstances can a
dealer or distributor accept return of a kit if assembly has started.
1:10
Instruction Manual
WARRANTY
No.6198
Advertisement
Table of Contents

Related Manuals for THUNDER TIGER TOMAHAWK SC


Summary of Contents for THUNDER TIGER TOMAHAWK SC
- Page 1 WARRANTY Thunder Tiger Corporation guarantees this model kit to be free from defects in both material and workmanship. The total monetary value under warranty will in no case exceed the cost of the original kit purchased. This warranty does not cover any components damaged by use or modification.
-
Page 2: Table Of Contents
Thank you for your purchase of this Thunder Tiger product. You should enjoy many hours of fun and excitement from this advanced R/C model. Thunder Tiger strives to bring you the highest level of quality and service we can provide. We race and test our cars around the world to bring you state-of-the-art products. -
Page 3: Important Notes & Warning 2
3. If the fuel gets onto your skin, wash it well with soap and water. WARNING 1. Improper operations may cause personal and/or property damage. Thunder Tiger and its distributor have no control over damage resulting from shipping, improper construction, or improper usage. -
Page 4: Items Required For Operation 3
ITEMS REQUIRED FOR OPERATION Glow Starter w/ Charger Screw Drivers, Lexan Body Reamer, Hobby Knife, Lexan Scissors. *AA Rechargeable Ni-MH AA Alkaline dry batteries 8 Fuel Bottle Glow Fuel, Methanol 10% to 30% battery 4 pieces for receiver pieces for transmitter Nitro 5% to 18% Caster / Synthetic Oil 10%~30% 5%~18%... -
Page 5: Unwrapping Contents From Box 4
UNWRAPPING CONTENTS FROM BOX Pull out a. Contents of the box are secured with reusable zip-ties. To unlock zip-tie, press on the small lever. b. Pull on the zip-tie while keeping the small lever pressed. Pull the zip-tie out completely. CHARGING THE GLOW PLUG IGNITER a. -
Page 6: The Ace Rc Cougar Ps3 2.4Ghz Radio System 2.4Ghz
The ACE RC Cougar PS3 2.4GHz Radio System 2.4GHz Throttle Trim Steering Wheel Transmitter Antenna Steering D/R (Dual Rates) Power Switch Battery Level Indicator Throttle Trigger HI/LO Throttle ATV(Adjustable Travel Volume) AUX Ch Button Steering Tension Adjustment Servo reversing switches External Charging Jack Battery Cover Steering Trim... -
Page 7: Transmitter Controls 6
TRANSMITTER CONTROLS 1. Transmitter Antenna: Straighten up the antenna before operating the model. 2. Battery Level Indicator: Three LEDs indicate the battery voltage level. If the Red LED flashes, please replace the batteries. 3. HI/LO Throttle ATV (Adjustable Travel Volume): Provides the function to let you independently preset the maximum travel of the throttle servo either side (high / low) of neutral. -
Page 8: Binding Process 7
BINDING PROCESS A binding feature is included in the ACE RC Cougar 2.4GHz spread spectrum system to ensure the transmitter and receiver bind properly and prevent interference from other controllers. To manually bind Tx/Rx, please proceed as per the following steps: a. -
Page 9: Fail Safe(F/S) Function Setting 8
FAIL SAFE(F/S) FUNCTION SETTING ACE RC COUGAR 2.4GHz R/C system features a built-in Failsafe function to automatically set a servo command if the receiver loses the signal from transmitter due to interference. For safety, we strongly recommend to active the FAILSAFE function on your Cougar R/C system. - Page 10 Step TX Action RX Action Check Binding Complete TX LED GREEN SOLID Binding Complete RX LED GREEN SOLID Push for 10 sceonds No Action RX LED GREEN FLASH Pre-settings for F/S 1. Steering: Neutral function: 2. Keep brake or trigger at neutral EP Car :Steering at Neutral / ESC at Neutral GP Car :Steering at Neutral /...
-
Page 11: Radio Operation 10
RADIO OPERATION a. When turning radio system on. Turn the transmitter on first, then turn on the ESC. b. When turning the radio system off. Turn the ESC off first, then turn off the transmitter. c. Servo Reversing:It is sometimes necessary or convenient to reverse the output direction of the servo. The direction of the rotation for each individual servo can be changed by simply flipping the reversing switch that corresponds to the channel number on the receiver where the servo is plugged in. -
Page 12: Operating Radio Throttle/ Brake Function
OPERATING RADIO THROTTLE/ BRAKE FUNCTION a. Check the radio throttle/brake functions. With the radio transmitter and receiver on, pull the trigger / push the stick forward. The carburetor should be fully opened and the brake disengaged. To reverse this function, flip the throttle/brake servo reverse switch. b. -
Page 13: Adjusting Carburetor 12
ADJUSTING CARBURETOR a. To set the high speed needle: (large needle sticking out from the carburetor body), turn the screw as pictured. Initial high speed needle setting should be 3~3.5 turns (close the needle completely, then back out 3~3.5 turns). Clockwise turn will provide leaner setting (lower fuel to air mixture), and counterclockwise turn will provide richer setting (higher fuel to air mixture). -
Page 14: Preparing The Engine For Starting 13
(replace with new one). After checking, reinstall the glow plug. The glow plug used for this engine can be: Thunder Tiger 9281, McCoy #9 / #59, Novarossi C4S / C5S / C6S,OS #8 / #A3 / #A5, and Picco P6S / P7S. - Page 15 ENGINE BREAK-IN For a new engine (break-in setting), the high speed needle needs to be set as rich as possible. Turn the high speed needle 1/4 turn counterclockwise from initial setting (3~3.5 turns from fully closed). Repeat step 15b. Keep doing this until the engine stalls at full throttle, then turn the high speed needle 1/4 turn clockwise.
-
Page 16: Shock Adjustment 15
SHOCK ADJUSTMENT a. Use the included shock clips to adjust for spring pre-load. Pressing the entire car down, release, and the car should returm to ride height (indicated on set-up page). More pre-load clips will produce higher ride height, and less clips will produce lower ride height. -
Page 17: Storing And Maintenance 16
STORING AND MAINTENANCE a. Before storing you car, draw out any fuel from the tank. b. Next, restart the engine to combust remaining fuel. c. Unplug the glow plug and put after engine oil inside the engine, re-plug the glow plug. d. -
Page 18: Driving Tips 17
DRIVING TIPS a. Hold your elbows in and keep the b. Squeeze the throttle trigger or pull the c. Squeeze the throttle trigger and transmitter antenna pointing straight throttle stick gently and steer the car release. Repeat this action to control to left and right. - Page 19 TROUBLESHOOTING If you have trouble starting or keeping your TOMAHAWK SC running, here's a quick checklist of what to look for first. TOMAHAWK SC Description Problem Solution Engine will not Out of fuel ............ Fill fuel tank start Contaminated fuel ........
- Page 20 Glow Plug Problems. Fuel Mixture The glow plug in your engine must The fuel mixture is controlled by three different adjustments be replaced periodically to maintain on the carburetor, and should come preset from the factory peak performance and easy (see photos below).
Need help?
Do you have a question about the TOMAHAWK SC and is the answer not in the manual?
Questions and answers