Table of Contents
Advertisement
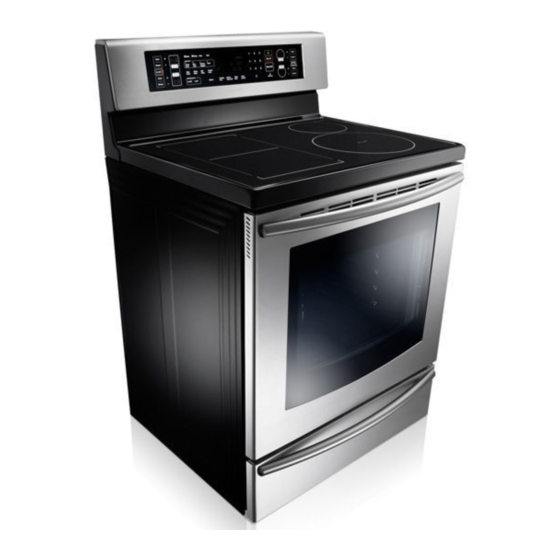
NE597N0PBSR
Electric Range
user manual
This manual is made with 100% recycled paper.
imagine
the possibilities
ENGLISH
Thank you for purchasing this Samsung product.
To receive more complete service, please register
your product at
www.samsung.com/register
1-800-SAMSUNG (726-7864)
NE597N0PBSR_BEST_DG68-00429A_EN_120412.indd 1
2012-04-12
11:59:02
Advertisement
Table of Contents

Related Manuals for Samsung NE597N0PBSR/AA


Summary of Contents for Samsung NE597N0PBSR/AA
-
Page 1: User Manual
NE597N0PBSR Electric Range user manual This manual is made with 100% recycled paper. imagine the possibilities ENGLISH Thank you for purchasing this Samsung product. To receive more complete service, please register your product at www.samsung.com/register 1-800-SAMSUNG (726-7864) NE597N0PBSR_BEST_DG68-00429A_EN_120412.indd 1 2012-04-12... -
Page 2: Important Safety Instructions
important safety instructions Read and follow all instructions before using your oven to prevent the risk of fire, electric shock, personal injury, or damage when using the range. This guide does not cover all possible conditions that may occur. Always contact your service agent or manufacturer about problems that you do not understand. -
Page 3: For Your Safety
anti-tiP deVice WARNING - To reduce the risk of tipping the range, the range must be secured by a properly installed Anti-Tip device. AFTER THE RANGE WARNING HAS BEEN INSTALLED, CONFIRM THAT THE ANTI-TIP DEVICE HAS BEEN PROPERLY INSTALLED AND VERIFY THAT THE ANTI- TIP DEVICE IS PROPERLY ENGAGED. - Page 4 User servicing - Do not repair or replace any part of the appliance unless specifically recommended in the manual. All other servicing should be referred to a qualified technician. Always disconnect the power to the appliance before servicing by removing the fuse or switching off the circuit breaker. Do not enter the oven.
- Page 5 induction cooktoP eLeMents Be sure you know which touch control operates each surface heating unit. Place a pan of food on the unit before turning it on, and turn the unit off before removing the pan. Use proper pan sizes - This appliance is equipped with surface units of different sizes.
-
Page 6: Electrical Safety
Repairs carried out by unqualified individuals may cause injury or a serious malfunction. If your appliance is in need of repair, contact a Samsung authorized service center. Failure to follow these instructions may result in damage and void the warranty. -
Page 7: Child Safety
chiLd safety WARNING- This appliance is not intended for use by young children or infirm persons without the adequate supervision of a responsible adult. WARNING Young children should be supervised to ensure that they do not play with the appliance. Keep children away from the door when opening or closing it as they may bump themselves on the door or catch their fingers in the door. -
Page 8: Warming Drawer
Use care when opening the door. Let hot air or steam escape before you remove food from or put food into the oven. Protective liners. Do not use aluminum foil to line the oven bottoms, except as suggested in the manual. Improper installation of these liners may result in a risk of electric shock or fire. - Page 9 Do not use the drawer to dry newspapers. If overheated, they can catch on fire. Do not use aluminum foil to line the drawer. Foil is an excellent heat insulator and will trap heat beneath it. This will upset the performance of the drawer and it could damage the interior finish.
-
Page 10: Before You Begin
GLass/ceraMic cookinG surfaces DO NOT TOUCH SURFACE UNITS OR AREAS NEAR UNITS. Surface units may be hot even though they are dark in color. Areas near surface units may become hot enough to cause burns. During and after use, do not touch, or let clothing or other flammable materials contact the surface units or areas near the units until they have had sufficient time to cool. - Page 11 This appliance must be properly grounded. Do not ground the appliance to a gas pipe, plastic water pipe, or telephone line. - This may result in electric shock, fire, an explosion, or problems with the product. Do not cut or remove the ground prong from the power cord under any circumstances.
- Page 12 If materials inside the oven should ignite, keep the oven door closed, turn the oven off and disconnect the power cord, or shut off power at the fuse or circuit breaker panel. If the door is opened, the fire may spread. Always observe safety precautions when using your oven.
- Page 13 Do not insert fingers, foreign substances, or metal objects such as pins or needles into inlets, outlets, or holes. If foreign substances are inserted into any of these holes, contact your product provider or nearest service center. Do not tamper with or make any adjustments or repairs to the door. Under no circumstances should you remove the door or outer shell of the oven.
- Page 14 usaGe cautions caution If the surface is cracked, turn the appliance off. - Failing to do so may result in electric shock. Dishes and containers can become hot. Handle with care. Hot foods and steam can cause burns. Carefully remove container coverings, directing the steam away from hands and face.
- Page 15 Do not operate while empty except for self-cleaning. Do not defrost frozen beverages in narrow-necked bottles. The containers can break. Do not scratch the glass of the oven door with a sharp object. - This may result in the glass being damaged or broken. Do not store anything directly on top of the appliance when it is in operation.
-
Page 16: Induction Cooktop Features
This means uneven heat distribution and uneven cooking. Your new range has Surround Airvection™, which Samsung enhanced by adding a third heating element and a multi-fan system that circulates the heat evenly in all directions. You get more efficient energy consumption and more even cooking. -
Page 17: Table Of Contents
contents INTRODUCING YOUR NEW RANGE Overview What’s included with your range INDUCTION COOKTOP COOKING About induction cooktop cooking Location of the induction cooktop elements and controls Induction touch control Using the touch control pads How to set the appliance for cooktop cooking Select cooking zone on Power setting... - Page 18 contents OPERATING THE OVEN The oven control panel Setting the clock Minimum and maximum settings Setting the kitchen timer Using the oven racks Baking Convection baking Convection roasting Timed cooking Delay timed cooking Broiling Using the custom cook feature Using the easy cook feature Using the defrost function Using the keep warm function Extra features...
-
Page 19: Introducing Your New Range
introducing your new range oVerVieW Cooktop control panel See page 21 for more information Oven control panel See page 34 for more Glass surface information Automatic oven light switch Oven light Self/steam clean latch Oven door Warming drawer Convection fan Gasket Shelf position What’s incLuded With your ranGe... -
Page 20: About Induction Cooktop Cooking
induction cooktop cooking about induction cooktoP cookinG BEFORE COOKING • Do not use the Induction cooktop surface as a cutting board. • Do not place or store items that can melt or catch fire on the Induction cooktop, even when it is not being used. • Turn the induction cooktop on only after placing the cookware on them. - Page 21 AFTER COOKING • Do not touch the Induction elements until they have cooled down. • The surface can stay hot for some time after cooking is complete. If you touch the surface before it has had time to cool down sufficiently, you can burn yourself. • Immediately clean spills on the cooking area to prevent a tough cleaning chore later.
-
Page 22: Induction Touch Control
induction touch controL 1. COOKING ZONE SELECTOR AND 4. INDICATOR FOR BURNER ON/OFF a. Power Setting(Lo~Hi) b. Boost(P) 2. POWER LEVEL SETTING SELECTORS c. Simmer(Si) a. +,- d. Boil Alert(A) b. Boost e. Hot Surface(H) c. Simmer 3. FLEXCOOK ZONE BURNER ON/OFF • Power boost : Use this function to heat up the contents of the pan faster than maximum power level ‘... -
Page 23: Using The Touch Control Pads
usinG the touch controL Pads If more than one touch pad is pressed for longer than 1 minute, appears in the power setting display. To reset, touch the On/Off control pad. hoW to set the aPPLiance for cooktoP cookinG • The cooktop elements can be hot and can cause burns. Do not touch the surface elements until they have cooled down sufficiently. -
Page 24: Induction Power Boost Control
induction PoWer boost controL The power boost function makes additional power available to the induction cooking zone. Example: To bring a large volume of water to a boil. The power boost function is activated for a maximum of 10 minutes for each cooking zone. After Power Boost is finished, the cooking zones automatically return to power level In certain circumstances, the Power boost function may be deactivated automatically to... -
Page 25: Using The Griddle
If you use the Flexcook Zone and place a pan on each of the front and rear burners, and then remove any one pan for about 1 minute, only the burner left will be enabled. (The Flexcook Zone key will be positioned to On whenever you use the Flexcook Zone function.) To reactivate the Flexcook zone function, touch the Flexcook Zone On/Off control to adjust the setting. - Page 26 INCORRECT CORRECT • Unsuitable size for Flexcook zone. See the “Size of Pans” section (28 page). • Two examples of 1 suitably sized pan in the correct location in the Flexcook zone. boiL aLert controL (onLy use the LarGest burner) The Boil Alert function automatically reduces power to a power level you have selected and sounds a signal.
-
Page 27: Before Using The Cooktop
before usinG the cooktoP Use quality cookware in good condition The cookware used with the cooktop surface should have flat bottoms that make good contact with the entire surface of the Cooking Zone. Check for flatness by rotating a ruler across the bottom of the cookware. - Page 28 Use Quality Cookware in Good Condition INCORRECT CORRECT • Cookware not centered on Cooking Zone • Cookware centered correctly on Cooking surface. Zone surface. • Curved or warped pan bottoms or sides. • Flat pan bottom & straight sides. • Pan does not meet the minimum size • Pan size meets or exceeds the recommended required for the Cooking Zone used.
-
Page 29: Cookware For Induction Cooking Zones
cookWare for induction cookinG Zones The Induction element can only be turned on when cookware with a magnetic base is placed on one of the cooking zones. You can use the cookware identified as suitable below. Cookware material cookware material suitable Steel, Enamelled steel Cast iron... -
Page 30: Operating Noises
oPeratinG noises You may hear the following operating noises: • Cracking noises : The cookware you are using is made of two or more different materials. • Whistling : You are using more than two cooking zones and the cookware you are using is made of two or more different materials. -
Page 31: Temperature Detection
teMPerature detection If for any reason the temperatures on any of the cooking zones were to exceed the safety levels, then the cooking zone will automatically reduce the heat to a lower power level. When you have finished using the cooktop, the cooling fan will continue to run until the cooktop’s electronics have cooled down. -
Page 32: Protecting The Cooktop Surface
setting cooking method examples for use Melting, Lo-2 Melting chocolate and butter, dissolving gelatin, simmer, keep warm. Warming • The power settings indicated in the table above are provided only as guidelines for your reference. • You will need to adjust the power settings according to specific cookware and foods. ProtectinG the cooktoP surface Cleaning • Clean the cooktop before using it for the first time. • Clean your cooktop daily or after each use. This will keep your cooktop looking good and can prevent damage. -
Page 33: Using The Warming Drawer
using the warming drawer about the WarMinG draWer The warming drawer will keep hot, cooked foods warm. Always start with hot food. Do not use to warm cold food other than bread, crackers, chips or dry cereal. Allow approximately 25 minutes for the warming drawer to preheat. -
Page 34: Turning The Warming Drawer On Or Off
turninG the WarMinG draWer on or off 1. Turn the warming drawer on. Press the WARMING DRAWER On/Off pad. 2. Select the power setting you want. Pressing the WARMING DRAWER LEVEL pad once for low, twice for medium, or 3 times for high. The warming drawer starts automatically once you have finished selecting the level you want. -
Page 35: Operating The Oven
operating the oven the oVen controL PaneL READ THE INSTRUCTIONS CAREFULLY BEFORE USING THE OVEN. For the best results, familiarize yourself with the various features and functions of the oven as described below. Detailed instructions for each feature and function follow later in this user manual. 1. -
Page 36: Setting The Clock
settinG the cLock The clock must be set to the correct time of day for the automatic oven timing functions to work properly. • The time of day cannot be changed during a timed cooking, a delay-timed cooking or a self- cleaning cycle. -
Page 37: Minimum And Maximum Settings
MiniMuM and MaxiMuM settinGs All of the features listed in the table below have minimum and maximum time or temperature settings. A beep will sound each time a pad on the control panel is pressed and the entry is accepted. An error tone will sound in the form of a long beep if the entered temperature or time is below the minimum or above the maximum setting for the feature. -
Page 38: Using The Oven Racks
usinG the oVen racks Oven rack positions The oven has 7 rack positions (1~7). TYPE OF FOOD RACK POSITION Frozen pies Angel food cake Bundt or pound cakes Biscuits, muffins, brownies, cookies, cupcakes, layer cakes, pies Casseroles Small roast, ham Turkey, large roast Baking layer cakes Centering the baking pans in the oven as much as possible will produce better results. -
Page 39: Baking
bakinG The oven can be programmed to bake at any temperature from 150°F to 550°F. How to set the thermostat 1. Start the set up. Press the BAKE pad. The default temperature is 350°F. 2. Enter the temperature you want on the number pad, eg. 3, 7, 5. 3. -
Page 40: Convection Baking
conVection bakinG By using the convection bake feature, you will be able to cook faster. You can program the oven for convection baking at any temperature between 150°F and 550°F. Convection baking uses a fan to circulate the oven’s heat evenly and continuously within the oven. - Page 41 Recommended convection baking guide Set Temp.* Convection bake Food Item Rack Position (preheated oven) °F time ** (min) Cake Cupcakes 17-19 Bundt Cake 35-43 Angel Food 35-39 2 crust, fresh, 9" 350-400 45-55 2 crust, frozen fruit, 9" 68-78 Cookies Sugar 325-350 12-17...
-
Page 42: Convection Roasting
conVection roastinG Convection roasting is good for cooking large tender cuts of meat, uncovered. Heat comes from the top heating element. The convection fan circulates the heated air evenly over and around the food. Meat and poultry are browned on all sides as if they were cooked on a rotisserie. - Page 43 Recommended convection roasting guide Roasting time* Meat Weight (lb) Oven Temp. (˚F) Internal temp. (°F) (min per lb) Beef 25-28 145 (med/rare) Rib Roast 28-32 160 (medium) 24-29 145 (med/rare) Rib Eye Roast, (boneless) 29-34 160 (medium) 25-30 145 (med/rare) Rump, Eye, Tip Sirloin (boneless) 28-35...
-
Page 44: Timed Cooking
tiMed cookinG In timed cooking, the oven turns on immediately and cooks for the length of time you select. At the end of the cooking time, the oven turns off automatically. • You can use the timed cooking feature only with another cooking operation (bake, convection bake, or convection roast). -
Page 45: Delay Timed Cooking
deLay tiMed cookinG In a delay timed cooking, the oven’s timer turns the oven on and off at times you select in advance. • You can use the delay timed cooking feature only with another cooking operation (bake, convection bake, or convection roast). • You can set the oven for a delay timed cooking before setting other cooking operations. -
Page 46: Broiling
broiLinG Broil stop position Leave the door open at the broil stop position. The door will Broil stop position stay open by itself, yet the proper temperature is maintained in the oven. Should an oven fire occur, close the oven door and turn the oven off. If the fire continues, throw baking soda on the fire or use a foam-type fire extinguisher. -
Page 47: Recommended Broiling Guide
Recommended broiling guide The size, weight, thickness, starting temperature, and your doneness preference will affect broiling times. This guide is based on meats at refrigerator temperature. First Second Quantity and/ Shelf Food side time side time Comments or thickness position (min.) (min.) Space evenly. -
Page 48: Using The Custom Cook Feature
usinG the custoM cook feature By using the custom cook feature, you can record up to 3 different recipe settings. The feature may be used for baking, convection baking, or convection roasting. It will not work with any other function, including the delay start feature. How to record a recipe setting 1. -
Page 49: Using The Easy Cook Feature
usinG the easy cook feature Slow Cook The Slow Cook feature cooks food more slowly at lower oven temperatures. The extended cooking times allow better distribution of flavors in many recipes. This feature is ideal for roasting beef, pork, and poultry. Slow cooking meats may result on the exterior of meats becoming dark but nor burnt. -
Page 50: Using The Defrost Function
Crispy Pizza The pizza function is designed to give pizzas crisp, browned bottoms while keeping the topping moist. 1. Press the Pizza pad. 2. Press the START/SET pad to begin pizza cooking. Use only 1 rack and place the rack in position 2 or 3 for the best results when using the pizza feature. -
Page 51: Using The Keep Warm Function
usinG the keeP WarM function The keep warm feature maintains an oven temperature of 170°F and will keep cooked food warm for serving up to 3 hours after cooking has finished. After 3 hours, the feature will shut the oven off automatically. The feature may be used without any other cooking operations or may be set to activate after a timed or delay timed cooking operation. -
Page 52: Extra Features
extra features 12 hour energy saving With this feature, should you forget and leave the oven on, the control will automatically turn off the oven after 12 hours during baking functions or after 3 hours during a broil function. How to turn the 12 hour energy saving feature on or off 1. -
Page 53: Thermostat Adjustment
Convection auto conversion feature When you use the auto conversion feature, the convection auto conversion feature will automatically convert entered regular baking temperatures to convection baking temperatures. If this feature is activated, the display will show the actual converted (reduced) temperature. For example, if you enter a regular recipe temperature of 350 °F and press the START/SET pad, the display will show the converted temperature of 325 °F. -
Page 54: Control Lockout
Sound on/off By using this feature, you can set the oven controls to operate silently. How to turn the sound on or off 1. Press Oven Light and 0 on the number pad at the same time for 3 seconds. The display will show Snd On (sound on) or Snd OFF (sound off). -
Page 55: Setting The Sabbath Feature
settinG the sabbath feature (For use on the Jewish Sabbath & Holidays) For further assiistance, guidelines for proper usage, and a complete list of models with the Sabbath feature, please visit the web at http:\\www.star-k.org. You can use the Sabbath feature with baking only. The oven temperature may be set higher or lower after setting the Sabbath feature. - Page 56 Do not to attempt to activate any other program feature except BAKE while the Sabbath feature is active. ONLY the following key pads will function correctly with the Sabbath feature: NUMBER, BAKE, START/SET and CLEAR/OFF pad. ALL OTHER KEYPADS should not be used once the Sabbath feature is activated. You can change the oven temperature, but the display will not change and tones will not sound when a change occurs.
-
Page 57: Maintaining Your Appliance
maintaining your appliance seLf-cLeaninG This self-cleaning oven uses high temperatures (well above cooking temperatures) to burn off leftover grease and residue completely or reduce them to a finely powdered ash that you can wipe away with a damp cloth. • During the self-cleaning cycle, the outside of the range will become very hot to the touch. - Page 58 How to set the oven for self-cleaning 1. Select the length of time for the self-cleaning operation, eg. 3 hours. Press the SELF CLEAN pad once for a 3 hour clean time, twice for a 4 hour clean time, or 3 times for a 2 hour clean time. The default setting is 3 hours.
-
Page 59: Steam-Cleaning
steaM-cLeaninG How to set the oven for steam-cleaning For light cleaning, the Steam-cleaning function saves time and energy. For heavier-duty cleaning of debris and grease, use the self-cleaning function. 1. Remove all accessories from the oven. 2. Pour approximately 10 oz. (300 ml) of water onto the bottom of the empty oven and close the oven door. -
Page 60: Care And Cleaning Of The Oven
care and cLeaninG of the oVen • Be sure all controls are OFF and all surfaces are COOL before cleaning any part of the range. • If your range is removed for cleaning, servicing, or any reason, be sure the Anti-Tip device is re-engaged properly when the range is replaced. -
Page 61: Oven Racks
Oven racks • If the racks are left in the oven during a self-cleaning cycle, their color will turn slightly blue and the finish will be dull. After the self-cleaning cycle is complete and the oven has cooled, rub the sides of the racks with wax paper or a cloth containing a small amount of oil. -
Page 62: Care And Cleaning Of The Glass Cooktop
care and cLeaninG of the GLass cooktoP Normal daily use cleaning Use only a ceramic cooktop cleaner or the cleaner supplied with this appliance on the glass cooktop. Other creams may not be as effective. By following these steps, you can maintain and protect the surface of your glass cooktop. 1. - Page 63 Removing metal marks and scratches 1. Be careful not to slide pots and pans across your cooktop. It will leave marks on the cooktop surface. You can remove these marks by applying ceramic cooktop cleaner or the included cleaner with a cleaning pad for ceramic cooktops. 2.
-
Page 64: Removing And Replacing The Oven Door
reMoVinG and rePLacinG the oVen door How to remove the door • The door is very heavy. Be careful when removing and lifting the door. Do not lift the door by the handle. caution • Turn the power OFF before removing the door. 1. -
Page 65: Removing And Replacing The Warming Drawer
3. Open the door fully. If the door will not open fully, the indentation is not inserted correctly in the bottom edge of the slot. 4. Push the hinge locks up against the front frame of the oven cavity to the locked position. Hinge lock Unlocked position Locked position... -
Page 66: Changing The Oven Light
changing the oven light The oven light is a standard 40-watt appliance bulb. It will come on when the oven door is open. When the oven door is closed, press the OVEN LIGHT pad to turn it on or off. It will not work during a self-cleaning cycle. -
Page 67: Troubleshooting
Samsung works hard to ensure that you don’t have problems with your new electric range. If you run into unexpected trouble, look first for a solution in the table below. If, after trying the suggested solution, you’re still having trouble, call Samsung at 1-800-SAMSUNG (1-800-726-7864). - Page 68 PROBLEM POSSIBLE CAUSE SOLUTION The surface units Improper cookware is being used. • Use pans which are flat and match the will not maintain diameter of the surface unit selected. a rolling boil or In some areas, the power (voltage) • Cover the pan with a lid until the desired will not cook fast may be low.
- Page 69 PROBLEM POSSIBLE CAUSE SOLUTION Food does not bake The oven controls have not been • See the chapter on operating the oven. or roast properly. set correctly. The oven rack has been positioned • See the section on using the oven racks incorrectly or is not level.
- Page 70 PROBLEM POSSIBLE CAUSE SOLUTION The oven door will The oven is too hot. • Allow the oven to cool. not open after a self-cleaning cycle. Oven not clean The oven controls were not set • See the section on self-cleaning on page after a self-cleaning correctly.
- Page 71 SAMSUNG will repair or replace this product, at our option and at no charge as stipulated herein, with new or reconditioned parts or products if found to be defective during the limited warranty period specified above. All replaced parts and products become the property of SAMSUNG and must be returned to SAMSUNG.
- Page 72 CANADA 1-800-SAMSUNG (726-7864) www.samsung.com/ca_fr (French) MEXICO 1-800-SAMSUNG (726-7864) www.samsung.com U.S.A 1-800-SAMSUNG (726-7864) DG68-00429A NE597N0PBSR_BEST_DG68-00429A_EN_120412.indd 71 2012-04-12 11:59:32...
Need help?
Do you have a question about the NE597N0PBSR/AA and is the answer not in the manual?
Questions and answers