Table of Contents
Advertisement
Quick Links
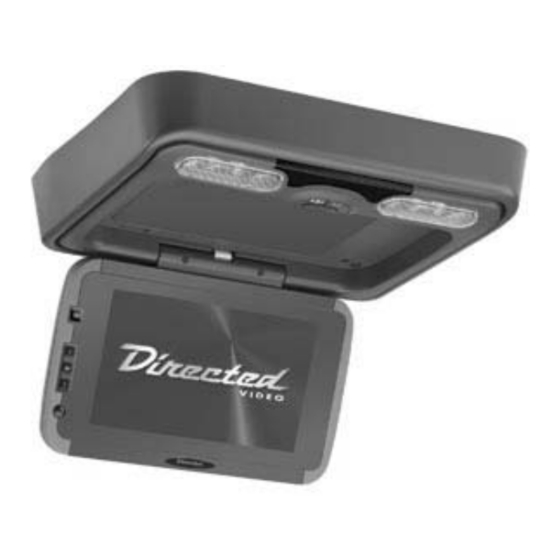
9 9 " " ( ( 1 1 6 6 : : 9 9 ) )
O O v v e e r r h h e e a a d d V V i i d d e e o o
M M o o n n i i t t o o r r
M M O O D D E E L L O O H H V V 9 9 0 0 1 1
© 2005 Directed Electronics, Inc. N81901 03-05
O O W W N N E E R R ' ' S S G G U U I I D D E E
I I N N S S T T A A L L L L A A T T I I O O N N G G U U I I D D E E
Advertisement
Table of Contents

Related Manuals for Directed Video OHV901


Summary of Contents for Directed Video OHV901
- Page 1 9 9 ” ” ( ( 1 1 6 6 : : 9 9 ) ) O O v v e e r r h h e e a a d d V V i i d d e e o o M M o o n n i i t t o o r r M M O O D D E E L L O O H H V V 9 9 0 0 1 1 ©...
- Page 2 N N O O N N - - T T R R A A N N S S F F E E R R A A B B L L E E L L I I M M I I T T E E D D O O N N E E Y Y E E A A R R C C O O N N S S U U M M E E R R W W A A R R R R A A N N T T Y Y Directed Electronics, Inc.
-
Page 3: Table Of Contents
T T a a b b l l e e o o f f C C o o n n t t e e n n t t s s N N o o n n - - T T r r a a n n s s f f e e r r a a b b l l e e L L i i m m i i t t e e d d O O n n e e Y Y e e a a r r C C o o n n s s u u m m e e r r W W a a r r r r a a n n t t y y ..........2 2 S S a a f f e e t t y y I I n n s s t t r r u u c c t t i i o o n n s s a a n n d d C C a a u u t t i i o o n n s s . - Page 4 S S a a f f e e t t y y I I n n s s t t r r u u c c t t i i o o n n s s a a n n d d C C a a u u t t i i o o n n s s W W A A R R N N I I N N G G : : TO REDUCE THE RISK OF FIRE OR ELECTRIC SHOCK, DO NOT EXPOSE THIS EQUIP- MENT TO RAIN OR MOISTURE.
-
Page 5: While Driving
W W e e l l c c o o m m e e Thank you for your purchase of Directed’s Overhead Monitor. Prior to operating this unit, please fully read this instruction manual and retain it for future reference. W W h h a a t t ’... -
Page 6: Picture Quality
R R E E P P A A I I R R S S If the monitor stops working for any reason, discontinue use immediately and consult with your retailer about any necessary repairs. R R A A D D I I O O / / T T V V T T U U N N E E R R U U S S E E When the unit is used in conjunction with a Radio/TV tuner, please assure that the receiver is man- ufactured to receive television broadcast signals that are transmitted via terrestrial radio waves. -
Page 7: Your Warranty
I I m m p p o o r r t t a a n n t t I I n n f f o o r r m m a a t t i i o o n n F F C C C C N N O O T T I I C C E E This device complies with Part 15 of FCC rules. -
Page 8: Monitor
C C o o n n t t r r o o l l s s M M O O N N I I T T O O R R DOME LIGHTS—Quantity 2. DOOR LIGHT On/Off—Engage this switch to have the door open switch activate the dome lights. - Page 9 S S e e t t t t i i n n g g t t h h e e S S c c r r e e e e n n M M o o d d e e The overhead monitor has 4 different screen modes.
- Page 10 R R e e m m o o t t e e C C o o n n t t r r o o l l U U n n i i t t R R E E M M O O T T E E B B U U T T T T O O N N S S 1.
-
Page 11: Remote Buttons
16. DOWN (display) 17. MENU/PBC 18-19 Numeric 20. Image (wide, zoom, full, normal) 21. TITLE 22. UP (Cursor) 23. SETUP 24. MUTE (on/off) 25. LEFT (Cursor) 26. ENTER 27. RIGHT (Cursor) I I R R R R E E M M O O T T E E F F E E E E D D T T H H R R O O U U G G H H The remote will operate, through the monitor, and transmit commands to other compatible devices attached to the AV1 or AV2 source at the switch-box. - Page 12 B B A A T T T T E E R R Y Y R R E E P P L L A A C C E E M M E E N N T T N N O O T T E E : : Before using remote after installation, remove the battery plastic protective slip. 1.
- Page 13 O O p p e e r r a a t t i i n n g g t t h h e e M M o o n n i i t t o o r r O O P P E E N N / / C C L L O O S S E E T T H H E E D D I I S S P P L L A A Y Y M M O O N N I I T T O O R R To open the display monitor, push the "OPEN"...
- Page 14 P P o o w w e e r r U U p p / / D D o o w w n n t t h h e e D D i i s s p p l l a a y y M M o o n n i i t t o o r r The unit will power up when the display monitor is unlatched and pulled down.
- Page 15 M M E E N N U U ( ( C C O O N N S S O O L L E E M M E E N N U U ) ) Press "MENU" button on the monitor or remote to activate the screen parameters set-up. The sequence of set-up items is as follows: FM →...
- Page 16 I I n n s s t t a a l l l l i i n n g g O O p p t t i i o o n n s s This unit allows the mounting of an optional DVD player or Hard Drive, not provided with this model. N N O O T T E E : : Before installing any options, ensure that the Power to the Monitor is Off and that the ignition key is Off.
-
Page 17: Directed Electronics, Inc
I I n n s s t t a a l l l l a a t t i i o o n n G G u u i i d d e e P P R R E E C C A A U U T T I I O O N N S S This unit should be installed by an authorized Directed dealer. - Page 18 E E L L E E C C T T R R I I C C A A L L C C O O N N N N E E C C T T I I O O N N S S P P o o w w e e r r C C a a b b l l e e ( ( 4 4 –...
- Page 19 S S I I G G N N A A L L C C O O N N N N E E C C T T I I O O N N S S A A d d a a p p t t e e r r A A u u d d i i o o C C o o l l o o r r C C o o d d e e 1 (RCA) White 1 (RCA)
- Page 20 T T Y Y P P I I C C A A L L W W I I R R I I N N G G D D I I A A G G R R A A M M Wireless Headphones YELLOW–12V Constant...
-
Page 21: Dome Light Wiring
I I n n s s t t a a l l l l a a t t i i o o n n P P r r o o c c e e d d u u r r e e Identify the polarity of the dome light circuit and set the switch on the cable connection side of the overhead monitor housing to match the vehicle’s door trigger polarity. - Page 22 Cut a 1" hole in the headliner along the backside of the mounting bracket for the cables to pass through. Route cables through the hole to the predetermined location of the AV source(s). Identify the dome light wires in the vehicle and connect them to the corresponding dome light wires on the overhead monitor system.
- Page 23 S S y y s s t t e e m m W W i i r r i i n n g g D D i i a a g g r r a a m m E E x x a a m m p p l l e e BATTERY (+12V) BLACK (GROUND) ©...
- Page 24 T T r r o o u u b b l l e e s s h h o o o o t t i i n n g g N N o o P P i i c c t t u u r r e e Press the POWER (source) button (or the button on the remote) to make sure the monitor is on and the proper source input is selected.
- Page 25 T T h h e e R R e e m m o o t t e e d d o o e e s s N N O O T T F F u u n n c c t t i i o o n n Are there obstacles obstructing the view between the monitor and the remote.
- Page 26 S S p p e e c c i i f f i i c c a a t t i i o o n n s s S S y y s s t t e e m m Laser Signal Formats A A u u d d i i o o C C h h a a r r a a c c t t e e r r i i s s t t i i c c s s...
- Page 27 T T h h e e c c o o m m p p a a n n y y b b e e h h i i n n d d t t h h i i s s s s y y s s t t e e m m i i s s D D i i r r e e c c t t e e d d E E l l e e c c t t r r o o n n i i c c s s , , I I n n c c . . Since its inception, Directed has had one purpose, to provide consumers with the finest vehicle security, car stereo products, rear seat entertainment, and accessories available.
Need help?
Do you have a question about the OHV901 and is the answer not in the manual?
Questions and answers