
Related Manuals for Directed Video OHD1502


Summary of Contents for Directed Video OHD1502
- Page 1 OWNER’S GUIDE INSTALLATION GUIDE 15.4” (16:9) Overhead Video Monitor MODEL OHD1502 © 2004 Directed Electronics, Inc. N82104 05-04...
- Page 2 Viewing the monitor while operating a motor vehicle can result in serious injury and/or property damage. Directed is not responsible for any injury and/or property damage as a result of the improper use or viewing of the monitor. © 2004 Directed Electronics, Inc...
- Page 3 VCR head, or Product which has been opened or tampered with for any reason or which has been damaged due to alteration or service performed by anyone other than Directed Electronics, Inc. ALL WARRANTIES INCLUDING BUT NOT LIMITED TO EXPRESS WARRANTY, IMPLIED WARRANTY, WARRANTY...
-
Page 4: Important Information
Make sure you receive the warranty registration from your dealer. It is also necessary to keep your proof of purchase, which reflects that the product was installed by an authorized dealer. © 2004 Directed Electronics, Inc... -
Page 5: Table Of Contents
............. . . 23 © 2004 Directed Electronics, Inc... -
Page 6: Safety Instructions And Cautions
IN MOTION. SUCH USE MAY DISTRACT THE DRIVER OR INTERFERE WITH THE SAFE OPERATION OF THE VEHICLE, AND MAY ALSO VIOLATE STATE LAW. DIRECTED ELECTRONICS, INC. DISCLAIMS ANY LIABILITY FOR ANY BODILY INJURY, INCLUDING FATALITIES, OR PROPERTY DAMAGE THAT MAY RESULT FROM ANY IMPROPER OR UNINTENDED USES OF THIS PRODUCT. -
Page 7: Important
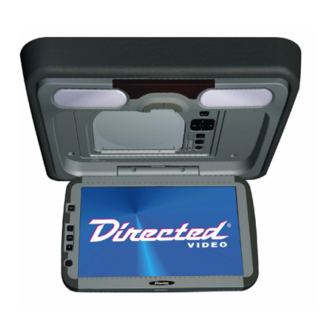
The picture quality of this LCD unit depends strictly on its installed location. To achieve the best picture quality, adjust the brightness control or viewing angle of the unit until the optimum viewing is achieved. Installation Guide PRECAUTIONS © 2004 Directed Electronics, Inc... - Page 8 Do not install screws over the plane surface, which may affect monitor eject or retract function. Opening the Overhead Monitor Press the “OPEN” button to release the overhead monitor. closed position © 2004 Directed Electronics, Inc. © 2004 Directed Electronics, Inc open position...
- Page 9 The vehicle’s ignition key must be “ON” or “ACC” position for the monitor to have power. NOTE: © 2004 Directed Electronics, Inc...
-
Page 10: Setting The Screen Mode
FULL, NORMAL, WIDE and ZOOM. Pressing the MODE button on the front control panel or the remote control can access the different screen modes. The current mode is displayed on the screen first. Each time the MODE button is pressed, the screen mode switches in the following sequence: © 2004 Directed Electronics, Inc... -
Page 11: Function Keys
Selects the items to be adjusted. Menu Button: Press the menu button to access the monitor adjustments. Press Menu button over 1 second can turn FM on/off. Selects the items to be adjusted. 9. IR Sensor © 2004 Directed Electronics, Inc... -
Page 12: Remote Control Unit
Right Cursor Button ○ Enter Cursor Button ○ Mode Button ○ Play/Pause Button ○ Headphone Button ○ Reverse Button ○ Fast Forward Button ○ Previous/Preserve Skip Button ○ Next Button ○ . ○ Volume Adjust Button © 2004 Directed Electronics, Inc... -
Page 13: Replacement Of Battery
3. If the remote is not to be used for a long period, remove the battery from the remote to prevent damage from battery leakage. 4. To avoid accidents, prevent children from playing with the battery. © 2004 Directed Electronics, Inc... -
Page 14: Loading And Unloading Discs
1. Press at the upper right corner to open the door. 2. Remove the disc. (Avoid touching the recorded surface.) 3. Push to close the door, until you hear a click sound from the door mechanism. © 2004 Directed Electronics, Inc... - Page 15 Audio Button ○ Menu Button ○ Up Button ○ Down Button ○ Left Button ○ Right Button ○ Enter Button ○ Play/Pause Button ○ Stop Button ○ MS Card ○ SD Card ○ CF Card © 2004 Directed Electronics, Inc...
-
Page 16: Dvd Playback
1. Press the Left and Right arrow buttons, you can activate Directory Region, File Region and File Switch Region separately. 2. The highlight in Directory Region and File Region is shown as the picture above; while it appears a transparent rectangle in File Switch Region. © 2004 Directed Electronics, Inc... -
Page 17: Settings And Adjustments
(2) Screen Saver ON: Choose this setting to activate the screen saver. OFF: Choose this setting to cancel the screen saver. ” and “ ” will appear to white and “ © 2004 Directed Electronics, Inc ” black. If a MP3... - Page 18 Select the VIEW ALL option to cancel the rating limit. The default setting is VIEW ALL. Notes: If the password option is locked, you cannot set the ratings limit; the rating limit doe not work when the password option unlocked. their original aspect ratio © 2004 Directed Electronics, Inc...
- Page 19 Highlight the MENU LANG option, and press the Arrow buttons to choose the menu language you prefer. Press Enter to confirm. You can select English, Japan, French, Spanish, Portuguese, Latin, German and Chinese. SCREEN SAVER © 2004 Directed Electronics, Inc...
-
Page 20: Installation
•Do not open the case; there are no serviceable parts inside. If you drop anything into the unit during installation, consult with your dealer or an authorized Clarion service center. WARNING! Be sure to disconnect the battery (-) negative terminal before starting. This is to prevent short circuits during the installation. © 2004 Directed Electronics, Inc... -
Page 21: Installation Procedure
12. Ground the Black wire of the power harness to a clean ground spot. Note: Make sure you keep the ground wire of the model and video source as short as possible to prevent any type of unwanted vehicle noise. © 2004 Directed Electronics, Inc... -
Page 22: Connection Diagram
Please contact a qualified Directed technician for further installation assistance. A/V Cable A/V Input Connector Function Audio B-L IR EXT Audio B-R Audio A-L Audio A-R MUTE Video 2 Source select B Source select A GND A/V GND Shielding GROUND © 2004 Directed Electronics, Inc... -
Page 23: Complete System Diagram
Complete System Diagram YELLOW (+12V) Video Out BLACK (GEN Power RED (ACC) YELLOW (B+) BLACK (GEN GRAY (Door Switch) IR Transmitter © 2004 Directed Electronics, Inc... -
Page 24: Sample Installation
Make sure that the screws you use to mount the bracket, monitor, or optional spacers are not to long! If the screws are to long, they will damage the roof of the vehicle. Take great care when planning this part of the installation. © 2004 Directed Electronics, Inc... -
Page 25: Package Contents
Package Contents Overhead Monitor 1 5M Power Cable 1 75cm Power Cable 1 Metal Mounting Bracket 1 Screws For Metal Mounting Bracket 1 IO Box 1 Trim Ring 1 Remote Control © 2004 Directed Electronics, Inc... -
Page 26: Troubleshooting
MODE button on the remote control. With a widescreen 16:9 monitor, I have black bars on the screen? Change the T.V. display mode to “Wide”. Unit does not eject? Make sure the model is powered “ON” © 2004 Directed Electronics, Inc... -
Page 27: Specifications
90dB 0.01 % DVD video 2 Vrms 1 Vp-p @75 ohms 2 Vrms 1 Vp-p @75 ohms 14.4V DC, 3.35 amps 23 watts 474.54x387.3x71.54mm 6.2Kg 10% to 90% 20Hz-40KHZ∀1dB 20Hz-40KHZ∀1dB 20Hz-40KHZ∀1dB 95dB 95dB 18.68x15.25x2.82 in © 2004 Directed Electronics, Inc...
Need help?
Do you have a question about the OHD1502 and is the answer not in the manual?
Questions and answers