Table of Contents

Related Manuals for Directed Video OHD070


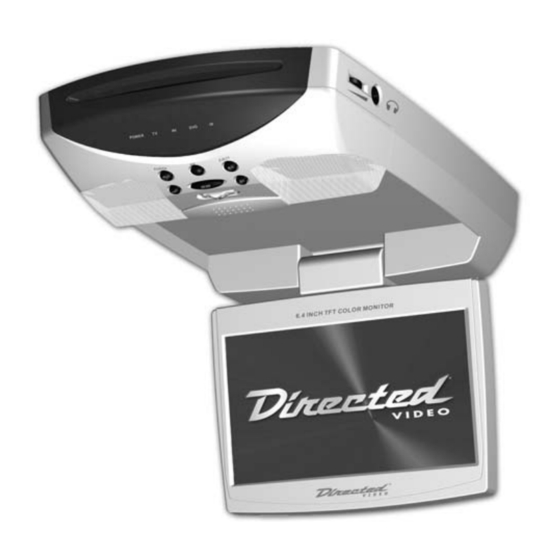
Summary of Contents for Directed Video OHD070
- Page 1 7” Mobile Video System M M O O D D E E L L O O H H D D 0 0 7 7 0 0 © 2004 Directed Electronics, Inc. N83070 12-04 O O W W N N E E R R ’ ’ S S G G U U I I D D E E I I N N S S T T A A L L L L A A T T I I O O N N G G U U I I D D E E...
- Page 2 In such states, the exclusion or limitation of this Limited Warranty may not apply to you. This Limited Warranty gives you specific legal rights, and you may have other rights which vary from state to state. 920-0001 Directed Video, 1 year Warranty Rev 11-04 Directed Video 1 year RSE warranty 11-17-04.doc...
-
Page 3: Table Of Contents
T T a a b b l l e e o o f f C C o o n n t t e e n n t t s s Non-Transferable Limited Consumer Warranty ......2 Safety Information . - Page 4 LCD Menu Operations ........21 Menu...21 Transmit ...21 Screen...21...
- Page 5 I I m m p p o o r r t t a a n n t t N N o o t t e e s s N N O O T T E E : : The parental level control is discussed in the Preferences Setup section of this manual.
- Page 6 Congratulations on your purchase of the world’s finest video entertainment system. At Directed we are committed to bringing you the most technologically advanced products available. We are pleased that you chose a Directed Video product. Through years of critical testing and hand craftsmanship, we have created a wide range of video entertainment products for your viewing pleasure.
-
Page 7: Your Warranty
Y Y o o u u r r W W a a r r r r a a n n t t y y Your warranty registration must be completely filled out and returned within 10 days of purchase. Your product warranty will not be validated if your warranty reg- istration is not returned. -
Page 8: Installation
I I n n s s t t a a l l l l a a t t i i o o n n P P R R E E L L I I M M I I N N A A R R Y Y P P R R E E P P A A R R A A T T I I O O N N S S N N O O T T E E : : The unit should be installed by a qualified service technician. - Page 9 Self-tapping Screws ( ø4x10) Slots DVD Bracket Mounting Bolts (M3.5x10) Rubber Caps 1. Determine the mounting location and drill four mounting holes (see the figure above). 2. Attach the mounting bracket to the holes with the self-tapping screws (ø4x10). 3. Let the two levers aim at the slots on the DVD bracket to fix the display unit. 4.
- Page 10 E E L L E E C C T T R R I I C C A A L L C C O O N N N N E E C C T T I I O O N N S S P P O O W W E E R R A A N N D D V V I I D D E E O O W W I I R R I I N N G G Power and Dome Lamp Wiring...
- Page 11 V V i i d d e e o o S S y y s s t t e e m m C C o o n n t t r r o o l l s s a a n n d d D D e e s s c c r r i i p p t t i i o o n n ©...
- Page 12 1. POWER Button 2. EJECT Button 3. MENU Button 4. MOD Button 5. Car Dome Lamps 6. Light Switch 7. VOLUME+ 8. VOLUME- 9. IR Receiver 10. Indicator Light for DVD N N O O T T E E : : The TRANSMIT feature must be Off on the Setup Menu for the speakers to operate. The auxiliary audio output and conventional headphone jacks are active at all times.
- Page 13 R R e e m m o o t t e e C C o o n n t t r r o o l l F F U U N N C C T T I I O O N N S S MUTE MODE TITLE...
- Page 14 5. ANGLE Changing of the view angle on multi-angle DVD disc. 6. DISPLAY Display statistical disc information during playback. 7. MODE Changing between DVD mode, TV mode and AV mode. 8. SETUP Display the SETUP menu. 9. PAL/NTSC Switch between PAL mode and NTSC mode. 10.
-
Page 15: Remote Control
26. RESUME When in stop mode, press the button, the play can be resumed from the stop point. 27. GOTO Disc search button, used with numeric buttons. 28. PBC Changing between PBC ON and PBC OFF on the VCD disc. 29. - Page 16 O O p p e e r r a a t t i i o o n n L L O O A A D D I I N N G G / / E E J J E E C C T T I I N N G G A A D D I I S S C C When you have installed the unit and all connections have completed, you can load a disc as follows: 1.
-
Page 17: Mute
Normal playback 1X 2X 3X 4X MP3: Normal playback 2X 4X 6X 8X On the next press of the button after reaching the maximum speed, the disc resumes normal playback speed. S S K K I I P P P P I I N N G G T T R R A A C C K K Press the buttons on the remote control during playback. -
Page 18: Repeat
R R E E P P E E A A T T FOR DVD: Press the REPEAT button to cycle through the select repeat mode as follows: CHAPTER REPEAT ON—TITLE REPEAT ON—REPEAT OFF FOR VCD/CD: Press the REPEAT button to cycle through the select repeat mode as follows. REP-ONE—REP-ALL—REPEAT OFF 1. -
Page 19: Program
FOR CD/VCD (WITH PBC OFF): Press GOTO button once, the screen will display the following message: GO TO -- : -- 00:00:25 Use numeric buttons to input the time directly. Z Z O O O O M M Allows the picture to be increased in size. Press ZOOM to toggle among 1.5 scale, 2.0 scale and 3.0 scale. -
Page 20: Jack For Earphone
L L I I G G H H T T S S W W I I T T C C H H The two car dome lamps on the unit will be illuminated depending on the lamp operation setting. There are three settings for the car dome lamp operation: OFF, AUTO, and ON. -
Page 21: Transmit
L L C C D D M M e e n n u u O O p p e e r r a a t t i i o o n n s s M M E E N N U U Press the MENU button on the unit or on the remote control during DVD or AV mode to display a menu of the adjustment items on the screen. - Page 22 O O n n S S c c r r e e e e n n D D i i s s p p l l a a y y s s D D I I S S P P L L A A Y Y Press the DISPLAY button during playback to display the contents of the current disc on the screen.
- Page 23 V V C C D D (1) Press DISPLAY for the first time: SINGLE ELAPSED 00:00:25 The remaining playing time for the single presently playing is displayed. (2) Press DISPLAY a second time: SINGLE REMAIN 00:03:15 The remaining time for the single presently playing is displayed. (3) Press DISPLAY a third time: TOTAL ELAPSED 00:00:25...
- Page 24 (2) Press DISPLAY a second time: SINGLE REMAIN 00:03:15 TRACK: 01/14 The remaining time for the track presently playing is displayed. (3) Press DISPLAY a third time: TOTAL ELAPSED 00:00:25 TRACK: 01/14 The elapsed playing time for the disc presently playing is displayed. (4) Press DISPLAY a fourth time: TOTAL REMAIN 00:40:35...
- Page 25 CHAPTER ELAPSED 00:00:25 TRACK: 01/123 The elapsed playing time for the chapter presently playing is displayed. (2) Press DISPLAY a second time: CHAPTER REMAIN 00:04:25 TRACK: 01/123 The remaining time for the chapter presently playing is displayed. (3) Press DISPLAY a third time: The message is cleared off the screen.
- Page 26 T T I I T T L L E E M M E E N N U U F F U U N N C C T T I I O O N N This function applies only to DVDs. If the DVD has multiple titles recorded on the disc.
-
Page 27: Play Mode
M M P P 3 3 D D I I S S C C P P L L A A Y Y When a MP3 disc is playing an example of the format of the FOLDER is as follows: SMART NAV1 ROOT PLAY MODE Use the... -
Page 28: General Setup
S S e e t t u u p p I I N N I I T T I I A A L L S S E E T T U U P P 1. Press SETUP in the stop mode. (Press the stop button twice to ensure that the player is in STOP mode.) The initial SETUP menu is displayed. -
Page 29: Angle Mark
G G E E N N E E R R A A L L S S E E T T U U P P T T V V D D I I S S P P L L A A Y Y S S E E T T U U P P TV DISPLAY PIC MODE ANGLE MARK... - Page 30 P P I I C C M M O O D D E E S S E E T T U U P P TV DISPLAY PIC MODE ANGLE MARK OSD LANG CAPTIONS SCR SAVER MAIN PAGE Select the AUTO button, the player PIC mode will depend on the formatting of DVD disc.
-
Page 31: On Screen Displays
If it is set to ON, when the multi-angle recorded DVD disc is playing, the angle icon) will appear on the screen; if it is set to "OFF", the mark will not appear. O O S S D D L L A A N N G G TV DISPLAY PIC MODE ANGLE MARK... - Page 32 S S C C R R S S A A V V E E R R TY DISPLAY PIC MODE ANGLE OSD LANG CAPTIONS SCR SAVER MAIN PAGE Select the SCR SAVER ON/OFF. S S P P E E A A K K E E R R S S E E T T U U P P DOWNMIX MAIN PAGE This is to activate the audio output from DOLBY AC3 5.1 DOWNMIX to 2 channel...
- Page 33 Select the preferred SPEAKER connection by using the cursor buttons. ❍ Select the LT/RT to activate the Dolby surround-sound compatible output. ❍ Select the STEREO to activate stereo mode. A A U U D D I I O O S S E E T T U U P P A A U U D D I I O O O O U U T T AUDIO OUT OP MODE...
-
Page 34: Audio Out
O O P P M M O O D D E E AUDIO OUT OP MODE DYNAMIC LPCM MAIN PAGE There are two operating modes for the Dolby Digital decoder: LINE OUT and RF REMOD. D D Y Y N N A A M M I I C C R R A A N N G G E E C C O O N N T T R R O O L L AUDIO OUT OP MODE DYNAMIC... - Page 35 L L P P C C M M O O U U T T P P U U T T AUDIO OUT OP MODE DYNAMIC LPCM MAIN PAGE Select the LPCM OUTPUT between LPCM48K and LPCM 96K. P P R R E E F F E E R R E E N N C C E E S S S S E E T T U U P P ( ( I I N N C C L L U U D D I I N N G G P P A A R R E E N N T T A A L L ) ) T T V V T T Y Y P P E E S S E E T T U U P P TV TYPE AUDIO...
- Page 36 Select NTSC format, when the unit is connected to NTSC TV. Select PAL format, when the unit is connected to PAL TV. Select AUTO format, the player TV output format will be according to the DVD disc format. A A U U D D I I O O ( ( L L A A N N G G U U A A G G E E ) ) TV TYPE AUDIO SUBTITLE...
- Page 37 S S U U B B T T I I T T L L E E ( ( L L A A N N G G U U A A G G E E ) ) TV TYPE AUDIO SUBTITLE DISC MENU PARENTAL PASSWORD...
- Page 38 P P A A R R E E N N T T A A L L TV TYPE AUDIO SUBTITLE DISC MENU PARENTAL PASSWORD DEFAULTS SMART NAV LOGO MAIN PAGE Select suitable parental guidance by the cursor buttons and confirm by pressing ENTER button.
-
Page 39: Smart Nav
D D E E F F A A U U L L T T S S TV TYPE AUDIO SUBTITLE DISC MENU PARENTAL PASSWORD DEFAULTS SMART NAV LOGO MAIN PAGE Select reset to revert to factory initial settings (except for password). S S M M A A R R T T N N A A V V TV TYPE AUDIO... - Page 40 L L O O G G O O TV TYPE AUDIO SUBTITLE DISC MENU PARENTAL PASSWORD DEFAULTS SMART NAV LOGO MAIN PAGE The LOGO feature is inactive. 4 4 0 0 ORIG LOGO CUST LOGO © 2004 Directed Electronics, Inc.
-
Page 41: General Setup
F F A A C C T T O O R R Y Y D D E E F F A A U U L L T T S S E E T T T T I I N N G G The following table lists the factory default settings for each setup feature. -
Page 42: Cleaning The Lcd Screen
A A p p p p e e n n d d i i x x A A – – C C l l e e a a n n i i n n g g C C L L E E A A N N I I N N G G T T H H E E L L C C D D S S C C R R E E E E N N C C A A U U T T I I O O N N : : To avoid possible shock hazard and equipment damage, be sure the LCD sys- tem is turned off and unplugged from the main electrical outlet before cleaning. - Page 43 Use a dry soft cloth to wipe the surface. If the disc is quite dirty, use a soft cloth slightly moistured with isopropyl (rubbing) alcohol. Never use solvents such as ben- zine, thinner or conventional record cleaners as they may mar the surface of the disc.
- Page 44 A A p p p p e e n n d d i i x x B B – – T T r r o o u u b b l l e e s s h h o o o o t t i i n n g g I I f f t t h h e e u u n n i i t t f f a a i i l l s s t t o o o o p p e e r r a a t t e e n n o o r r m m a a l l l l y y , , t t r r y y s s o o l l v v i i n n g g t t h h e e p p r r o o b b l l e e m m s s u u s s i i n n g g t t h h e e p p r r o o c c e e d d u u r r e e s s b b e e l l o o w w .
- Page 45 a. Check digital connections. b. Check the Digital Audio menu setup to ensure that the digital output is correctly set. Check if the audio format of the selected audio language matches your systems capabilities. 10. Remote control not working. a. Check to verify that the batteries are installed correctly (polarities aligned with case markings), replace if necessary (2-AAAs).
- Page 46 A A p p p p e e n n d d i i x x C C – – S S p p e e c c i i f f i i c c a a t t i i o o n n s s Signal System Discs compatability Audio output...
- Page 47 T T h h e e c c o o m m p p a a n n y y b b e e h h i i n n d d t t h h i i s s s s y y s s t t e e m m i i s s D D i i r r e e c c t t e e d d E E l l e e c c t t r r o o n n i i c c s s , , I I n n c c . . Since its inception, Directed has had one purpose, to provide consumers with the finest vehicle security, car stereo products, rear seat entertainment, and accessories available.
Need help?
Do you have a question about the OHD070 and is the answer not in the manual?
Questions and answers