Table of Contents
Advertisement
Advertisement
Table of Contents

Subscribe to Our Youtube Channel
Related Manuals for Directed Electronics 3000


Summary of Contents for Directed Electronics 3000
- Page 1 ® 3000 O O w w n n e e r r ’ ’ s s G G u u i i d d e e...
-
Page 2: Limited Lifetime Consumer Warranty
Directed Electronics does not authorize any per- son to create for it any other obligation or liability in connection with this security system. -
Page 3: Trademarks And Copyrights
This product warranty is automatically void if its date code or serial number is defaced, miss- ing, or altered. This warranty will not be valid unless you have completed the warranty card and mailed it to Directed Electronics within 10 days after purchase to the address listed on the warranty registration card. -
Page 4: Table Of Contents
table of contents limited lifetime consumer warranty .....i trademarks and copyrights ..ii table of contents ... . .1 what is included . -
Page 5: What Is Included
: : Your system MUST be installed by an Authorised dealer in accor- dance with the instructions we supply them. The Merlin 3000 system is designed to be installed on any 12-volt, negative ground motorcy- cle or moped. -
Page 6: System Maintenance
Your authorized dealer can correct any system wiring prob- lems and, if needed, can return any malfunctioning component to Directed Electronics for repair/replacement under the terms of the Limited Lifetime Warranty printed at the beginning of this guide. -
Page 7: Remote Configurations
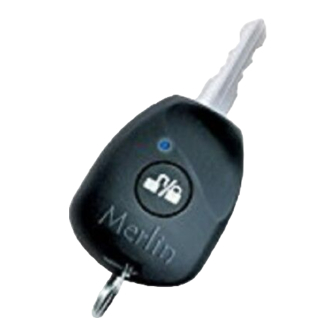
The 3000 system has an in-key 2-button remote control and a 3-button remote control. Two additional Merlin remote controls can be added. ARM/DISARM/PANIC ARM/DISARM/PANIC IN-KEY 2-BUTTON REMOTE CONTROL FRONT REAR 3-BUTTON REMOTE CONTROL ACCESSORY SILENT ARM/DISARM © 2 0 0 5 d i re c t e d e l e c t ro n i c s , a l l r i g h t s re s e r v e d... -
Page 8: Remote Functions
remote functions This system uses computer-based code learning to learn the remote buttons. This makes it possible to assign any remote button to any sys- tem function. The remotes initially come programmed with standard configuration. The buttons in all of the instructions in this manual cor- respond to a standard configuration remote. -
Page 9: Using Your System
Button An optional accessory convenience or expansion function that you have added to your system can be activated by pressing this button. Button Silent arm and disarm is controlled by this button. Buttons When pressed together, these buttons disable the on-board control module tilt sensor and any optionally installed sensors. - Page 10 While the system is armed, the LED status indicator will flash approxi- mately once per second showing that the system is actively protecting your vehicle. If you hear more than one chirp when arming, refer to the Diagnostics section of this guide. These extra chirps confirm a malfunc- tion autobypass.
-
Page 11: Disarming
disarming To disarm the system, press parking lights will flash twice. If the siren chirps four times when disarm- ing, refer to the Diagnostics section of this guide. This is called Tamper Alert. If the siren is active (sounding) when the system is disarmed you will hear three chirps but the system is not disarmed. -
Page 12: Auto-Immobilisation
Then once. Then once. This enters the final digit 1. auto-immobilisation Immobiliser circuits automatically activate after 30-seconds. Auto-immobilisation sequence: Turn ignition off or disarm alarm. After 30-seconds the systems Immobilisation circuits activate and engage the starter and engine interrupts. LED flashes at ½ normal speed. Disarm the system when immobilised: Use one of the following methods to turn off auto-immobilisation. -
Page 13: Remote Chirp Muting (3-Button Remote Only)
When you remote siren silence, the siren will either chirp 1 or 3 times. 1-chirp indicates that the system is still armed, and that all zones are inactive and being monitored. 3-chirps indicate that the system is still armed, and that at least one zone is still active and being bypassed. -
Page 14: Remote Sensor Disable
remote sensor disable This can be performed anytime the system is armed. Follow the proce- dure listed below. Arm the system. Using the remote press The indicators will flash four times; all Warn Away optionally installed sensors are now bypassed (zones two and three). -
Page 15: Auxiliary Channel Bypass
auxiliary channel bypass All alarm sensor inputs will be bypassed while a pulsed or timed auxil- iary output is active. panic mode If you are threatened near your vehicle, you can attract attention by triggering the system with your remote! Just press onds to enter Panic Mode. -
Page 16: Remote Valet Mode
remain on if Valet Mode has been entered. The LED status indicator will light steadily if you are entering Valet Mode. N N o o t t e e : : The LED will turn off when the ignition is ON. To exit Valet Mode: Turn the ignition On. -
Page 17: Instant Auto-Arming Bypass
instant auto-arming bypass This will bypass the auto arm feature once only. With the key, turn the ignition on, then off within two seconds. The siren will chirp once to confirm auto arming bypass. The system will not auto arm. n n o o t t e e : : The system will revert to normal auto arming when the system sees the ignition on for at least three seconds and then turned off, or the system is armed and disarmed with the remote. -
Page 18: 2 0 0 5 D I Re C T E D E L E C T Ro N I C S , A L L R I G H T S Re S E R V E D
n n o o t t e e : : Arming and disarming the system does not reset this function.The only ways to reset a bypassed zone are for it to not trigger for 60 min- utes, or to turn on the ignition. If testing your system, it is important to remember that the NPC bypassed and appear to stop working. -
Page 19: Diagnostics
diagnostics The microprocessor at the heart of your security system is constantly monitoring all of the switches and sensors that are connected to it. It detects any faulty switches and sensors and prevents them from dis- abling the entire system. The microprocessor will also record and report any triggers that occurred during your absence. -
Page 20: Disarming Diagnostics
disarming diagnostics Extra disarm chirps are the Tamper Alert. If four chirps are heard when disarming, the system was triggered in your absence. If four chirps are heard, the LED status indicator will indicate which zone was triggered when the ignition is turned on and will repeat 5-times (refer to the Arm/Disarm Diagnostic Chart and Table of Zones section). -
Page 21: Table Of Zones
table of zones The zone number is the number of LED flashes used by the system to identify a specific input. The standard input assignments are listed below, along with spaces to write in any optional sensors or switches you have had installed. If a Warning Zone response is triggered, the LED will not report it. -
Page 22: High Frequency
high frequency Your system transmits and receives at 433 MHz. This provides a cleaner spectrum with less interference and a more stable signal. rapid resume logic This security system will store its current state to non-volatile memory. If power is lost and then reconnected the system will recall the stored state from memory. -
Page 23: Power Saver Mode
power saver mode When in Valet mode, the LED will turn off 1-hour after enter- ing Valet mode. After 24 hours in the armed state, the LED will decrease the flash rate to the normal rate. After 96 hours of no activity (arm, disarm, or alarm trigger) the alarm enters sleep mode. -
Page 24: Programming Options
programming options Programming options control what your system does during normal operation, and require few or no additional parts. However, some may require additional installation labor. Following is a list of the program settings, with the factory settings in bold: Autoarming on or autoarming off of the alarm : Automatic arming 30-seconds after ignition turned off. -
Page 25: Manual Programming Instructions
manual programming instructions It is a good idea to document changes by taking note of all feature changes made in programming mode. To enter the User Selectable Features programming: Ignition on - Turn the ignition to the on/run position or start the engine. - Page 26 Feature change - Press the the system chirps once, the feature has just turned off or switched to the first setting in the grid slot for this feature; if the system chirps twice, the feature has just turned on or switched to the second setting in the grid slot.
-
Page 27: User Selectable Features
user selectable features user selectable features descriptions - column one add new remote (for 2-button in-key and 3-button remotes only) Auto-learn new remote controls to the system (one at a time) in the standard button configuration. For more infor- mation, refer to Note #1 in Programming Notes section. ©... - Page 28 auto (passive) arm - on/off On: When the system sees the ignition turn off, it will begin a 30-second countdown before arming itself. The count- down is indicated by the system LED rapid flashing. After the first five seconds, you will hear one chirp and the indicators will flash.
-
Page 29: User Selectable Features Descriptions - Column Two
user selectable features descriptions - column two set pin code This feature allows you to change your personal PIN code. For more information, please refer to the PIN Programming section of this guide. Factory default PIN number is 2. select siren sounds This feature allows you to select which siren sounds will be played back when the alarm is triggered. -
Page 30: User Selectable Features Descriptions - Column Three
system resets the one hour timer. If one hour passes and the zone has not triggered again, the zone is activated and can trigger the system again. NPC monitors sensor inputs and the door trigger. If NPC ® turned off, the system will respond to repeated triggers on the sensor inputs and will do so indefinitely. - Page 31 n n o o t t e e : : When programming a remote control to custom configuration, a remote button must first be learned to the arm/disarm. The rest of the features in this column can then be learned. A remote button can only be learned to one designated feature.
-
Page 32: Pin Programming
pin programming A PIN code can have one to four digits; each digit can be from 0-9. n n o o t t e e : : A PIN code cannot begin with a zero. Programming Procedure Enter the feature location (column 2, row 1) in the user- selectable programming grid. - Page 33 PIN Code Confirmation Procedure Begin this procedure within 15 seconds of finishing the programming sequence or the new code will not be set. Turn on the ignition. Enter the new PIN code. Press and hold LED turns on: New PIN code is learned and program- ming is complete.
-
Page 34: Glossary Of Terms
It houses the micro- processor which monitors your vehicle and controls all of the system's functions. The Merlin 3000 control unit houses the battery backup siren and Tilt sensor. Input : A physical connection to the system. An input can be provided by a sensor, switch or through an existing system on the motorcycle. -
Page 35: Expansions
security & convenience expansions Here we have listed only some of the many expansion options avail- able. Please contact your dealer for a complete list of all the options available to you. Field Disturbance Sensor: An invisible dome of coverage is established by installing the 508D "radar"... -
Page 36: Quick Reference Guide
QUICK REFERENCE GUIDE remote functions function Arm/Disarm/Panic Accessory Output Silent Arm/Disarm Sensor Disable Remote Valet ■ Transmit "Silent Arm/Disarm" to delete the arm/ disarm chirps for one operation only. ■ Transmit "Sensor Disable" once to bypass the sensor warn away chirps, twice to bypass sensors entirely. Note: The system must be armed first. - Page 37 system disarm To disarm the system without a transmitter, turn the key to the ON position and enter your PIN code. valet mode entry To enter Valet Mode without a transmitter, turn the key to the ON position and enter your PIN code. Continue to hold seconds.
- Page 38 The company behind this system is Directed Electronics. Since its inception, Directed Electronics has had one purpose, to provide consumers with the finest vehicle security and car stereo products and accessories available. The recipient of nearly 100 patents and Innovations Awards in the field of advanced electronic technology, Directed is ISO 9001 registered.
Need help?
Do you have a question about the 3000 and is the answer not in the manual?
Questions and answers