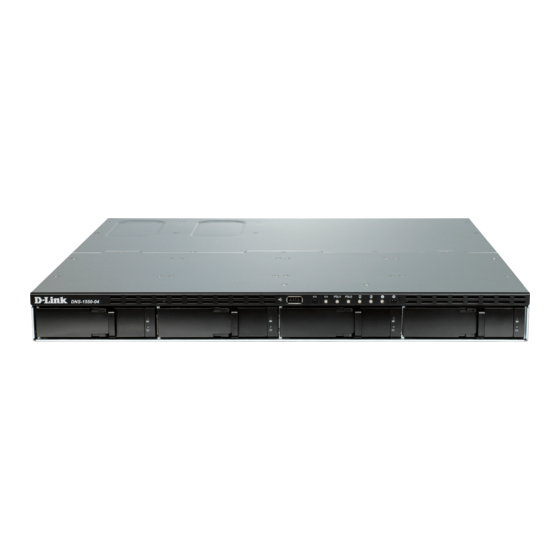
D-Link ShareCenter Pro DNS-1550-04 User Manual
4-bay smb rack-mount unified network storage enclosure
Hide thumbs
Also See for ShareCenter Pro DNS-1550-04:
- Quick installation manual (13 pages) ,
- Quick installation manual (65 pages) ,
- Quick installation manual (61 pages)
Table of Contents
Advertisement
Advertisement
Table of Contents

Related Manuals for D-Link ShareCenter Pro DNS-1550-04


Summary of Contents for D-Link ShareCenter Pro DNS-1550-04
-
Page 2: Table Of Contents
Installing Disk Drives..............10 Connecting the Ethernet cable ........... 13 Connecting the Power ..............13 Shutting Down the ShareCenter Pro DNS-1550-04 ....13 Setup Wizard ................15 Replacement of Power Supply Units (PSU) ....... 18 Replacement of Control Module ..........19 Chapter 3: WebPAM PROe ................. - Page 3 3.4.1 Create Disk Array ............39 3.4.2 Disk Array Management ..........43 3.4.3 Logical Drive Management ..........44 3.4.4 Spare Drive Management ..........47 AdminTool Tab ................49 3.5.1 System settings and clearing statistics ......49 3.5.2 Services ................. 51 3.5.3 Runtime and NVRAM event logs ........
- Page 4 ShareCenter Pro DNS-1550-04 User Manual 4.2.6 Restoring Backed-up Files ........... 109 4.2.7 Viewing the Backup Event Log ........112 4.2.8 Saving the Event Log ........... 113 4.2.9 Clearing the Event Log ..........115 4.2.10 Setting the Port ............116 Managing Share Folders ............117 4.3.1...
-
Page 5: Chapter 1: Introduction
Chapter 1: Introduction 1.1 About This Manual This Product Manual describes how to setup, use, and maintain the ® ShareCenter Pro DNS-1550-04. It also describes how to use: • ® ShareCenter NAVI software that you install and run on your Windows or Mac •... -
Page 6: Protocol Support
ShareCenter Pro User Manual 1.2 Protocol Support ® ShareCenter Pro DNS-1550-04 series supports: • SMB/CIFS for Microsoft Windows • NFS for Linux/Unix • AFP for Mac • FTP • WebDAV for the file transform over the Internet • iSCSI Target model and Initiator model 1.3 Hardware Specifications... -
Page 7: Client Utility Os Support
• Safari 5 and above • Google Chrome 8 and above Warning ® The electronic components within the ShareCenter DNS-1550-04 are sensitive to damage from Electro-Static Discharge (ESD). Observe appropriate precautions at all ® times when handling the ShareCenter Pro DNS-1550-04... - Page 8 ShareCenter Pro User Manual Important ® To configure the ShareCenter Pro DNS-1550-04, you ® are advised to install ShareCenter NAVI. Please refer to the User Manual. Warning The fan contains hazardous moving parts. Keep fingers away. Caution RISK OF EXPLOSION IF BATTERY IS REPLACED BY AN INCORRECT TYPE.
-
Page 9: Chapter 2: Quick Setting-Up
Chapter 2: Quick Setting-up ® 2.1 Unpacking the ShareCenter Pro DNS-1550-04 ® The ShareCenter Pro DNS-1550-04 series box contains the following items: • ShareCenter ® Pro DNS-1550-04 Unit • Quick Installation Guide • Screws for disk drives • Ethernet cable •... -
Page 10: Installing Disk Drives
Protection. ® You can populate the ShareCenter Pro DNS-1550-04 series NAS with SATA 1.5 Gb/s or 3.0 Gb/s disk drives. For optimal performance, install disk drives of the same model and capacity. Your disk drives will become ®... - Page 11 3. Insert the screws through the holes in the drive carrier and into the sides of the disk drive. ․ Only install the countersunk screws supplied with the ® ShareCenter Pro DNS-1550-04. ․ Install four screws per drive. ․ Snug each screw. Be careful not to over-tighten.
- Page 12 ShareCenter Pro User Manual ® 4. Reinstall the drive tray into the ShareCenter Pro DNS-1550-04 enclosure. Tip: Repeat steps 1 through 4 until all of your disk drives are installed.
-
Page 13: Connecting The Ethernet Cable
Pro DNS-1550-04: 1. Attach the two power cords to the dual power supplies of the ® ShareCenter Pro DNS-1550-04 enclosure and plug the other ends into the power source. See Figure 2. ® 2. On the front of the ShareCenter Pro DNS-1550-04, press the power button. - Page 14 ShareCenter Pro User Manual Figure 3. Press and hold the Power button about 5 seconds Power Button Figure 4. System status LED turns red, and then goes dark System Status ® To restart the ShareCenter Pro DNS-1550-04, press the power button again.
-
Page 15: Setup Wizard
2.6 Setup Wizard You can quickly set up your DNS-1550-04 system through the WebPAMS PROe Wizard using either the One-Click Setup or using Advanced-Setup. 1. Quick Setup by Setup Wizard in WebPAM PROe The system’s Wizard in WebPAM PROe lets you configure your disk array(s) easily and quickly. - Page 16 ShareCenter Pro User Manual ․ Click NAS tab > Wizard. ․ ․ Click the One-Click Setup button. The Automatic Configuration box displays: ․ The Summary window displays the general information of the system, including: ․ Computer Name ․ IP Address ․...
- Page 17 Complete the required settings in the Network Settings window, including: ․ Computer Name ․ Obtain an IP address automatically ․ IP Address ․ Subnet Mask ․ Default Gateway ․ Primary DNS ․ Secondary DNS When done, click the Next button.
-
Page 18: Replacement Of Power Supply Units (Psu)
To accept the proposed configuration, click the Submit button. 2.7 Replacement of Power Supply Units (PSU) The DNS-1550-04 supports two hot-swappable PSUs. You may swap either of the PSUs one at a time if an uninterruptable power supply is in use. -
Page 19: Replacement Of Control Module
2.8 Replacement of Control Module When the system controller malfunctions, you may replace the control module as per following steps: Step 1. Please turn off the system power. Step 2. Loosen screw (A) on the control module. Step 3. Remove the controller by pulling on the handle. Step 4. -
Page 20: Chapter 3: Webpam Proe
3.1 Quick Start ® The WebPAM PROe is factory-installed on the ShareCenter DNS-1550-04 system. WebPAM PROe runs in the browser on your PC/Mac. You can access WebPAM PROe by using your browser. Browser Support Choose one of the following browsers to use with WebPAM PROe: •... - Page 21 The default user name is “administrator” and default password is “password” (The user name and password are case sensitive). Choose the language you prefer by clicking the Language menu on the login screen. To log out of WebPAM PROe, you can do either of the following: •...
-
Page 22: Dashboard Tab
ShareCenter Pro User Manual 3.2 Dashboard Tab The Dashboard tab is the default screen of WebPAM PROe. The System Status icon indicates the top-level status of the NAS by displaying: system is OK system has errors 3.2.1 System Status The System Status field displays the status of the NAS components by means of the following icons: the component is OK the component needs attention... -
Page 23: Event Information
To view the status of each component, click the following tab and topic sequence. A status screen will then be displayed: • Controller (RAID controllers) Device tab > Component List. • Voltage Device tab > Component List. • Temperature (RAID and JBOD enclosures only) Device tab >... - Page 24 ShareCenter Pro User Manual • Total Physical Capacity. Display the total storage space of the system. − Unconfigured – not assigned to a logical drive. − Configured – assigned to a logical drive. • Device Number. Display the current number of devices in the system.
-
Page 25: Device Tab
3.3 Device Tab The Device tab displays the status of all devices in the NAS including physical drives, disk arrays, logical drives, power supply units, fans and backplanes. In the Device tab, you can change settings for the enclosure and physical drives. -
Page 26: Back View
ShareCenter Pro User Manual Identifying Unconfigured Physical Drives Click the Show unconfigured PD(s) box to identify the unconfigured physical drives in the NAS. Identifying Physical Drives Assigned to a Disk Array Click the Highlight Arrays button to identify the physical drives assigned to a disk array. -
Page 27: Component List
3.3.3 Component List Click Device tab > Component List to display the device ID, operational status, enclosure type, and status description of all enclosures. • Enclosure − View: Move your mouse over the enclosure you want and click the View button to display the enclosure information list. −... - Page 28 ShareCenter Pro User Manual Level 1: Park R/W heads Level 2: Slow down (need to be supported by hard drive) Level 3: Spin down − Spin Down Type − Power Saving Idle Time − Power Saving Standby Time −...
- Page 29 capacity to the nearest 1,000,000,000 byte boundary. 10GB Truncate – Reduces the useful capacity to the nearest 10,000,000,000 byte boundary. Group Rounding – Uses an algorithm to determine how much to truncate. Results in the maximum amount of usable drive capacity. ...
-
Page 30: Physical Drive
ShareCenter Pro User Manual − Manual − Automatic When done, click the Save button. 3.3.4 Physical Drive Click Device tab > Physical Drive to display the list of physical drives in the NAS. Physical drive information includes: − ID – ID number of the physical drive −... -
Page 31: Iscsi
In the Global Physical Drive Settings window, check the boxes to enable or uncheck to disable. Enable Write Cache Enable Read Look Ahead Cache Enable Command Queuing To change the individual physical drive settings: Click Device tab > Physical Drive. Move your mouse over the physical drive you want and click the Settings button. - Page 32 ShareCenter Pro User Manual − iSNS − CHAP − Ping Setting up CHAP Click Device tab > iSCSI > CHAP tab. Move your mouse over the item you want and click the Setting button. Complete the required settings in the Chap Settings window, and then click the Submit button.
-
Page 33: Network
3.3.6 Network Click Device tab > Network to display the networking information of the system. Networking information includes: − − DHCP − IP Address − Gateway IP Address − Speed − − Link Changing Networking Configuration Click Device tab > Network. Move your mouse over the network you want and click the TCP/IP (or IPV6) button. - Page 34 ShareCenter Pro User Manual Advanced Networking Configuration Click Device tab > Network. Click the Setup button. Complete the required settings in the Setup window, and then click the Submit button. − Computer Name − Enable Network Binding – Choose to enable or disable a biding.
- Page 35 Complete the required settings in the DHCP Server Settings window, and then click the Submit button. − Enable DHCP Server – Choose to enable or disable the function. − IP range – Assign the IP range in the text boxes. −...
-
Page 36: Ups
ShareCenter Pro User Manual 3.3.7 UPS Click Device tab > UPS to display the information of the connected UPS in the system. Setting up UPS Click Device tab > UPS. Click the Setup button to bring up the Setup window. Select the option you want and complete the required settings, and then click the Submit button. - Page 37 − Cache ShareCenter Pro DNS-1550-04 can support external file system as below: EXT3, XFS,FAT32, NTFS,HFS+ Warning! To remove the connected USB drive safely, you MUST click the Remove button before disconnecting the USB drive. Managing the External Drive Click Device tab > External Drive.
-
Page 38: Storage Tab
ShareCenter Pro User Manual 3.4 Storage Tab The Storage tab enables you to create, manage, and delete disk arrays, logical drives, and spare drives. The list of Disk Array Provides the information of the disk array, including: − ID – DA0, DA1, DA2, etc. −... -
Page 39: Create Disk Array
Warning! When you initialize a logical drive, all the data on the logical drive is lost. Backup any important data before you initialize a logical drive. 3.4.1 Create Disk Array You can also use the Wizard to create a disk array with logical drives and spare drives at the same time. - Page 40 ShareCenter Pro User Manual function on this disk array; otherwise, clear this option to disable. In the Select Physical Drives diagram, click the drives to add them to your disk array. The ID numbers of the selected drives will appear in the field below the diagram.
- Page 41 − In the Alias field, enter an alias at a maximum of 32 characters (includes letters, numbers, space between characters, and underline). − Set the LDType as NAS or SAN/DAS. − Select a RAID Level from the dropdown menu, depending on the number of physical drives in the disk array.
- Page 42 ShareCenter Pro User Manual Disk Array Problems: Disk array Problems typically result from a physical drive failure. The most common Problem is a degraded disk array. The RAID controller can rebuild a degraded disk array. A more serious, but far less common Problem is an Incomplete Array. An incomplete array results from a physical drive that fails or becomes missing during: −...
-
Page 43: Disk Array Management
3.4.2 Disk Array Management Click Storage tab > Disk Array. The list of disk arrays appears. Move your mouse over the disk array you want to display the options of the disk array, including: − View – Select to view disk array status in the Information tab: ... -
Page 44: Logical Drive Management
ShareCenter Pro User Manual CAUTION: IF YOU DELETE A DISK ARRAY, YOU ALSO DELETE LOGICAL DRIVES THAT BELONG TO IT, ALONG WITH THE DATA IN THOSE LOGICAL DRIVES. BACK UP IMPORTANT DATA BEFORE DELETING A DISK ARRAY. 3.4.3 Logical Drive Management Click Storage tab >... - Page 45 WWN – World Wide Number, a unique identifier assigned to this logical drive Codec Scheme – Pertains to some RAID levels Serial Number – Assigned to this logical drive ALUA Access State For Ctrl1 ALUA Access State For Ctrl2 ...
- Page 46 ShareCenter Pro User Manual CAUTION: IF YOU DELETE A LOGICAL DRIVE, YOU ALSO DELETE ALL THE DATA IN THE LOGICAL DRIVE. BACK UP IMPORTANT DATA BEFORE DELETING A LOGICAL DRIVE. To run Redundancy Check on a logical drive: Click AdminTool tab > Background Activity. The list of background activities appears.
-
Page 47: Spare Drive Management
RAID 0. A spare drive is not available for a RAID 10 Volume because RAID 10 requires all four disk ® drives in the ShareCenter Pro DNS-1550-04 enclosure. However, when you ® replace the failed disk drive, the ShareCenter Pro DNS-1550-04 will automatically rebuild the RAID Volume using the new disk drive. - Page 48 ShareCenter Pro User Manual − Status – Green, yellow or red icon. − Capacity – Data capacity of the spare drive. − Physical Drive ID − Revertible − Type − Dedicated to Array When done, click the Confirm button.
-
Page 49: Admintool Tab
3.5 AdminTool Tab The AdminTool tab enables you to manage the Subsystem NAS system or virtual enclosure, monitor events, manage background activities, perform firmware updates, restore factory default settings, and save a NAS configuration report. 3.5.1 System settings and clearing statistics The list of NAS system information, including: −... - Page 50 ShareCenter Pro User Manual To change the Subsystem settings; Click AdminTool tab > Subsystem Information. The list of system information Click the Settings button. In the Alias field, enter an alias or change the existing alias. When done, click the Save button. To restart/shutdown the Subsystem: Click AdminTool tab >...
-
Page 51: Services
3.5.2 Services ® To start a service on the ShareCenter Pro DNS-1550-04: Click the AdminTool tab > Service. The list of services displays. Move your mouse over the service you want and click the Start button. Click the Confirm button. - Page 52 ShareCenter Pro User Manual at this time. Warning – User can decide whether or not action is required. Info – Information only, no action is required. − Time – Date and time the event occurred. − Description – Plain language description of the event. The device also Provides NVRAM event logs.
- Page 53 − Index – A number assigned to this specific event. Highest number is most recent. − Device – Identifies the device involved − Event ID – Identifies the action that occurred − Severity – Displays the Severity Level: Info, Minor, Major, Warning, Critical, or Fatal.
-
Page 54: Background Activity, Settings And Schedules
ShareCenter Pro User Manual 3.5.4 Background activity, settings and schedules Each background activity has its own set of parameters. The most important parameters are: Status and Progress. The Status displays: − Running – Now in Progress. − Paused – Waiting for a higher priority activity to finish or waiting for you to click the Resume button. - Page 55 Running – Normal. You can access your logical drives at any time. Yield – Temporary pause while a read/write operation takes place. Paused– Temporary pause while another background runs. Or a pause initiated by the user. − Redundancy Check: ...
- Page 56 ShareCenter Pro User Manual − Migration: The term "Migration" means either or both of the following Change the RAID level of a logical drive Expand the storage capacity of a logical drive Before you begin a migration, examine your current disk array to determine whether: ...
- Page 57 PDM also counts the number of media errors reported by Media Patrol. A disk drive becomes unhealthy when: A SMART error is reported The bad sector remapping table fills to the specified level. You can specify the maximum levels for the reassigned and error blocks in PDM settings.
- Page 58 ShareCenter Pro User Manual look under Logical Drive Information beside the line that says Synchronized. A Yes means the logical drive was synchronized. Select the item you want (e.g. Media Patrol, PDM, Rebuild, etc.) from the list and click the Start button to run the background activity. To add a scheduled background activity: Click AdminTool tab >...
- Page 59 − Start Time – Choose a start time. − Recurrence Pattern – Select a Recurrence Pattern as Daily, Weekly, or Monthly. − Start From – Select a start date. − End On – Select an end option. When done, click the Save button. To view scheduled background activity: Click AdminTool tab >...
-
Page 60: Firmware Updates
ShareCenter Pro User Manual − PDM Rate − Transition Rate − Reassigned Block Threshold − Error Block Threshold − Enable Media Patrol − Enable Auto Rebuild For example, to change the Rebuild settings: Click the Rebuild Rate dropdown menu and choose a rate: −... -
Page 61: Performance Monitor
The firmware image file appears in the in the field. Click the Submit button. When the update is completed a message tells you to reboot the subsystem. Click the OK button to restart the system. Warning: Do NOT power off the system during the update! 3.5.6 Performance monitor The Performance Monitor screen allows you to monitor the performance of NAS using the analyzed illustrations. - Page 62 ShareCenter Pro User Manual Click AdminTool tab > Performance Monitor. In the Physical Drive field, click the Select Physical Drives button to select the physical drive you want and select a performance type from the dropdown menu. When done, the performance of selected physical drive will be shown in the illustration below.
-
Page 63: Restore Factory Default Settings
3.5.7 Restore factory default settings The Restore Factory Default function allows you to restores settings (any or all) to their default values for the NAS. The settings include: − CIFS Settings − FTP Settings − AFP Settings − SNMP Settings −... -
Page 64: Import/Export A System Configuration File
ShareCenter Pro User Manual 3.5.8 Import/Export a system configuration file To import the configuration file to the NAS: Click AdminTool tab > Configuration File. Click the Import button. Click the Browse button to locate the configuration file (.bcf), and then click the Open button. -
Page 65: Lunmap Management
3.5.9 LUNMap Management The LUN Mapping function allows you to control what storage arrays are visible to which computers. To add initiator: Click AdminTool tab > LUNMap. Click the Add Initiator button. Enter a name in the Initiator Name field and click the Submit button. The initiator will be added in the LUNMap list. -
Page 66: Power Option
ShareCenter Pro User Manual 3.5.10 Power Option The Power Option screen displays the power management of the NAS. You can change the following power settings from the screen by moving the mouse over the setting item and clicking the Settings button: −... -
Page 67: Network Security
− SMTP Port – Enter the port number of SMTP server − From – The sender of the notification message. − SMTP Authentication − Username – Enter the username to log in the SMTP server. − Password – Enter the password to log in the SMTP server. To set up the e-mail account: Click AdminTool tab >... - Page 68 ShareCenter Pro User Manual...
- Page 69 To set up Access Protection: Click AdminTool tab > Network Security. Click the Access Protection button and complete the required settings. − Enable Services – Check to enable the function. − Block Policy − Protocol When done, click the Save button. To set up SSL Certificate: Click AdminTool tab >...
-
Page 70: Nas Tab
ShareCenter Pro User Manual 3.6 NAS Tab 3.6.1 Setup Wizard The system’s Wizard lets you configure your disk array(s) easily and quickly. The Wizard will guide you through the required settings step by step. You can choose to configure automatically by using One-Click Setup, or configure manually by using Advance Setup. - Page 71 Using Advanced Configuration Wizard Click NAS tab > Wizard. Click the Advance Setup button. The Advanced Configuration box displays: Complete the required settings in the Network Settings window, including: − Computer Name − Obtain an IP address automatically − IP Address −...
-
Page 72: User Account Management
ShareCenter Pro User Manual 3.6.2 User account management To add users for the NAS: Click NAS tab > NAS User. Click the Create User button. In the Create User window, complete the required settings. − User Name − Password − Retype Password When done, click the Save button. - Page 73 In the NAS Group list, move your mouse over the group item and then you can: − Add/remove the users for the group by clicking the Group Settings button. − Remove the selected group by clicking the Delete button. When the new user/group is added, you have to complete the permission settings for each user/group to access the system.
-
Page 74: Protocol Control And Setting
ShareCenter Pro User Manual 3.6.3 Protocol Control and Setting Click NAS tab > Protocol Control. In the Protocol Control list, move your mouse over the Protocol option you want and click the Enable/Disable button to turn the feature ON/OFF. The Protocols include: −... -
Page 75: File Sharing Setting
3.6.5 File Sharing Setting Creating ISO Folder Click NAS tab > File Sharing. Click the Create ISO Folder button to add a folder for ISO file sharing: a. Enter the Source Folder, ISO Image File and Folder Name, and then click the Next button. b. - Page 76 ShareCenter Pro User Manual Creating Folder Click NAS tab > File Sharing. Click the Create Folder button to add a folder for sharing: a. Enter the Volume and Folder Name, and then click the Next button. b. Select the Protocol as Windows/FTP or UNIX/LINUX, and then click the Next button.
- Page 77 • Mac AFP Group Member Result Deny-Access Deny-Access Deny-Access Read-Only Deny-Access Read-Write Deny-Access Deny-Access Deny-Access Read-Only Read-Only Read-Only Read-Write Read-Only Deny-Access Deny-Access Read-Write Read-Only Read-Only Read-Write Read-Write • FTP Group Member Result Deny-Access Deny-Access Deny-Access Read-Only Deny-Access Read-Write Deny-Access Deny-Access Deny-Access Read-Only Read-Only...
-
Page 78: Backup
ShareCenter Pro User Manual • WebDAV Group Member Result Deny-Access Deny-Access Deny-Access Read-Only Deny-Access Read-Write Deny-Access Deny-Access Deny-Access Read-Only Read-Only Read-Only Read-Write Read-Only Deny-Access Deny-Access Read-Write Read-Only Read-Only Read-Write Read-Write − UNIX/LINUX: Assign the IP address in the New IP Address box then click the Add button for sharing. - Page 79 • Snapshot Backup Click NAS tab > Backup > Snapshot Backup tab. Click the Create button and complete the required settings in the Create Snapshot window. − Volume: Select the desired setting from the dropdown menu. − Reserve Capacity for Snapshot: From the dropdown menu, assign the reserved capacity for the backup solution.
- Page 80 ShareCenter Pro User Manual − Recovery: Click to restore the data volume using the Snapshot. − Export: Click to export the Snapshot to the share folder. − Settings: Click to change the settings of the backup solution. − Delete: Click to delete the backup solution. •...
- Page 81 • Local Backup enables you to change the backup services of the ® ShareCenter Pro DNS-1550-04 and the USB storage device. To set the Local Backup settings: Notes: The USB port on the front panel of the device supports Flash drive, which ONLY allows you to backup the data/file from the ®...
- Page 82 ShareCenter Pro User Manual File system: FAT32, NTFS, XFS Click NAS tab > Backup > Local Backup tab. Move your mouse over the USB device you want and click the Settings button. Complete the required settings in the Setting window. −...
- Page 83 Select the One Touch Backup checkbox to enable the backup solution. Click the Save button. Now you can backup specified folders from your PC to the ® ShareCenter Pro DNS-1550-04 by simply pressing a button on ® the front of the ShareCenter Pro DNS-1550-04. One-Touch Backup...
- Page 84 ShareCenter Pro User Manual • Amazon S3 allows you to upload backup files to Amazon S3 server. Click NAS tab > Backup > Amazon S3 tab. Click the Create button and complete the required settings in the Create Amazon S3 Backup window. −...
-
Page 85: Plug-In Management
hourly interval you choose from the dropdown menu. Daily – snapshots will be taken at the time of day you choose from the dropdown menus. Weekly – snapshots will be taken on the day of the week, at the time of day you choose from the dropdown menus. -
Page 86: Iscsi Initiator
Click the Create and complete the required settings in the Create Snapshot window. − − Port When done, click the Connect button. After successful logon, you can ® start to use the disk volume on ShareCenter Pro DNS-1550-04 as a virtual drive on your computer. -
Page 87: Chapter 4: Sharecenter Navi
® ® The ShareCenter NAVI software connects your PC to the ShareCenter Pro DNS-1550-04, performs backups, changes the network settings, create RAID volumes, add and mounts folders, and manages file downloads from the Internet. 4.1.1 Opening the Main Window ®... - Page 88 ShareCenter Pro User Manual ® When the ShareCenter NAVI Window opens, double-click a system in the Device List. When the login window appears, enter the user name and password. Click Login then Yes to login the system. The default user name is “administrator” and default password is “password”.
-
Page 89: Choosing A Sharecenter ® Navi Language
The Main Window opens, which contains the management ® features of ShareCenter NAVI. ® 4.1.2 Choosing a ShareCenter NAVI Language ® On Windows PCs, ShareCenter NAVI chooses the display language automatically based on your OS language setting. On Macs, you choose the display language. -
Page 90: Starting The Advanced Storage Manager
ShareCenter Pro User Manual 4.1.3 Starting the Advanced Storage Manager This feature opens Advanced Storage Manager in your default browser. Main Window Right-click the system in the Device List that you want to open in ASM. -
Page 91: Viewing Sharecenter ® Navi Information
4.1.4 Viewing ShareCenter NAVI Information ® ShareCenter NAVI is the software application that connects your PC ® with the ShareCenter Pro DNS-1550-04 system. ® To view information about ShareCenter NAVI on Windows: ® Right-click the ShareCenter NAVI icon in the application tray. - Page 92 ShareCenter Pro User Manual The About window appears and lists the following information: • ShareCenter ® NAVI Version number • Java Virtual Machine (JVM) Version number • JVM Vendor name • ShareCenter ® NAVI installation directory on your PC • ShareCenter ®...
-
Page 93: Closing Sharecenter
® 4.1.5 Closing ShareCenter NAVI ® To close ShareCenter NAVI: ® ShareCenter Click the close icon on the Main Window. NAVI in Windows • Windows icon in the top right corner • Mac icon in the top left corner For Windows PCs, if you close ®... - Page 94 ShareCenter Pro User Manual ® If you close ShareCenter NAVI this way, you must open it from the Start menu.
-
Page 95: Managing Backups
4.2 Managing Backups Caution ® Please do not close the ShareCenter Pro NAVI or log out of the MS Windows system while you are setting a scheduled back up or running the backup process. It will discontinue the backup process. 4.2.1 Doing a Backup Now This feature enables you to perform an immediate scheduled backup of ®... - Page 96 ShareCenter Pro User Manual • The NAS or Local drive (your PC or MAC) from the first dropdown menu. • The letter designation of your PC or MAC drive under the second dropdown menu. Do any of the following actions to select your backup folders:...
- Page 97 • Check the Backup My Data box – Selects the My Documents, Favorites, and Desktop folders with all their contents. • Click the Add to Backup icon – Opens the My Documents folder. Click a folder you want to backup, and then click the Choose button.
- Page 98 ShareCenter Pro User Manual • Drag and drop the folders you want to backup to the Backup your data from window. Click the Backup button. The backup begins immediately. Device List ® Before you can do a backup from the ShareCenter NAVI Main Window, you must create a backup schedule.
- Page 99 The backup begins immediately. Tray Icon ® Before you can do a backup from the ShareCenter NAVI tray icon, you must create a backup schedule and setup default NAS first. This feature applies to Windows PCs only. ® Right-click the ShareCenter NAVI icon in the application tray.
-
Page 100: Scheduling A Backup
ShareCenter Pro User Manual 4.2.2 Scheduling a Backup You can schedule backups by the hour, day, or week. To set a schedule for backing up files from your PC to the NAS system ® (ShareCenter NAVI): Go to the Main Window. Click the SmartSYNC icon. - Page 101 • Check the Backup My Data box – Selects the My Documents, Favorites, and Desktop folders with all their contents. • Click the Add to Backup icon – Opens the My Documents folder. Click a folder you want to backup, and then click the Choose button.
- Page 102 ShareCenter Pro User Manual • Drag and drop the folders you want to backup to the Backup your data from window.
- Page 103 Click the Schedule button. Click an option button for: ․ Hour ․ ․ Day of the week Choose the corresponding values from the dropdown menus: ․ Number of hours ․ Time of day in hours and minutes ․ Time of day and day of the week...
- Page 104 ShareCenter Pro User Manual Click the Add button. The newly created schedule appears in the Schedule List.
-
Page 105: Viewing Backup Schedules
The backed up files will appear on the NAS in a folder named BACKUPDATA_your username. You can also click the Start button to run a scheduled backup immediately. 4.2.3 Viewing Backup Schedules To view the list of current schedules: Go to the Main Window. Click the SmartSYNC icon. - Page 106 ShareCenter Pro User Manual Click the schedule you want to change. (C) Click the Modify button. (D) Click the folder whose contents you want to backup.
- Page 107 Click the Add to Backup icon to expand the tree and narrow your choices. Click the Schedule button. Click an option button for: ․ Hour ․ ․ Day of the week Choose the corresponding values from the dropdown menus: ․ Number of hours ․...
-
Page 108: Deleting A Scheduled Backup
ShareCenter Pro User Manual The modified schedule appears in the Schedule List. You can also click the Start button to run a scheduled backup immediately. 4.2.5 Deleting a Scheduled Backup Deleting a scheduled backup has no effect upon any files previously ®... -
Page 109: Restoring Backed-Up Files
Click the Delete button. (D) Click the Yes button in the confirmation box. 4.2.6 Restoring Backed-up Files You can restore all or any portion of the files in the BACKUPDATA_your ® username folder on the NAS system (ShareCenter NAVI). You can choose to restore the files to: •... - Page 110 ShareCenter Pro User Manual The original file structure is maintained during backup and restoration. Caution If you restore to the original folders on your PC, the restore function will overwrite the files in those folders. Be careful which files you restore and where on your PC you direct the backup files.
- Page 111 ․ Type the name of an existing folder in the field Provided ․ Type the name of an new folder in the field Provided ․ Click the Folder icon - Opens the My Documents folder. (F) Click a folder you want to use for a target, then click the Open button (G) Click the Restore button.
-
Page 112: Viewing The Backup Event Log
ShareCenter Pro User Manual The amount of time required depends on the size and number of files being restored. 4.2.7 Viewing the Backup Event Log Backup events report on backups, schedules, and file transfers. Events are reported by date, time, severity (information or error) and description. -
Page 113: Saving The Event Log
Note For NAS system events, see “Viewing the System Event Log” on page 129. 4.2.8 Saving the Event Log This function saves a copy of the Backup Event Log as a text file onto your PC. The text file records the events displayed in the Event Log window. Set the Event Filter dropdown menu to display: •... - Page 114 ShareCenter Pro User Manual Optional. Change the file name or save to a different location. Click the Save button in the Save dialog box.
-
Page 115: Clearing The Event Log
4.2.9 Clearing the Event Log Note Before you clear the Backup Event Log, consider saving a copy for future reference. See “Saving the Event Log” on page 111. To clear the Backup Event Log: Go to the Main Window. Click the SmartSYNC icon. Click the Event Log button. -
Page 116: Setting The Port
ShareCenter Pro User Manual 4.2.10 Setting the Port By using port setting, the public services like a WWW server or an FTP server, and others running on your private network may become accessible from the Internet. To set the Port: Go to the Main Window. -
Page 117: Managing Share Folders
4.3 Managing Share Folders 4.3.1 Opening a Share Folder This feature opens share folders in the file browser. From the Device List: Right-click the system in the Device List whose share folders you want to open. Choose the Share Folders item. All share folders open in your PC’s file browser. -
Page 118: Viewing A List Of Share Folders
ShareCenter Pro User Manual Click the Share Folder icon. Double-click the folder in the Share Folder List that you want to open. The share folder opens in your PC’s file browser. From the Tray Icon: ® Right-click the ShareCenter NAVI icon in the application tray. Choose Share Folder in the popup menu. - Page 119 The Share Folder List appears. Double-click the individual share folder to view its contents.
-
Page 120: Mounting A Share Folder /Creating A Network Drive
ShareCenter Pro User Manual 4.3.3 Mounting a Share Folder /Creating a Network Drive To mount a share folder or create a network drive (Windows): Go to the Main Window. Click the Share Folder icon. (A) Click the Mount Share Folder button. (B) Click the share folder you want to mount or make a network drive. -
Page 121: Un-Mounting A Share Folder /Disconnecting A Network Drive
4.3.4 Un-mounting a Share Folder /Disconnecting a Network Drive To un-mount a share folder or disconnect a network drive (Windows): Go to the Main Window. Click the Share Folder icon. (A) Click the Mount Share Folder button. (B) Click the share folder you want to un-mount or delete as a network drive. -
Page 122: Setting Up A Share Folder For Time Machine
® On ShareCenter NAVI ® To set up a ShareCenter Pro DNS-1550-04 folder for Time Machine backups: Go to the Main Window. Click the Share Folder icon. Click the Mount Share Folder button. Click the share folder you want to use for Time Machine backups. - Page 123 In the list of external drives, choose the share folder that you ® mounted on the ShareCenter Pro DNS-1550-04 and click the Use for Backup button. A Name and Password dialog box appears. In the dialog box, enter your username and password, then click...
-
Page 124: Making Management Settings
ShareCenter Pro User Manual 4.4 Making Management Settings 4.4.1 Configuring a NAS System The Setup Wizard has two modes: • One Click Setup - Loads a collection of default settings. Recommended for most users. • Advanced Setup - Enables you to make your own settings. Recommended for advanced users. - Page 125 Click the Yes button in the confirmation box. The NAS reboots. Then your RAID volume is ready. Advanced Setup To configure your NAS system using Advanced Setup: Go to the Main Window. Click the Setup Wizard icon. (A) Click the Advanced Setup button. (B) Choose Automatic (DHCP) or Manual network settings.
- Page 126 ShareCenter Pro User Manual Choose the following values from their respective dropdown menus: ․ Timezone ․ Year ․ Month ․ ․ Time in Hours, Minutes, and Seconds Click the Next button to continue.
- Page 127 Choose Automatic or Manual RAID Volume creation. If you chose Manual, choose the type of RAID Volume you want: ․ Maximum Capacity and performance - RAID 0, using all disk drives ․ Data Protection - RAID 5, using all disk drives Click the Next button to continue.
- Page 128 ShareCenter Pro User Manual Review your parameters. To make changes, click the Previous button. To accept the parameters and configure your NAS system, click the OK button. Click the Yes button in the confirmation box.
-
Page 129: Locating The Sharecenter Pro Dns-1550-04
10. The NAS reboots. Then your RAID volume is ready. ® 4.4.2 Locating the ShareCenter Pro DNS-1550-04 This feature helps you to physically locate a NAS system. ® To locate a ShareCenter Pro DNS-1550-04: Go to the Main Window. Right-click the system in the Device List that you want to locate. -
Page 130: Wake-On-Lan
ShareCenter Pro User Manual 4.4.3 Wake-on-LAN ® This feature allows you to turn on or wake up the ShareCenter DNS-1550-04 by means of the Locate NAS feature. ® To wake up a ShareCenter Pro DNS-1550-04: Go to the Main Window. -
Page 131: Viewing The System Event Log
The default NAS is highlighted in the Device List. 4.4.5 Viewing the System Event Log NAS events report functions and status of the NAS system. The Event Log displays the 20 most recent events. Events are reported by date, time, severity (information or warning) and description. - Page 132 Event Log” on page 110. Warning Do not disconnect the power or shut down the ® ShareCenter Pro DNS-1550-04 while the plug-in installation is running! Click the Configure Plugin button. The newly added plug-in appears in the list. Its Service Status is OFF.
- Page 133 Click the Enable button. After a moment, the Service Status changes to ON. ® The plug-in is now installed ShareCenter Pro DNS-1550-04.
-
Page 134: Viewing A List Of Plug-Ins
ShareCenter Pro User Manual 4.4.6 Viewing a List of Plug-ins To view a list of installed plug-ins: Go to the Main Window. Click the NAS Management icon. Click the Configuration Plug-in button. Currently installed plug-ins appear in the Configuration Plug-in list. -
Page 135: Enabling And Disabling Plug-Ins
4.4.8 Enabling and Disabling Plug-ins Enabling Plug-ins ® You must add a plug-in to the ShareCenter Pro DNS-1550-04 before you can use this function. To enable a plug-in: Go to the Main Window. Click the NAS Management icon. (A) Click the Configuration Plug-in button. - Page 136 ShareCenter Pro User Manual Click the Enable button. (D) After a moment, the Service Status changes to ON. ® The plug-in is now enabled on ShareCenter Pro DNS-1550-04.
- Page 137 Disabling Plug-ins Disabling a plug-in saves memory space and Processing time on the ShareCenter Pro DNS-1550-04. If you do not use a feature, consider disabling its plug-in. To disable a plug-in: Go to the Main Window. Click the NAS Management icon (A).
-
Page 138: Removing Plug-Ins
ShareCenter Pro User Manual 4.4.9 Removing Plug-ins There are two reasons to remove a plug-in: ․ To replace the old plug-in with a new one ․ You know that you will never use the plug-in To remove a plug-in: Go to the Main Window. Click the NAS Management icon. -
Page 139: Rebooting The Sharecenter Pro Dns-1550-04
4.4.10 Rebooting the ShareCenter Pro DNS-1550-04 ® Normally you will only need to reboot the ShareCenter DNS-1550-04 is after a firmware upgrade or a plug-in installation. During the reboot, none of your folders will be accessible from your networked PCs. ®... - Page 140 ShareCenter Pro User Manual The reboot runs automatically. ® When the ShareCenter Pro DNS-1550-04 is fully booted: ․ The system status LED turns blue ․ The buzzer beeps one time (if the buzzer is enabled)
-
Page 141: Shutting Down The Sharecenter Pro Dns-1550-04
Pro DNS-1550-04 ® The only time you need to shut down the ShareCenter DNS-1550-04 is to replace the disk drive cooling fan or the power supply. During and after the shutdown, none of your folders will be accessible from your networked PCs. - Page 142 ShareCenter Pro User Manual The shutdown runs automatically.
-
Page 143: Chapter 5: Troubleshooting
Chapter 5: Troubleshooting 5.1 WebPAM PROe system event log Controller Corrective Action The controller parameter(s) The user successfully changed controller changed by user settings. The controller has new Check the event logs. crash information The controller is overheating. Check for Controller temperature is airflow around and through the controller, above the warning... - Page 144 ShareCenter Pro User Manual Event Log Corrective Action Event log buffer is cleared in The event log was cleared. Event log buffer is cleared in The non-volatile RAM event log was NVRAM cleared. Front End Driver Corrective Action Host interface link is up Normal.
- Page 145 Logical Drive Corrective Action Logical drive initialization has Result of user action. Normal. started Logical drive initialization has Logical drive is ready to use. Normal. completed Logical drive initialization has Initialization paused because of user paused intervention, schedule or a higher priority background activity.
- Page 146 ShareCenter Pro User Manual Media patrol is stopped Media patrol stopped because of user intervention, schedule or the logical drive was deleted or went critical or offline. Media patrol is aborted due to System resources are low. Reduce an internal error. system load or restart the NAS.
- Page 147 intervention, schedule or the logical drive was deleted or went critical or offline. PDM is switched to rebuild. PDM changed to rebuild because the logical drive went critical PDM is stopped internally The destination drive was removed or used for a rebuild. Physical Disk Corrective Action Physical disk is marked online...
- Page 148 ShareCenter Pro User Manual no longer found removed from the enclosure. Replace or reinstall the disk drive as needed. A physical disk has Disk drive experienced an unknown encountered an unknown error. If this message appears (non-ECC) media error. repeatedly, replace the disk drive. A physical disk has A potentially faulty address or bad sector encountered PFA condition...
- Page 149 Array was incomplete due to RAID migration was interrupted by a missing NV Watermark shutdown. If array is online, try migration again. If array is offline, delete and recreate array. Rebuild Corrective Action Rebuild is started Result of settings or user action. Normal. Rebuild is completed Normal.
- Page 150 ShareCenter Pro User Manual due to internal error system load or restart the NAS. Redundancy Check Check the logical drive’s inconsistent encountered inconsistent block table. Rebuild the disk array if block(s) necessary. Redundancy Check task is Redundancy Check has been set queued manually or by schedule.
- Page 151 after a pause or a reboot. Synchronization is stopped Synchronization stopped because of user intervention, schedule or the logical drive was deleted or went critical or offline. Synchronization is aborted due System resources are low. Reduce to an internal error. system load or restart the NAS.
- Page 152 ShareCenter Pro User Manual A NAS sharing folder has been Result of settings or user action. Normal. removed A NAS sharing folder has been Result of settings or user action. Normal. modified NFS setting has been changed Result of settings or user action. Normal. CIFS setting has been Result of settings or user action.
- Page 153 pause. Transition is stopped Transition stopped because of user intervention or the logical drive was deleted. Transition was switched to Transition changed to rebuild because rebuild the logical drive went critical. Watermark Corrective Action Migration has detected stale Watermarks are Progress markers left as NV Watermark the result of interrupted RAID migrations.
-
Page 154: How To Use Usb Retrieval To Export System Information
With the USB Retrieval application, you can easily export the system information to the log file. ® Download the ShareCenter Pro DNS-1550-04 USB Retrieval application from CD. Copy “OPAS_general.zip” to your USB Pen Drive. Insert the USB Pen Drive into the USB port on the front panel of NAS. -
Page 155: Chapter 6: Warranty
Warranty Period or ninety (90) days, whichever is longer, and is subject to the same limitations and exclusions. If a material defect is incapable of correction, or if D-Link determines that it is not practical to repair or replace the defective Hardware, the actual price paid by the original purchaser for the defective Hardware will be refunded by D-Link upon return to D-Link of the defective Hardware. - Page 156 Software. Except as otherwise agreed by D-Link in writing, the replacement Software is provided only to the original licensee, and is subject to the terms and conditions of the license granted by D-Link for the Software. Replacement Software will be warranted for the remainder of the original Warranty Period and is subject to the same limitations and exclusions.
- Page 157 The customer shall return the product to the original purchase point based on its return policy. In case the return policy period has expired and the product is within warranty, the customer shall submit a claim to D-Link as outlined below: •...
- Page 158 • Canadian residents send to D-Link Networks, Inc., 2525 Meadowvale Boulevard Mississauga, Ontario, L5N 5S2 Canada. D-Link will not be held responsible for any packages that are lost in transit to D-Link. The repaired or replaced packages will be shipped to the customer via Purolator Canada or any common carrier selected by D-Link.
- Page 159 While necessary maintenance or repairs on your Product can be performed by any company, we recommend that you use only an Authorized D-Link Service Office. Improper or incorrectly performed maintenance or repair voids this Limited Warranty.
- Page 160 Warranty provides specific legal rights and you may also have other rights which vary from state to state. Trademarks: D-Link is a registered trademark of D-Link Systems, Inc. Other trademarks or registered trademarks are the property of their respective owners. Copyright Statement:...
- Page 161 Connect the equipment into an outlet on a circuit different from that to which the receiver is connected. • Consult the dealer or an experienced radio/TV technician for help. For detailed warranty information applicable to products purchased outside the United States, please contact the corresponding local D-Link office.
-
Page 162: Chapter 7: Tech Support
Chapter 7: Tech Support D-Link’s website contains the latest user documentation and software updates for D-Link products. U.S. and Canadian customers can contact D-Link Technical Support through our website or by phone. Before you contact technical support, please have the following ready: •... -
Page 163: Chapter 8: Registration
Chapter 8: Registration Product registration is entirely voluntary and failure to complete or return this form will not diminish your warranty rights. Version 1.0 June 29, 2011...
Need help?
Do you have a question about the ShareCenter Pro DNS-1550-04 and is the answer not in the manual?
Questions and answers