Advertisement
Quick Links
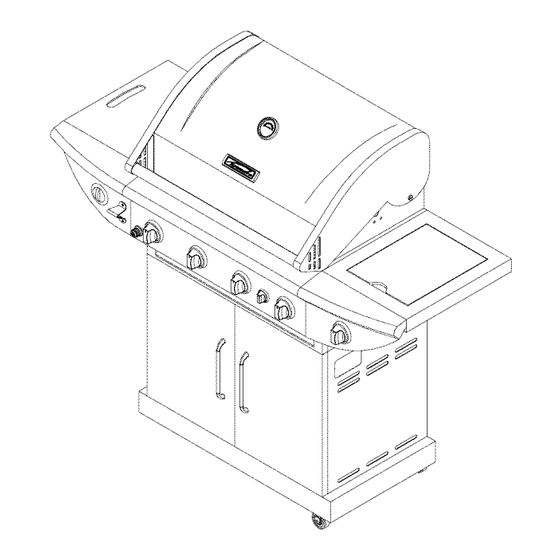
Use and Care Guide
®
Liquid Propane Gas Grill
Sears Model No. 122.16643900
Kmart Item No. 640-082960815-7
• Parts
• Assembly
• Safety Rules
• Use and Care
• Troubleshooting
/_
WARNING"
Read this Owner's manual carefully and be
sure your gas grill is properly assembled,
installed and maintained. Failure to follow
these instructions could result in serious injury
and/or property damage. This gas grill is
intended for outdoor use only and is not
intended to be installed in or on recreational
vehicles or boats.
Note to Installer
Leave this Owner's Manual with the customer
after delivery and/or installation.
Note to Consumer
Leave this Owner's Manual in a convenient
place for future reference.
Customer Service Helpline:
For parts ordering, call:
1-800-4-MY-HOME
(_)
For assembly questions, call:
1-800-913-8999
MFG No: 720-0670
Date: 10/20/2008
Sears, Roebuck and Co., Hoffman Estates, IL 60179 U.S.A.
Advertisement

Related Manuals for Kenmore 720-0670 - Gas Grill With Side


Summary of Contents for Kenmore 720-0670 - Gas Grill With Side
- Page 1 Use and Care Guide ® Liquid Propane Gas Grill Sears Model No. 122.16643900 Kmart Item No. 640-082960815-7 • Parts • Assembly • Safety Rules • Use and Care • Troubleshooting Note to Consumer WARNING" Read this Owner's manual carefully and be Leave this Owner's Manual in a convenient sure your gas grill is properly assembled, place for future reference.
- Page 2 One-Year Full Warranty on Kenmore Grill Failure to comply with these instructions may If this grill fails due to a defecting material or result in serious bodily injury.
- Page 3 • Have your LP gas tank filled by a reputable A tankof approximately 12inches indiameter b y 18- propane gas dealer and visually inspected and re- 1/2inches highisthemaximum sizeLPgastankto qualified at each filling. use.Youmustusean OPDgastankwhichoffers • Do not store a spare LP gas tank under or an Overfill Prevention Device.
- Page 4 Congratulations on making a smart purchase. Your new spark resulting in fire and/or explosion. Kenmore product is designed and manufactured for years of dependable operation. But like all products, it NOTE: The normal flow of gas through the regulator may require repair from time to time.
- Page 5 The following table illustrates a breakdown of the hardware pack. It highlights what components are used in the various stages of assembly. Item Description Specification Quantity Phillips Head Screw 1/4 x 1/2" 26pcs Phillips Head Screw 1/4 x 3/8" 4 pcs Phillips Head Screw 5/32 x 3/8"...
- Page 6 .[]2...
- Page 7 3. Part Description To make sure you obtain the correct replacement 4. Quantity of parts needed parts for your Kenmore gas grill, please refer to the part numbers on this page. You can purchase the Kenmore rotisserie kit, item # 15803 at your local Sear's store.
- Page 8 Figure 2 CAUTION: While it is possible for one person to assemble this grill, obtain assistance from another person when handling some of the larger, heavier pieces 1. Open lid of shipping carton and remove top sheet of cardboard. Lay cardboard sheet on floor and use as a work surface to protect floor and grill parts from scratches.
- Page 9 InstallingGrillHead 1. Be sure grill cart doors are closed to stabilize cart. Figure 8 Remove grill head from carton. Place onto cart from above as shown in Figure 6. CAUTION: Grill head is heavy. To avoid injury, obtain the help of an assistant for this step.
- Page 10 Figure 12 5. Using (3) 5/32 x 1/2" screws and (3) 1/2" lock washers, securely attach side burner shelf to grill head. Fully tighten two screws from previous step. Secure side burner control panel to main control panel with screw removed in step 2. (Fig. 11) 6.
- Page 11 Installing Gas Tank Heat Shield Figure 17 1. Assemble 2pcs longer gas tank heat shield bracket A to gas tank heat shields using (2) 5/32 x 3/8" Phillips head screws with (4) 5/32" lock washers from up to down (Fig. 16 A) 2.
- Page 12 Congratulations Your Kenmore gas grill is now ready for use. CAUTION: When the appliance is not in use, gas Before the first use and at the beginning of each must be turned off at the supply tank.
-
Page 13: Using The Side Burner
Checking for LP gas leaks Never test for leaks with a flame. Prior to first use, at the beginning of each season, or every time your LP gas tank is changed, you must check for gas leaks. 6. To light additional burners, turn burner knob(s) to Make a 50/50 (soap/water) mild soap solution. - Page 14 WARNING If Grill Still Fails To Light 1. Check gas supply and connections for leaks. Check Never lean over the grill cooking area while that all wire connections are secure. lighting your gas grill. Keep your face and body a safe distance (at least 18 inches) from the 2.
- Page 15 Cleaning Exterior Stainless Steel Surfaces To ensure a proper working unit the following proper care and maintenance is suggested. •Weathering and extreme heat can cause exterior stainless steel surfaces to turn tan in color. Machine Cleaning Cooking Grids oils used in manufacturing process of stainless steel We suggest you wash your cooking grids in a mild soap can also cause this tanning color.
- Page 16 3. Inspect each burner for damage (cracks or holes) Regardless of which burner cleaning procedure you and if such damage is found, order and install a new use, we recommend you also complete the following burner. After installation check to ensure that gas steps to help prolong burner life.
- Page 17 Indirect Cooking To cook indirectly, the food should be placed on the left or right side of your grill with the burner lit WARNING on the opposite side. Indirect cooking must be Do not leave the grill unattended. done with the Lid down. Your grill will get very hot.
- Page 18 WARNING: To ensure that it is :safe to eat, fo_ must be cooked to the minimum intema| temperatures listed in the table below. USDA* Safe Minimum Internal Temperatures Fish 145 ° F Pork 160 ° F 160 ° F Egg Dishes 145 °...
- Page 19 Your Home For expe_ troubleshooting and home solutions advice: For repair- in your home -of a!! major brand appliances, lawn and garden equipment, or heating and cooling systems, no ma_er who made it, no ma_er who so!d it! For the replacement pa_s, accessories owner's manuals that you need to do4t-yourself.
Need help?
Do you have a question about the 720-0670 - Gas Grill With Side and is the answer not in the manual?
Questions and answers